Want to paint the inside of an ornament? Here are the basic steps and tips and tricks to help ease your frustration and mess! Perfect for custom Christmas ornaments for sale or gifts.

I love making DIY Christmas ornaments with vinyl cut on my Cricut, but often the colors I find on pre-colored ornaments are just not my colorful jam. Traditional red and green are perfect for most people, but I’m over here having a pink and teal Christmas. Which means I need to color my own ornaments.
Common questions about painting the inside of an ornament:
What Kind of Ornaments Can I Use?
Both plastic and glass sphere ornaments work for this craft. I am using flat spheres since they are easier to work with when applying vinyl, but basically…if it’s clear and you can access the hole at the top, you’re good to go.
What kind of paint should I use?
I prefer acrylic craft paint for the inside of an ornament. It’s inexpensive and comes in every color you could ever want.

You can also glitter your ornaments, using my Glitter Ornament tutorial.
How much paint should I use?
While using a lot of paint will help you coat the inside of the ornament more quickly, I have found that using a smaller amount—about a tablespoon—allows you to get full coverage while wasting paint and increasing drying time. You’ll also be shocked (shocked, I tell you!) with how much extra paint runs out of your ornament when you set it to dry.
How long does it take for the paint to dry?
I usually wait 24 to 48 hours before re-inserting the ornament cap into my ornament. The paint has had time to fully cure, minimizing the risk of scratching the paint when you insert the cap.
How do I keep my paint from cracking?
This is a question I’ve had from readers but never actually experienced myself. So I did a little research, and here are two suggestions. First, you can drop some rubbing alcohol into the ornament before you paint. Swish it around and let it dry. This should prep the surface and help the paint stick.
Second, I think using new paint that you shake before using is key. New paint generally hasn’t separated or dried out at all—this will make for a smoother coating with less cracking.
How to Paint the Inside of an Ornament
Ornament Painting Supplies
- Clear glass or plastic ornaments
- Acrylic paint in your favorite colors
- Rubbing alcohol (optional, see above)
- Paper towel or plastic cup

Instructions
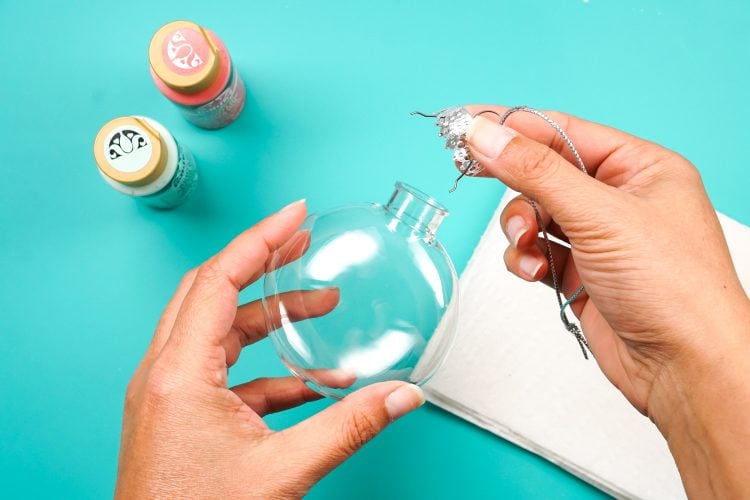
Start by removing the top of the ornament.

To prevent your paint from cracking, swish around some rubbing alcohol in the ornament, dump out, and allow to fully dry.
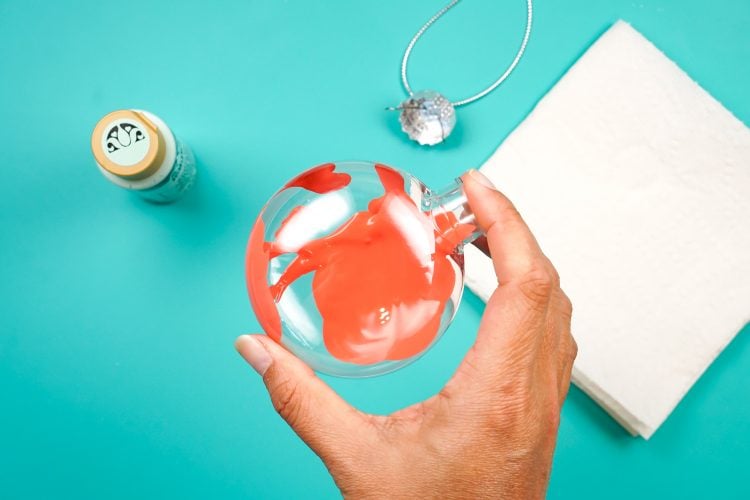
Once dry, squeeze about half a tablespoon-ish of craft paint inside the ornament, and another half tablespoon on the opposite interior side. This helps get better coverage than just putting it all on one half.

Then place a piece of paper towel on top of the ornament to prevent the paint from coming out and move and shake the ornament until it’s completely covered on the inside.
Be patient, paint moves slowly. I find a combination of shaking, waiting, and mumbling curse words under my breath works the best.
Then set the ornament upside down to drain out the extra paint. I’m using flat sphere ornaments and find a paper towel works best. Every few minutes move the ornament to a clean spot on the paper towel—you’ll be surprised how much extra paint is in there.

If you have a round sphere ornament, you can place it in a plastic cup that’s slightly smaller than your ornament and the extra paint will drip into the cup. Much tidier but it doesn’t work as well with the disk ornaments.
After 24 to 48 hours, replace the lid and your painted ornament is done! If you want to add vinyl, you can do it well before the 24 hours is up—just as long as there isn’t paint dripping everywhere.

This is a quick and easy way to perfectly match your ornaments to your decor, or to custom-make ornaments for gifts or sale!

Get Ornaments to Paint

HOW TO PAINT THE INSIDE OF AN ORNAMENT
Equipment
- Paper towel or plastic cup
Supplies
- Clear glass or
- plastic ornaments in your favorite colors
- Acrylic paint
Instructions
- Start by removing the top of the ornament.

- To prevent your paint from cracking, swish around some rubbing alcohol in the ornament, dump out, and allow to fully dry.Once dry, squeeze about half a tablespoon-ish of craft paint inside the ornament, and another half tablespoon on the opposite interior side. This helps get better coverage than just putting it all on one half.

- Then place a piece of paper towel on top of the ornament to prevent the paint from coming out and move and shake the ornament until it's completely covered on the inside.Be patient, paint moves slowly. A combination of shaking, waiting, and mumbling curse words under your breath works the best.Then set the ornament upside down to drain out the extra paint. For this project flat sphere ornaments are being used and find a paper towel works best. Every few minutes move the ornament to a clean spot on the paper towel—you'll be surprised how much extra paint is in there.

- If you have a round sphere ornament, you can place it in a plastic cup that's slightly smaller than your ornament and the extra paint will drip into the cup. Much tidier but it doesn't work as well with the disk ornaments.After 24 to 48 hours, replace the lid and your painted ornament is done! If you want to add vinyl, you can do it well before the 24 hours is up—just as long as there isn't paint dripping everywhere.This is a quick and easy way to perfectly match your ornaments to your decor, or to custom-make ornaments for gifts or sale!


Comments & Reviews
thyer says
The balls are very pretty, I like the orange color. fnf
Dee says
Thanks Cori! Really appreciated your simple and straightforward instructions to get me out of a last-minute Boxing Day jam!
Sheryl says
Hi, thanks for sharing this tip! I was also wondering if you think adding a few drops of poly acrylic in with the paint would ensure the paint adheres inside the ornaments? Also, how did the ornaments do after a year now? Looking forward to getting started with this year’s ornaments! We’ve done them the past few years using the poly acrylic but with fine glitter inside and I was wanting to try something different this year.
Shannon says
Well it was a thousand times easier than I thought it would be. This is a craft I can easily do.
Daniel Fonseca says
Thanks for the help, I was wondering how to make this kind of craft and this helped a lot.
Thanks :)