Here is the process we used to install our butcher block countertops, as well as our tips and tricks for making them look as perfect as possible!
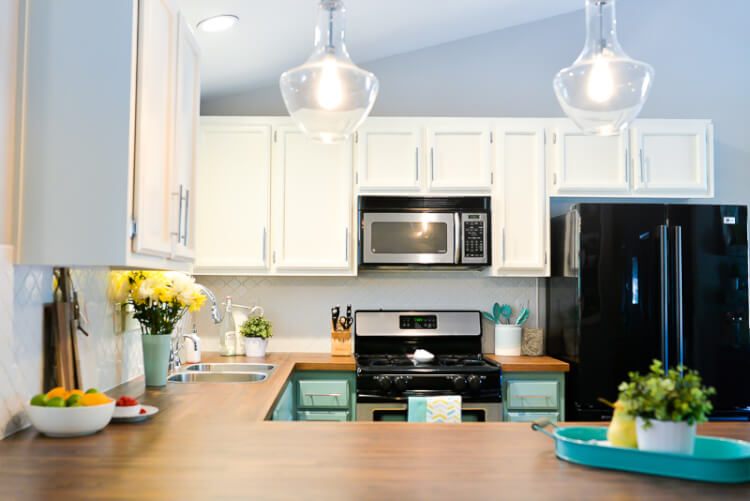
I partnered with Floor & Decor for our butcher block countertops. Thank you for supporting the brands that support Hey, Let’s Make Stuff!
Now that we’ve done our big kitchen reveal, I’ve been sharing the renovation details, as well as things we’ve learned, processes we used, and reasons why we chose what we chose.
When we first started planning our renovation, I thought that the cabinets would be the biggest challenge. Painting a kitchen’s worth of cabinets took a while, but it ended up being fairly straightforward. No, the beast of this renovation ended up being the butcher block countertops.
Yes, they were a beast, but holy wow, were they worth it. I am in LOVE with them. My husband is in love with them. And everyone who has stopped by to see them (or even just saw photos on social media) is in love with them.
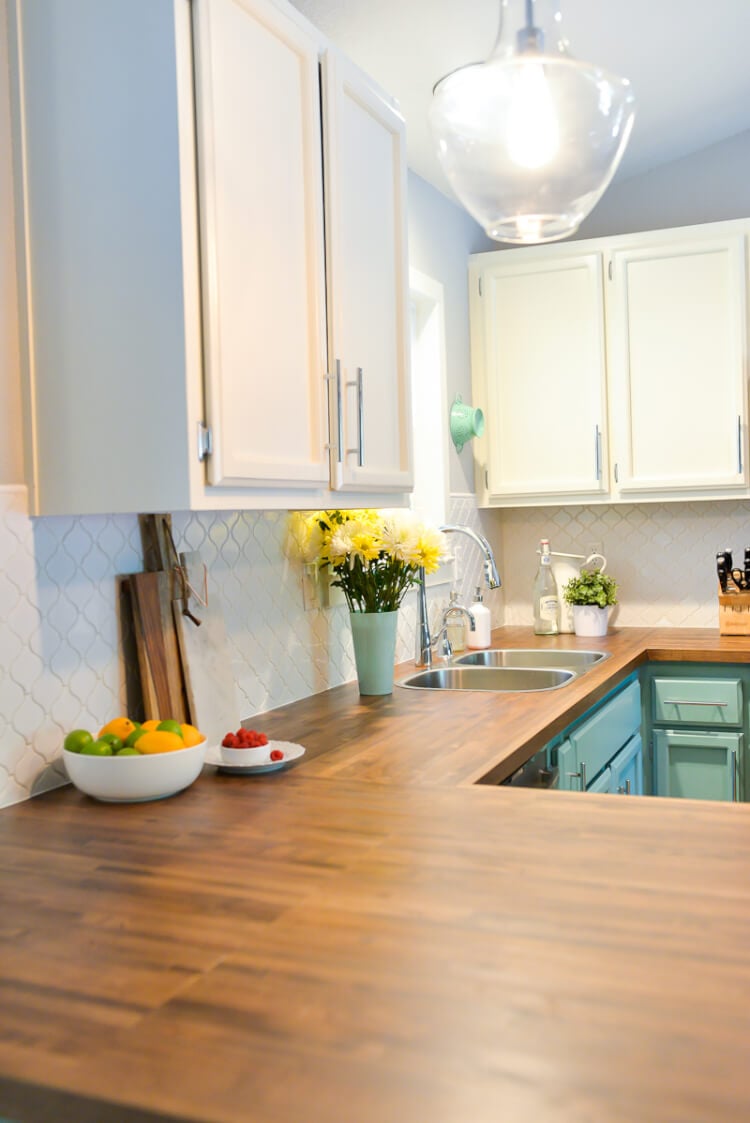
I thought getting butcher block would be fairly straightforward: Buy butcher block. Install butcher block. Love butcher block. The end.
But it was much more than that. Today I want to share a few things we learned about butcher block countertops, so if you make the same decision, you’ll know the process ahead of time. A word of warning — this will be a long post, but when we were working on our install, I really appreciated detailed posts, so I’m assuming someone else will need all the details I share here.
Finding Butcher Block
I thought finding butcher block would be easy—several bloggers I know used IKEA countertops. We headed there only to find they didn’t carry an island piece wide enough to span our counter and the bar overhang. They do have a few island-sizes options now, but as far as I can tell, they aren’t even real wood — they are particle board with a veneer. This wasn’t a great option because we needed to connect two pieces to span our large counter.
So we went to Home Depot. Nope. Lowes. Nope. Then a friend told me to check out a new store that recently moved in near us—Floor & Decor. We walked in and were shocked at the size of the showroom. There were so many things to see—wood and laminate flooring, tile flooring and back splashes, tons of travertine and marble. A DIYer’s paradise!
And, tucked away in the back, was the holy grail — butcher block.
*Insert sound of angels singing*
They had lots of choices, from economical to downright gorgeous. This being our budget renovation, we chose the American Maple, which they had in stock. We needed two 8′ x 24″ pieces, and one 6′ x 36″ island piece. It came to about $800, which was a bargain compared to pretty much any other countertop option we researched.
Butcher Block May Have Right and Wrong Sides
One of the things we discovered was that our butcher block has a nice, clean side, and a side that is a little less so. It wasn’t a problem—we just put the wrong side down and the right side up. But definitely know that going into it and make sure you’re looking at both sides of the slab before you take it home. There were definitely pieces that were in better shape than others, and since you could see the bottom under the bar overhang, we chose the piece that looked best on one side.
Butcher Block Preparation & Finishing
We decided to prep the bottom of the butcher block before the installation so they would be protected from moisture and because the bar area could be seen from underneath. We didn’t do the top until after it was all installed, so that the stain would take evenly over the seams we had to make.
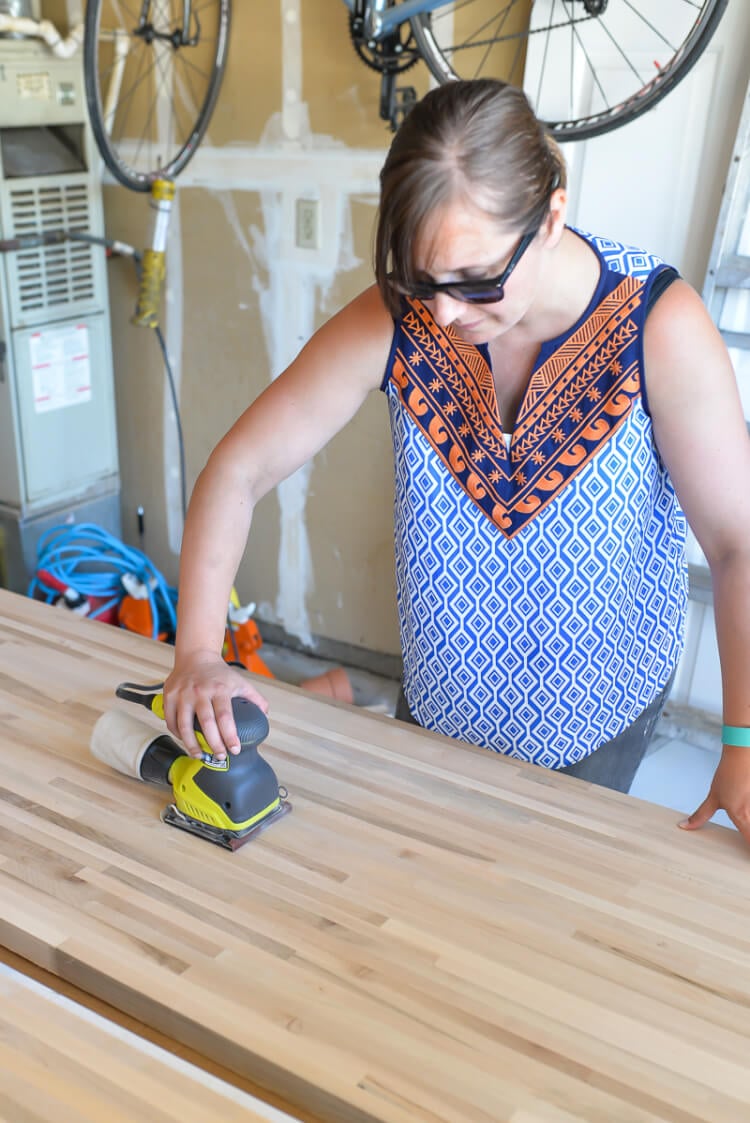
Here’s the process (it is the same for the top of the countertops, which we did after the installation):
- Unpack the butcher block. We worked in our garage, with the butcher block set on sawhorses.
- Face the wrong side of the butcher block up (see right and wrong sides above).
- Fill in any holes using a compound like Timber Mate (contractor recommended), making sure to wipe any excess from around your patches with a damp cloth. On the bottom of our counters, we used a different filler that I wouldn’t recommend and didn’t wipe away the excess. The stain didn’t adhere in those spots, leaving us with a blotchy surface. Thank goodness it was on the bottom! We learned our lesson for the top, and it turned out much better with the Timber Mate.
- Give the countertops a very good sanding with a palm or oscillating sander, starting with a 150 grit and moving to a 220.
- Raise the grain. This is an important process that our contractor taught us to get a smooth surface. Do NOT skip this step!
- After your initial sanding, dampen the wood with a wet cloth and let dry. As the wood dries, you will notice that it becomes rough again — the water draws the loose fibers out of the wood.
- Sand again using 220 grit and repeat until you get it wet and it stays smooth. It took us three rounds of raising the grain before we didn’t have any more loose fibers.
- This is only important if you’re using a water-based stain or finish. The water in the stain/finish will raise the grain in the same ways as mentioned above, so you want to get all those loose fibers out before you use your finish.
- If you are staining your countertops (we used Minwax’s Special Walnut), start by applying pre-stain conditioner. The package says to wait a bit before applying the stain, but our contractor said not to wait and to work in sections. He called this a wet-on-wet application:
- With a clean rag, apply the conditioner to the surface in 2-foot increments.
- With a different clean rag, stain over the conditioned part of the surface.
- Go over the stained portion with your conditioner rag.
- Do the next 2-foot section, using your rags to seamlessly blend the first stained section in with the second and so on.
- Once you’ve done the first coat of stain, do a second coat if desired. Let dry completely.
- Apply two coats of Waterlox according to the directions on the container.
- Leave the top and side of the butcher block raw for now.
Hiring Butcher Block Installation Help
Ryan and I considered installing the butcher block ourselves for a hot minute, and then realized that the cost of renting or buying the necessary tools and supplies would probably cost us as much as it would to hire someone. Our kitchen is not a straightforward layout. If you have two long stretches in a galley kitchen, for example, you might be able to give it a shot. Ours involved cutting six separate pieces, plus the sink.
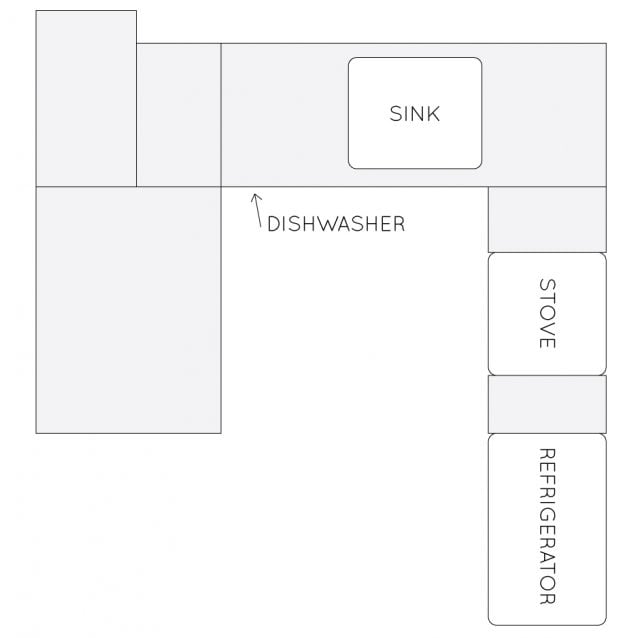
It wasn’t straightforward and we weren’t confident enough in our woodworking skills to do it ourselves.
Finding someone to install them, however, was way harder than I expected. I think Ryan talked to a dozen different contractors who kept referring him down the line, no one wanting to do it. Finally, a friend of a friend said he’d help us out, as long as we were willing to get our hands dirty and help him out.
Done and done. Let’s do this thing.
The Installation
Here’s how our half-DIY/half-contractor installation went, step by step. We did this installation process over the course of a few days because the glue had to dry overnight.
- Our contractor took about a million measurements to make sure we were cutting our three large pieces of butcher block into the correct sizes. This alone made me thankful to have him!
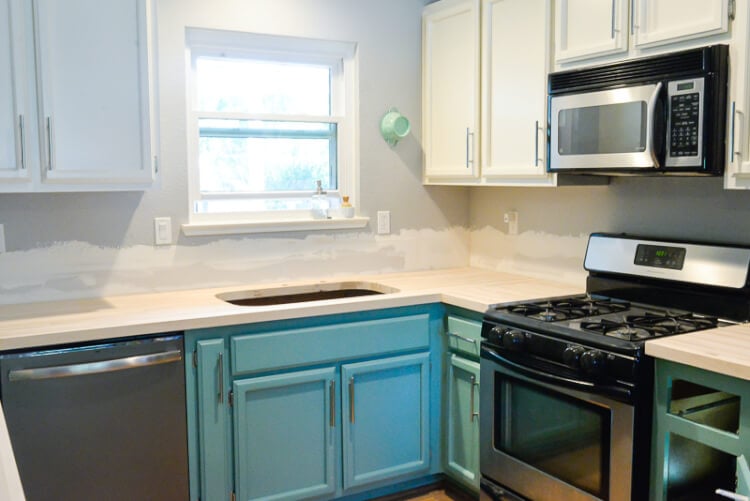
- We started by piecing our countertops together into the U-shape of our kitchen. We started in the garage, connecting some of the smaller pieces together. The contractor used a special saw to cut our butcher block into the six pieces we needed, and then joined everything together using biscuits, glue, and really long clamps. We helped him with this part but wouldn’t have been able to do it on our own without the correct tools.
- Make sure to wipe up the glue if it’s seeped through — the stain won’t take to the glue very well. Once the glue is dry, you can use an oscillating sander with 120 grit sandpaper to smooth the seams.
- We brought the butcher block pieces inside and connected it all together using the biscuit and glue method. As you can see from the diagram above, it took quite a few pieces and seams to get our countertops assembled.
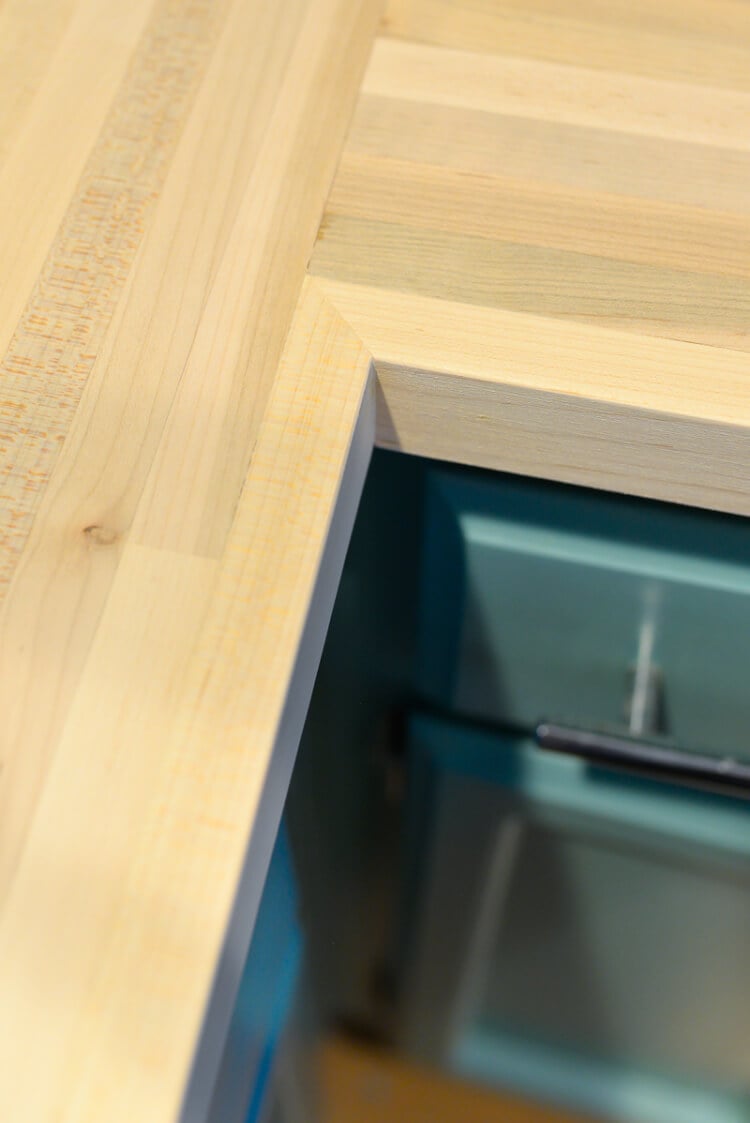
- Once we had our countertops installed, we had our contractor add a piece of maple edging around the whole thing, miter-cut at the corners. Because we had some extra seams, we thought his would help pull everything together. I absolutely love how this looks!
- Our contractor also cut a hole for our gorgeous stainless steel sink and holes for the faucet and hot water dispenser.
- Keep sanding until everything is smooth and perfect.
Finishing the Butcher Block Countertops
Using the same method as above, sand, raise the grain, stain, and Waterlox the tops and sides of the countertops! Once that was done, we were able to install our sink and faucets.
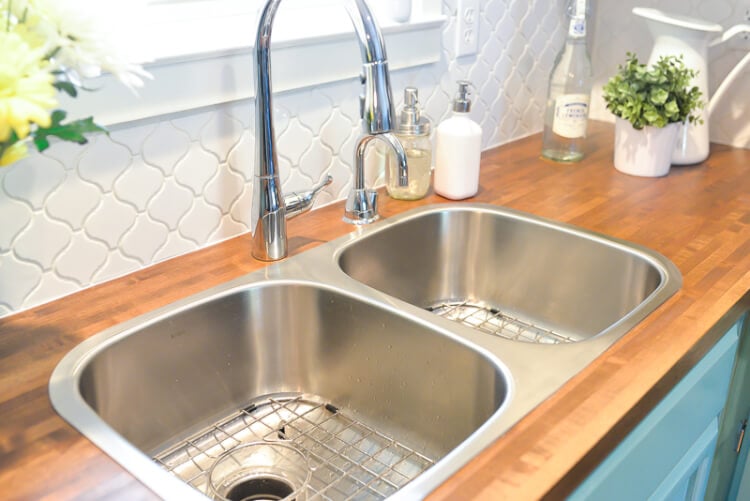
We’ve had the counters in for about two month now, and I couldn’t be happier with how they are holding up. I have made it a habit to wipe down the counters around the sink several times a day, and the Waterlox seems to be doing a great job of keeping the counters protected.
Installing butcher block was more of process than I imagined it would be, but seriously, I love them so much. They warm up the cool colors of the cabinets and are absolutely gorgeous. If you have any questions at all about our process, ask away in the comments!



Comments & Reviews
Cori George says
It’s been a long time, but I am pretty sure we used this: https://www.minwax.com/wood-products/preparation/minwax-prestain-wood-conditioner And yes, the process you have there is correct!
Patsy Martinez says
Hello… can you tell me what conditioner you used along with your stain? So to understand you would add the conditioner, then add the stain and condition after the stain and your doing this in small sections at a time is that right?
Aya says
I got Red Oak BB from F&D and am doing the exactly same preparation and finishing. Thanks for the very help tips!! The bad side (or the bottom) side has a lot of knotholes. Did you fill knotholes with Timber Mate? Thank you!
Amy Motroni says
Yes, we did!
Amy, HLMS Support
Marisa says
Just lovely. Can you please tell me what color Timber Mate you used? We are also using a walnut stain.
Thank you!
Amy Motroni says
We used Special Walnut
Chad Cote says
Is your contractor not concerned with expansion at the butt joints (seams)? I’ve read you should never glue two pieces as they may crack or warp when expansion occurs. They look absolutely beautiful and hopefully they remain that way for years to come.
Christina says
I’m not sure where you have read this, but my husband and I glued two pieces of butcher block to make up an island in the past and it held up beautifully. We had no issues with expansion and honestly don’t even notice the seam. We are installing a new kitchen and found the floor and decor island so we’re using our old island top in the laundry room for on top of the washer and dryer. We sealed ours with wipe on poly which is food safe once cured.
Sabrina Addams says
I absolutely loved the last picture of the finished wood countertop and how the stainless steel sink and white backsplash complement it. My mother-in-law loves the look of wood countertops and wants to find a contractor to install one for her. I’ll show her these pictures for inspiration for her kitchen countertop.
Nathaniel Craft says
Hi. What kind of sink is that? We are going to remodel our kitchen and we love this sink but can’t find one anywhere
Amy Motroni says
Hi Nathaniel,
The sink and all other details of where to find items in this post are detailed out here :)
https://heyletsmakestuff.com/modern-farmhouse-budget-kitchen-renovation/
Happy Remodeling!
Amy, HLMS Reader Support
Jessica says
It looks awesome! How did you secure your sink into the butcher block?
Cori George says
Lots and lots of clear glue and caulking! We glued it and then put dumbbells in the sink for a few days while the glue set. Hope that helps!