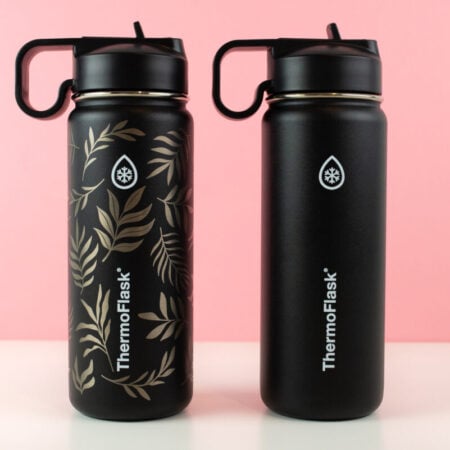
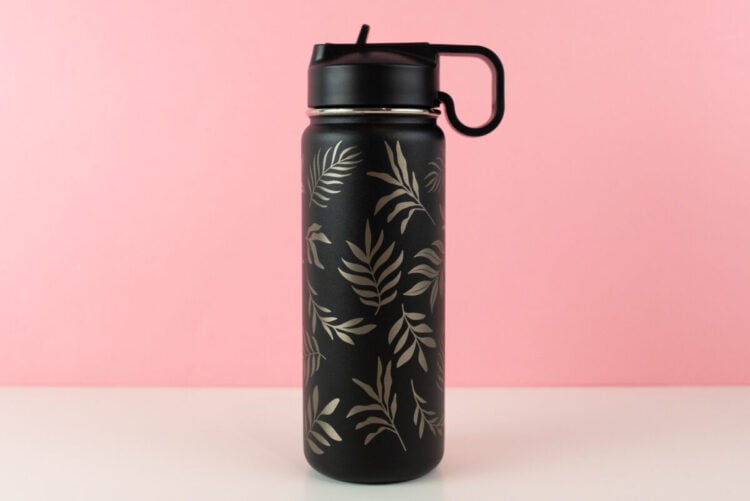
Learn how to engrave around a logo on a tumbler using a laser machine! This tutorial will walk you through how to measure your tumbler or other project correctly so you don’t engrave over the top of the logo.
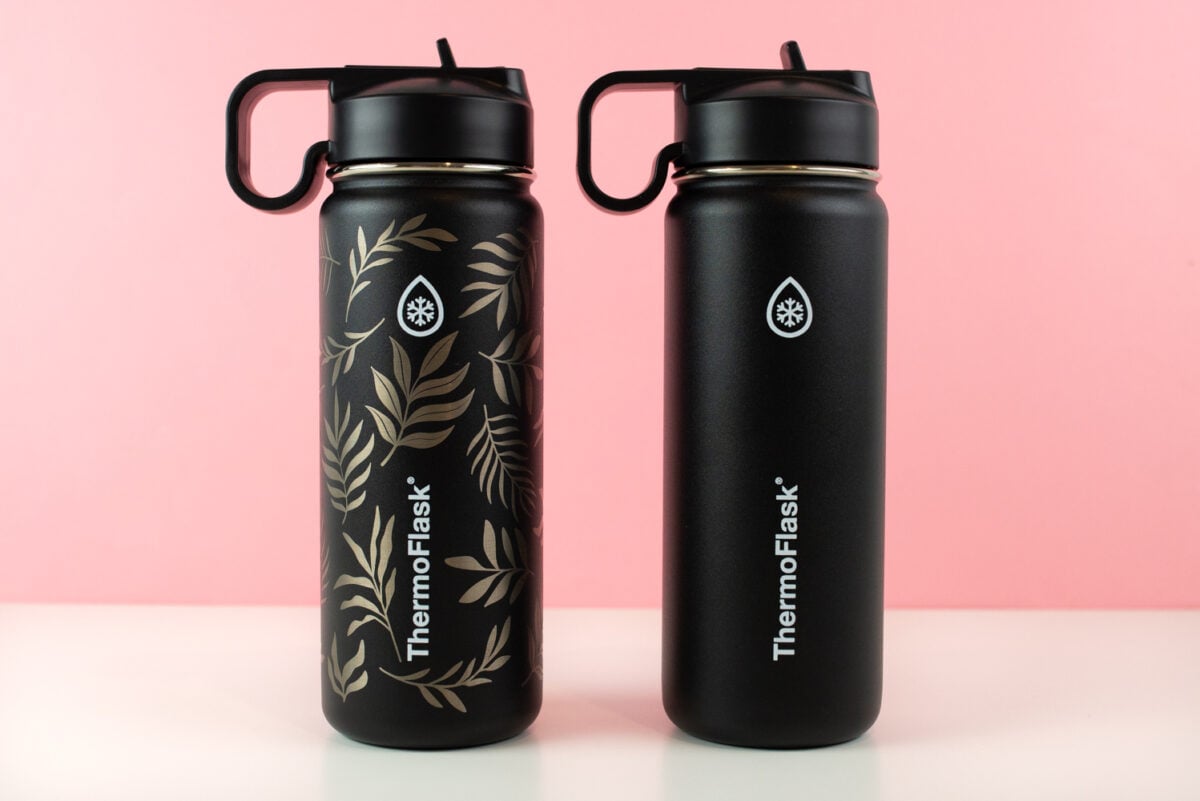
Engraving tumblers using a rotary tool on a laser is fairly straightforward. You can read how to do it using an xTool laser in my post How to Use the xTool RA2 Rotary Attachment. I won’t be going into the actually steps for setting up to engrave a tumbler—make sure to read that post first!
I say engraving tumblers easy…until you notice that your tumbler has a logo on it. And you want to do a full wrap design. Or you want to avoid the logo while doing a smaller image. It’s not exactly straightforward, but I’ve come up with a pretty good system for making sure I get it right the first time. Making tumblers is not cheap, so you don’t want to waste them!
Important: This tutorial is done within the xTool Creative Space program for my xTool S1. This should, however, work similarly for other machines with a rotary tool. My preference is actually to do this in Adobe Illustrator and then upload, but I wanted to give you an easy and free option that will work with your xTool laser.
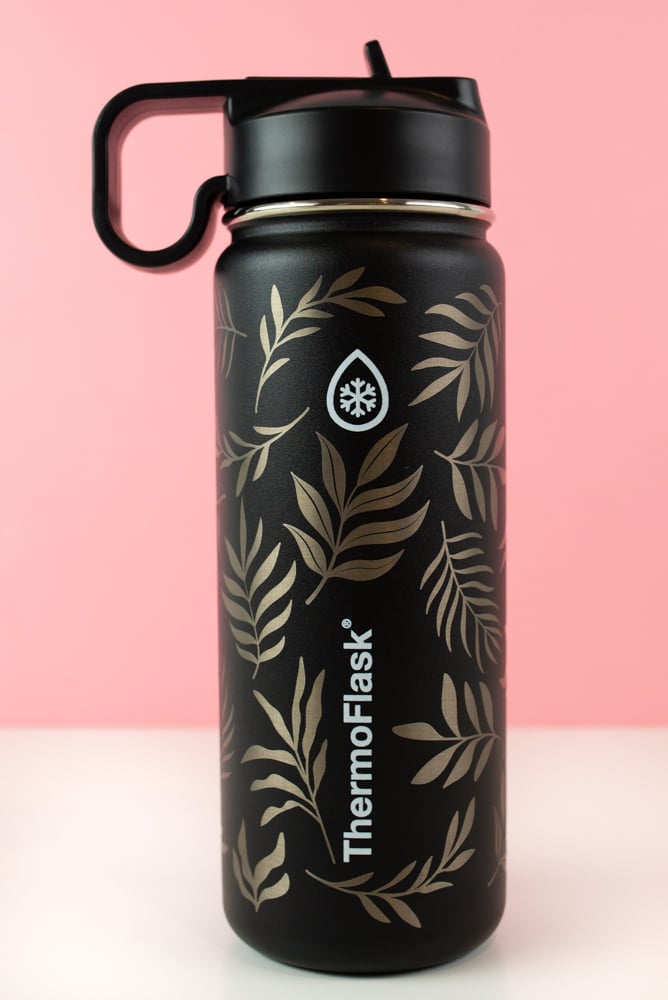
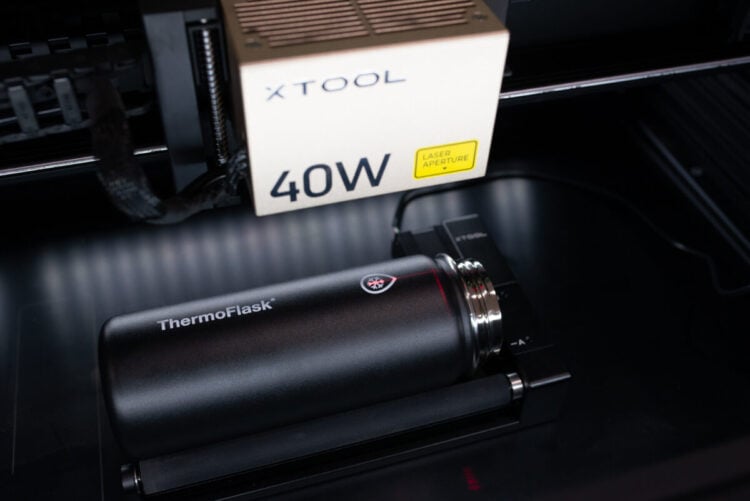
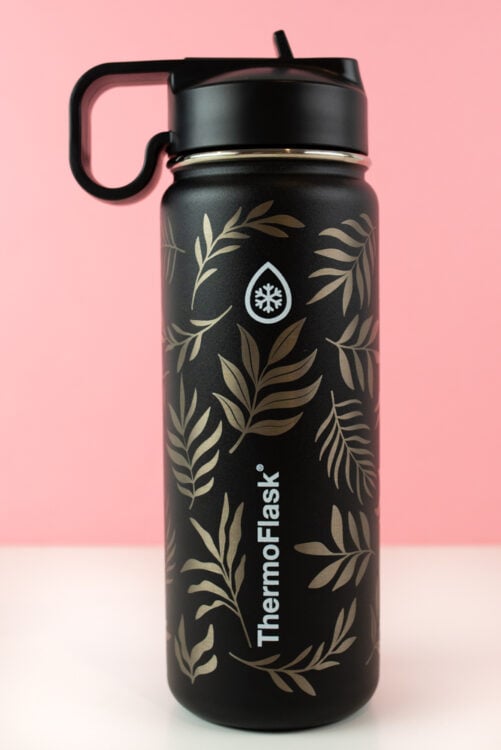
You can see that my particular tumbler has two different logos—the wordmark and the graphic element. We’ll be working around both of these for this project.
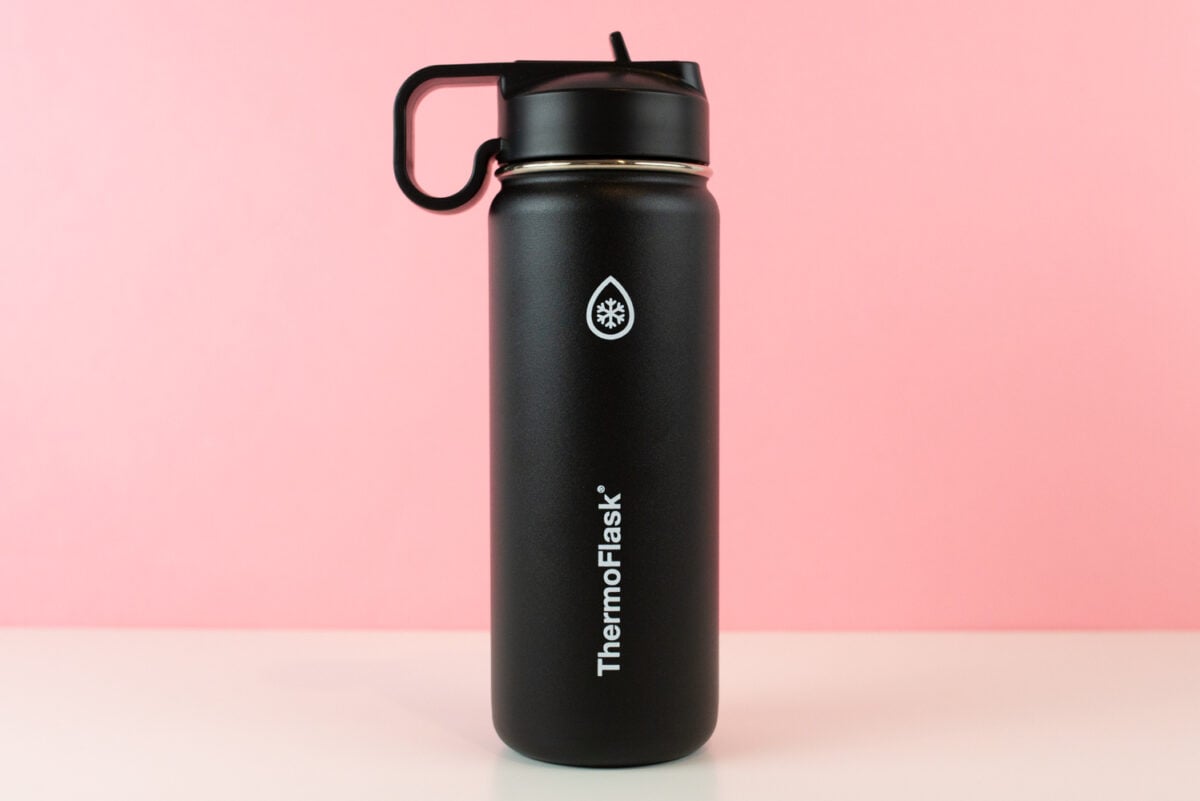
This tutorial is dependent on the size of your tumbler or other projects. For example, many tumbler wraps you can purchase are for Stanley 40oz tumblers. Most of these designs will have a place in the design removed for the logo. You can use parts of this tutorial to correctly place the design so it won’t engrave over the logo.
Watch the Video
This tutorial is really helpful when shown on video! Just hit play below to watch. Or keep reading for a written overview.
Measure Your Tumbler
We’re going to start by making a template. This will allow you to see just how big your design needs to be for your specific tumbler, along with where we need to place our logos. This should work with just about anything you need to engrave, including tumblers, mugs, and more. You will need to adjust how you make your template based on your own project (don’t use my measurements!).
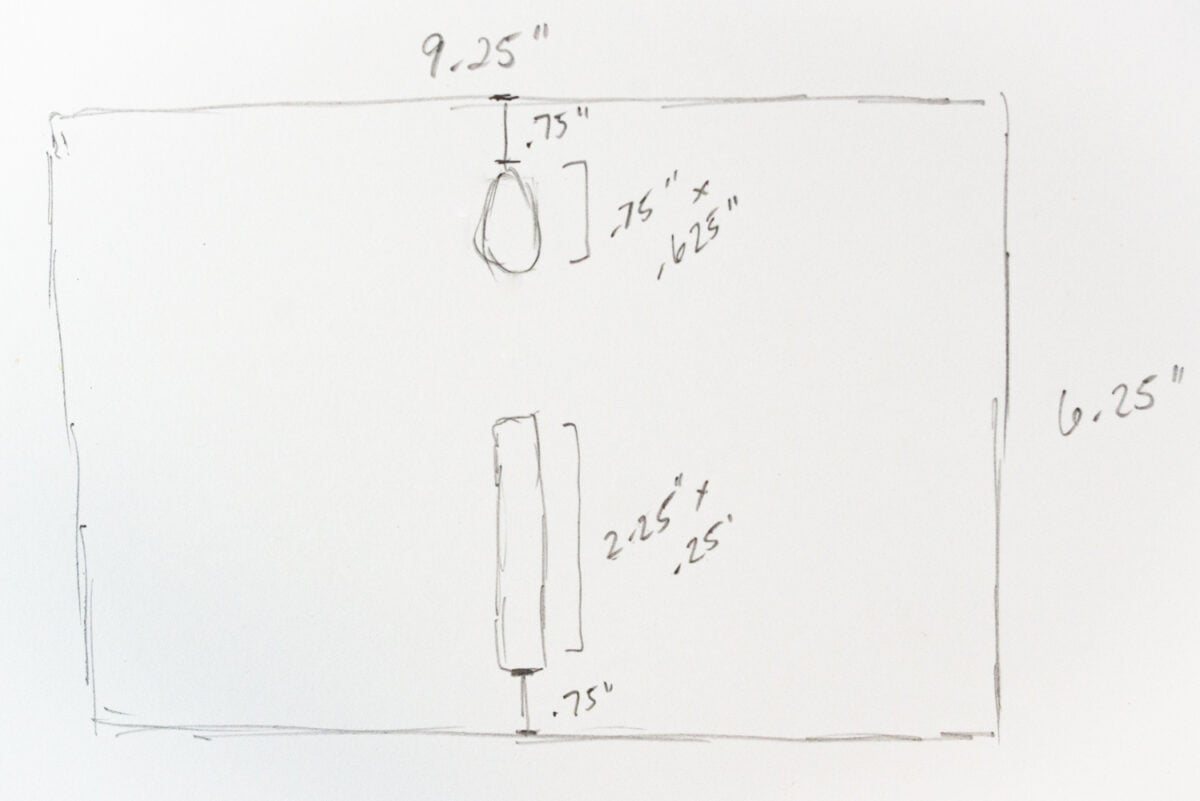
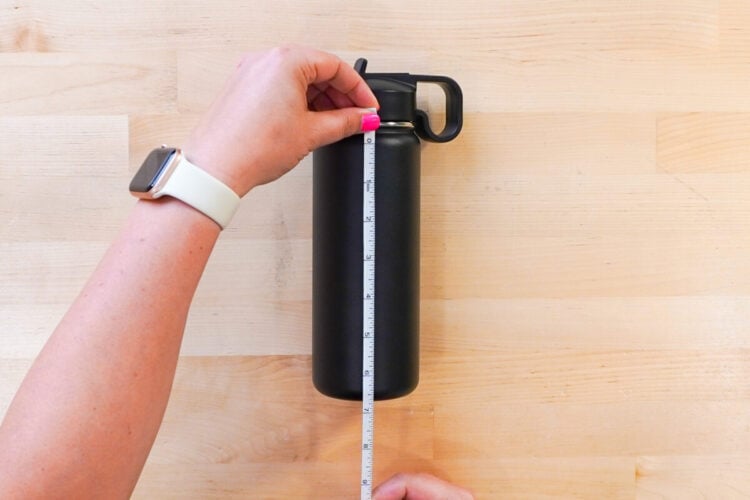
Start by measuring your tumbler. You want both the height where you will be engraving, as well as the circumference. For my tumbler, the height is 6.25″ and the circumference is 9.25″.
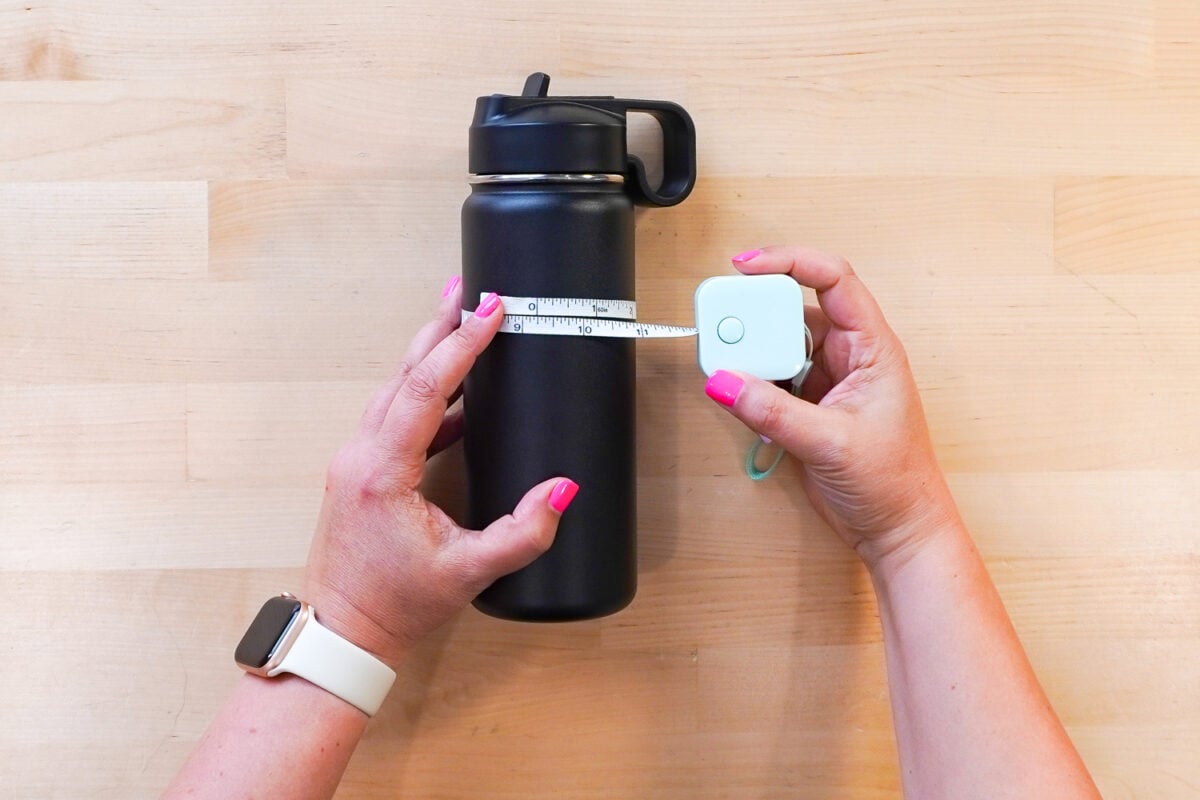
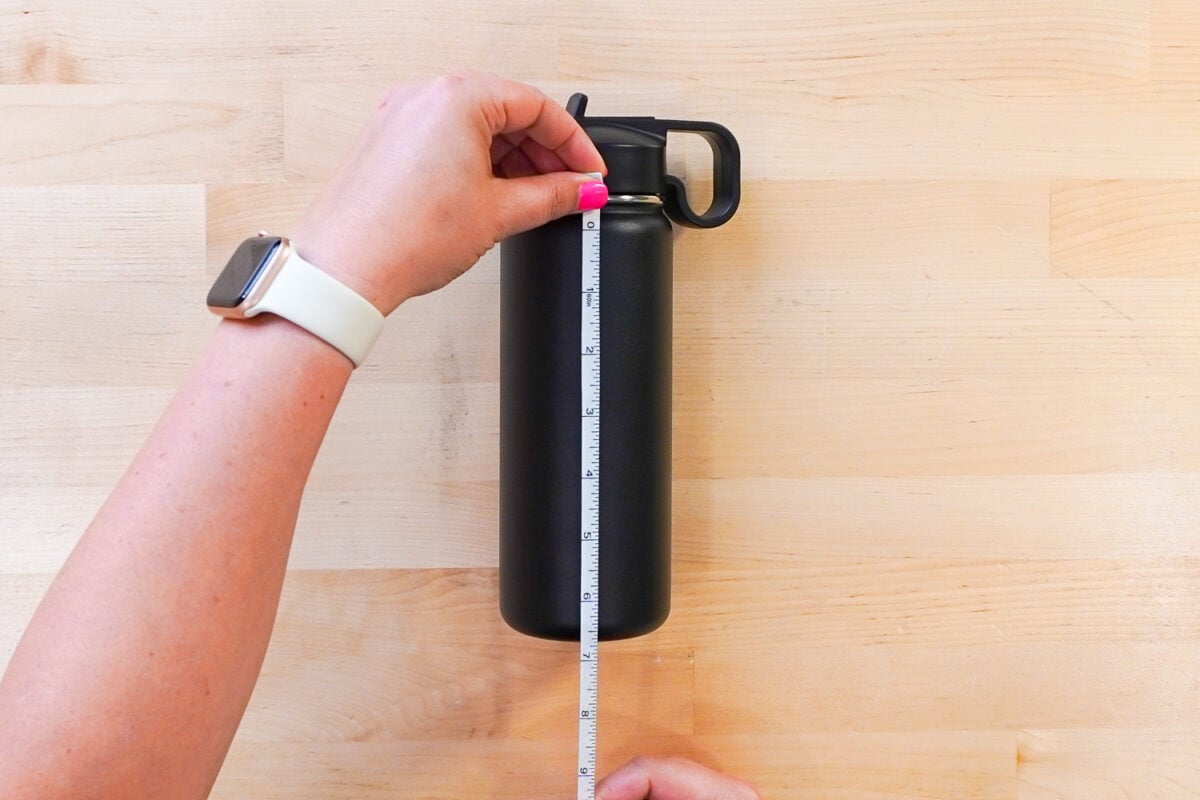
You’ll also want to measure the sizes of your logo AND the placement when it comes to the height of the tumbler
So I have the following:
- Height: 6.25″
- Circumference: 9.25″
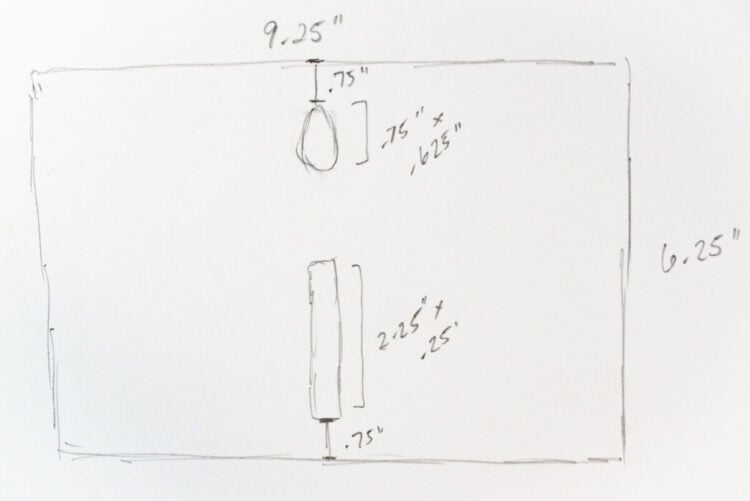
- Thermoflask wordmark: 2.25″ tall by .25″ wide
- Snowflake element: .75″ tall by .625″ wide
- Thermoflask wordmark distance from the bottom of the engraving space: .75″
- Snowflake element distance from the top of the engraving space: .75″
If it’s helpful, you can draw a quick sketch of what you need to re-create in xTool Creative Space. It does NOT need to be accurate, you just need it as a reference.
Create Your Template
Open xTool Creative Space and set the mode on the right to Use Rotary Attachment. I like to zoom out as well.
Now we’re going to re-create the sketch in xTool Creative Space using rectangles. You can change the size of any rectangle you create in the right panel. Make sure to “unlock” the dimensions so you can change the height and width separately.

Note that because of the way my xTool engraves, I once I have my template, I have to rotate it 90° to the right. The top of my tumbler is on the right and the bottom of my tumbler is on the left.
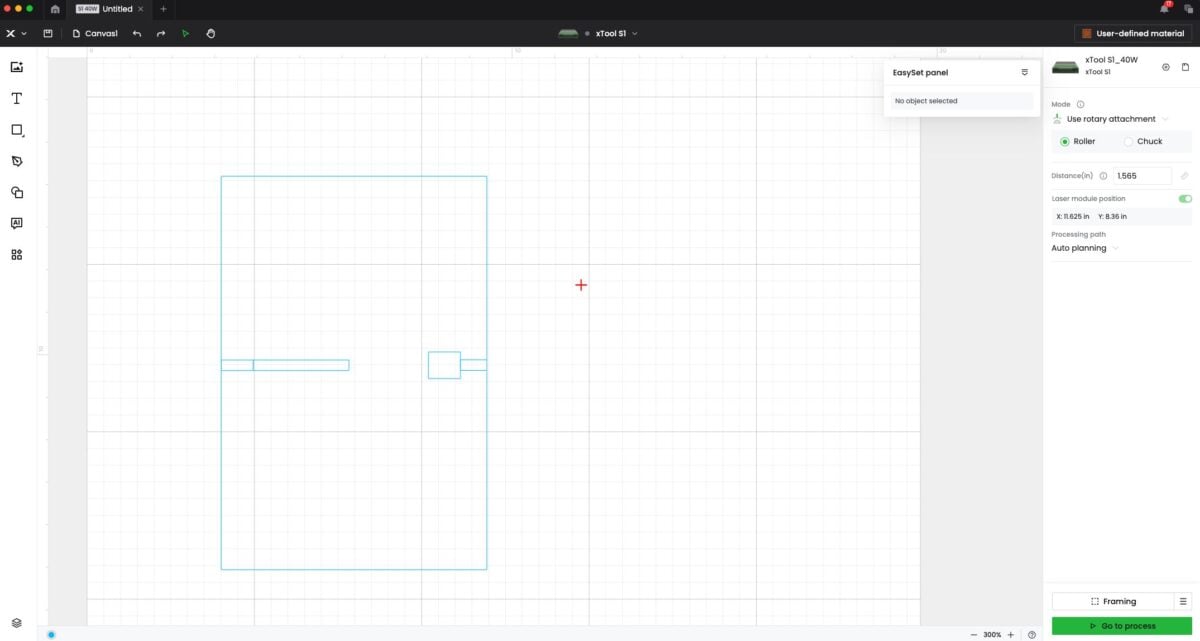
You can see I have a big rectangle showing the entire engraving area, rectangles for both logos, AND the .75″ spacers I’ve added to know where exactly my logos go in relation to the top and bottom of my tumbler. Note that your logos do NOT need to be in the center of your larger box! You can do them at any point along the box, you just need to line it up in the laser properly, like I’ll show later in this post.
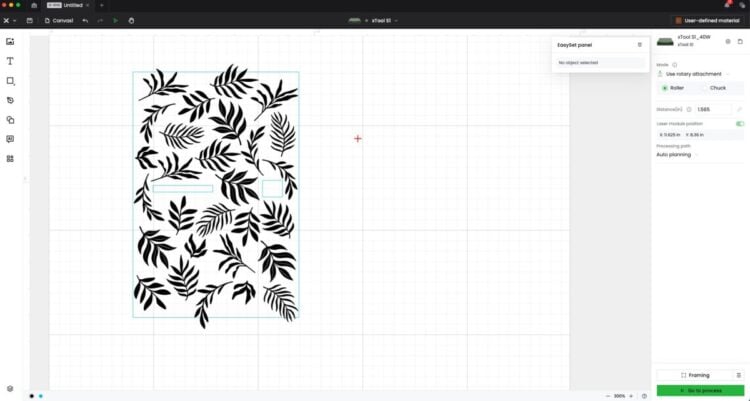
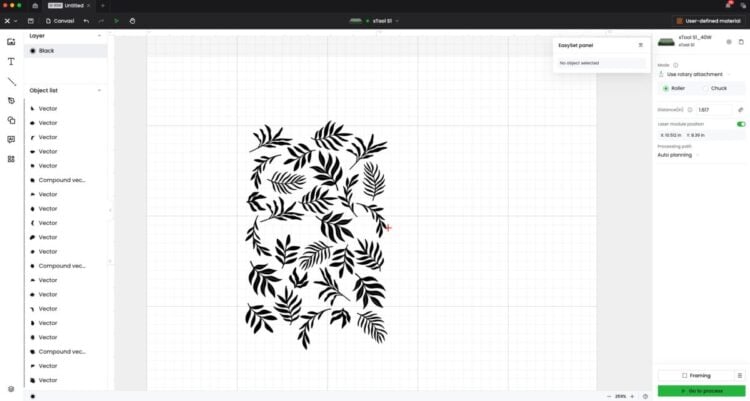
Then you can delete the spacer rectangles (keep the logo rectangles!) and add your design. For this example, I have just used a bunch of plant images that I have spaced around my logos. Remember, do NOT cover any logo boxes you have made. If you have a premade design, work it around the boxes.
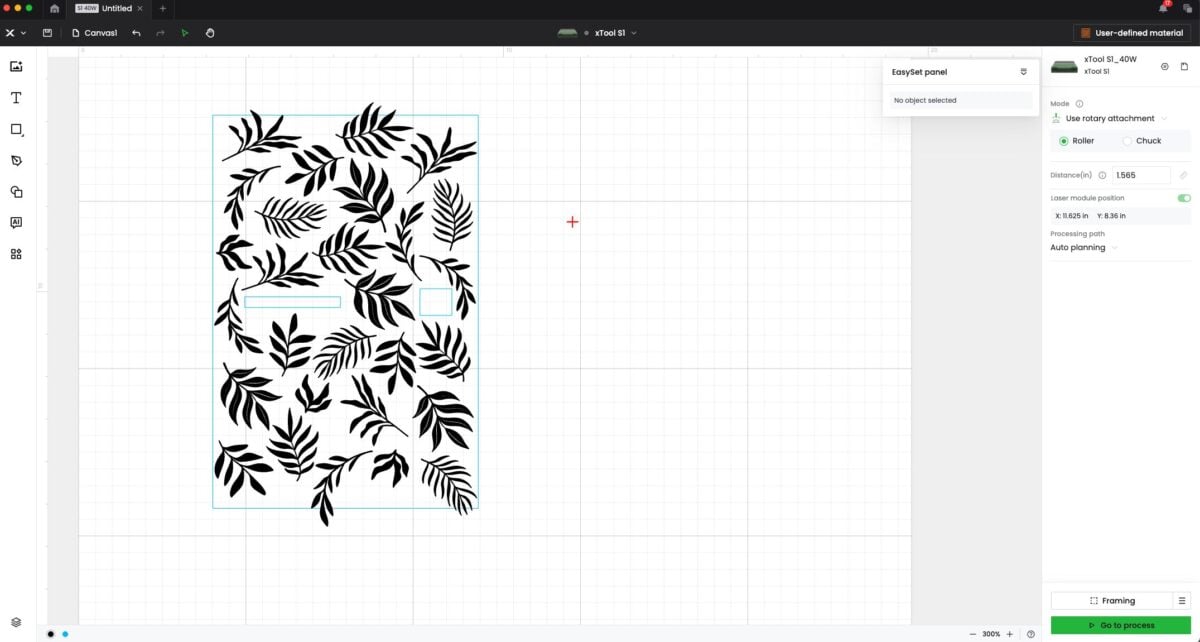
Note that for my design, I do have some of my leaves going off the sides of my rectangle (which are at the top and bottom of the image in Creative Space, because my design is rotated 90°). If you look at both sides, you’ll see that where the leaves go out of my rectangle, there’s space for them on the other side. This means I won’t have an obvious gap on the back of my tumbler where the two sides of my design come together. It takes a bit of practice to get this right (and I have definitely gotten it wrong), but if you can make it work, it’s great on the final project.
Placing the Design on the Tumbler
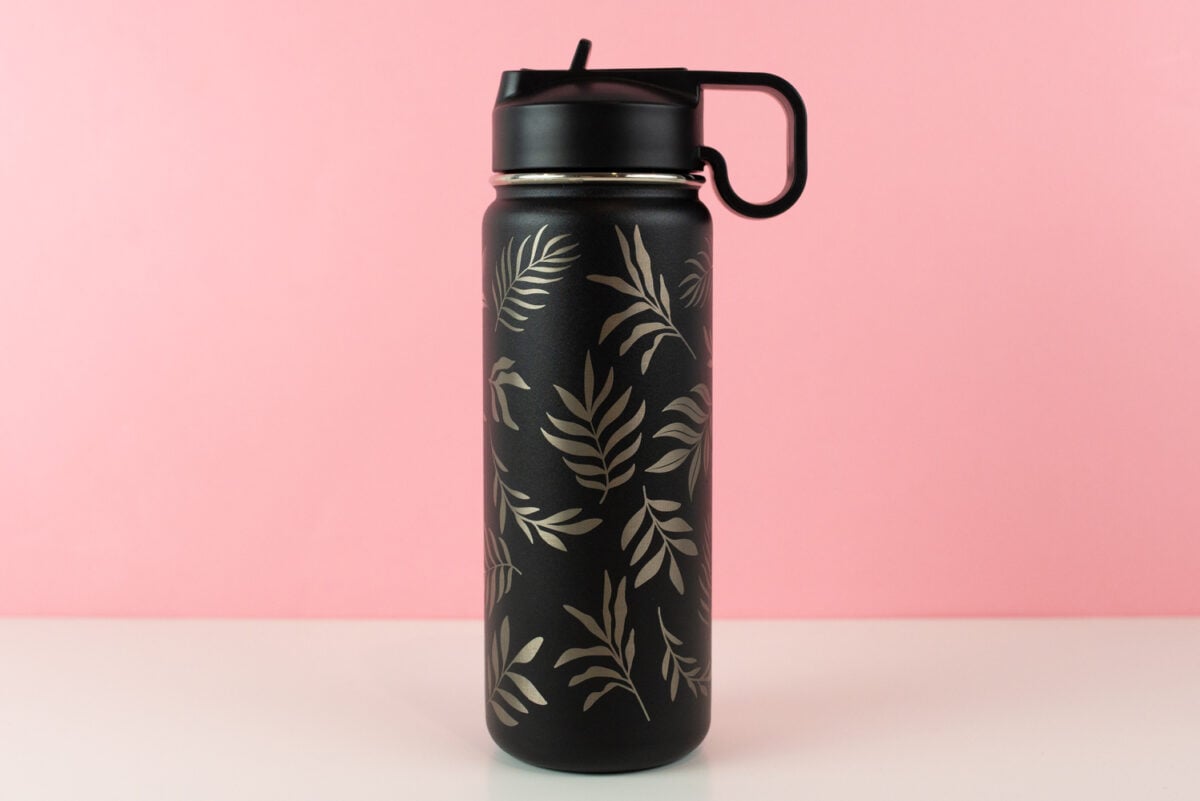
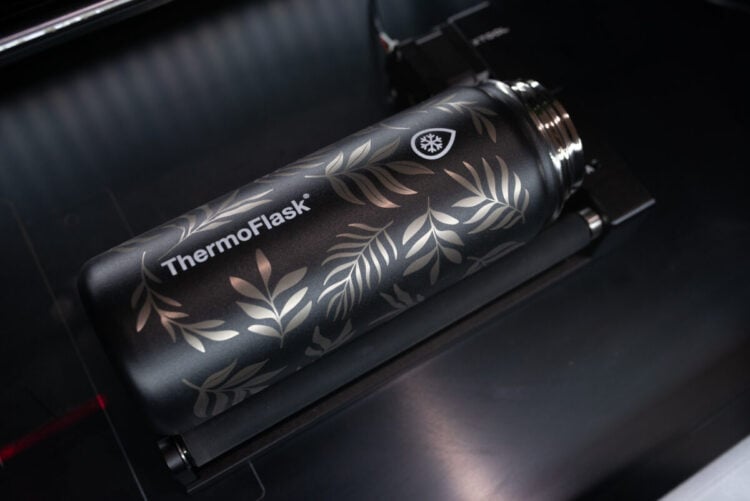
Now place your tumbler in your laser with the logo facing up.
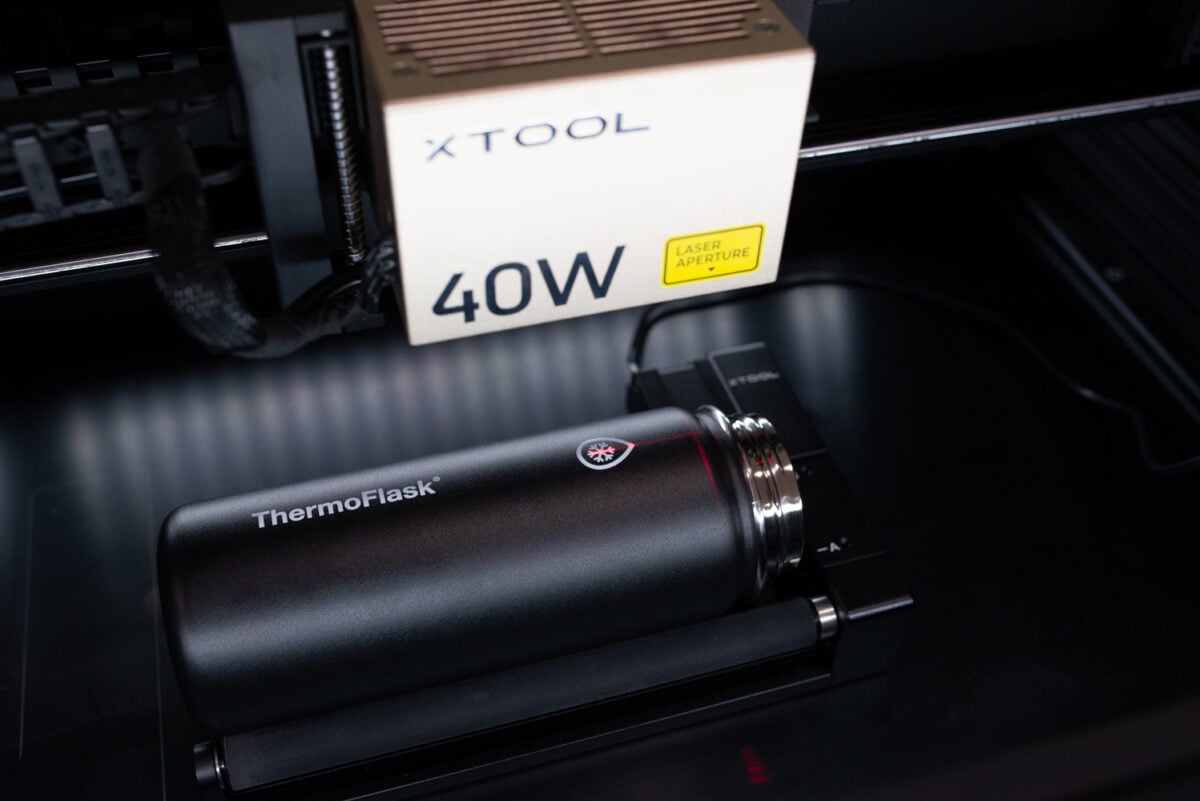
In my xTool S1, I can use the laser positioning system to know exactly where my laser is at all times. I placed the laser right over the top of my tumbler and I see that positioning as a red cross in Creative Space.
If you are doing this with a camera, you will need to place your design over the image, making sure the template lines up with the logos on the actual tumbler.
Then back in Creative Space, I can move my design so that the logo spaces are lined up with my red cross. Note that I am lining up my actual tumbler box (the height and circumference box), NOT the bounding box.
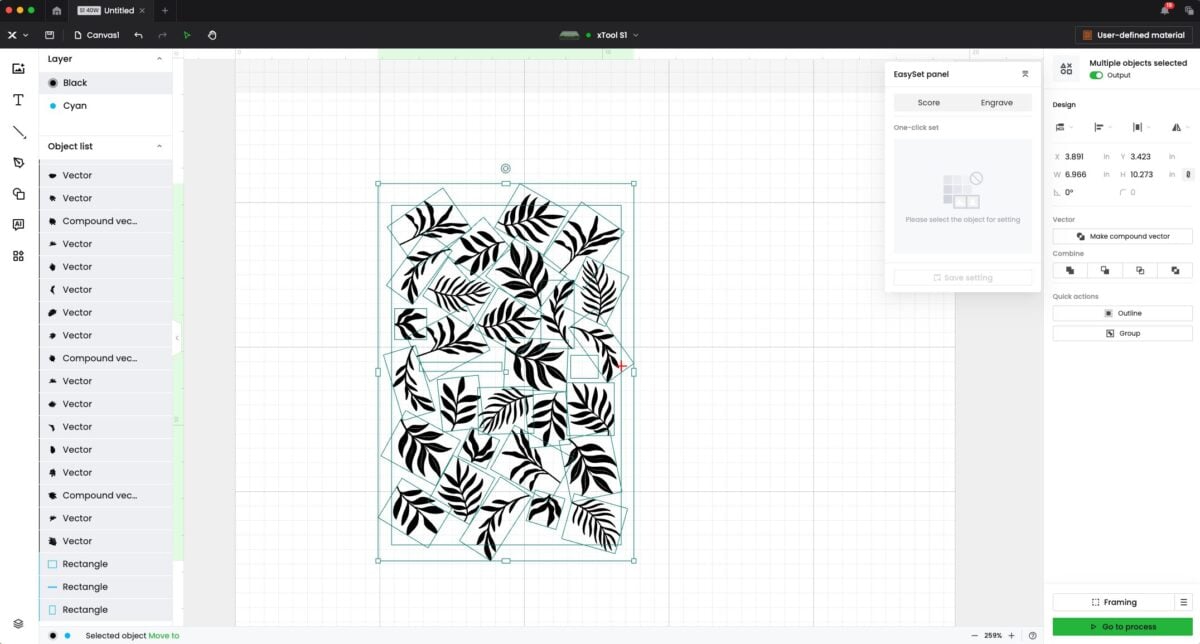
Once you have it lined up, delete your rectangles for the logos and your tumbler box.
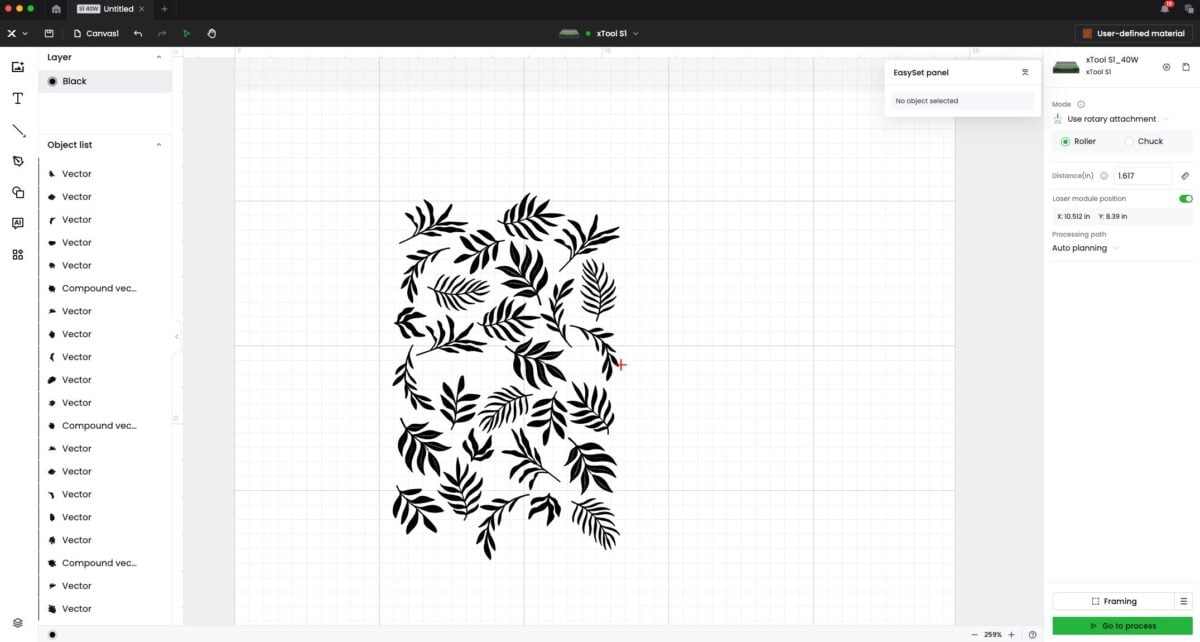
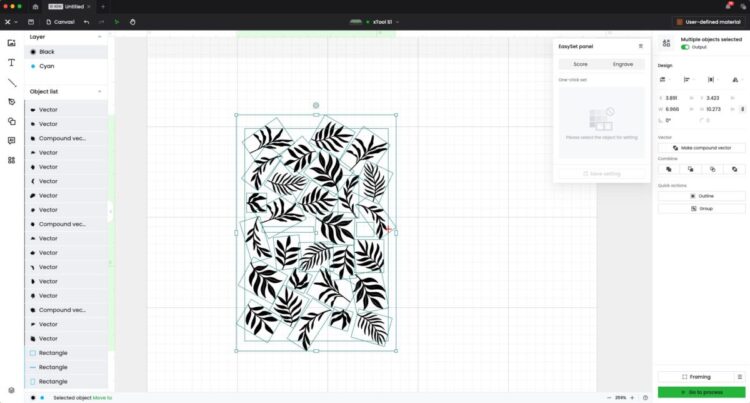
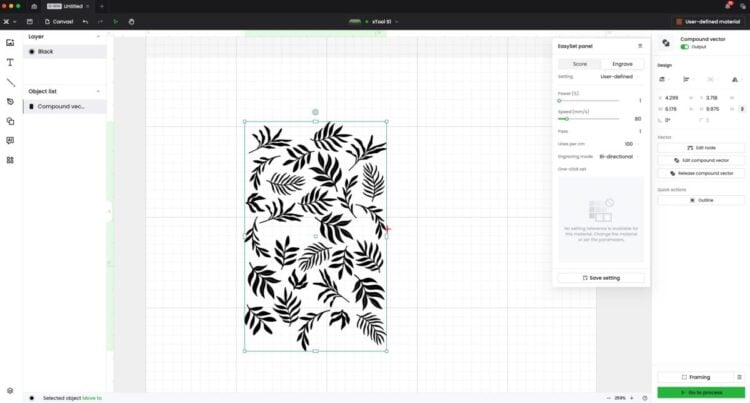
Then, depending on your design, you may want to weld all of the individual pieces into a single engrave piece using the first option in the combine panel on the right.

This will help reduce the file size and processing time for the image. You can see now that there is a single object in the layers panel on the left vs. a bunch of individual leaves.
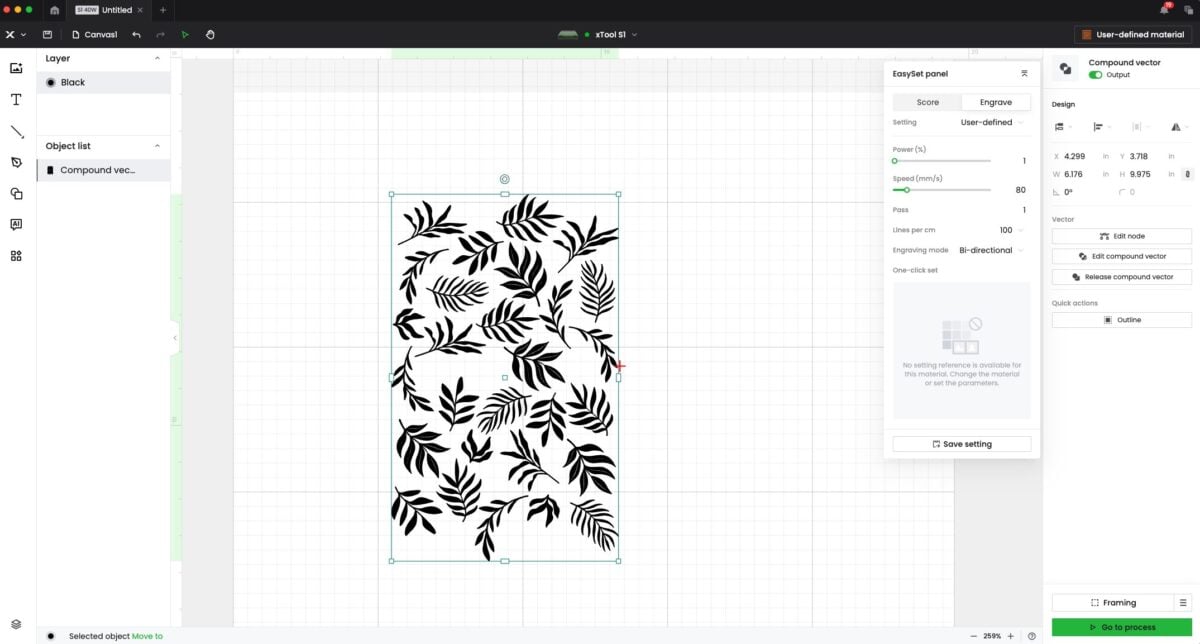
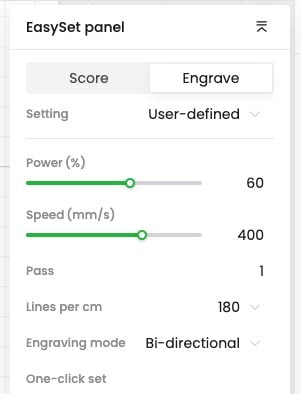
Now select the image and set your processing parameters. I have found that a power of 60, a speed of 400, and a lines per cm of 180 consistently gives me good results on most powder coated tumblers.
Then finally, measure the distance of your project inside your machine. Other machines may call this auto-focus, but it’s done with a physical mechanism in my xTool S1. Basically it’s measuring the distance from the laser to the top-most point of your project.

Now you’re ready to make your project! Click Go to Process in the lower right. If everything looks good, click start and you can press the button on your machine to engrave your project!
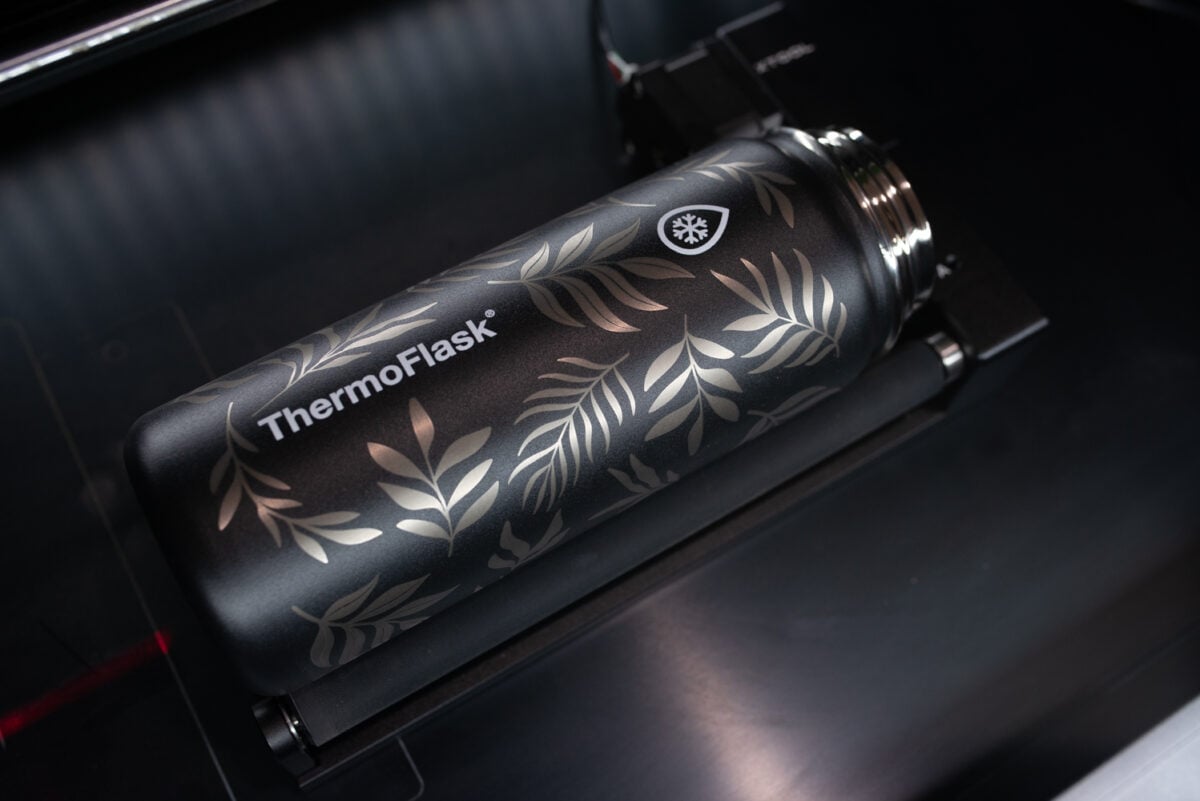
Clean your tumbler using warm water and a magic eraser and you’re done!
I hope you found this tutorial to engrave around a logo with your laser helpful! If you have any questions or need help troubleshooting, leave me a comment!
HOW TO LASER ENGRAVE AROUND A LOGO ON A TUMBLER
Equipment
Supplies
Instructions
- You can read how to do it using an xTool laser in this post How to Use the xTool RA2 Rotary Attachment. These instructions will not be going into the actual steps for setting up to engrave a tumbler—make sure to read that post first!Important: This tutorial is done within the xTool Creative Space program using the xTool S1. This should, however, work similarly for other machines with a rotary tool. This tutorial is dependent on the size of your tumbler or other projects. For example, many tumbler wraps you can purchase are for Stanley 40oz tumblers. Most of these designs will have a place in the design removed for the logo. You can use parts of this tutorial to correctly place the design so it won't engrave over the logo.
- Measure Your TumblerWe're going to start by making a template. This will allow you to see just how big your design needs to be for your specific tumbler, along with where we need to place our logos. This should work with just about anything you need to engrave, including tumblers, mugs, and more. You will need to adjust how you make your template based on your own project (don't use the measurements in these instructions!). Start by measuring your tumbler. You want both the height where you will be engraving, as well as the circumference. For this tumbler, the height is 6.25" and the circumference is 9.25".


- You'll also want to measure the sizes of your logo AND the placement when it comes to the height of the tumbler
- So for this tumbler, we have the following:Height: 6.25"Circumference: 9.25"Thermoflask wordmark: 2.25" tall by .25" wideSnowflake element: .75" tall by .625" wideThermoflask wordmark distance from the bottom of the engraving space: .75"Snowflake element distance from the top of the engraving space: .75"If it's helpful, you can draw a quick sketch of what you need to re-create in xTool Creative Space. It does NOT need to be accurate, you just need it as a reference.

- Create Your TemplateOpen xTool Creative Space and set the mode on the right to Use Rotary Attachment. Zoom it out if you like.Now we're going to re-create the sketch in xTool Creative Space using rectangles. You can change the size of any rectangle you create in the right panel. Make sure to "unlock" the dimensions so you can change the height and width separately.

- Note that because of the way the xTool engraves, once the template was ready, it had to be rotated 90° to the right. The top of the tumbler is on the right and the bottom of the tumbler is on the left.You can see there is a big rectangle showing the entire engraving area, rectangles for both logos, AND the .75" spacers were added to know where exactly the logos go in relation to the top and bottom of the tumbler. Note that your logos do NOT need to be in the center of your larger box! You can do them at any point along the box, you just need to line it up in the laser properly, as shown later in these instructions.

- Then you can delete the spacer rectangles (keep the logo rectangles!) and add your design. For this example, For this project a bunch of plant images were used and were spaced around the logos. Remember, do NOT cover any logo boxes you have made. If you have a premade design, work it around the boxes.

- Note that for this design, there are some of leaves going off the sides of the rectangle (which are at the top and bottom of the image in Creative Space, because the design is rotated 90°). If you look at both sides, you'll see that where the leaves go out of the rectangle, there's space for them on the other side. This means there won't be an obvious gap on the back of thee tumbler where the two sides of the design come together. It takes a bit of practice to get this right but if you can make it work, it's great on the final project.

- Placing the Design on the TumblerNow place your tumbler in your laser with the logo facing up.

- In the xTool S1, you can use the laser positioning system to know exactly where the laser is at all times. Here, the laser was placed right over the top of the tumbler and you can see that positioning as a red cross in Creative Space.If you are doing this with a camera, you will need to place your design over the image, making sure the template lines up with the logos on the actual tumbler. Then back in Creative Space, the design was moved so that the logo spaces were lined up with the red cross. Note that the actual tumbler box is being lined up (the height and circumference box), NOT the bounding box.

- Once you have it lined up, delete your rectangles for the logos and your tumbler box.

- Then, depending on your design, you may want to weld all of the individual pieces into a single engrave piece using the first option in the combine panel on the right.

- This will help reduce the file size and processing time for the image. You can see now that there is a single object in the layers panel on the left vs. a bunch of individual leaves.

- Now select the image and set your processing parameters. A power of 60, a speed of 400, and a lines per cm of 180 consistently gives good results on most powder coated tumblers.

- Then finally, measure the distance of your project inside your machine. Other machines may call this auto-focus, but it's done with a physical mechanism in the xTool S1. Basically it's measuring the distance from the laser to the top-most point of your project.

- Now you're ready to make your project! Click Go to Process in the lower right. If everything looks good, click start and you can press the button on your machine to engrave your project!

- Clean your tumbler using warm water and a magic eraser and you're done!





Leave A Reply!