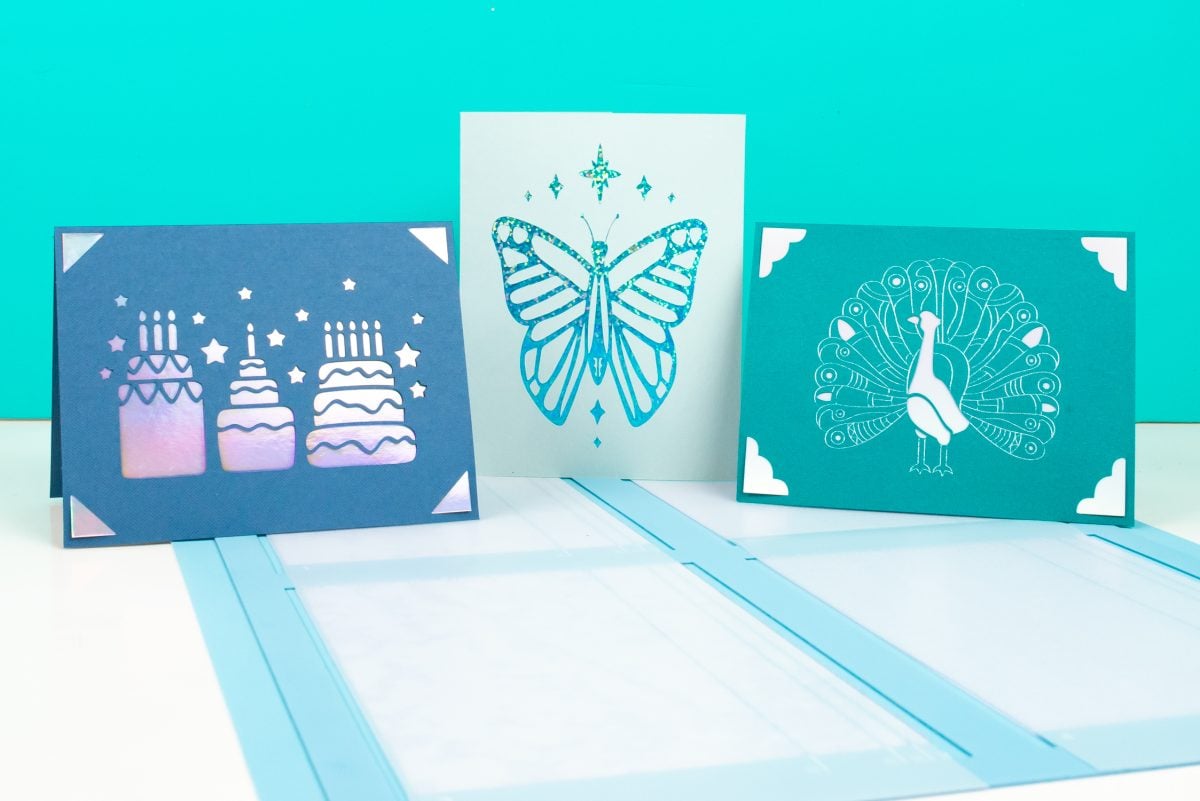
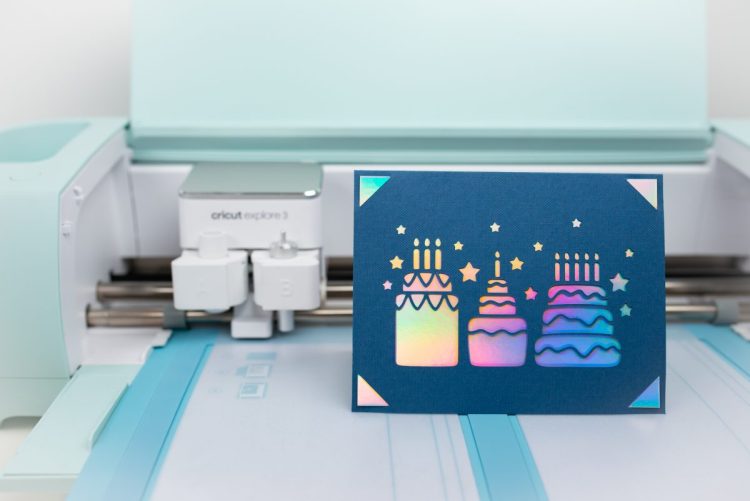
Use the Cricut Card Mat to easily craft up to four cards at the same time using your Cricut Maker or Cricut Explore! Use Cricut’s Insert Cards to make fun greeting cards for birthdays, baby and wedding showers, holidays, milestones, and more!
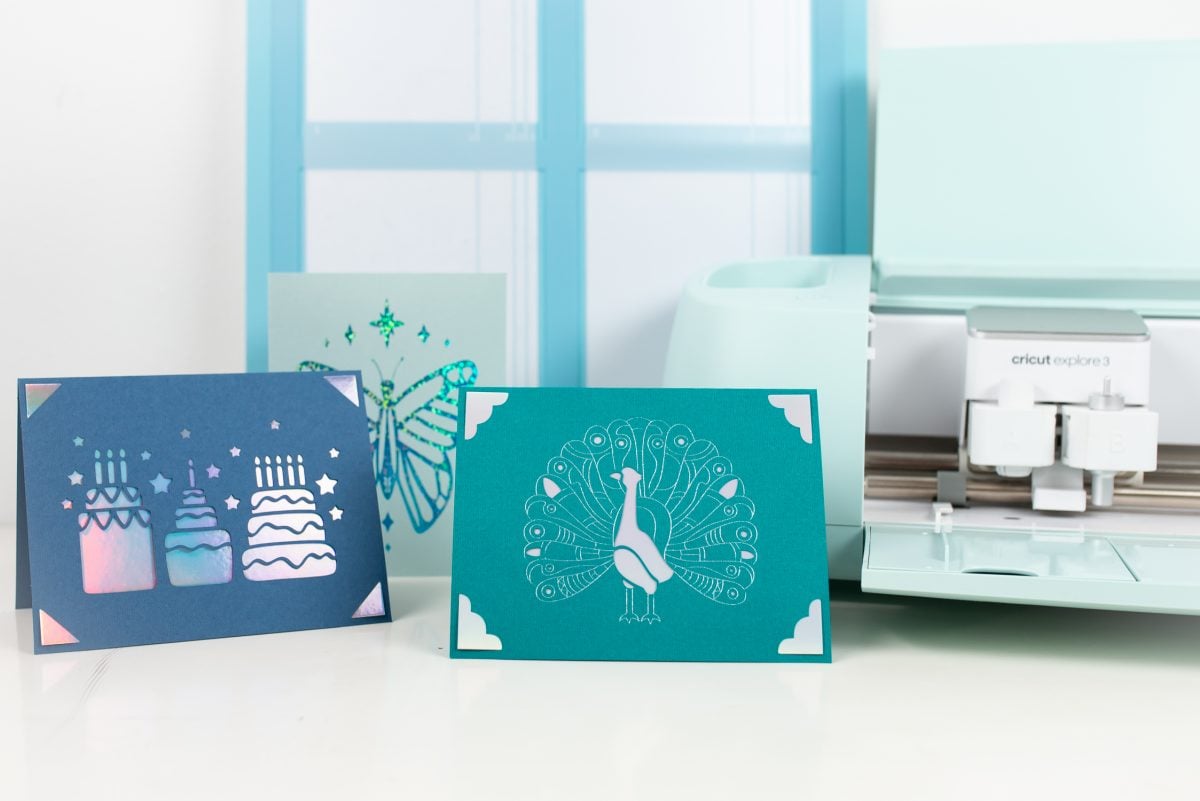
Cricut’s first card mat was exclusively for Cricut Joy, Cricut’s smallest cutting machine. You can read all about that in my post How to Use the Cricut Joy Card Mat to make Cricut Joy cards.
While there were hacks for using the Cricut Joy Card Mat in the Explore and Maker machines, we all figured Cricut would someday launch a card mat for the larger Cricut Explore series and Cricut Maker series machines.
And they have! This new Cricut Card Mat is designed for the Cricut Explore and Cricut Maker machines and features four slots so you can cut up to four cards in one go.
Before, if you wanted to make a card, you’d need to cut the card itself, score it, and in some cases, make the envelope. But the Cricut Card Mat and Insert Cards simplify this process by using pre-folded cards and envelopes. This means you can create last-minute birthday cards, custom cards for weddings and showers, eleventh-hour invites, your family Christmas cards, and more using this specialized reusable machine mat.
I don’t think I’ve purchased a card from the store since I started making cards with my Cricut!
How Does the Cricut Card Mat Work?
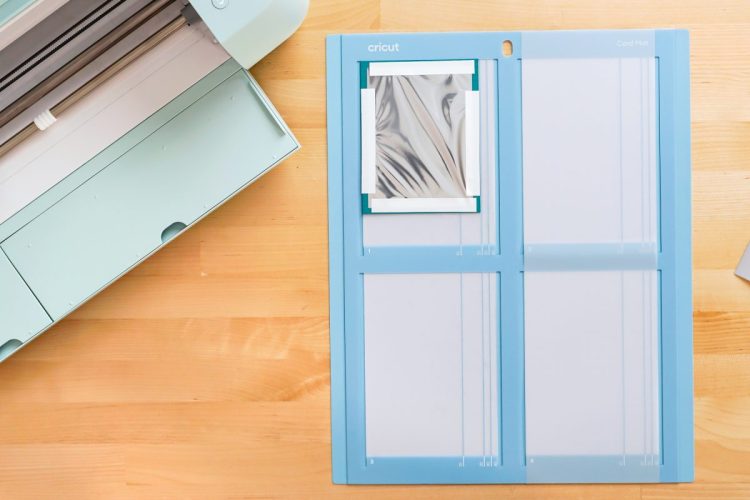
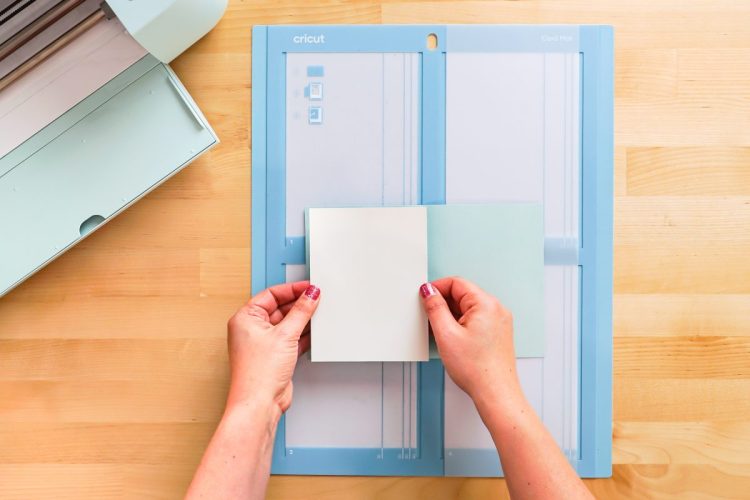
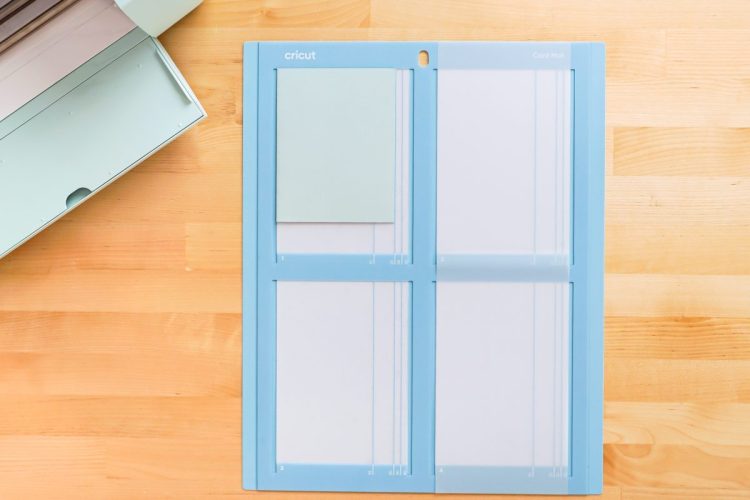
The magic is in the double-layered mat! You slide a pre-folded Cricut card (see below for options) with the back between the two layers while the front sticks to the top layer. This allows you to cut with the front of the card without cutting the back of the card.
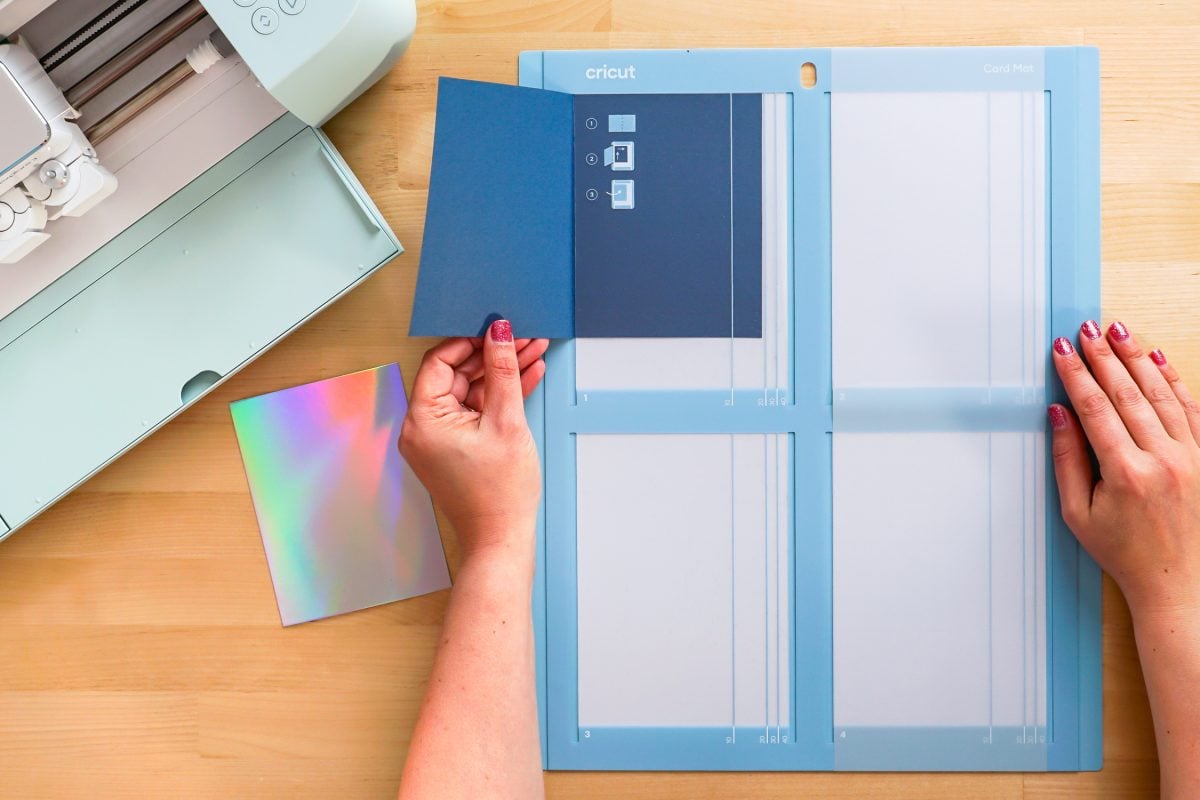
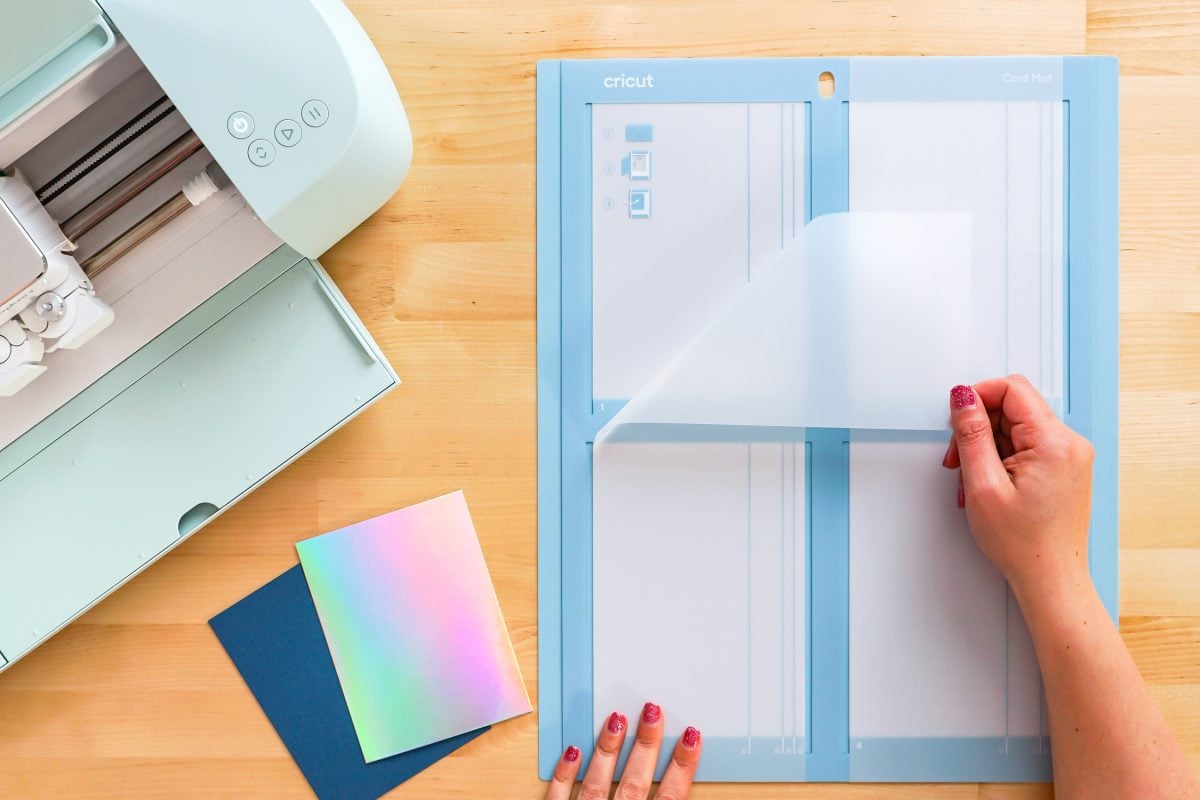
Note that there are two plastic protector sheets that you can remove when you use the mat, and then replace when you want to store it to protect it from dust and debris.
Priming the Cricut Card Mat
The card mat is STICKY so you may want to prime it a bit before your first cut. Do this by patting a t-shirt against the sticky part of the mat. The mat will pick up some of the t-shirts fibers and make it easier to release the cardstock off your mat.
What are Cricut Insert Cards?
Cricut has several types of Insert Card kits you can purchase to use with the Cricut Card Mat:
- Cricut Insert Cards: these packs contain pre-folded cards that you cut and/or draw on, pieces of cardstock (often a specialty cardstock like glitter or holographic) that you insert behind the image you cut, and envelopes.
- Cricut Foil Transfer Insert Cards: these packs contain pre-folded cards that you cut and/or foil on, pieces of cardstock that you insert behind the image you cut, pieces of Cricut Foil that you use to foil your card, and envelopes.
- Cricut Cutaway Cards: these packs include a sticky-backed pre-folded card, inserts that you stick to the card, and envelopes.
We’ll learn how to use all three below!
You can also use your own cards if you’d like—just insert and choose the right size, as you’ll see below.
What are the Cricut Card Sizes?
With the release of the Card mat, Cricut also introduced new card size options. Cricut also added their own naming conventions for their cards. I’m not a huge fan of this naming system since paper and card sizing already existed and was already confusing, but they never ask my opinion about these things!
R = rectangle card and S = square card. You’ll find Cricut Cards in these sizes:
- R10 – 3.5 in x 4.9 in (8.9 cm x 12.4 cm) — same as A1
- R20 – 4.25 in x 5.5 in (10.8 cm x 14 cm) — same as A2
- R30 – 4.5 in x 6.25 in (11.4 cm x 15.9 cm) — same as A6
- R40 – 4.75 in x 6.6 in (12.1 cm x 16.8 cm)
- S40 – 4.75 in x 4.75 in (12.1 cm x 12.1 cm)
Newer boxes of cards will say which size they are (R10, R20, etc.) but for older card boxes you may need to look at the actual measurements. You’ll need to know your card size when you go to make your project.
You will see these numbers on the Cricut Card Mat as well—if you slide a card into the mat, you’ll see which size card it is. Note that 40 is both R40 and S40.
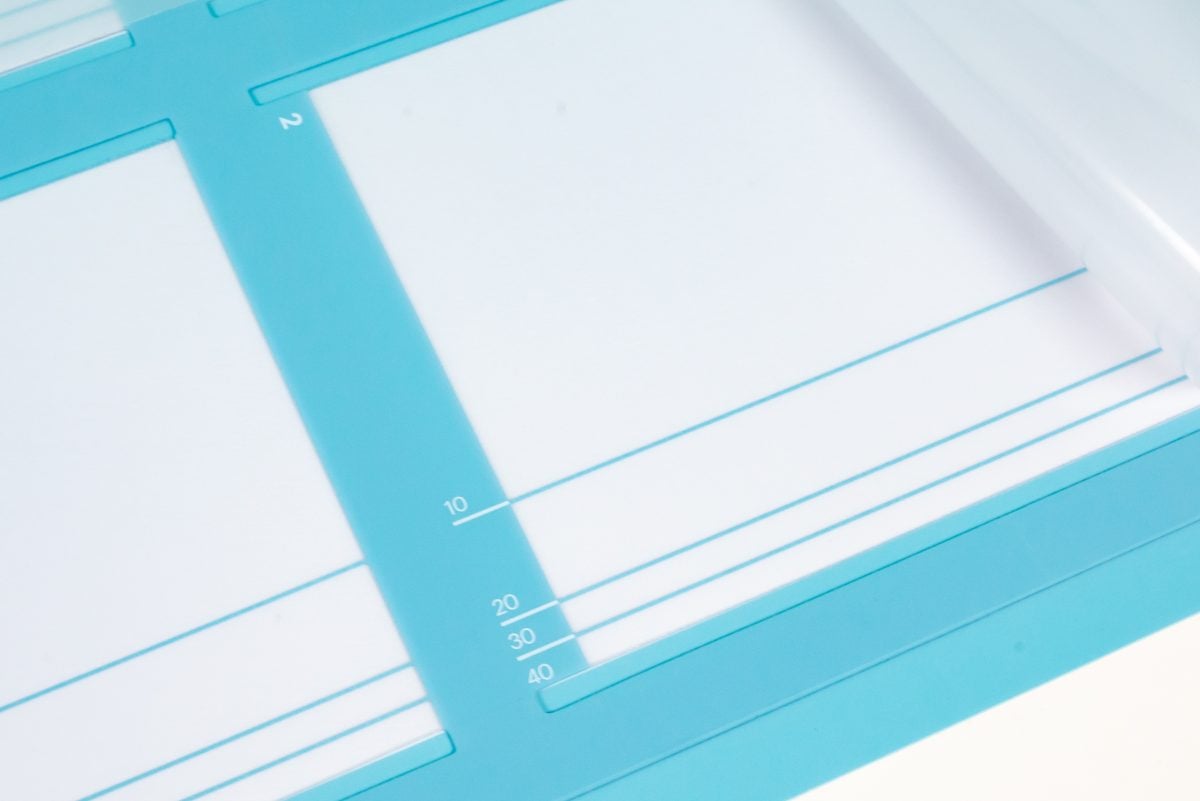
The R40 and S40 card sizes are ONLY for the Maker and Explore machines. These will not fit in the Cricut Joy.
Card Images in Cricut Design Space
There are quite a few ways to find images to use with the Cricut Card Mat and none of them are perfect. I find the search function in Cricut Design Space to be a bit exasperating sometimes, just to warn you!
To start, you can’t easily search by card size. Which seems a bit silly considering we now have five card sizes. You can put in things like A20 or R40 and it’s hit or miss what comes up.
Search In Projects
My favorite way is to click Projects and select Cards from the Category dropdown at the top of Design Space. Here you can narrow your search using the Search Projects search at the top of the screen.
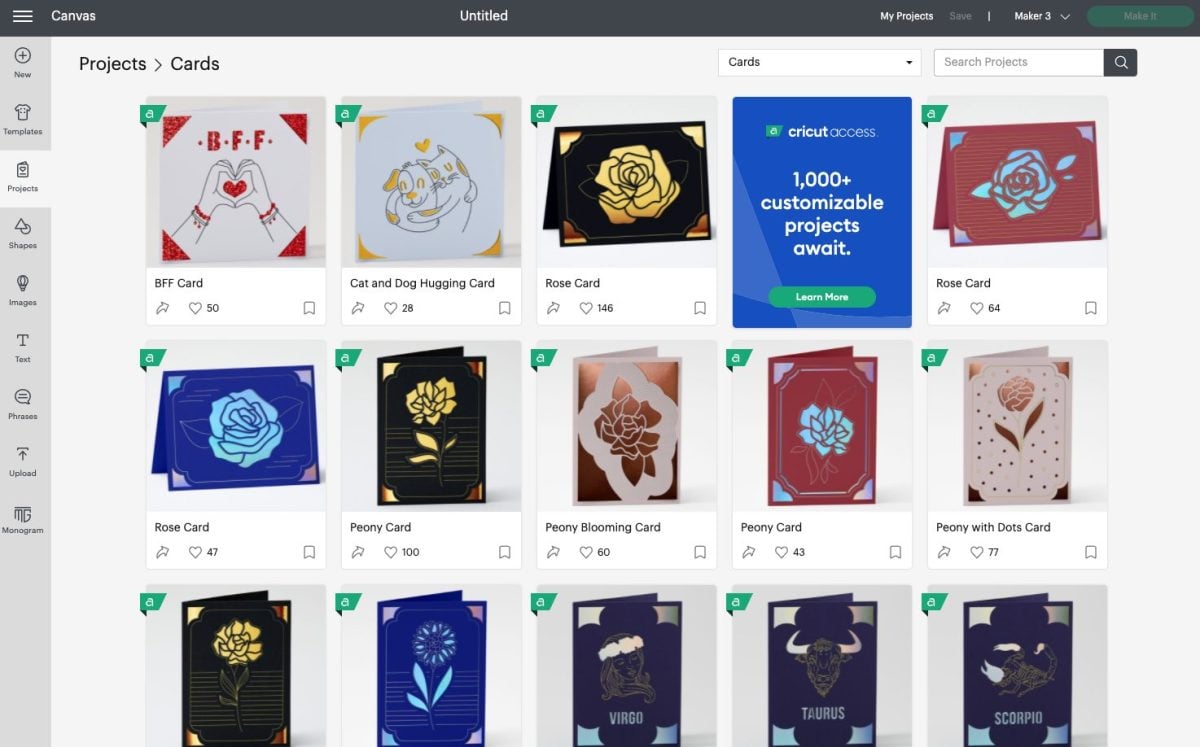
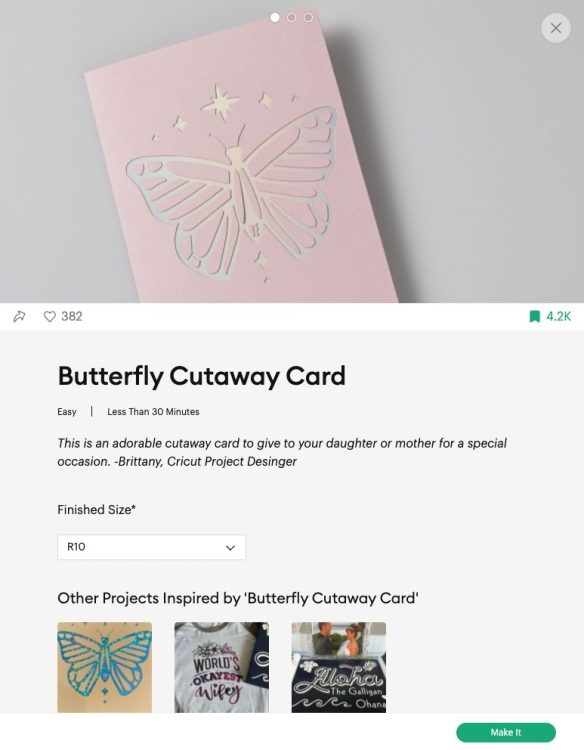
This gives you a large number of cards to search through and I like being able to see a final version of the cards (vs. just the file, as you’ll see in a moment). Once you click on a card to make it, you can select a dropdown for the Finished Size of your card and Cricut Design Space will adjust the image accordingly.
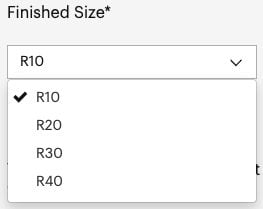
There are a few downsides to searching this way, however. You can filter in this view—you can’t say you only want cards that have a cut operation (no drawing or foiling). Which means much more manual searching.
You also have to “Make It” from this screen. As far as I can tell, you can’t take any of these cards onto your Canvas to edit them. You only have the option to Make It at the bottom.
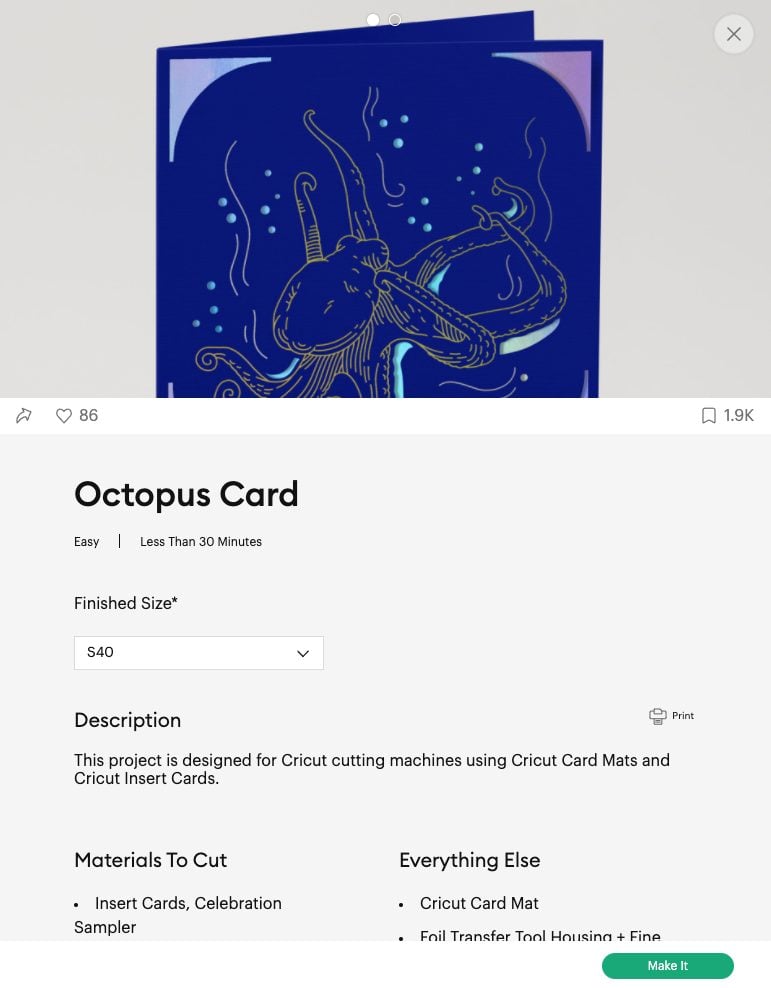
Which also means you can’t cut four different cards at one time (see my hack below), though you can cut up to four of the same card.
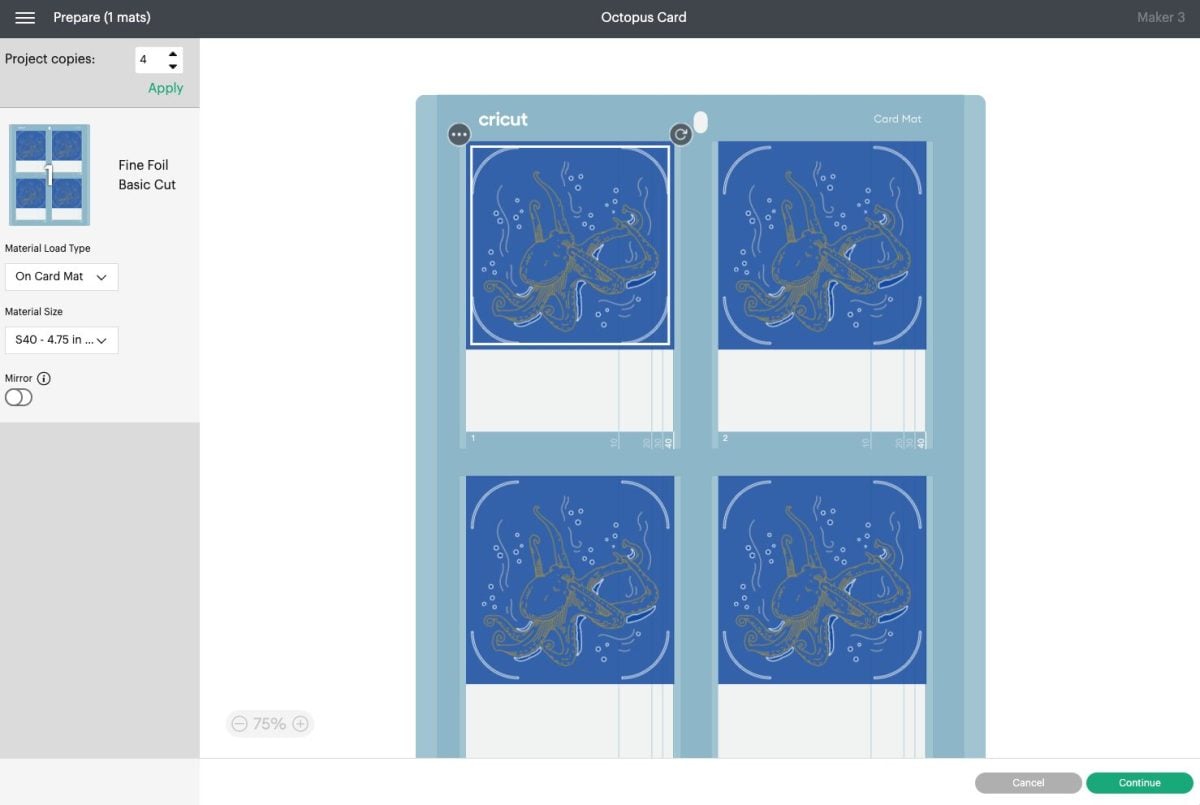
Image Search
Another way to search for cards is to click Images on the left and then in the filtering options on the left, choose Cards under Project Type.
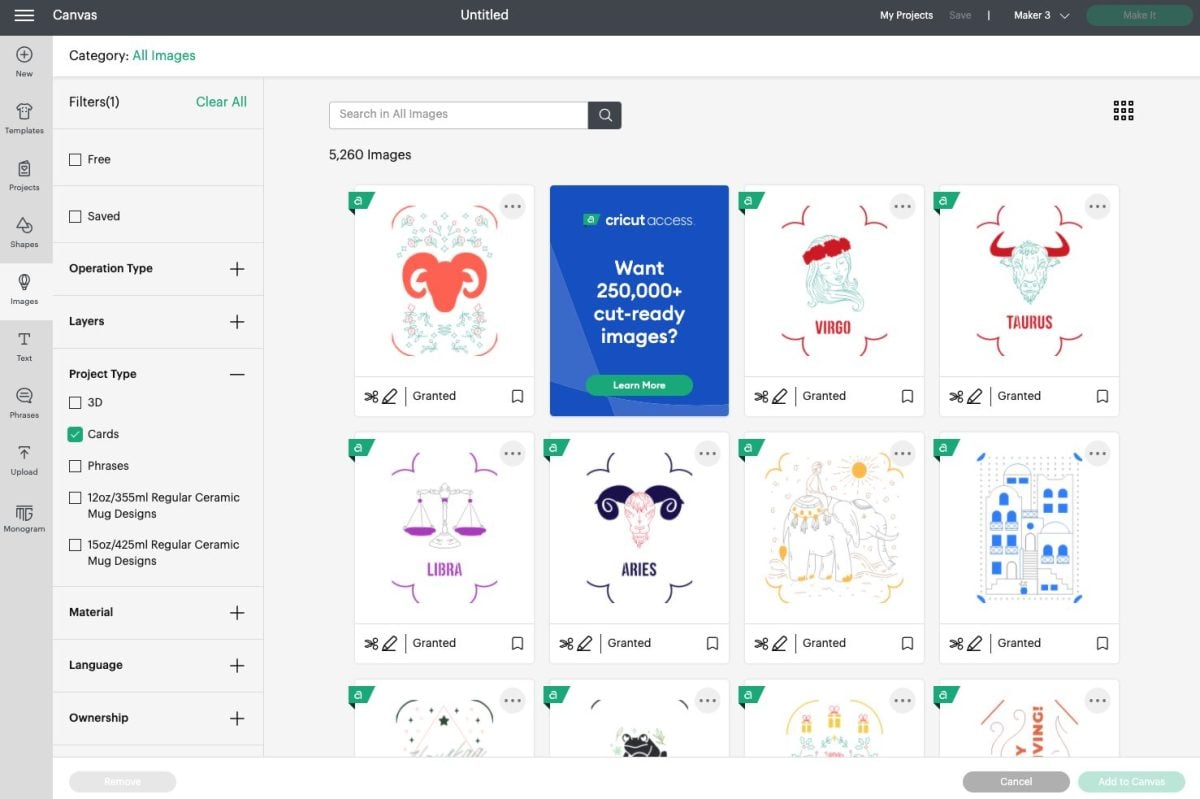
Here you can narrow your search using the search bar at the top.
You can also narrow your search using the Operation Type filter on the left. For example, if you wanted to foil your card, you could choose Cut + Draw and choose one of these cards. (Drawing can be done with a pen or with the Foil Transfer Tool.)
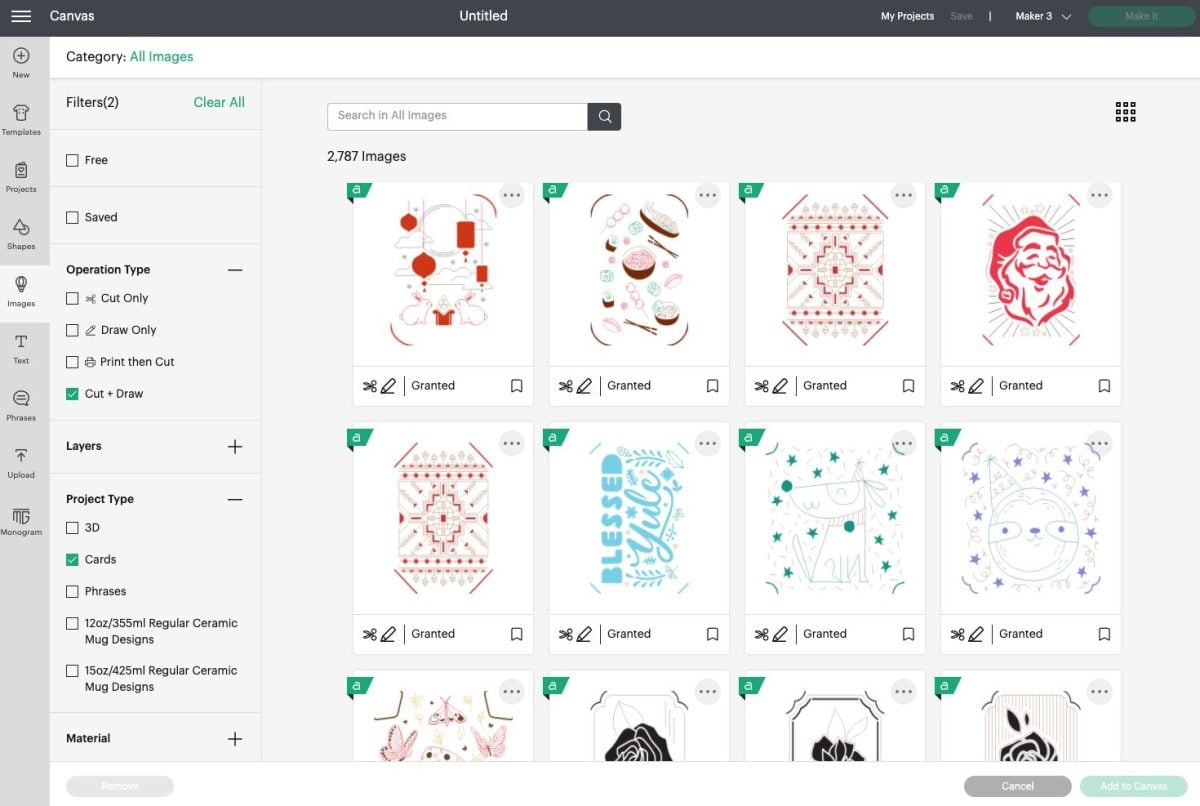
There are a few downsides to searching here. First you can’t see what the final card will look like. Second, I find it harder to tell which cards are square and which are rectangular.
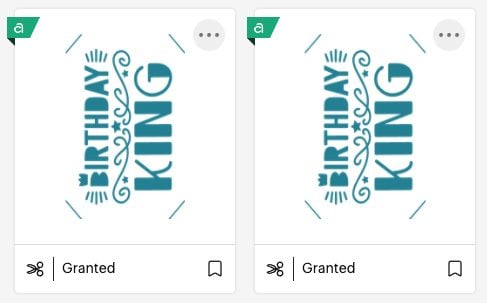
Third, there’s no way to easily see the sizes of these cards. For example, these two birthday cards look identical until you click the three little dots in the upper right to find out that one is A1 and one is A6. Which don’t even match Cricut’s “R” and “S” sizes.
I realize Cricut has hundreds of thousands of files to update, so just be warned that it may be a bit frustrating trying to sort through the card images until their search functions catch up with their images.
How Does the Cricut Card Mat Work?
Let’s make cards using the new Card Mat and each of the different type of Cricut Insert Cards.

Important: You can make up to four cards at one time, but they need to be the same type of card (Insert, Foil, or Cutaway) and the same size. Later in this post I’ll share a hack for cutting different colored cards on the same mat.
Supplies:
- Cricut Maker 3, Cricut Maker, Cricut Explore 3, or Cricut Explore Air 2
- Cricut Card Mat
- Cricut Insert Cards OR
- Cricut Foil Transfer Insert Cards OR
- Cricut Cutaway Cards
- Spatula
- Scraper Tool
Use my code HLMSSAVE22 at Cricut.com to save 10% on supplies and materials and to get free shipping on orders over $50! Excludes machines, digital files, and Cricut Access.
Cricut Insert Cards
Let’s start with the original Cricut Insert Cards. Inside these packs there are folded cards, insert cards, and envelopes.
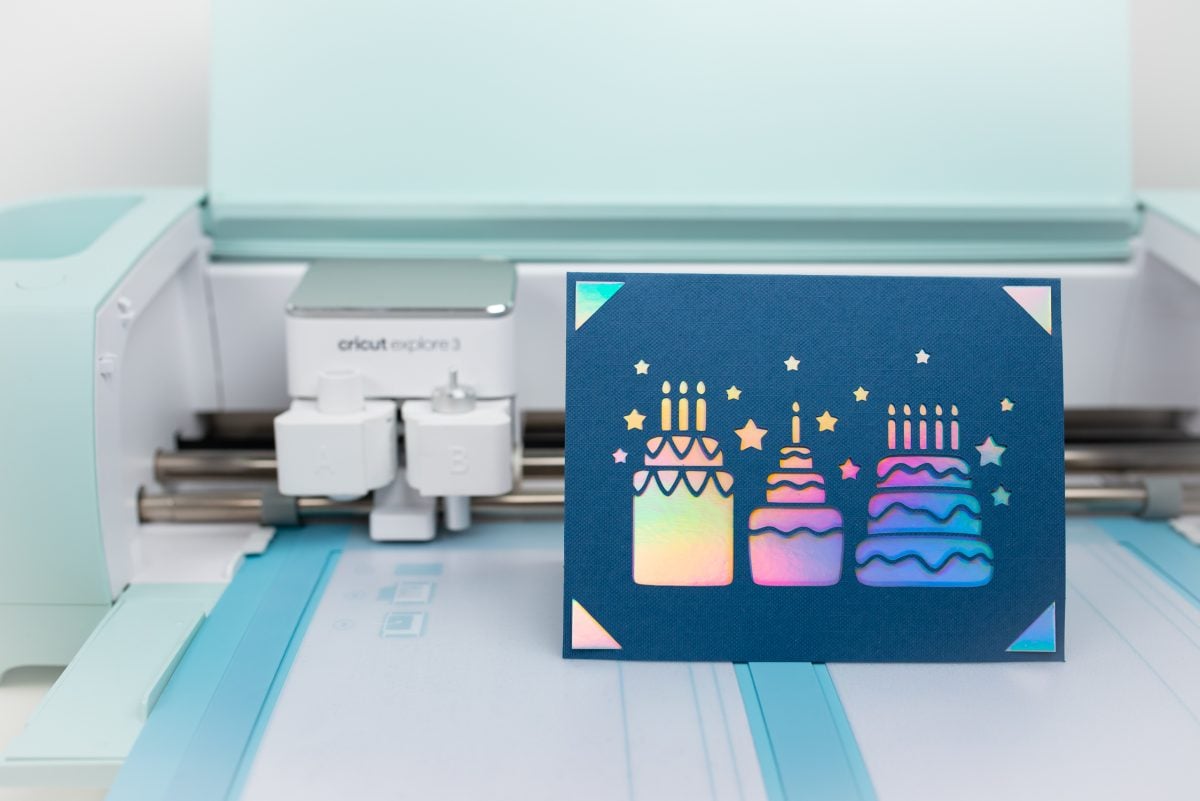
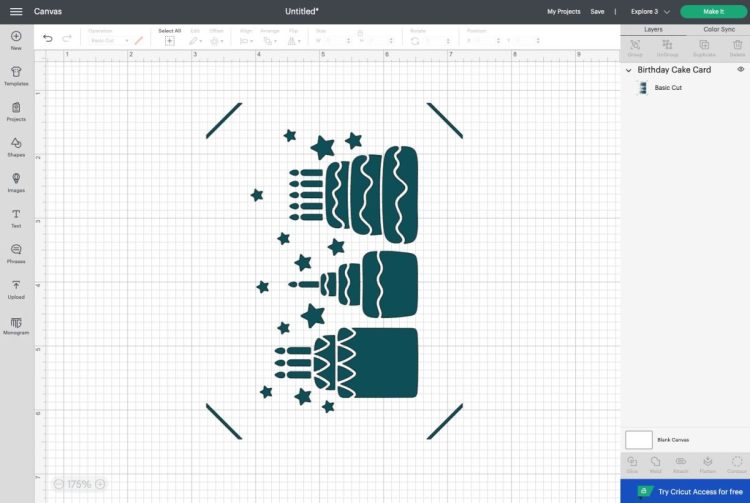
Choose an image in Cricut Design Space. You’ll want to make sure your image has “corner slots.” This will allow you to put the insert card behind the cut image, creating a layered greeting card. You can search via the Projects tab OR in the Image Search.
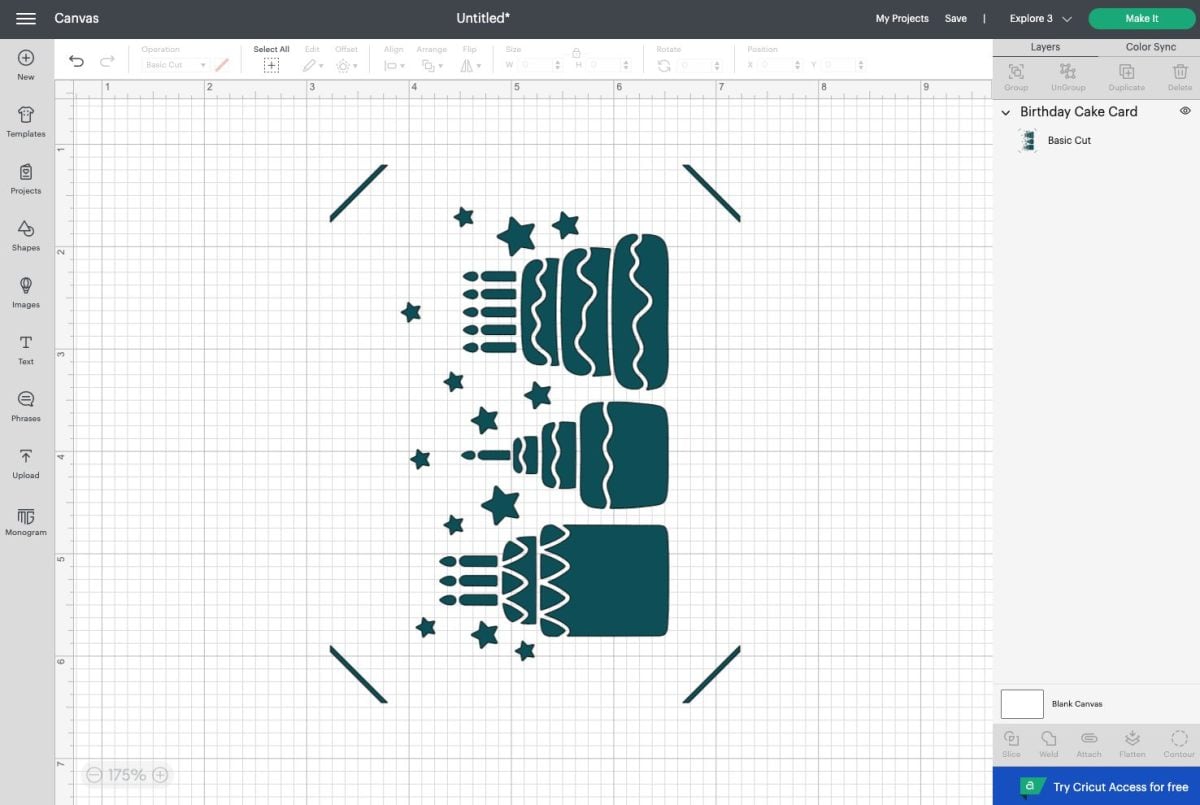
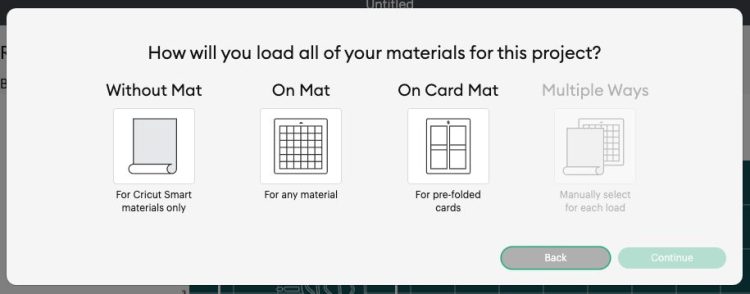
Then click Make It in the upper right. In the next screen, you’ll be asked to choose your load type.
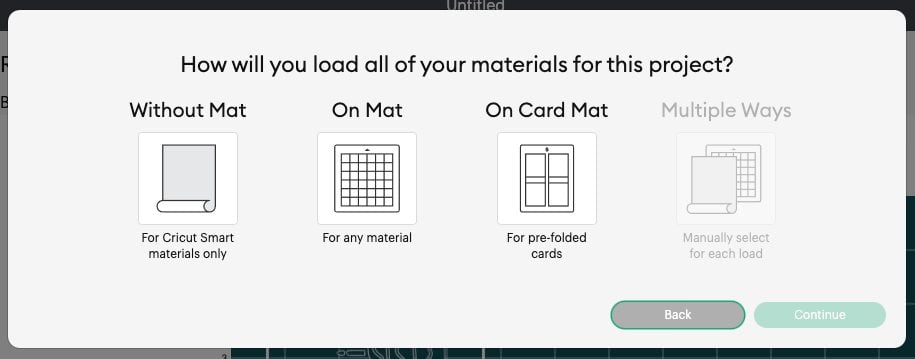
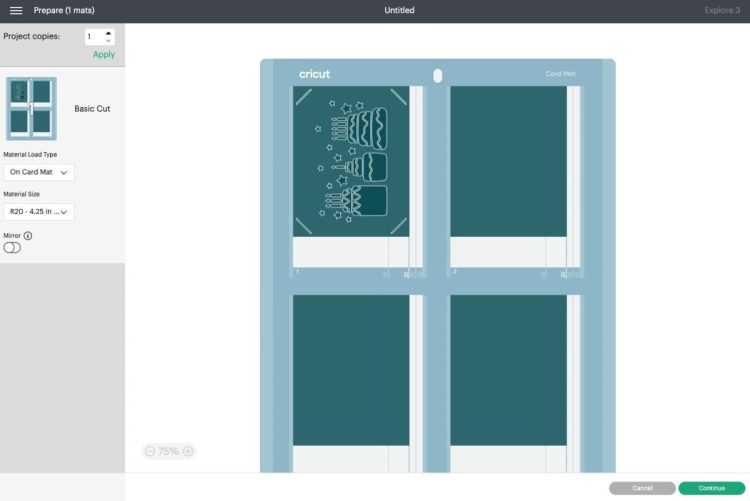
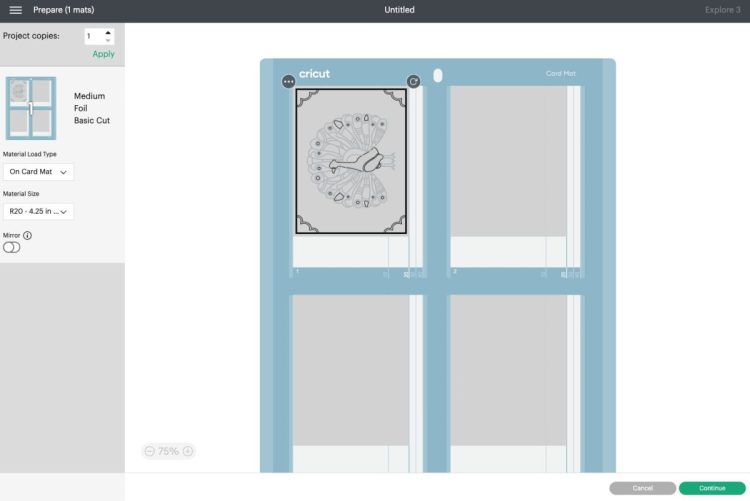
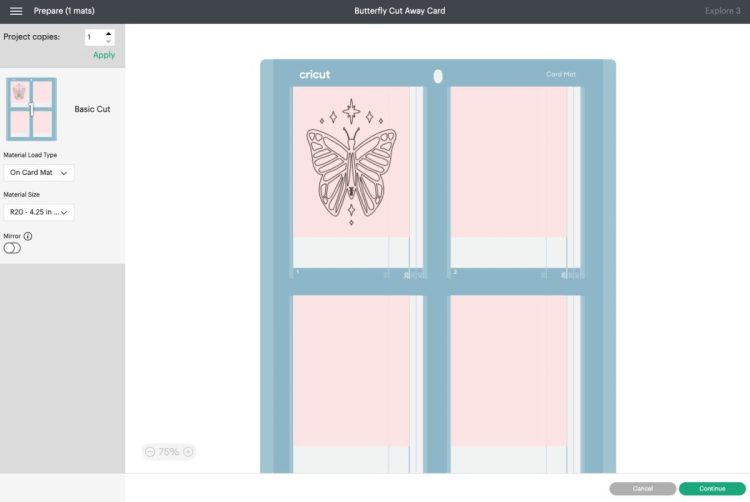
Choose “On Card Mat” and click Continue. In the next screen, you’ll see your image on the Card Mat.
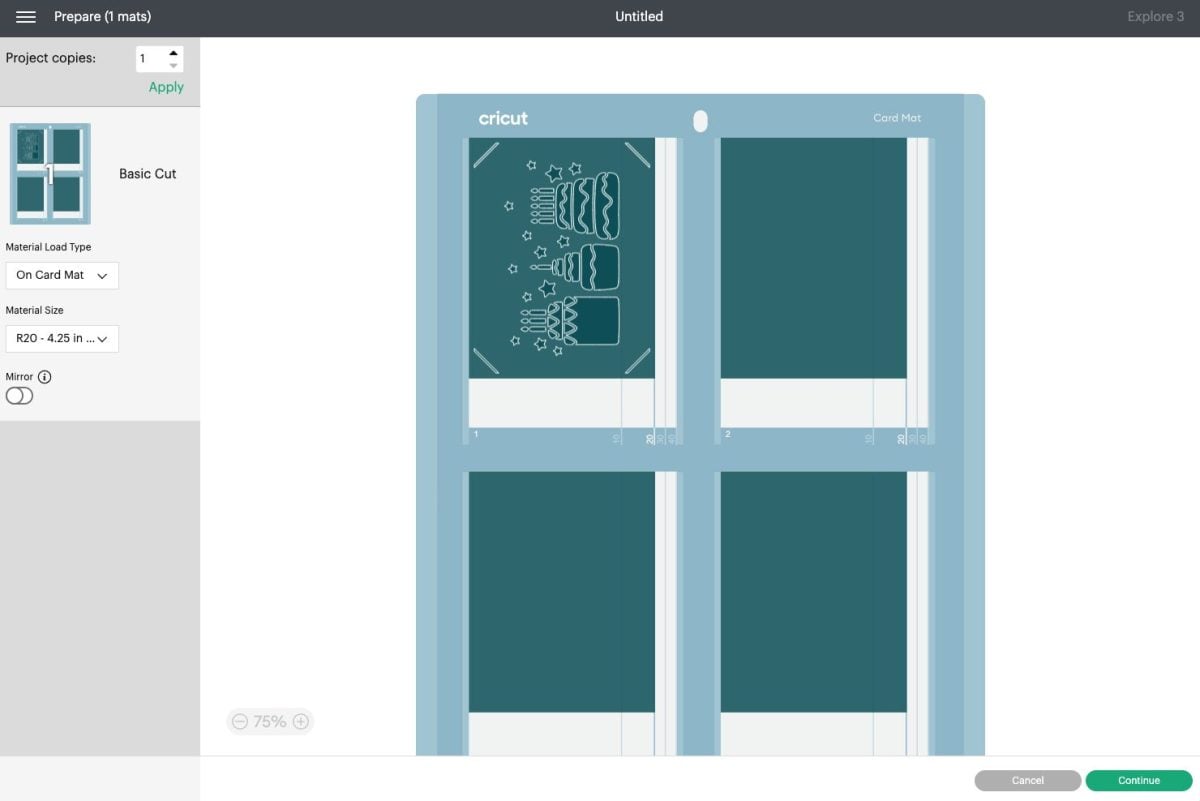
If you want to change the size of your card, you can use the dropdown on the left.
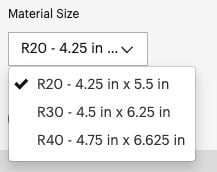
Note that this does NOT change the size of your image, it just places your current image in the middle of the card size you have chosen. If you want a larger image for a larger card, go on a hunt in the Image Search (for example, by searching “birthday cake square card.”)
Then click continue. In the next screen you’ll select your material. Search for Insert Card in the materials.
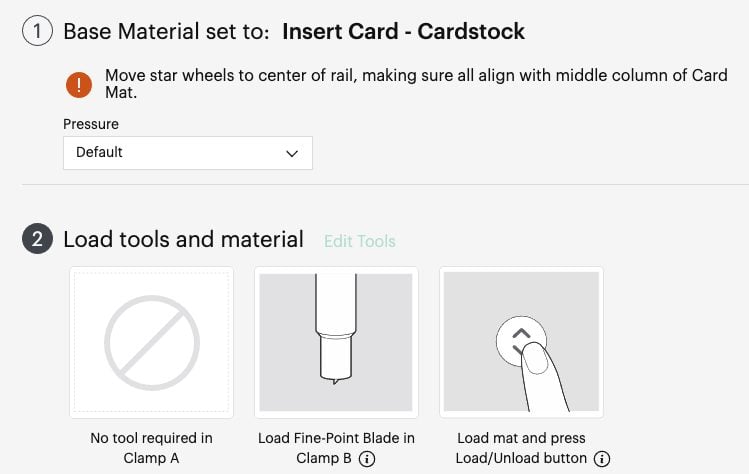
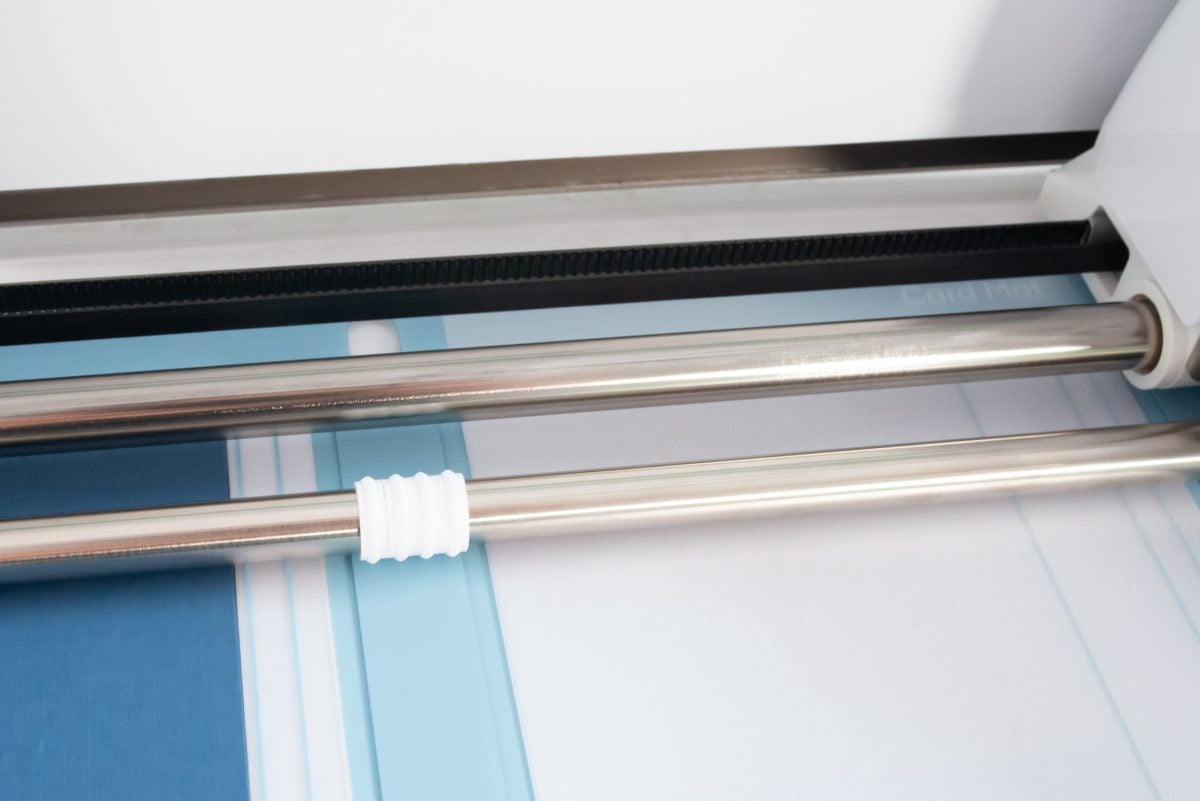
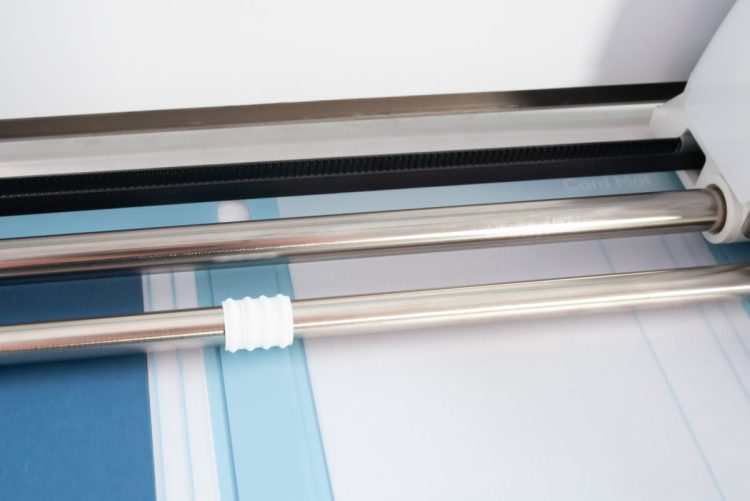
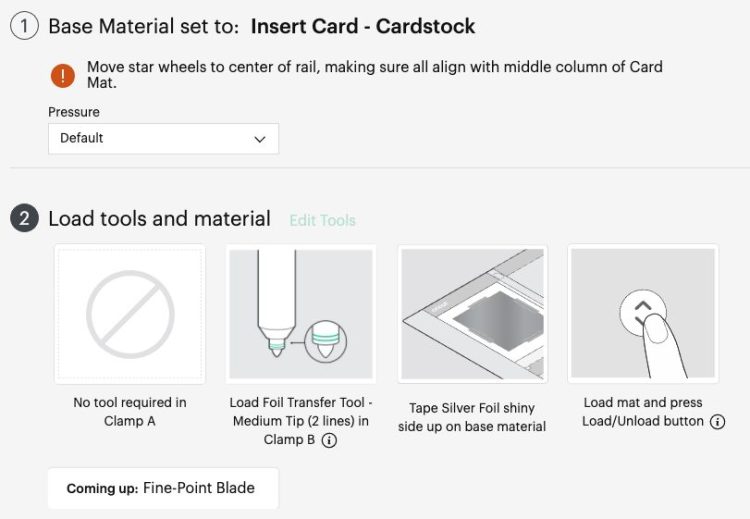
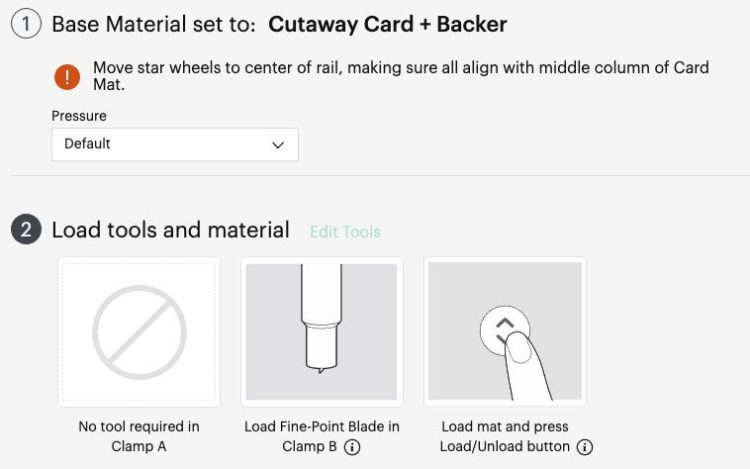
Insert your blade into your Cricut machine. You’ll also see a warning to move your Cricut’s star wheels to the center of the rail. This can be quite tough if your Cricut is newer. I find using one of those jar openers from my kitchen works to get a good grip so I can scoot them over.
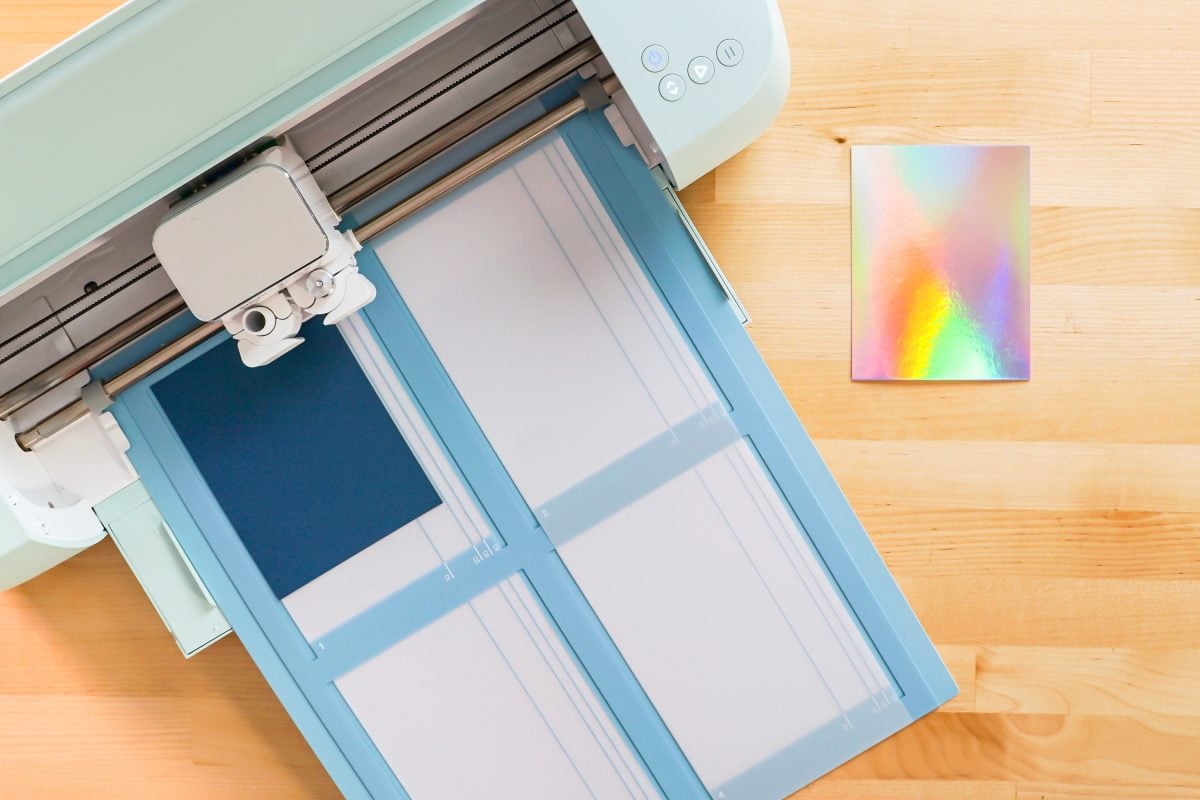
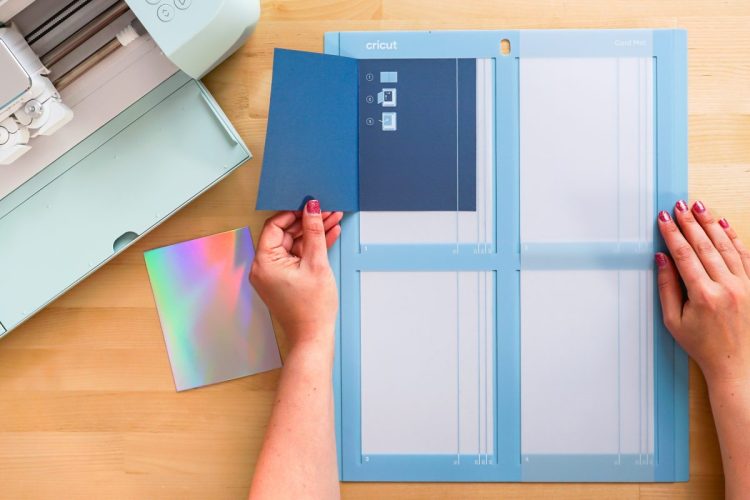
Then place your card between the two layers of the mat. The back of the card should go between the layers and the front of the card should adhere to the sticky surface. Make sure your card is on the mat straight.

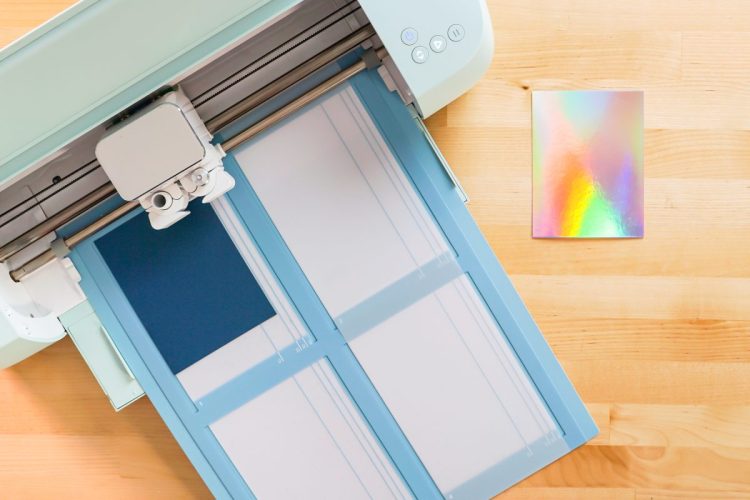
Then insert your mat into your machine and your Cricut will cut your card for you!
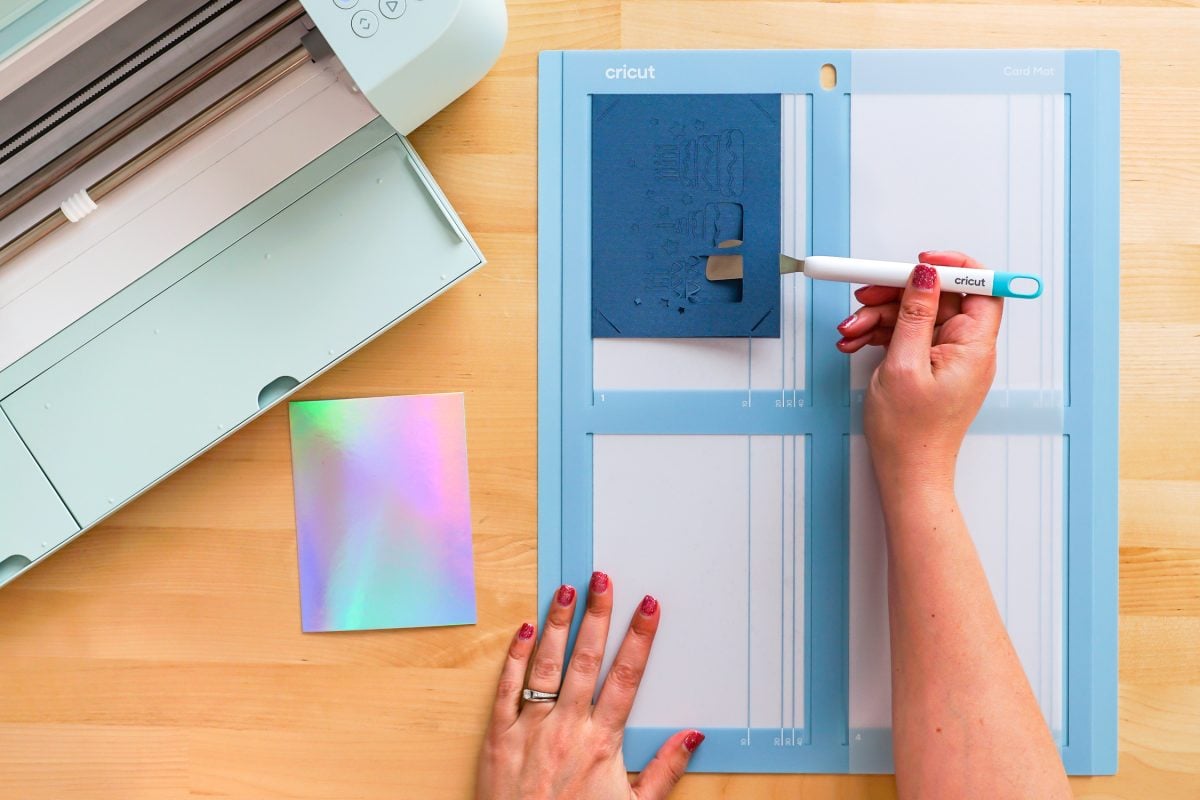
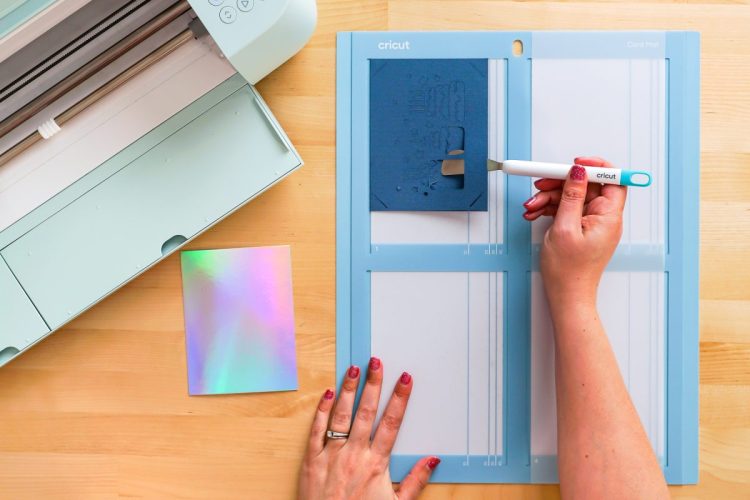
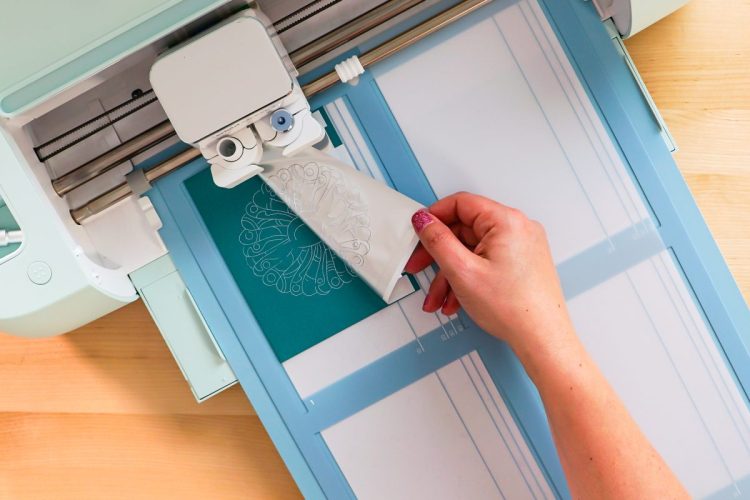
To remove your card from the mat, carefully use the spatula to release the card. Go slowly, making sure you’re not ripping any of the delicate pieces.
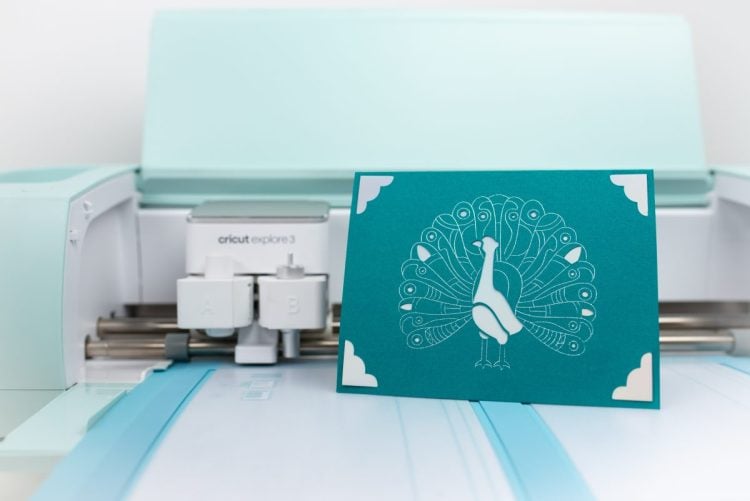
Add the insert card to the inside of the card, using the corner slots and your card is done!
Cricut Foil Transfer Insert Cards
Using the Cricut Foil Transfer Insert Cards is similar, with one extra step. Select your image you want to make. You’ll want to choose an image with a draw layer. You can then use the Operation dropdown to select Foil instead of Draw.
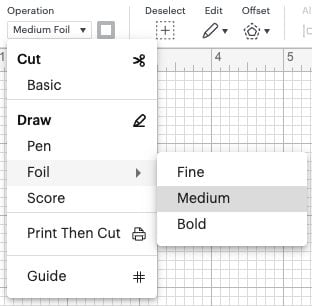
So you can see here that I have a cut layer as well as a Medium Foil layer.
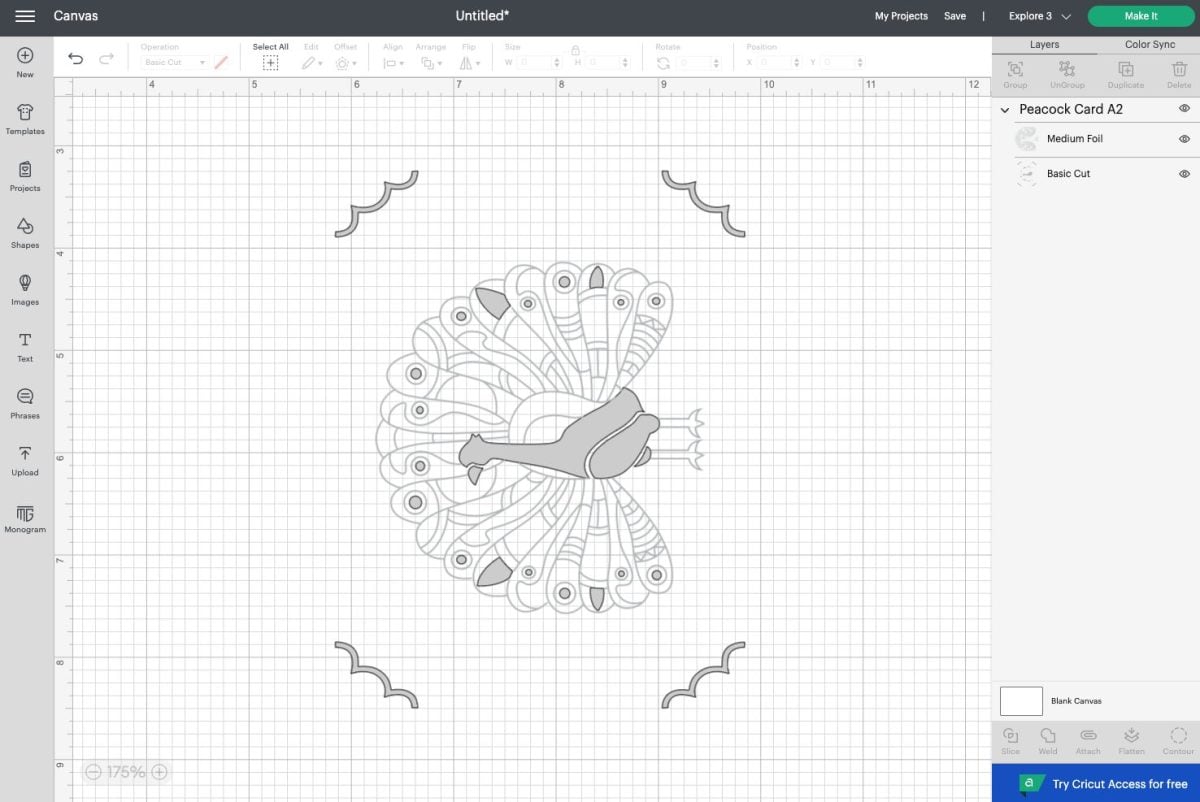
Click Make It!
You’ll see your image on the Prepare Screen, just like with the other Insert Card.
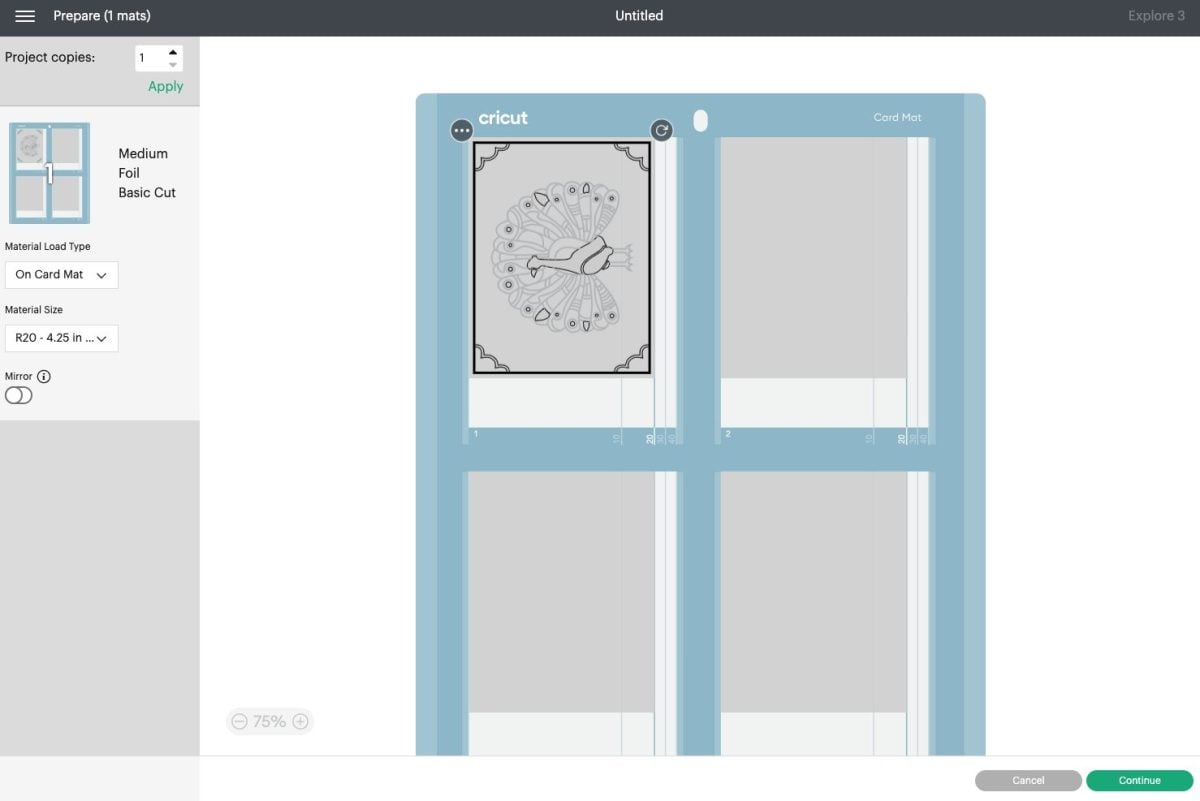
And then in the Make Screen, you’ll see instructions for foiling your card.
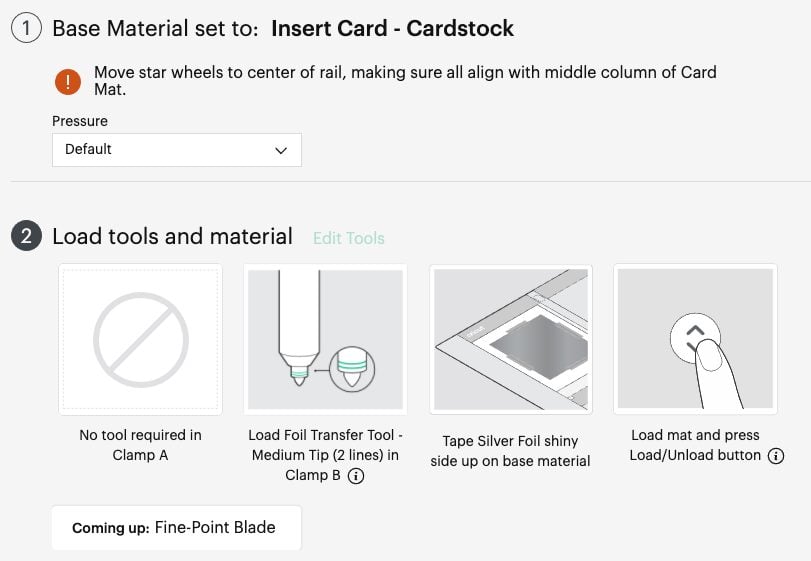
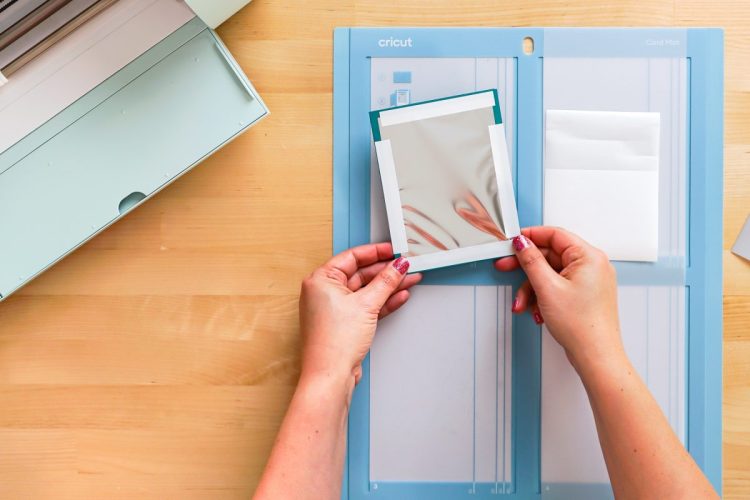
On the front of the card, use the enclosed tape to secure a piece of foil to the front of the card on all four sides. Make sure the foil is colored-side up.
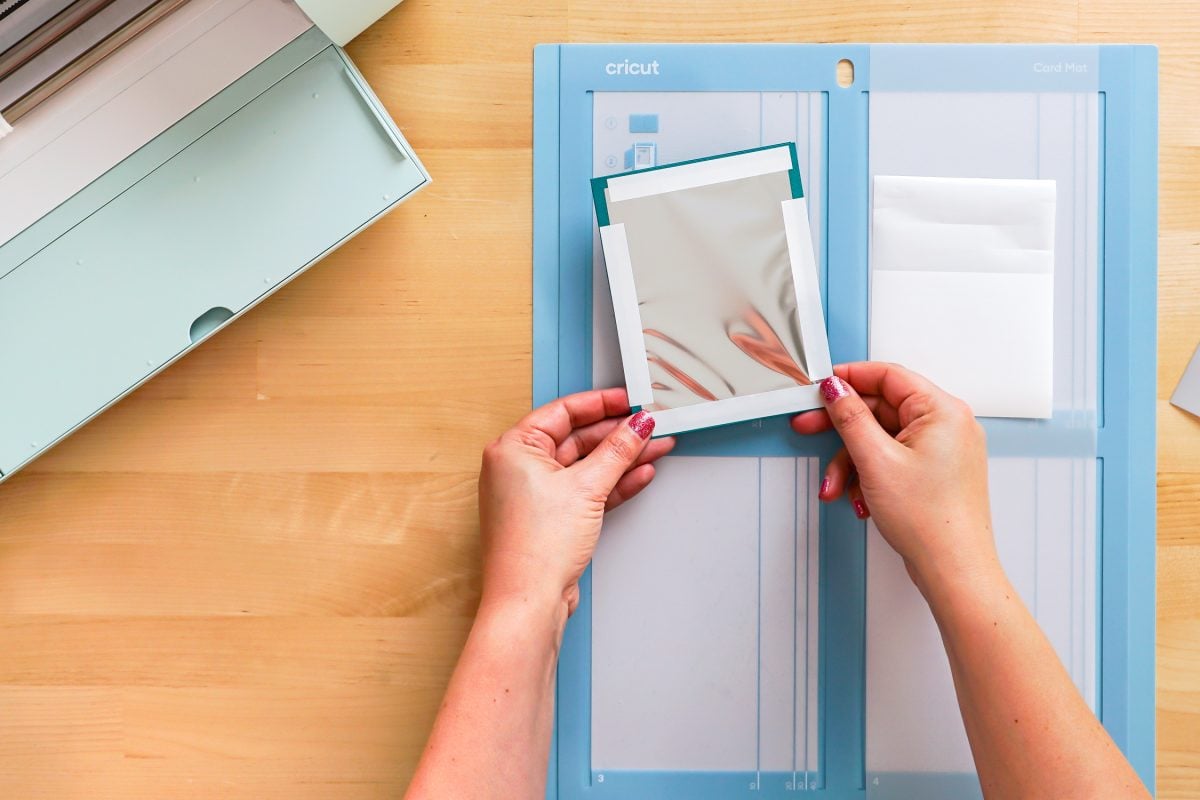
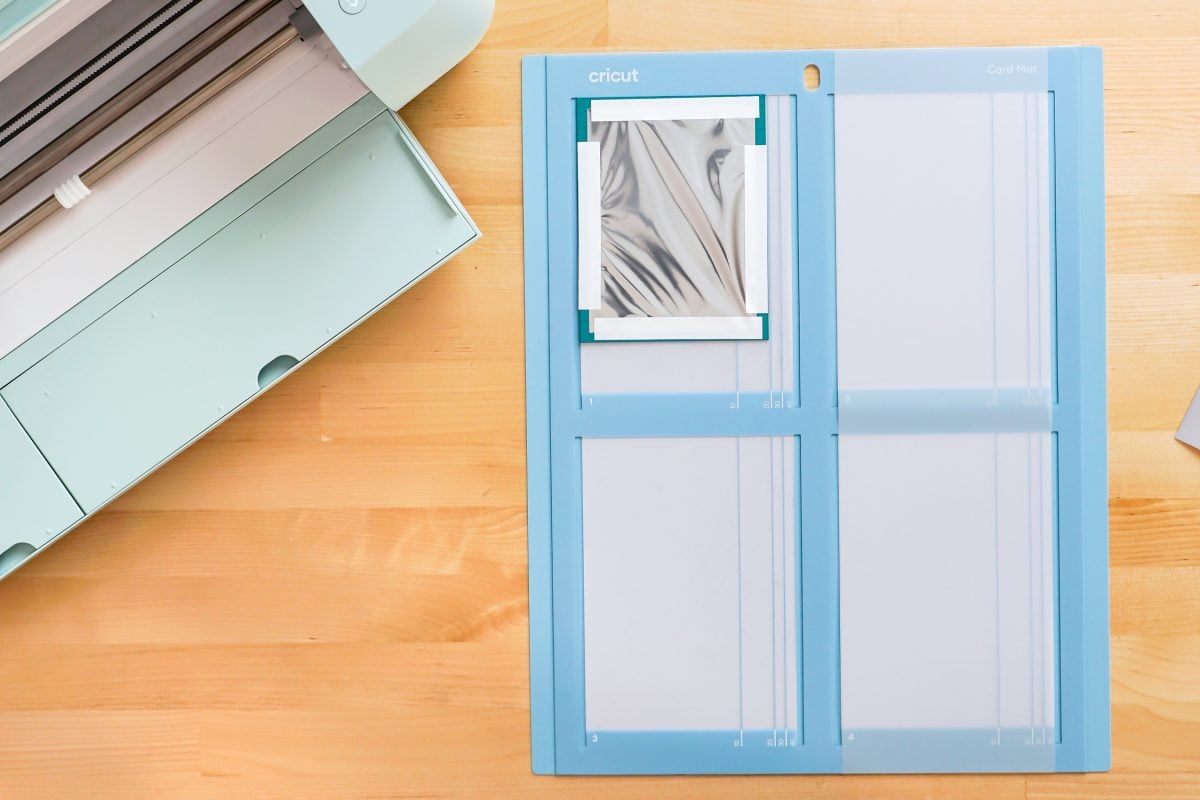
Then place the card in the card mat, with the back of the card between the two layers of the mat with the front of the card adhered to the sticky part of the mat.
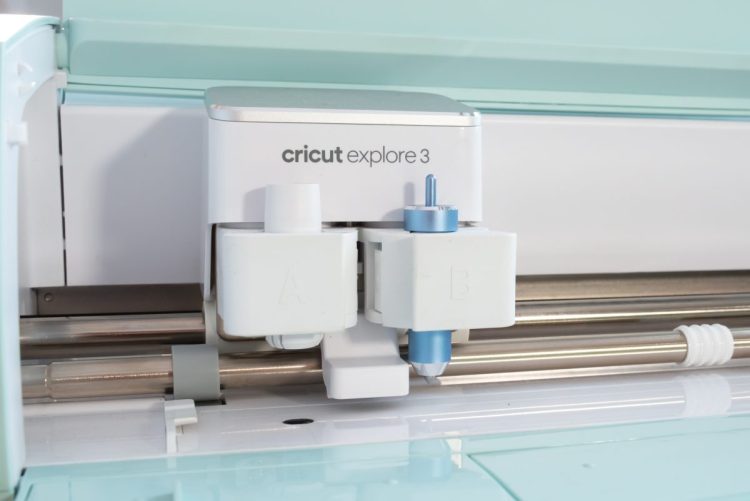
Swap out your regular blade for the Foil Transfer Tip tool.
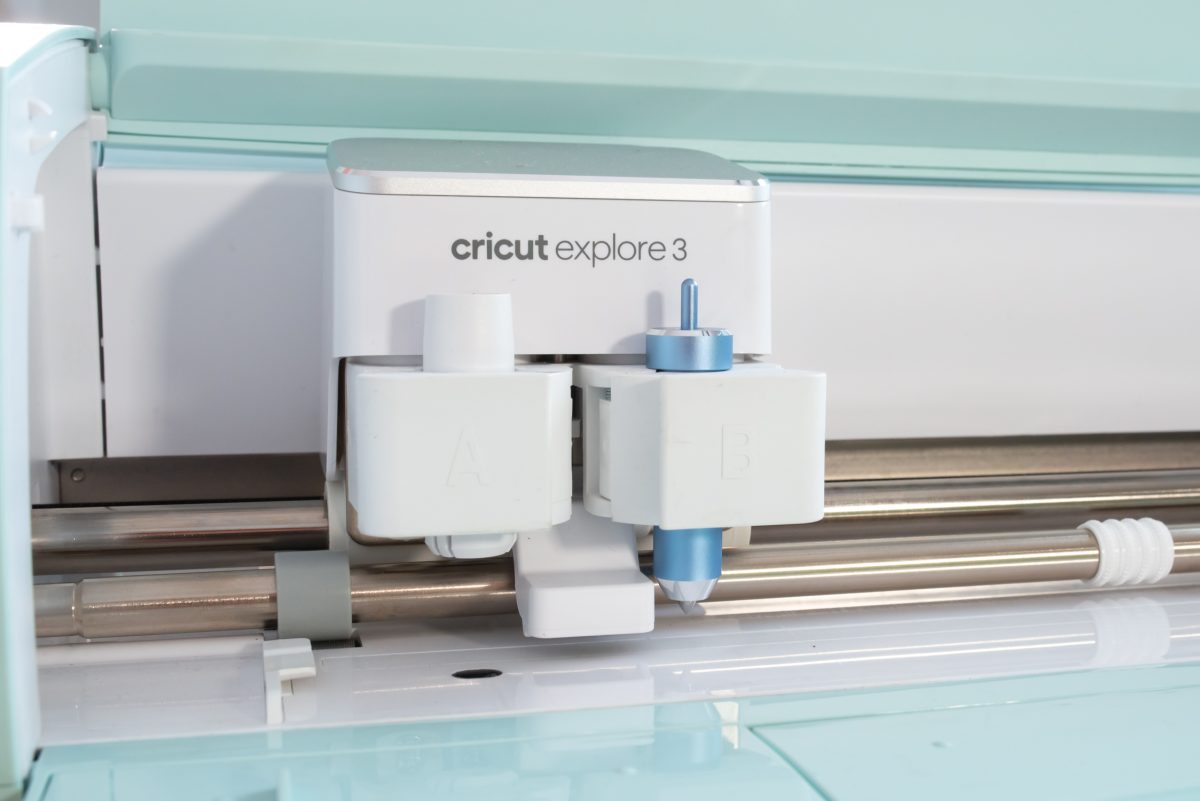
Then insert your mat into the Cricut and your machine will foil your project. Once it’s done foiling, do NOT remove the mat, but remove the foil and tape from the card.
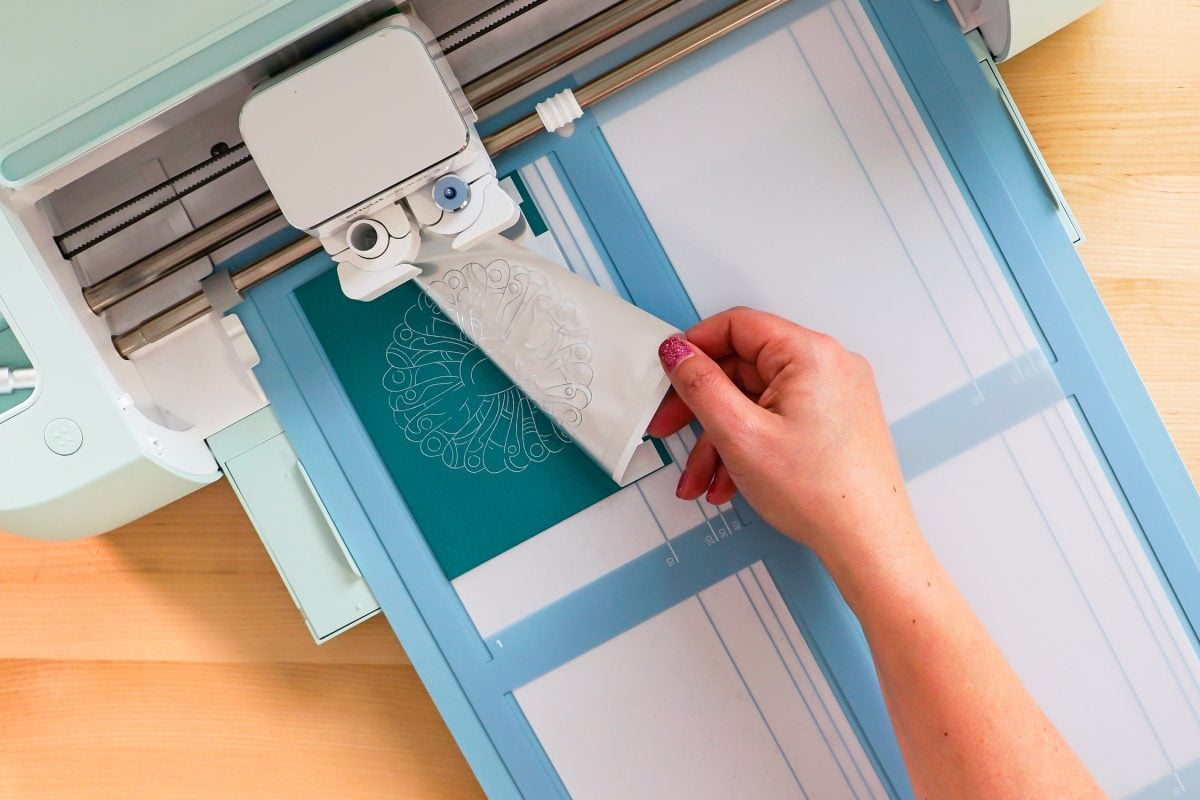
Then swap out your foil tip for the blade, and your Cricut will cut the other parts of your card. Carefully remove the card from the mat. Add the insert card behind the image in the corner slots and your foiled card is done!
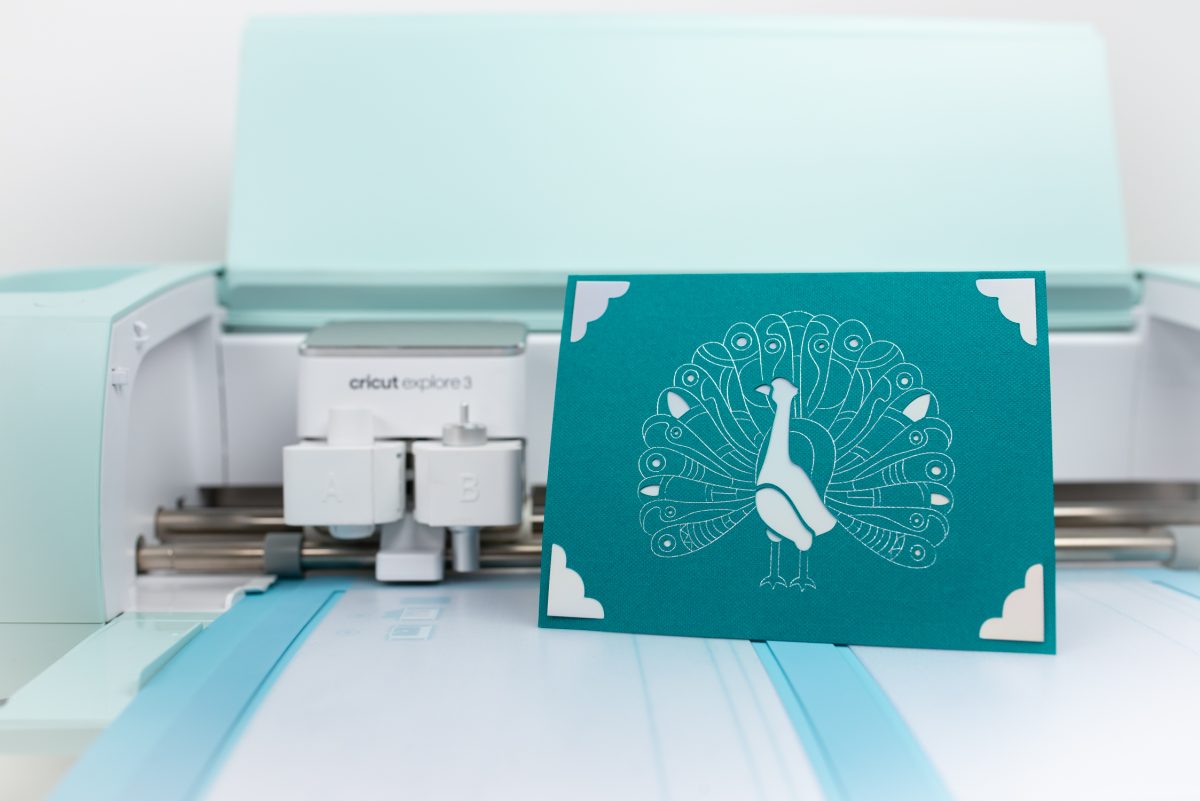
Cutaway Cards
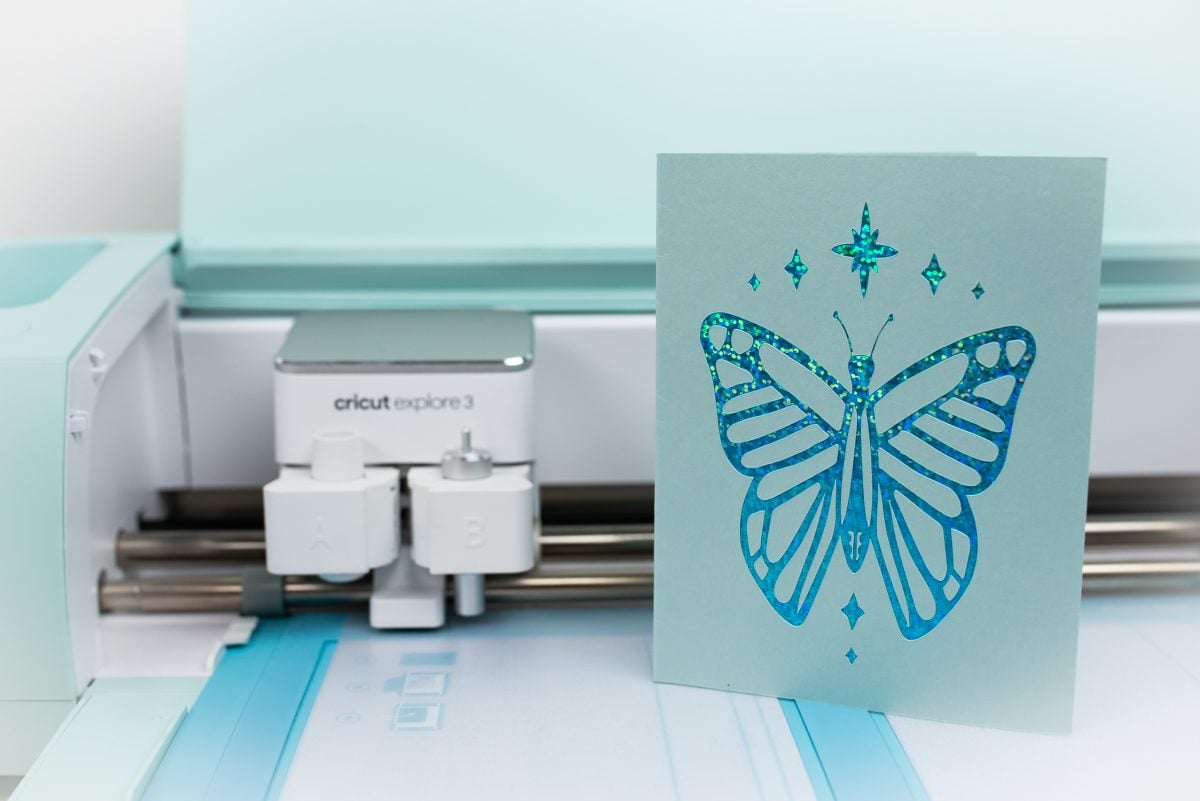
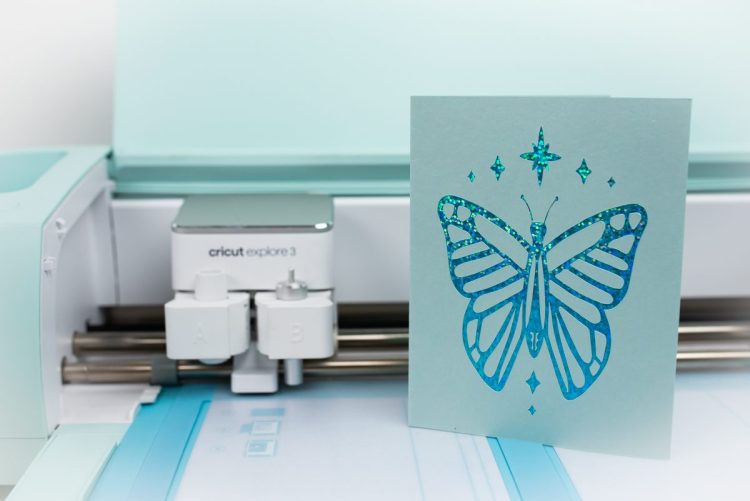
Cricut Cutaway Cards are a bit different. Instead of having an insert piece, it has a card that is adhered to the back of the front of the card. And then the card is “kiss cut” and you remove the cut pieces to reveal the colorful card behind.
This means that you can have small interior pieces that would “fall off” a normal insert card (like the insides of letters) AND you don’t need to use an image with corner cuts to hold the insert card. Let’s see how it works!
Create your card. For this one, I’m using one of the cards found under Projects.
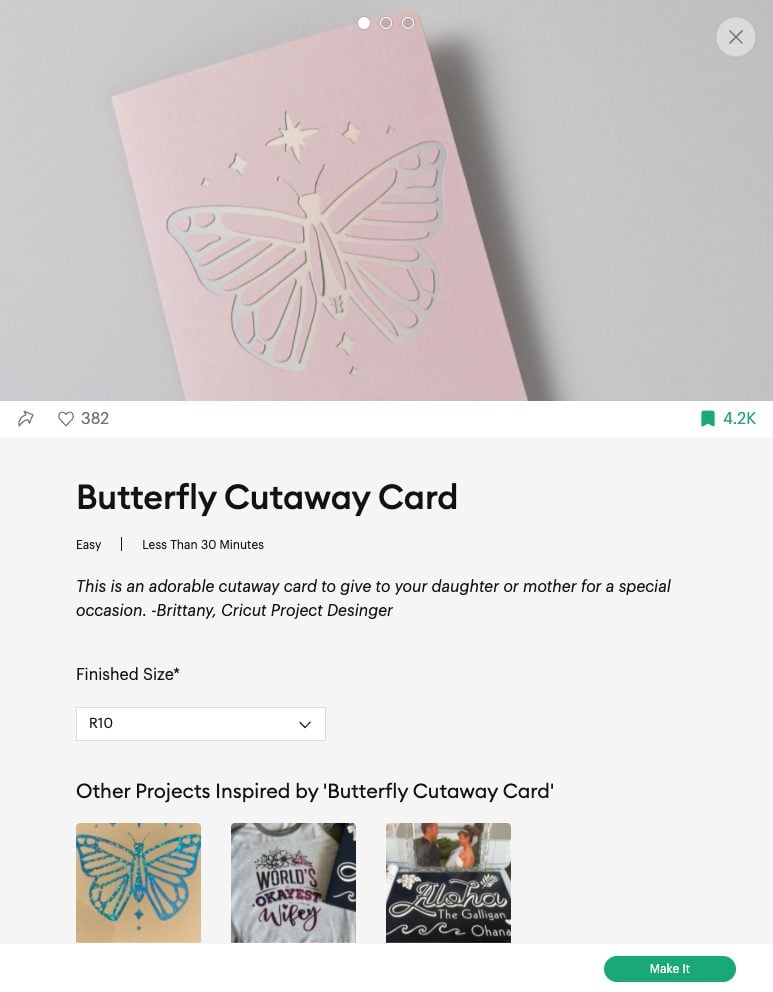
Click Make It and you’ll skip the Canvas altogether and see your image on the Prepare Screen.
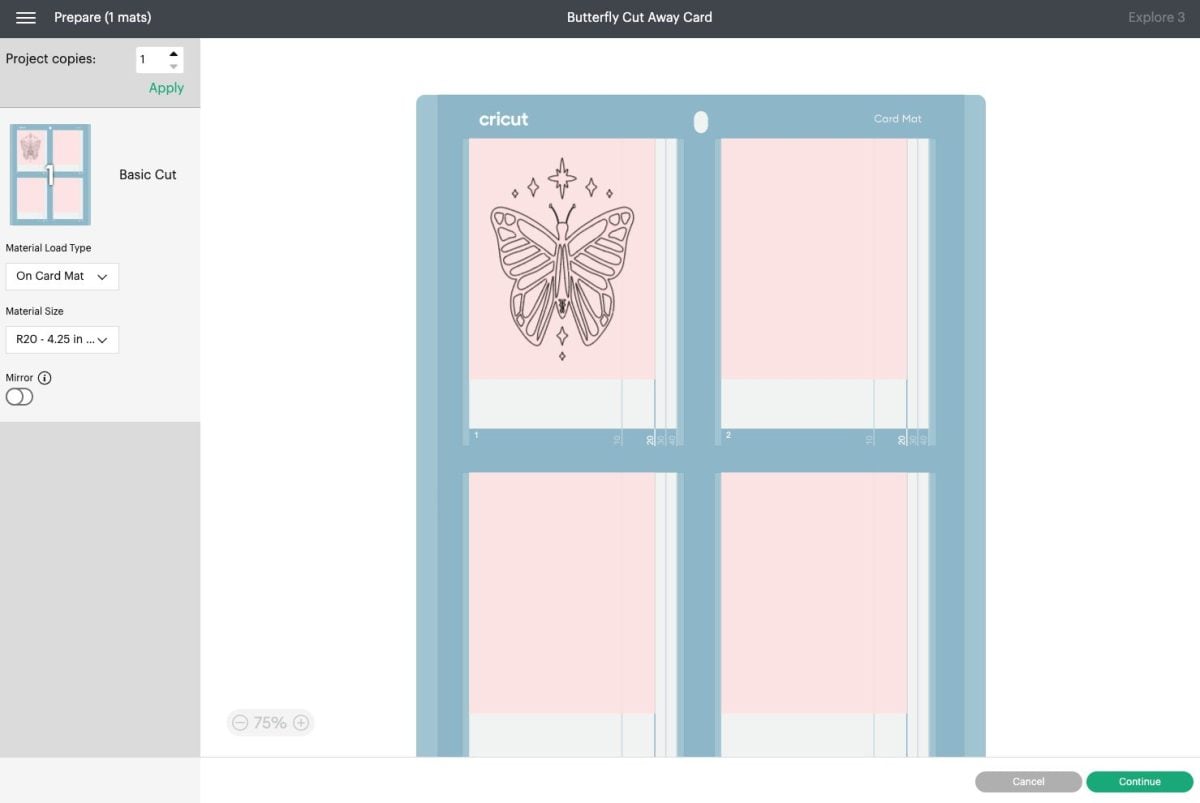
Click Continue and you’ll see the Make Screen with instructions for making your projects. Choose Cutaway Card as your material.
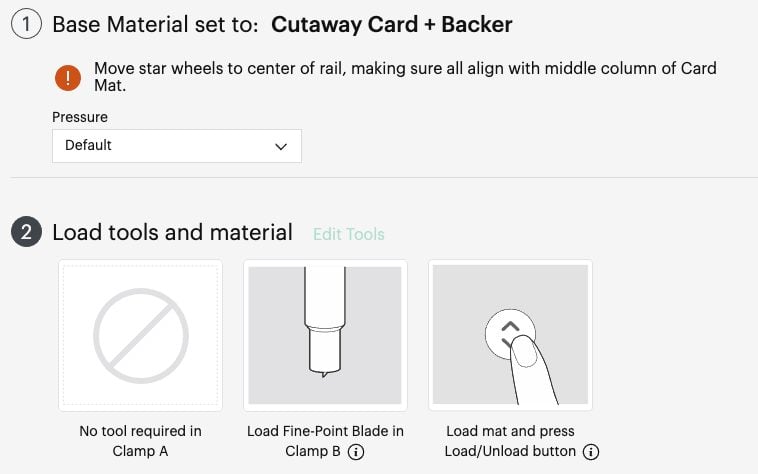
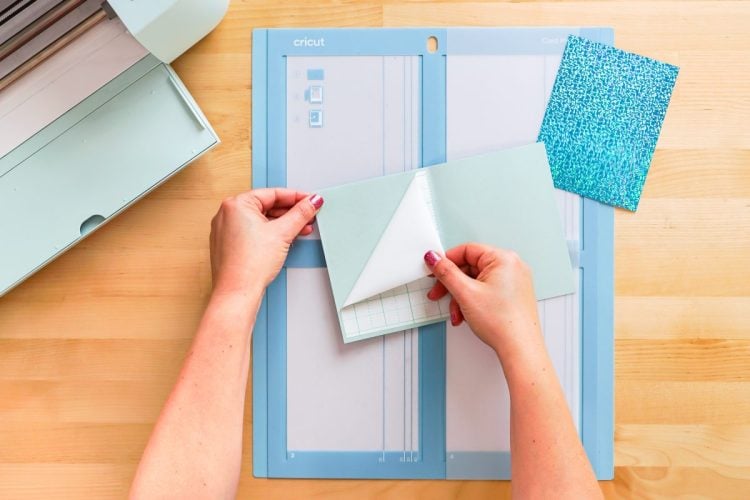
To prepare your card, peel back the liner on the adhesive inside the card.
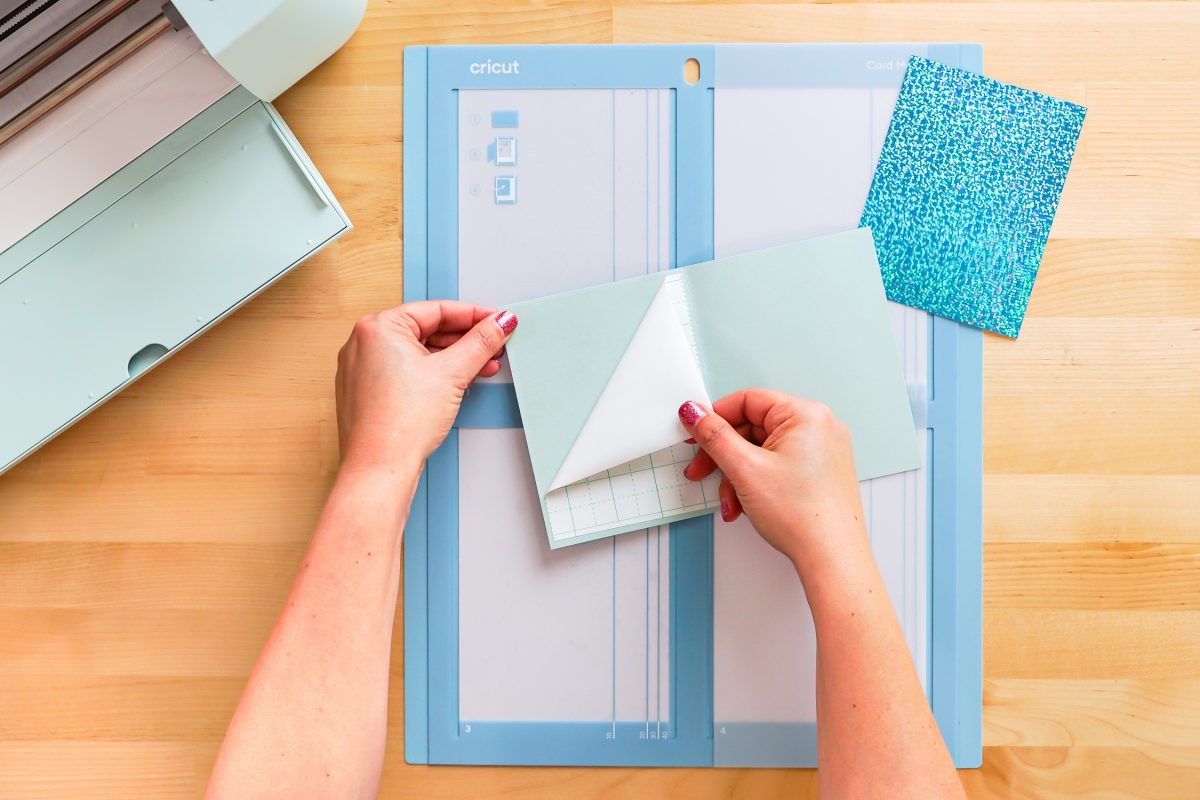
Then place the insert card with the pretty side DOWN. The adhesive is VERY sticky so you really need to get it right on the first try.
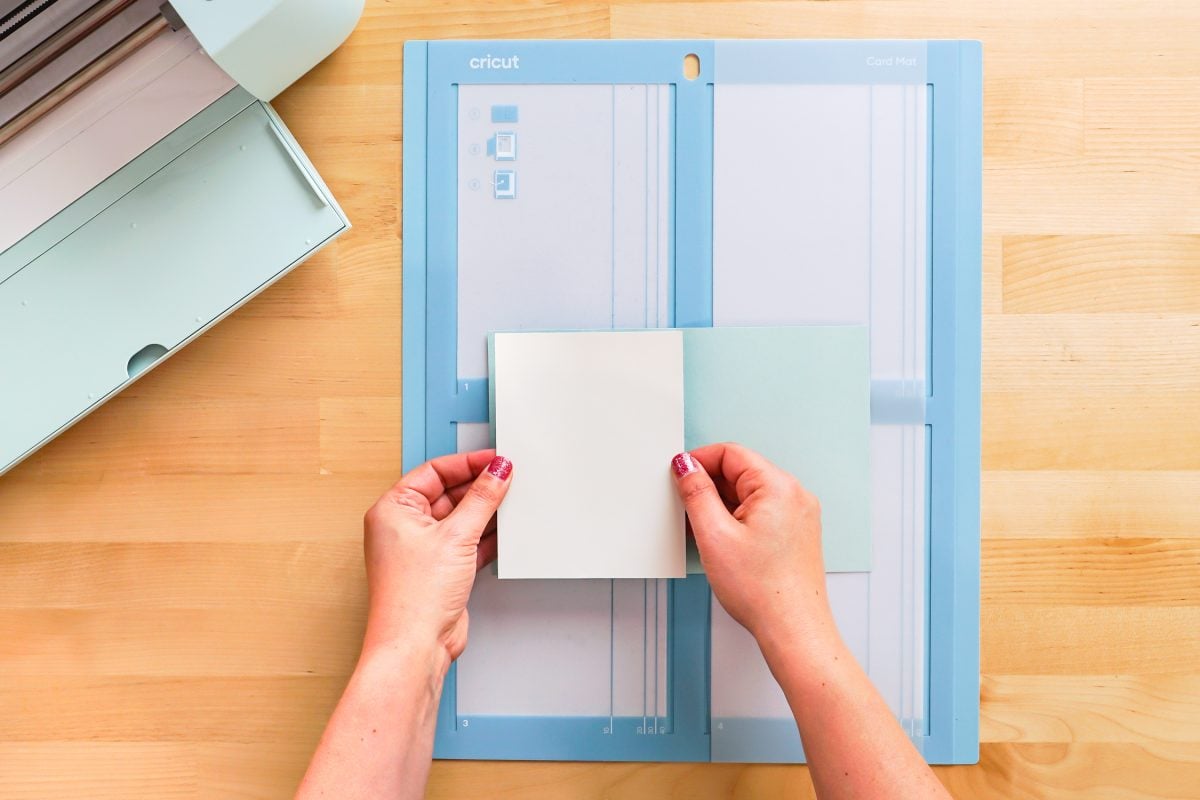
Then place the card inside the mat, with the back of the card tucked between the two layers and the front of the card adhered to the mat.
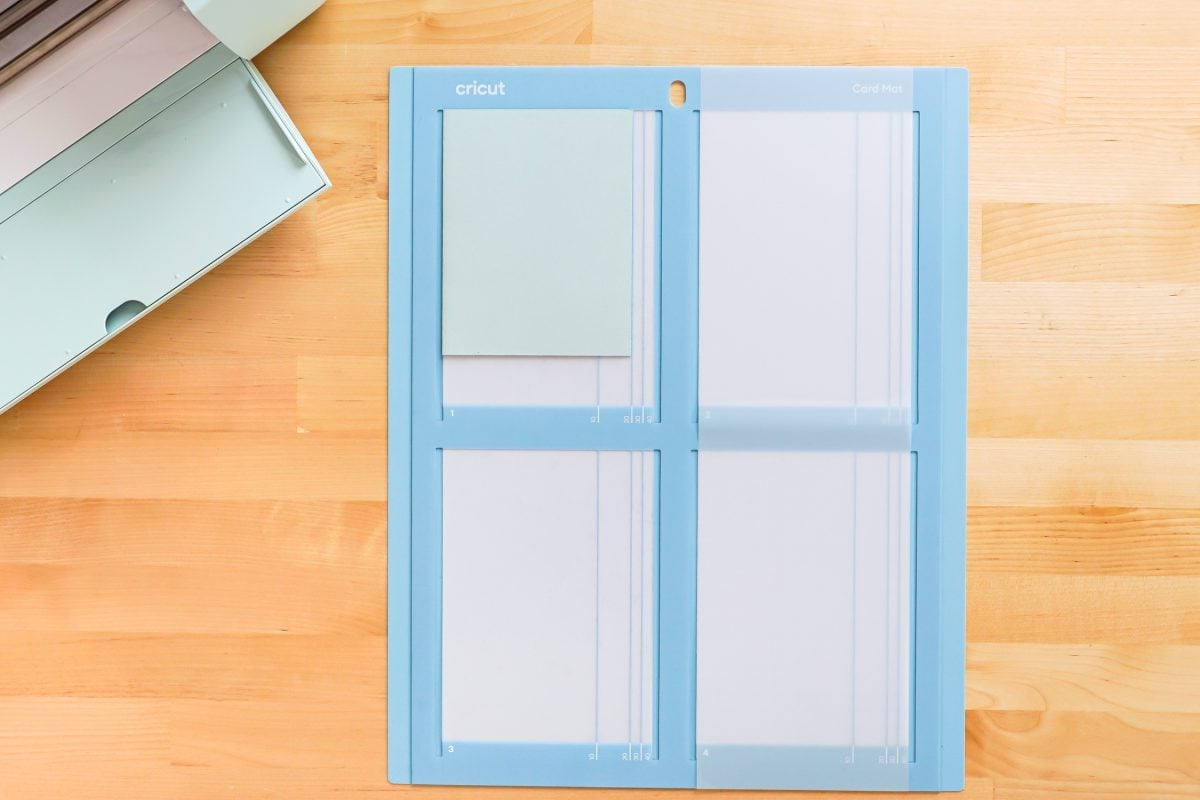
Then place your mat in the machine and cut!
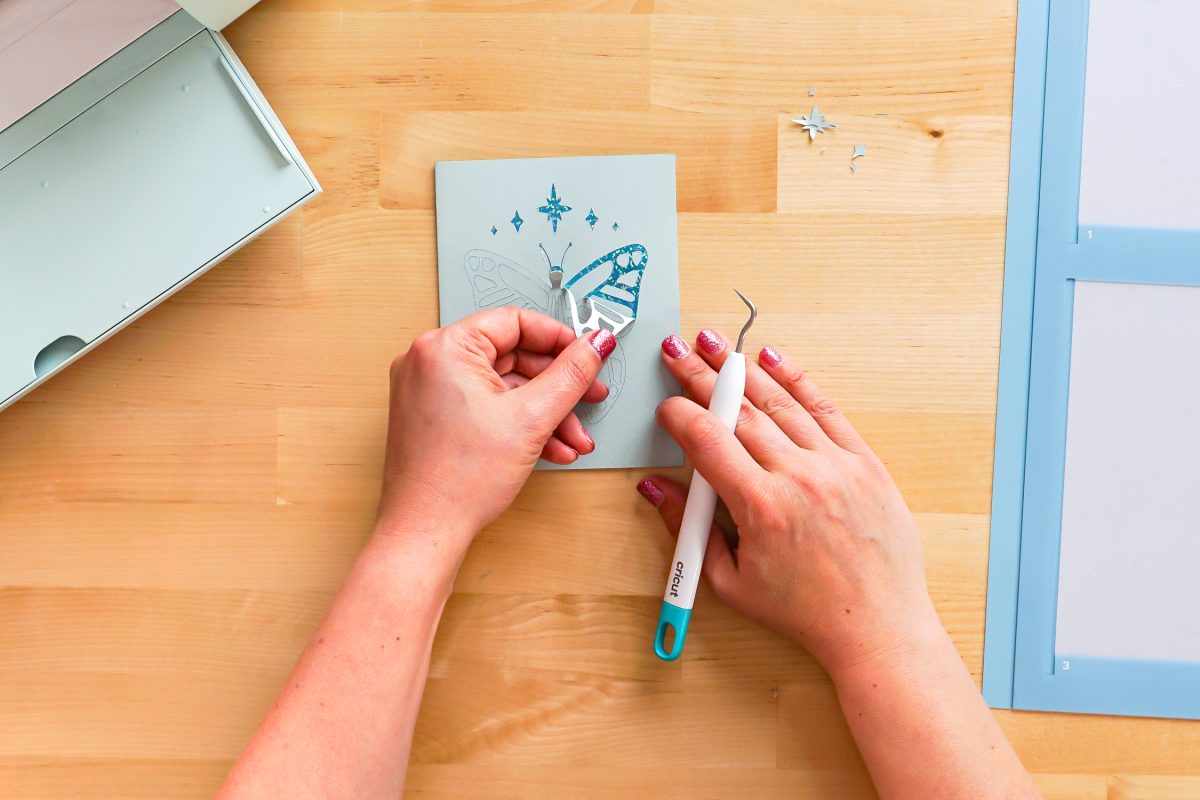
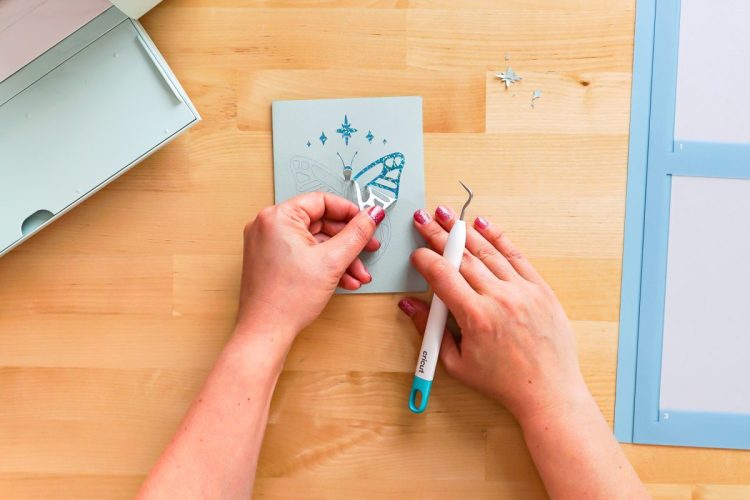
Once you’re done cutting, remove the card from the mat. You’ll then basically “weed” out the pieces of the card to allow the pretty paper to shine through. I found a weeding hook worked pretty well. I didn’t stab at the cardstock like I would with vinyl. But instead used the hook more like a tiny crow bar to lift the cardstock off until I could peel it up with my fingers.
How to Cut Different Colored Cards on the Same Mat
If you want to cut four cards on the same mat, you’ll need to find your cards via the Image Search method, not Projects.
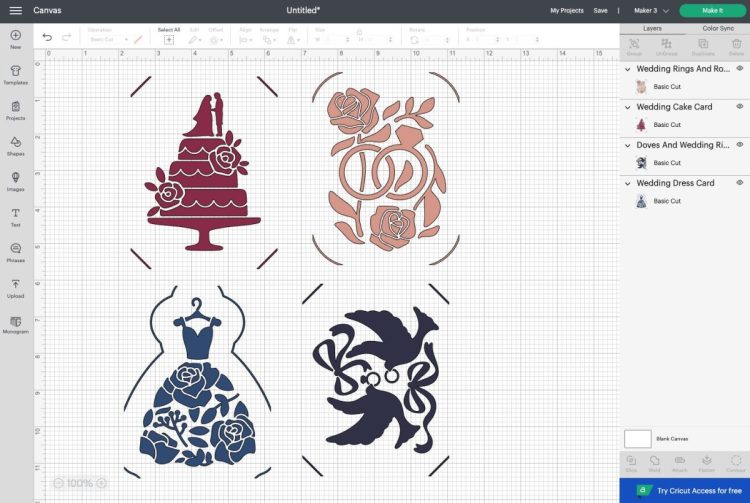
Choose the four cards you want to make. In this instance I chose four different wedding-themed cards.
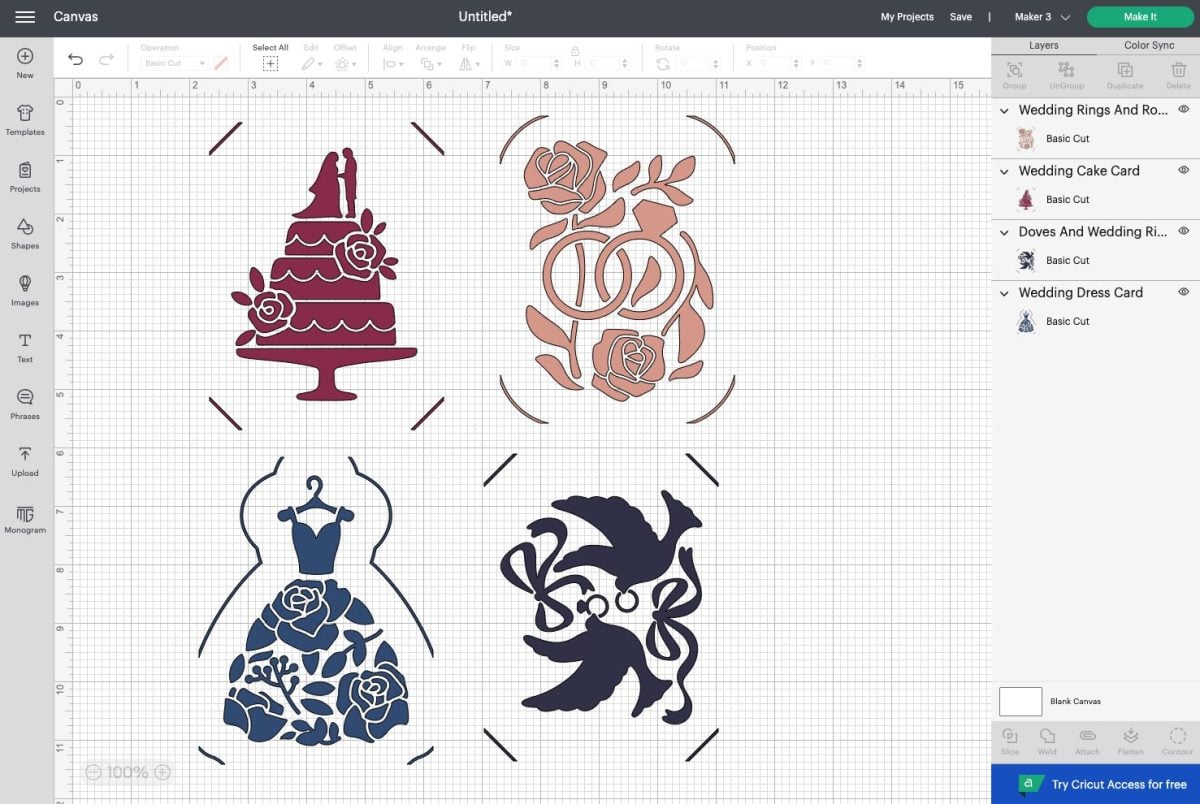
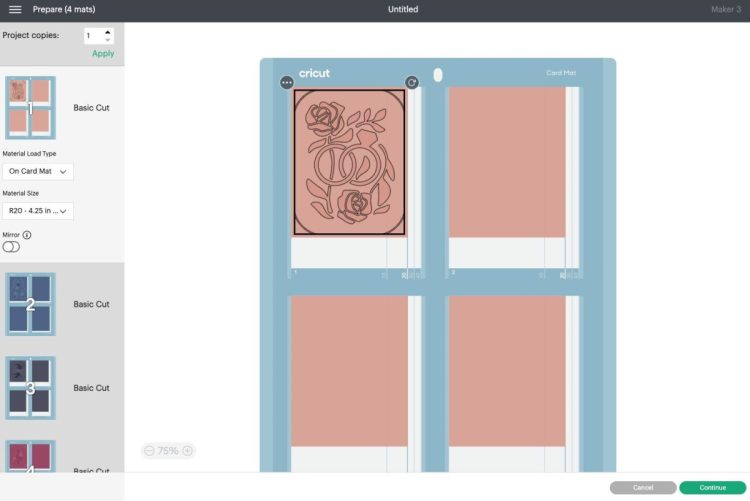
If I make these as is, Cricut Design Space puts them on four separate Cricut Card Mats:
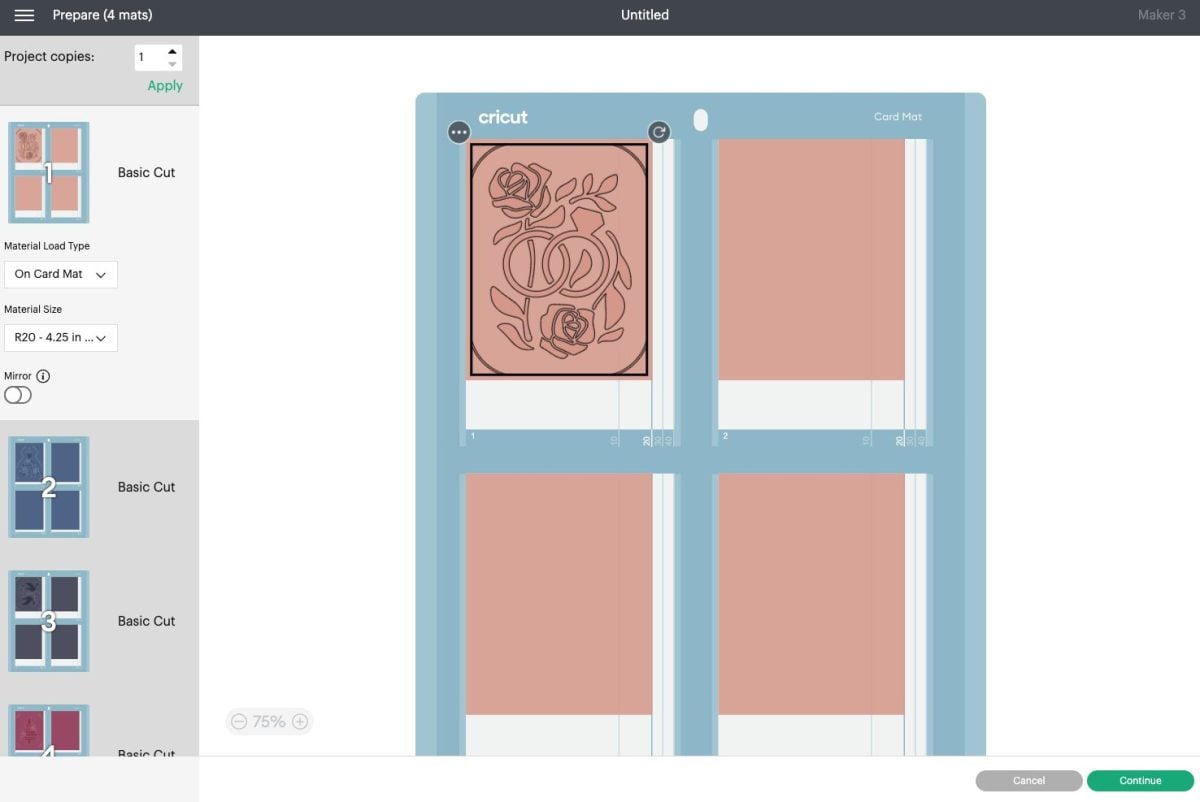
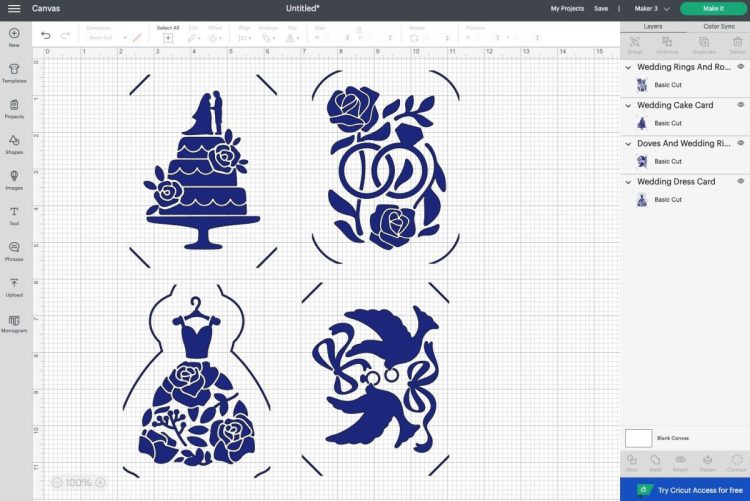
BUT, if you go back to the canvas and make all of the images the same color….
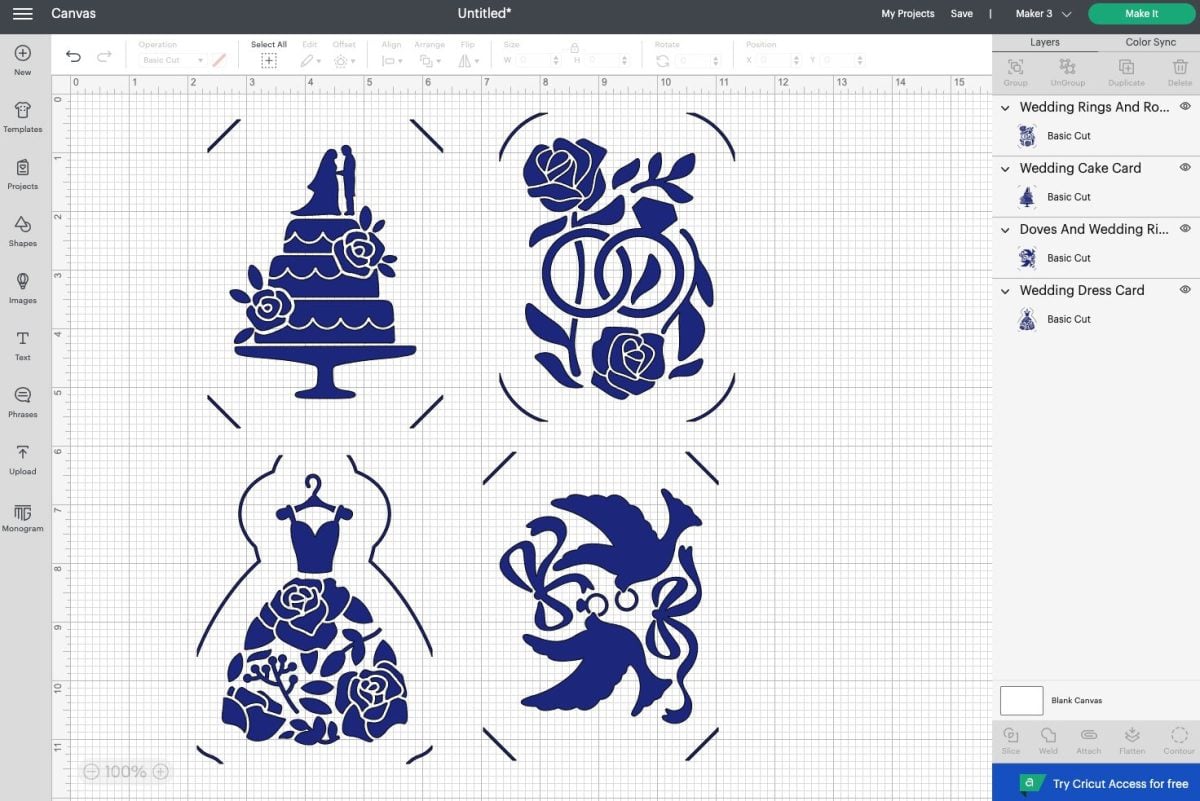
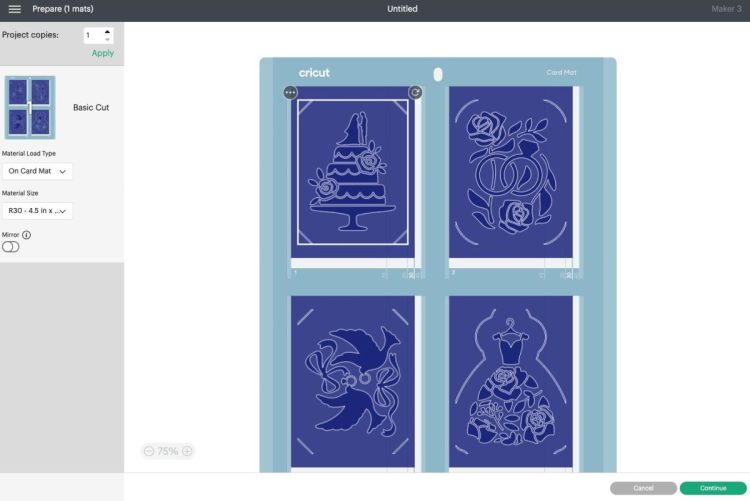
Design Space will put all four cards on the same Card Mat.
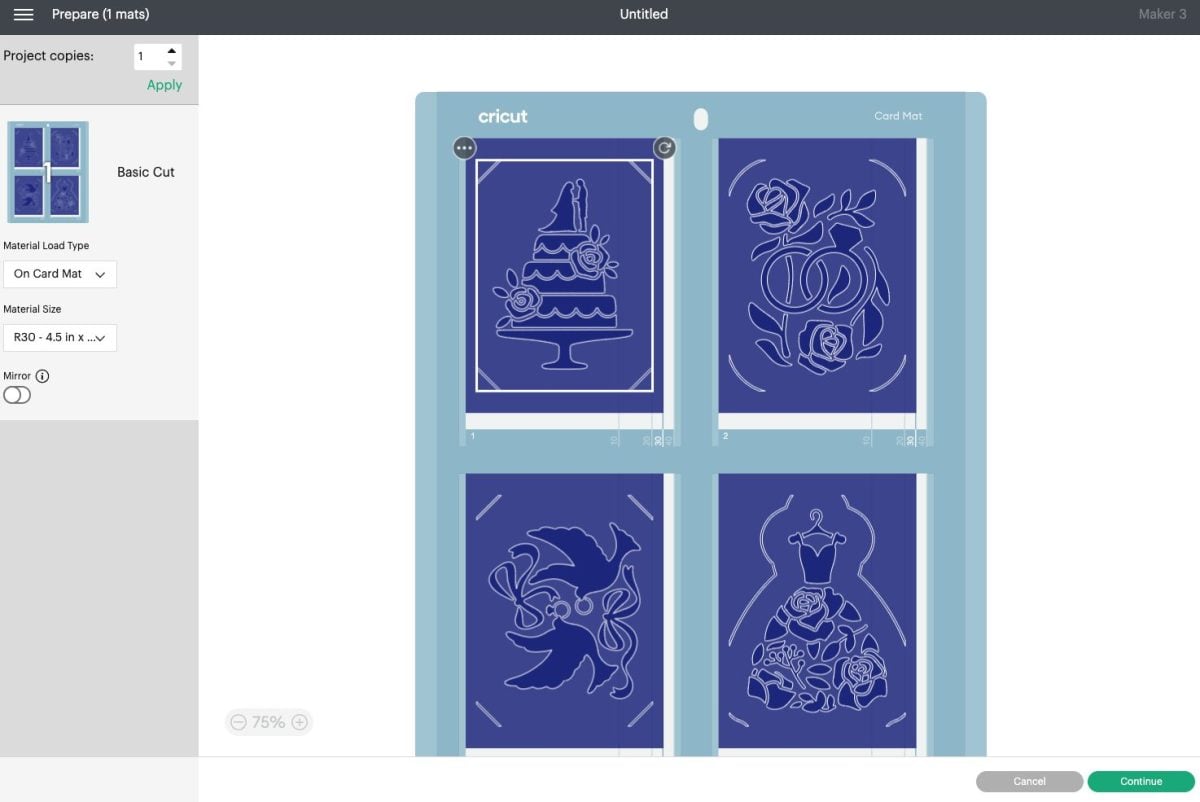
Then you can put four DIFFERENT card colors on the actual mat when you’re actually cutting. Just because the image looks blue, doesn’t mean you can’t put a pink card on the actual mat.
Hope you found this overview of the Cricut Card Mat and all of the Cricut cards easy to follow! Have questions? I’d love to answer them for you below!
Get a Cricut
HOW TO USE THE CRICUT CARD MAT
Equipment
- Cricut Maker or
Instructions
- Important: You can make up to four cards at one time, but they need to be the same type of card (Insert, Foil, or Cutaway) and the same size.Cricut Insert CardsLet's start with the original Cricut Insert Cards. Inside these packs there are folded cards, insert cards, and envelopes.Choose an image in Cricut Design Space. You'll want to make sure your image has "corner slots." This will allow you to put the insert card behind the cut image, creating a layered greeting card. You can search via the Projects tab OR in the Image Search.

- Then click Make It in the upper right. In the next screen, you'll be asked to choose your load type.

- Choose "On Card Mat" and click Continue. In the next screen, you'll see your image on the Card Mat.

- If you want to change the size of your card, you can use the dropdown on the left.Note that this does NOT change the size of your image, it just places your current image in the middle of the card size you have chosen. If you want a larger image for a larger card, go on a hunt in the Image Search (for example, by searching "birthday cake square card.")

- Then click continue. In the next screen you'll select your material. Search for Insert Card in the materials.

- Insert your blade into your Cricut machine. You'll also see a warning to move your Cricut's star wheels to the center of the rail. This can be quite tough if your Cricut is newer. Using one of those jar openers from your kitchen works to get a good grip so they can be scooted over.

- Then place your card between the two layers of the mat. The back of the card should go between the layers and the front of the card should adhere to the sticky surface. Make sure your card is on the mat straight.

- Then insert your mat into your machine and your Cricut will cut your card for you!

- To remove your card from the mat, carefully use the spatula to release the card. Go slowly, making sure you're not ripping any of the delicate pieces.

- Add the insert card to the inside of the card, using the corner slots and your card is done!

- Cricut Foil Transfer Insert CardsUsing the Cricut Foil Transfer Insert Cards is similar, with one extra step. Select your image you want to make. You'll want to choose an image with a draw layer. You can then use the Operation dropdown to select Foil instead of Draw.

- So you can see here that there is a cut layer as well as a Medium Foil layer.Click Make It!

- You'll see your image on the Prepare Screen, just like with the other Insert Card.

- And then in the Make Screen, you'll see instructions for foiling your card.

- On the front of the card, use the enclosed tape to secure a piece of foil to the front of the card on all four sides. Make sure the foil is colored-side up.

- Then place the card in the card mat, with the back of the card between the two layers of the mat with the front of the card adhered to the sticky part of the mat.

- Swap out your regular blade for the Foil Transfer Tip tool.

- Then insert your mat into the Cricut and your machine will foil your project. Once it's done foiling, do NOT remove the mat, but remove the foil and tape from the card.

- Then swap out your foil tip for the blade, and your Cricut will cut the other parts of your card. Carefully remove the card from the mat. Add the insert card behind the image in the corner slots and your foiled card is done!

- Cutaway CardsCricut Cutaway Cards are a bit different. Instead of having an insert piece, it has a card that is adhered to the back of the front of the card. And then the card is "kiss cut" and you remove the cut pieces to reveal the colorful card behind. This means that you can have small interior pieces that would "fall off" a normal insert card (like the insides of letters) AND you don't need to use an image with corner cuts to hold the insert card. Let's see how it works!Create your card. For this one, one of the cards found under Projects is being used.

- Click Make It and you'll skip the Canvas altogether and see your image on the Prepare Screen.

- Click Continue and you'll see the Make Screen with instructions for making your projects. Choose Cutaway Card as your material.

- To prepare your card, peel back the liner on the adhesive inside the card.

- Then place the insert card with the pretty side DOWN. The adhesive is VERY sticky so you really need to get it right on the first try.

- Then place the card inside the mat, with the back of the card tucked between the two layers and the front of the card adhered to the mat.

- Then place your mat in the machine and cut!Once you're done cutting, remove the card from the mat. You'll then basically "weed" out the pieces of the card to allow the pretty paper to shine through. A weeding hook worked pretty well for this. Do not stab at the cardstock like you would with vinyl, but instead use the hook more like a tiny crow bar to lift the cardstock off until you can peel it up with your fingers.


- How to Cut Different Colored Cards on the Same MatIf you want to cut four cards on the same mat, you'll need to find your cards via the Image Search method, not Projects. Choose the four cards you want to make. In this instance four different wedding-themed cards were chosen.

- If you try to make these as is, Cricut Design Space puts them on four separate Cricut Card Mats:

- BUT, if you go back to the canvas and make all of the images the same color….

- Design Space will put all four cards on the same Card Mat.Then you can put four DIFFERENT card colors on the actual mat when you're actually cutting. Just because the image looks blue, doesn't mean you can't put a pink card on the actual mat.




Comments & Reviews
Darlene says
What if you don’t have the Cricut cards, can you cut your own? I want to make the cut a way card,, do I just cut what adhesive baking to put on the inside back of the front card? Sorry I just received my first ever Cricut and am still learning.
Crystal Summers says
Hi Darlene,
Yes! You can use cardstock or thick paper to create your own cards and use the mat with them.
Happy crafting!
Crystal, HLMS Community Manager
Dee says
Now I get it. Thanks!
Siobhan says
With the release of this new Mat does it mean that the cards offered on design space are all now specific to making with the mat? It seems to make a card “ the old fashioned way” I have to customize and play around with the design more.
Thanks for the great content.
Crystal Summers says
Hi Siobhan,
I don’t think they are all specific to the mat, however, I do think Cricut is trying to format things to make it easier to use the mat. If you have a card you make over and over, I would save it one more time AFTER you’ve made all your edits so you only have to make adjustments once.
Hope this helps,
Crystal, HLMS Community Manager
Su Winter says
Great article Cori!
Do you know whether the Card Mat will be available in UK any time soon?
Crystal Summers says
Hi Su,
Yes, it is available in the UK. Here’s a link: https://cricut.pxf.io/jW0xgZ (affiliate).
Happy crafting!
Crystal, HLMS Community Manager