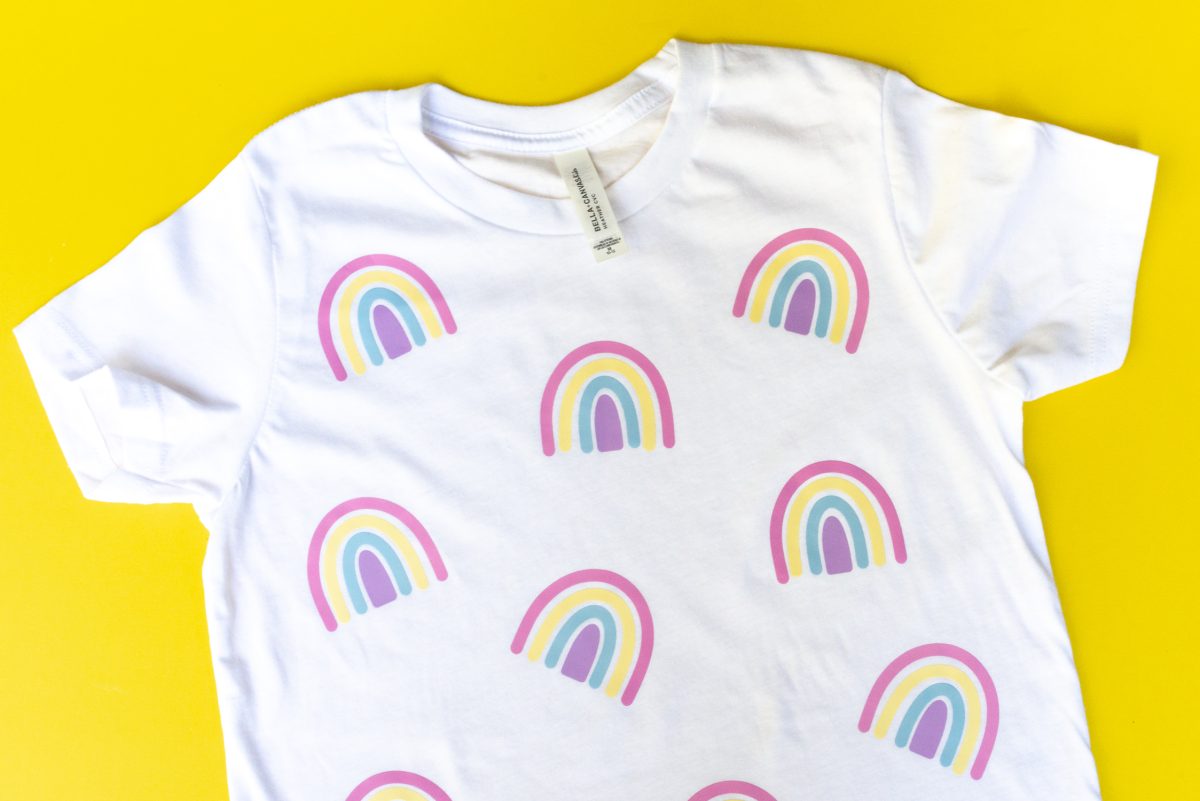
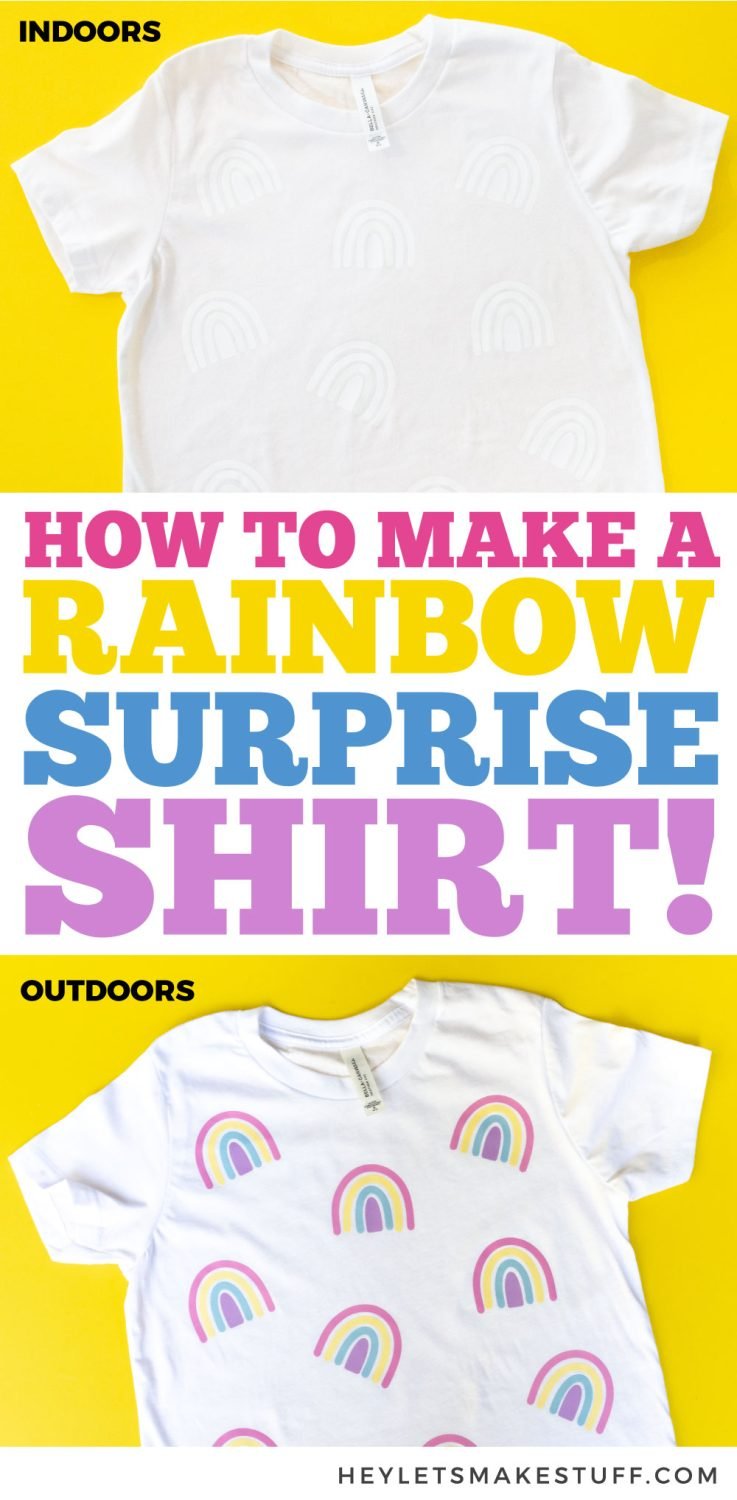
Make fun shirts and other apparel with Cricut color-changing HTV / iron-on! For this project, I’m making a “surprise” rainbow shirt—looks white indoors, but once you’re in the sun it’s covered in rainbows!
This post is sponsored by my favorite apparel brand, BELLA+CANVAS.
I have a really vivid memory from my childhood about a particular piece of clothing—a Hypercolor shirt that changed from purple to pink when exposed to heat—the sun, your hand, etc. Hypercolor shirts were so huge in 1991 when I was 10 years old (please don’t do that math), so I was the *prime* target market for that shirt and I LOVED IT.
So when Cricut recently launched a line of color-changing materials, my little 90s heart got so excited. I knew I wanted to use all four colors of color-changing HTV (also called heat transfer vinyl or iron-on) to make a “surprise” rainbow shirt for our family friend “S” that we’re seeing this summer at a wedding. She’s going to love it!
I grabbed a white BELLA+CANVAS kids’ tee for this project. I always have a bunch on hand because I love making t-shirts for my own boys, and they can be really sensitive to low-quality “scratchy” fabrics. BELLA+CANVAS tees are super soft (this one is a cotton and poly blend) and their dying process is eco-friendly. My boys love them, so I know “S” will love them too!
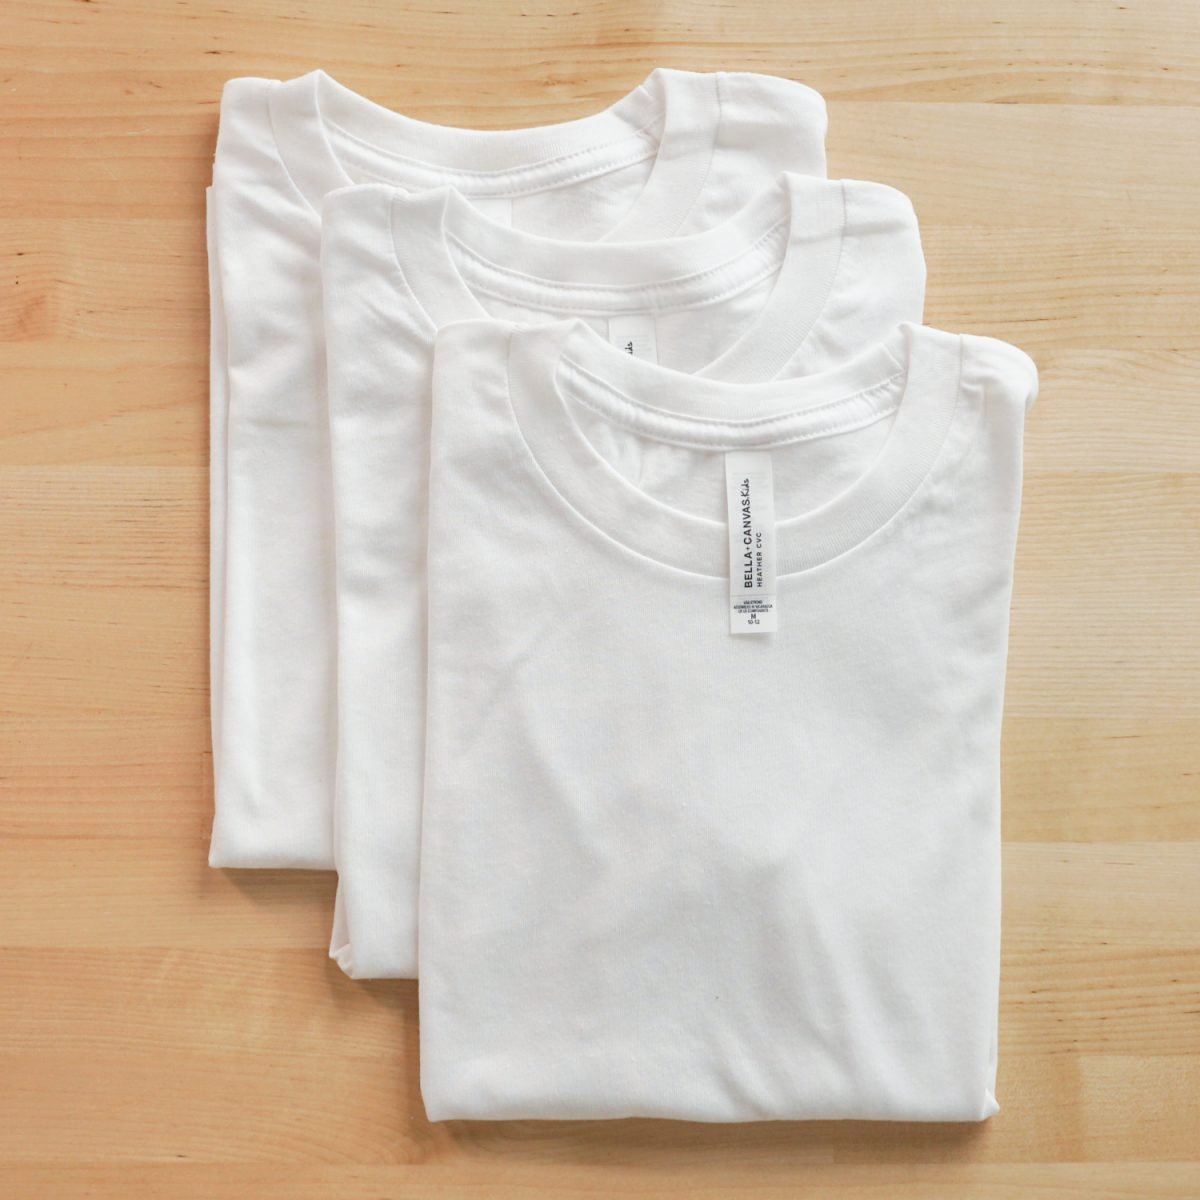
Did you know you can buy BELLA+CANVAS garments at wholesale pricing without a reseller license? Get a BELLA+CANVAS Maker’s Account! This account allows you access to the wholesale side of their business without the need for any permits or licenses. Even better? It’s free! Learn more in my post Buying Wholesale Blanks without a Resale License!
Watch the Video
Learn more about Color-Changing HTV and how to make this project in this video! Prefer written instructions? Read on for the full tutorial.
What is Cricut Color Changing Iron-On?
Cricut’s Color Changing Iron-On is the same as their Everyday Iron-On with one key difference—it changes colors under UV light! This means it goes from white to a bright vivid color in the sunlight (or under a UV light).
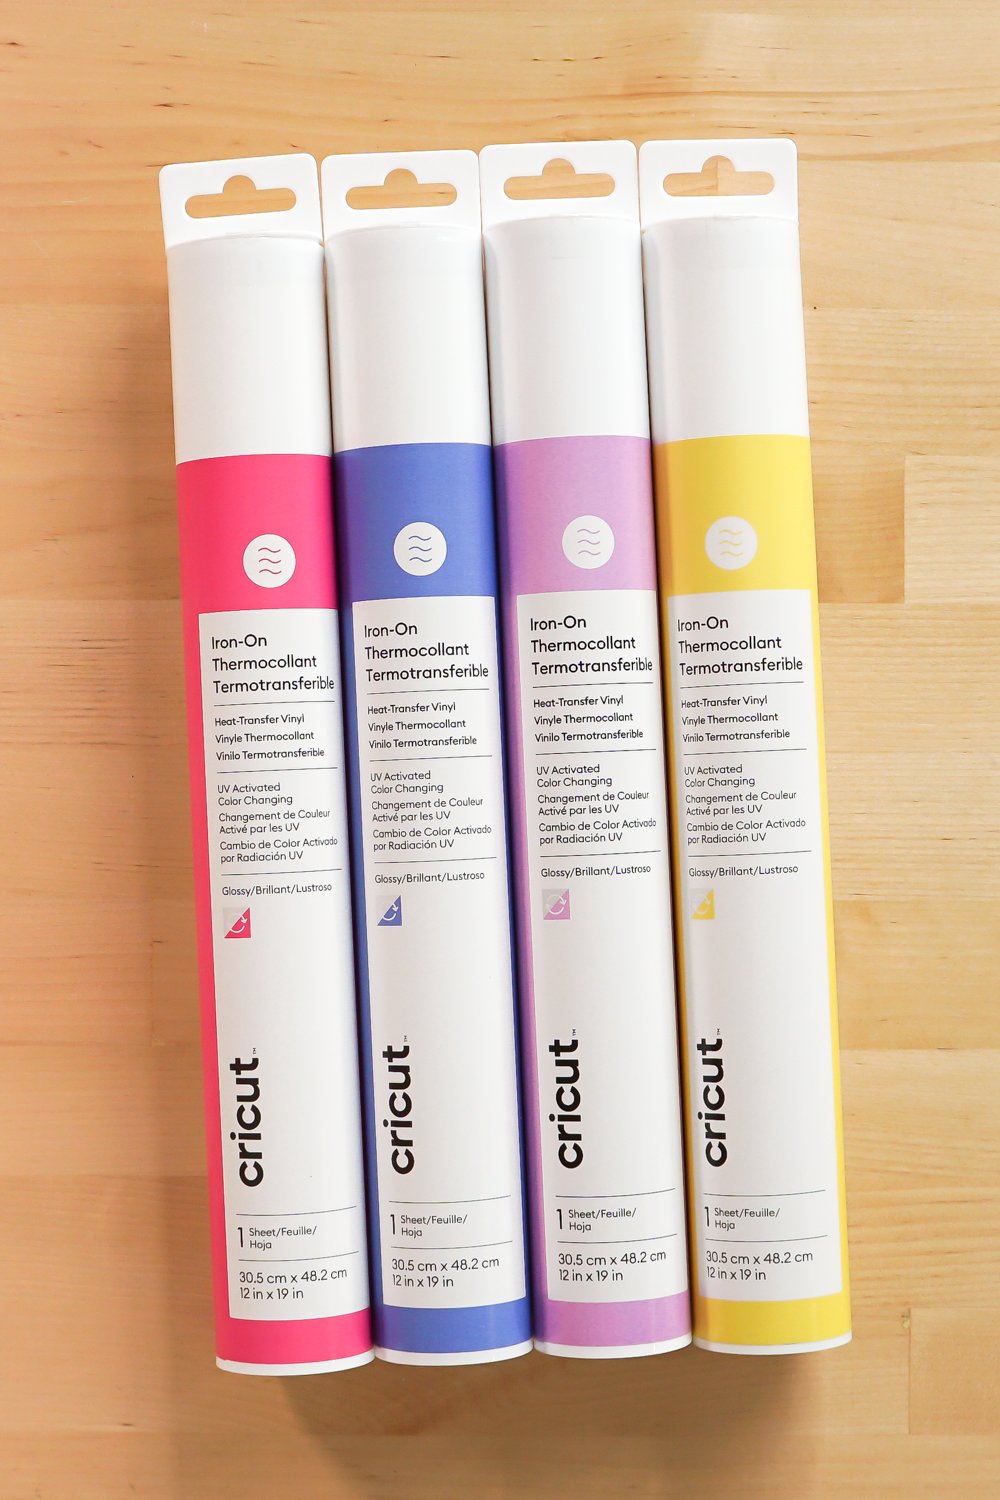
There are four colors of this color-changing HTV: pink, blue, purple, and yellow. All of them start out white and then change colors in the sunshine.
Tips for Using Cricut Color Changing Iron-On
- Keep your packaging! All of the colors look identical to white iron-on unless they are in the sunlight and you may end up using a color-changing HTV instead of regular white if you don’t keep things in their packages or labeled well.
- Got your scraps mixed up? Buy a small UV light for testing your HTV.
- The HTV is not the same as hypercolor. It’s UV-activated, not heat-activated. So when you press it with your heat press, it won’t change color.
- Think about your garment’s color—you want it to look good with both white and the color it changes into in the sun. BELLA+CANVAS has more than 300 colors to choose from, so there are a ton of options that will work for your project!
What is the “Cut Through” Method for HTV?
For this project, we are not going to be weeding the HTV. Instead, we are going to be using the “heavy cardstock” material setting to cut all the way through the carrier sheet. This allows you to place the rainbows on the shirt more easily, as you’ll see! Plus it saves time because there’s no weeding step.
Let’s make a shirt!
“Surprise” Rainbow Color-Changing Shirt Supplies
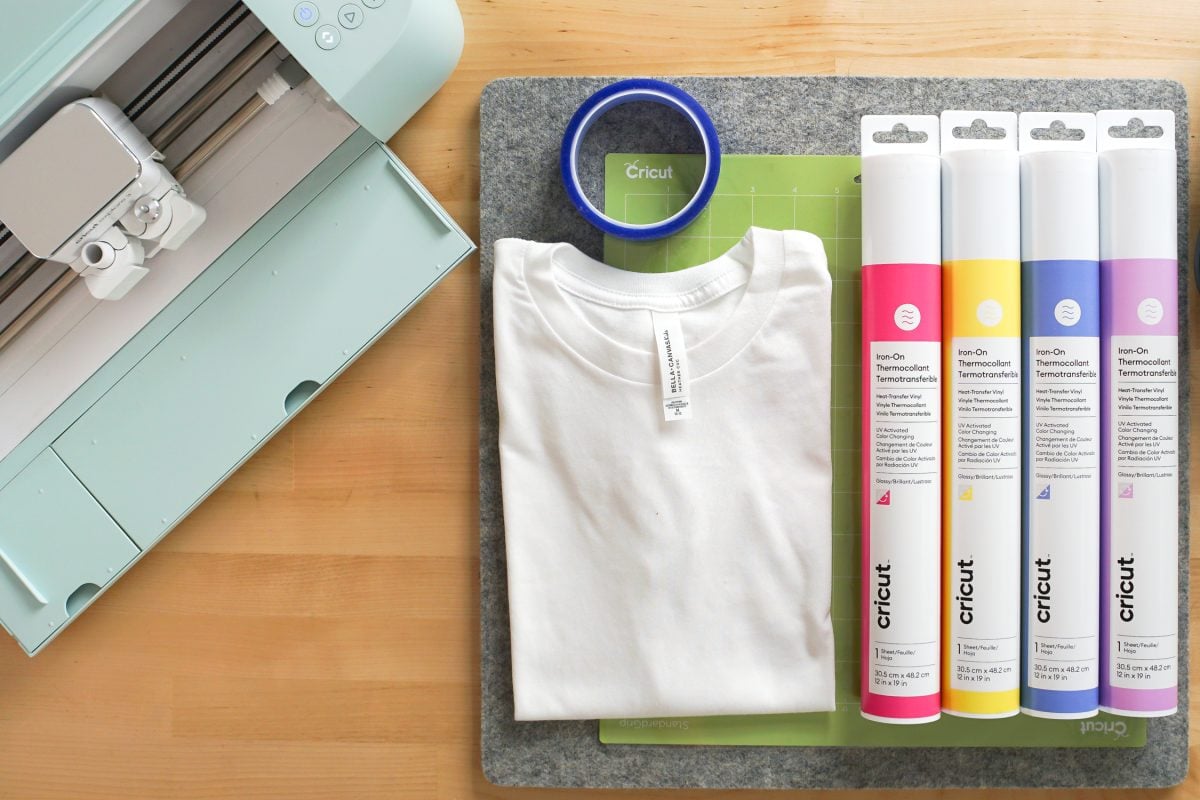
- White shirt (I’m using a BELLA+CANVAS kids’ tee 3001YCVC)
- Cricut Maker, Cricut Explore, or Cricut Joy
- Green cutting mat
- Color-changing HTV in four colors
- Cricut EasyPress Mini or other heat press
- Heat-resistant mat or EasyPress mat
- Heat-resistant tape
- The sunshine!
- SVG file (see below)
Get the Free File
Want access to this free file? Join my FREE craft library! All you need is the password to get in, which you can get by filling out the form below. The file number is: C463.
“Surprise” Rainbow Color-Changing HTV Shirt Instructions
Set up the file in Cricut Design Space
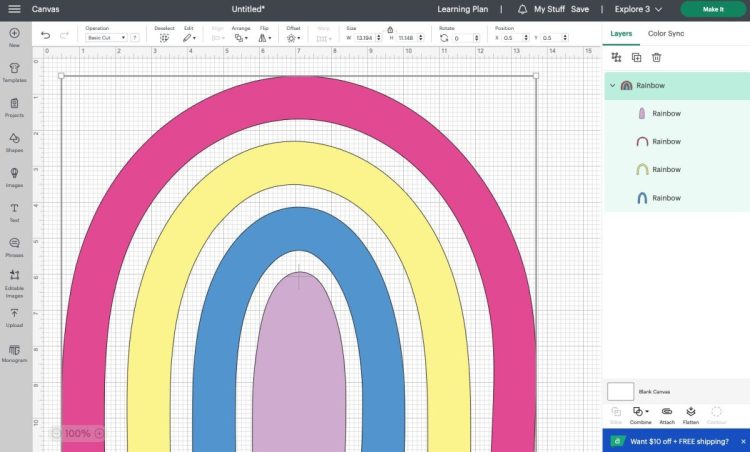
Upload the rainbow file to Cricut Design Space (see my post How to Upload SVG Files to Cricut Design Space for more information). The rainbow will be very large.
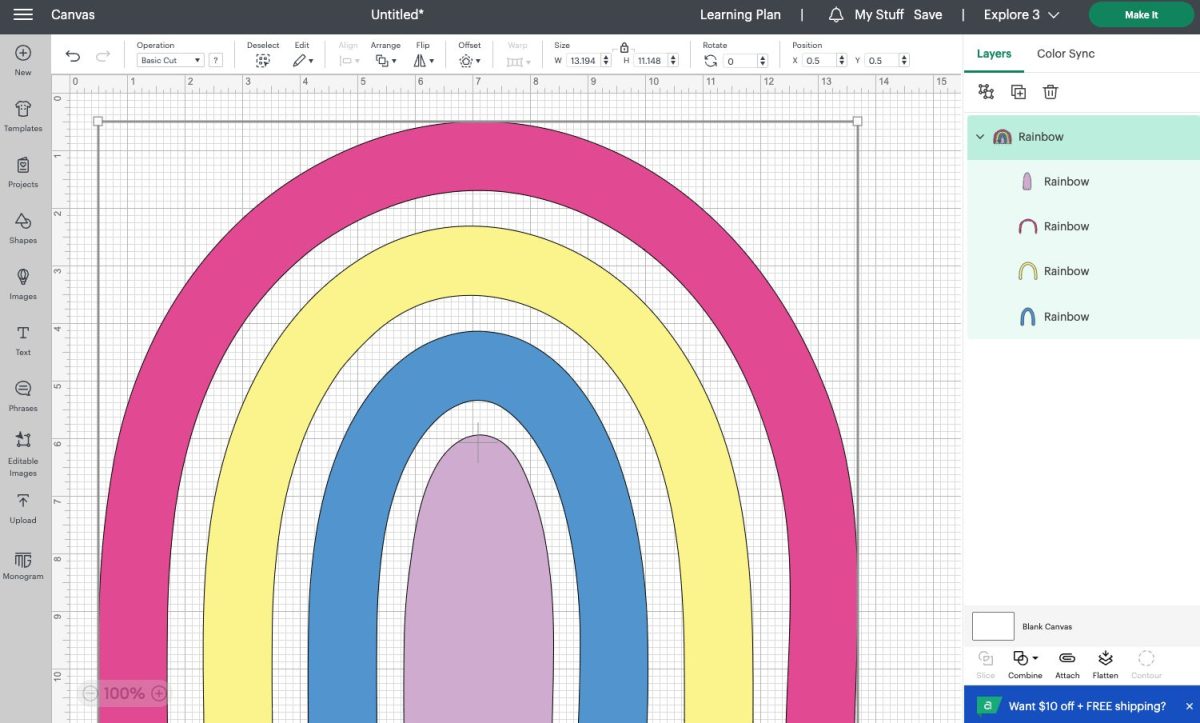
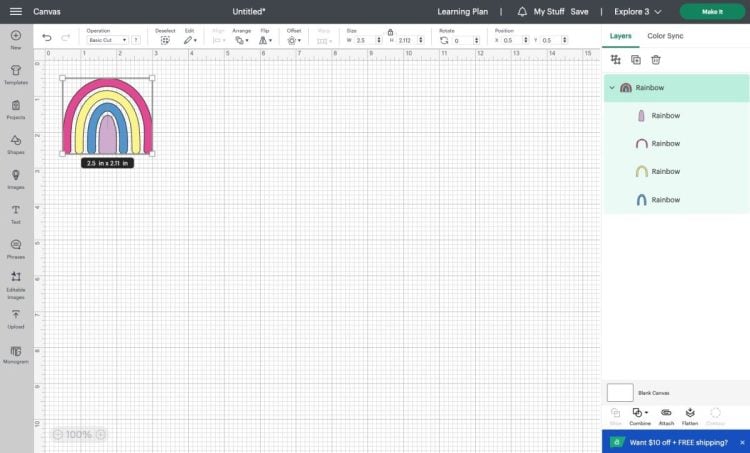
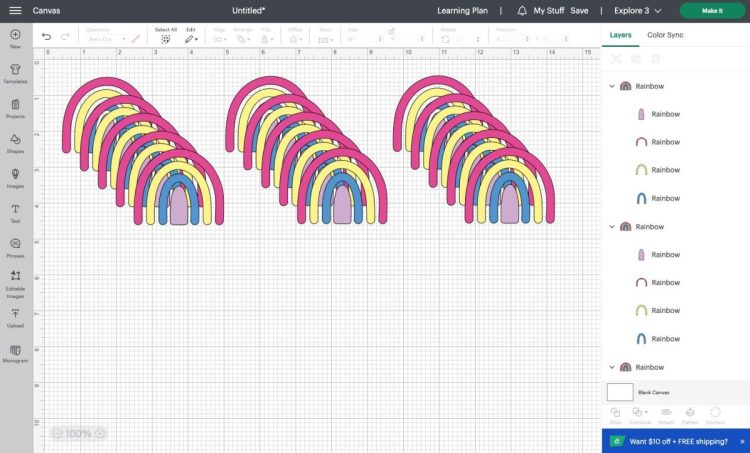
Resize the rainbow for your shirt. I’m putting small rainbows all over the shirt, but you could also do one large rainbow if you’d like. I made my small rainbow 2.5″ wide.
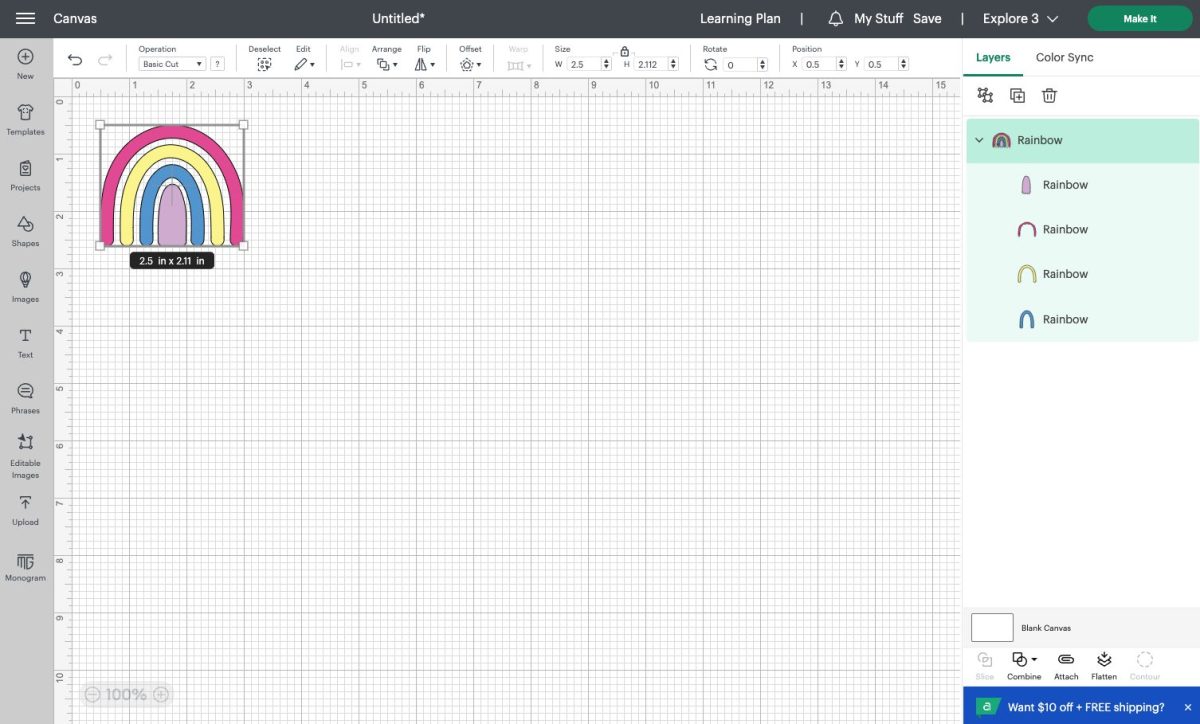
Then I duplicated the rainbow so I had 15 copies. If you’re doing a larger rainbow, skip this step.
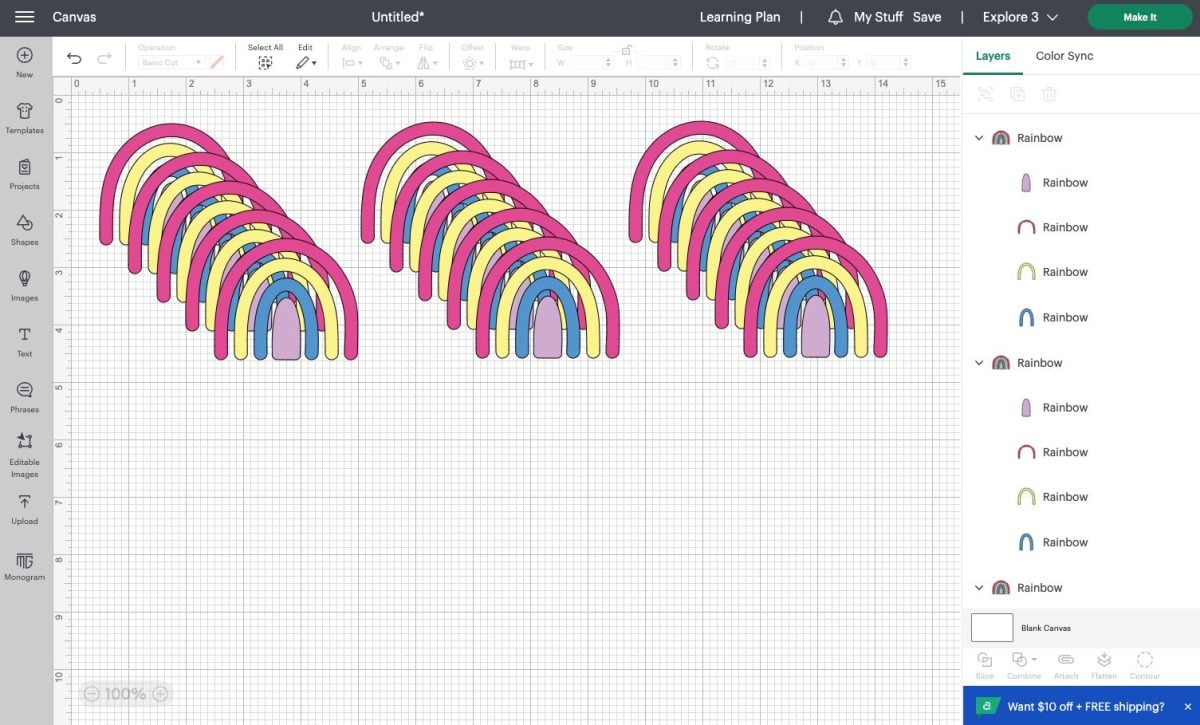
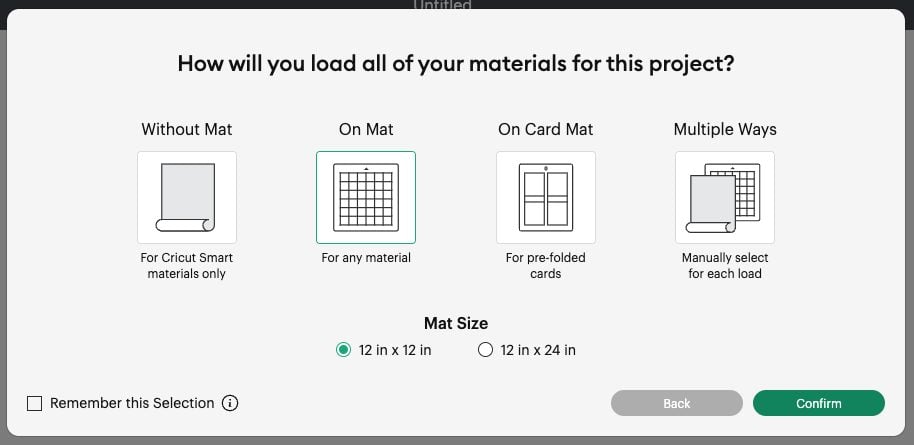
Then hit Make It in the upper right to make your project. You’ll first be asked how you want to load your material. In this case, we’ll be putting it on a Cricut mat, so choose On Mat.
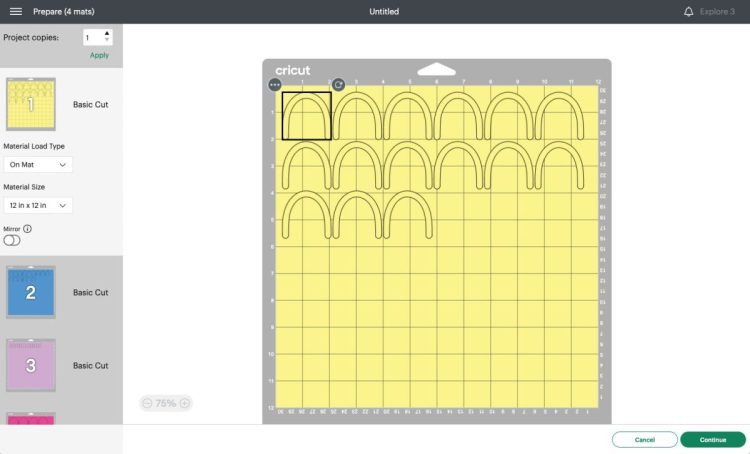
Cricut Design Space will lay out all of your rainbow pieces on the mat.
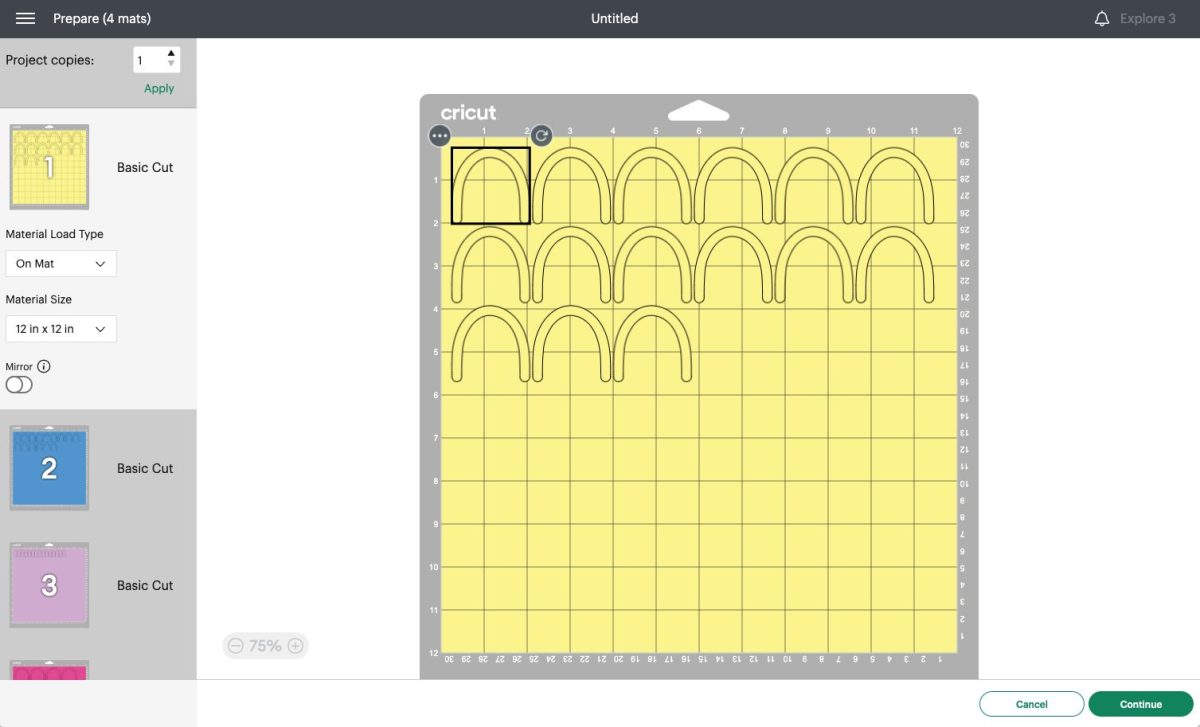
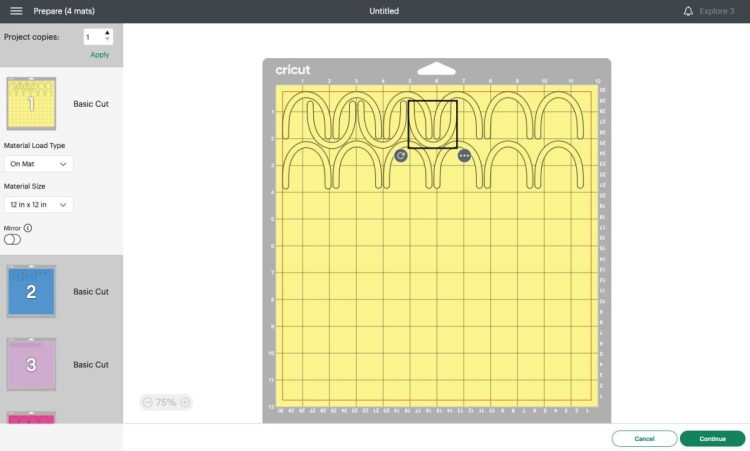
If you’d like, you can move your pieces around on your mat to save space. I only did this on the yellow and pink mats—I felt like the material savings on blue mat wasn’t worth my time and effort, but you can do that if you’d like.
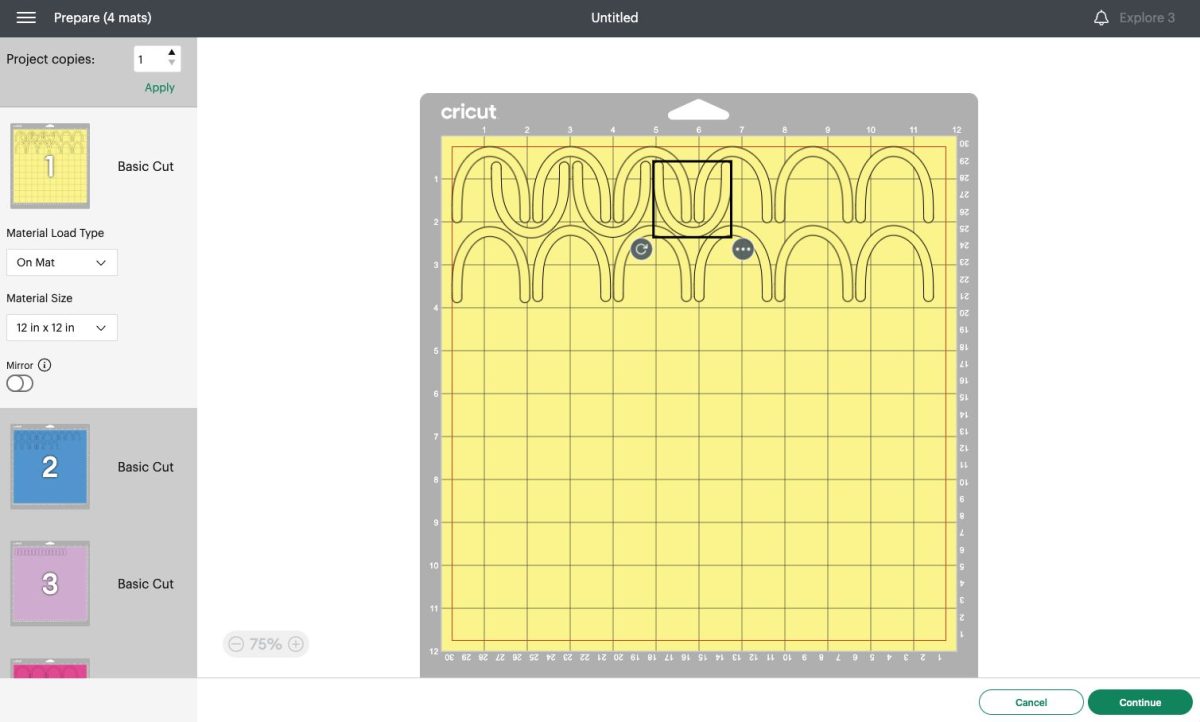
Click Continue. In the Make Screen, choose Heavy Cardstock for your material cut settings. This will cut entirely through the carrier sheet of your material, leaving you with individual rainbow pieces.
Cut Your Rainbows
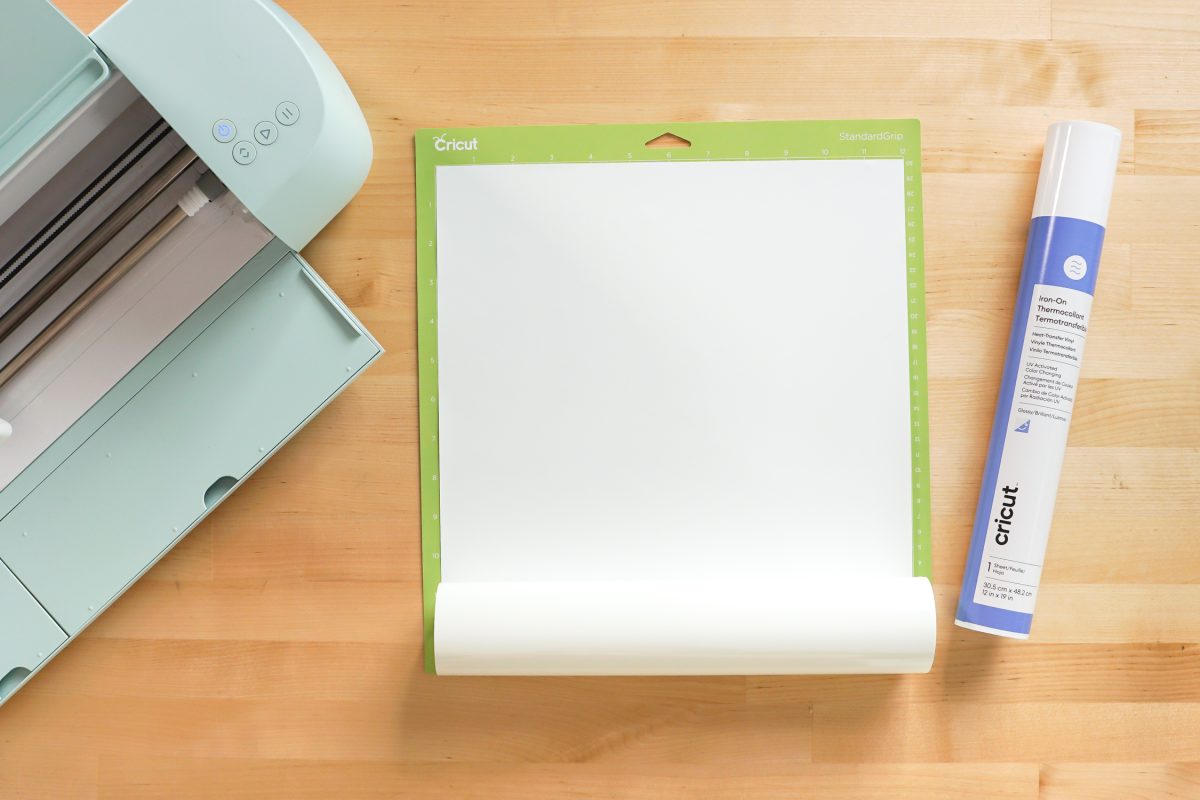
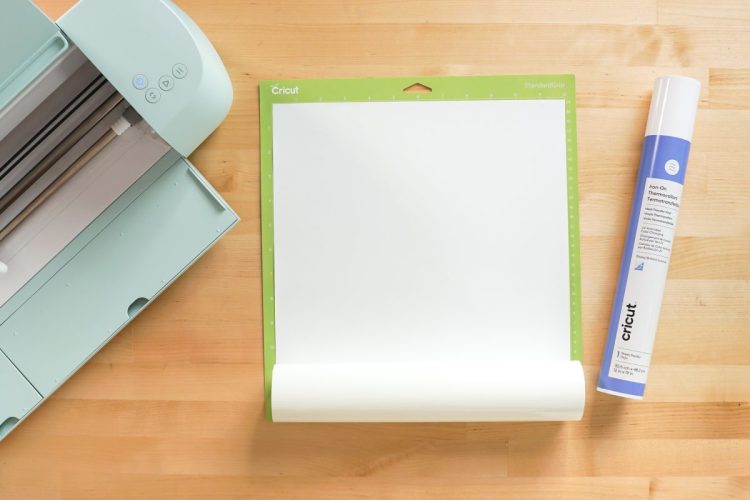
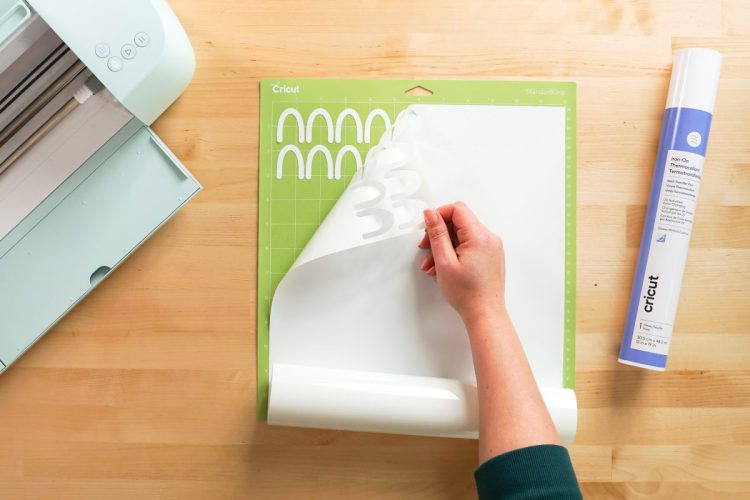
Place your material on your mat with the shiny side down. You can see that the blue color-changing HTV just looks white right out of the package.
Place your mat into your machine and press the blinking Go button. Your Cricut will cut your rainbow pieces. When you peel back the material from the mat, you’ll see that the pieces remain on the mat. Remove the pieces from the mat as well, making sure to remove them carefully so they don’t rip or stretch.
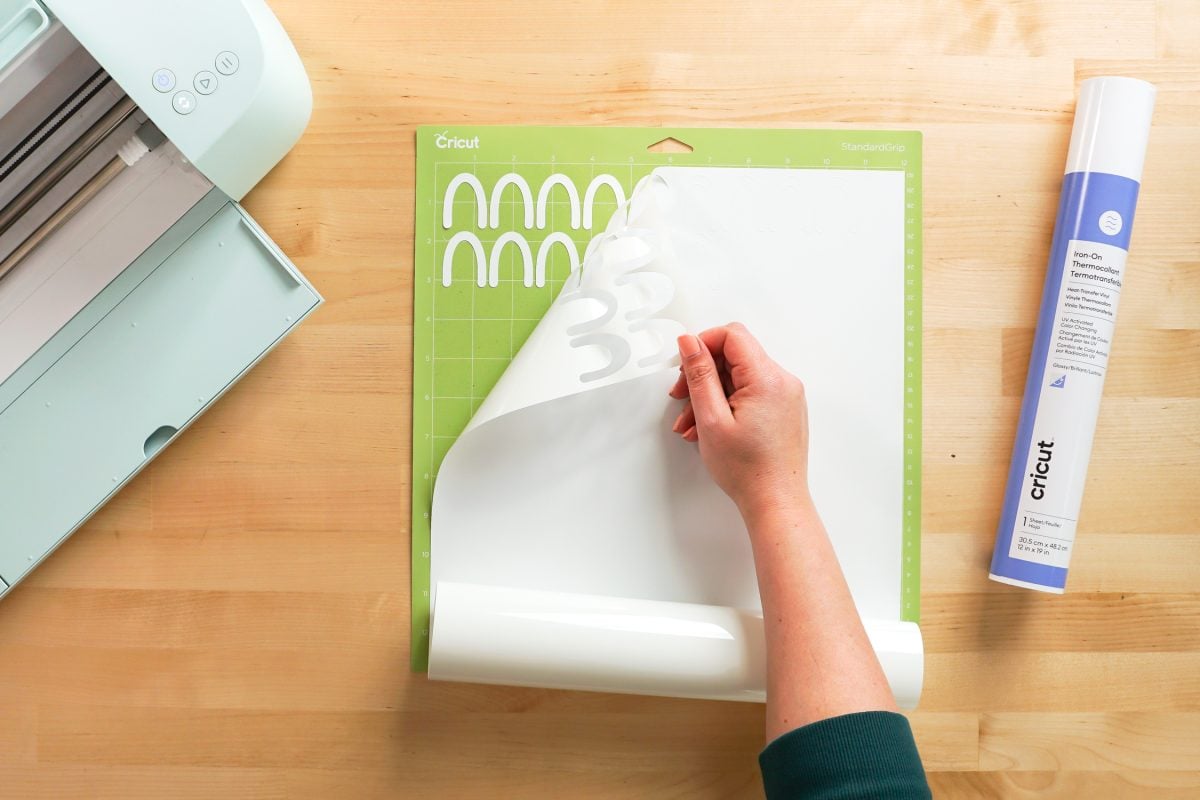
Repeat with the other colors of HTV until you have all of your rainbow pieces.
Assembling Your Rainbow Shirt
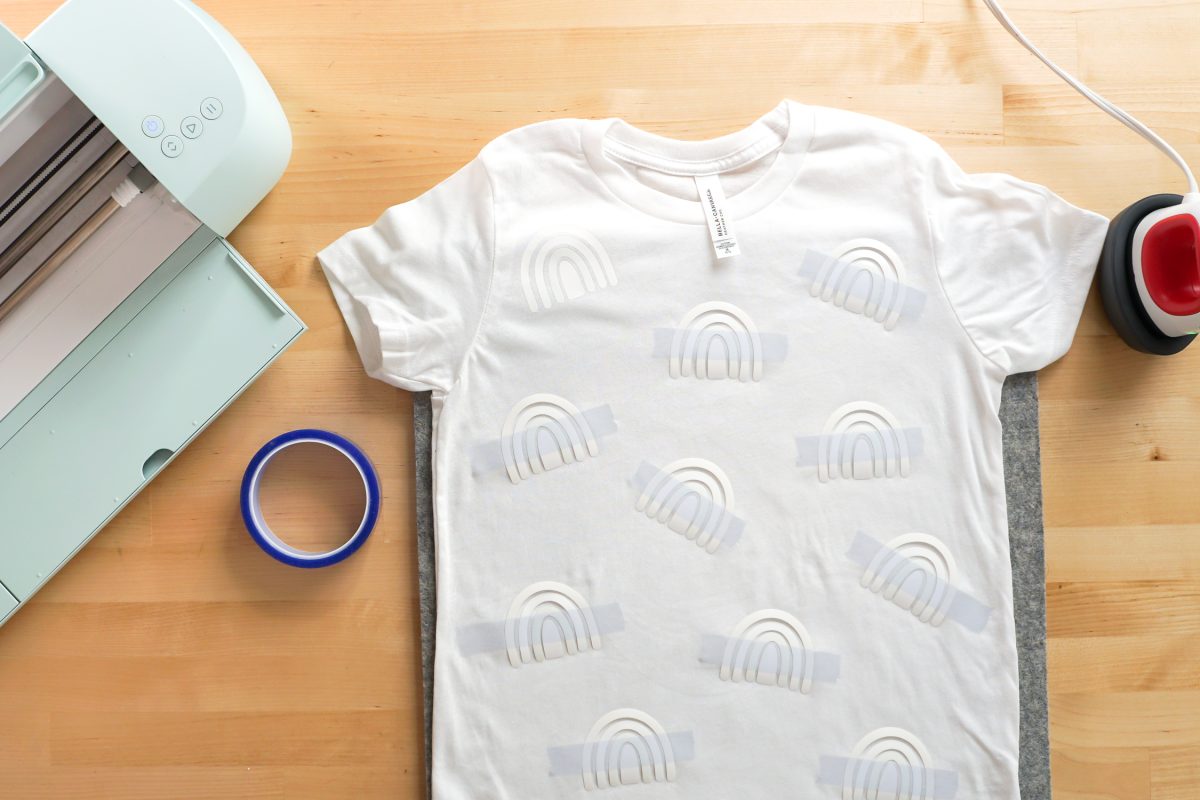
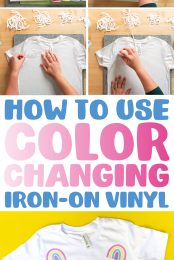
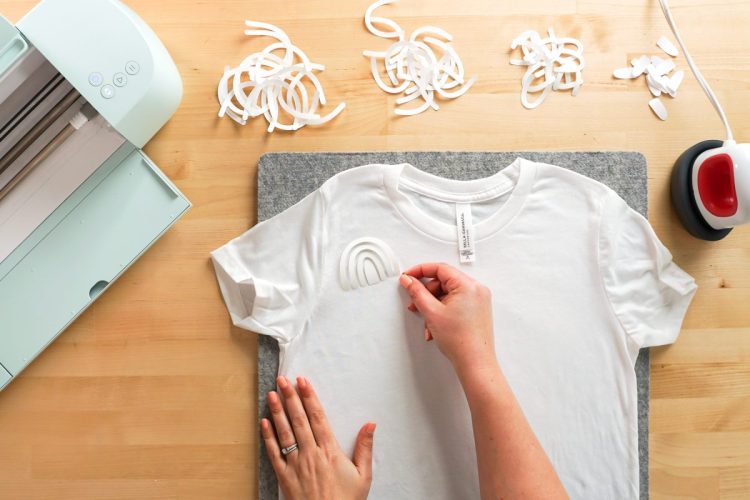
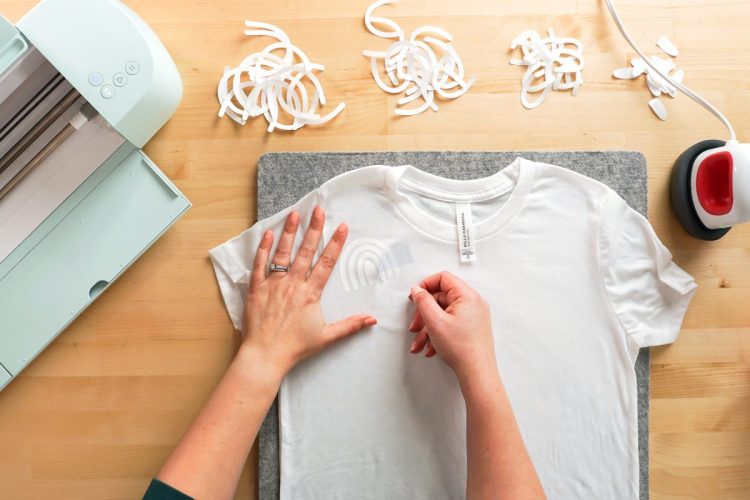
Then place your shirt on the heat-resistant mat and assemble your first rainbow. You’ll see that because we used the cut-through method, we don’t have to iron each piece individually. We can adhere all four at once!
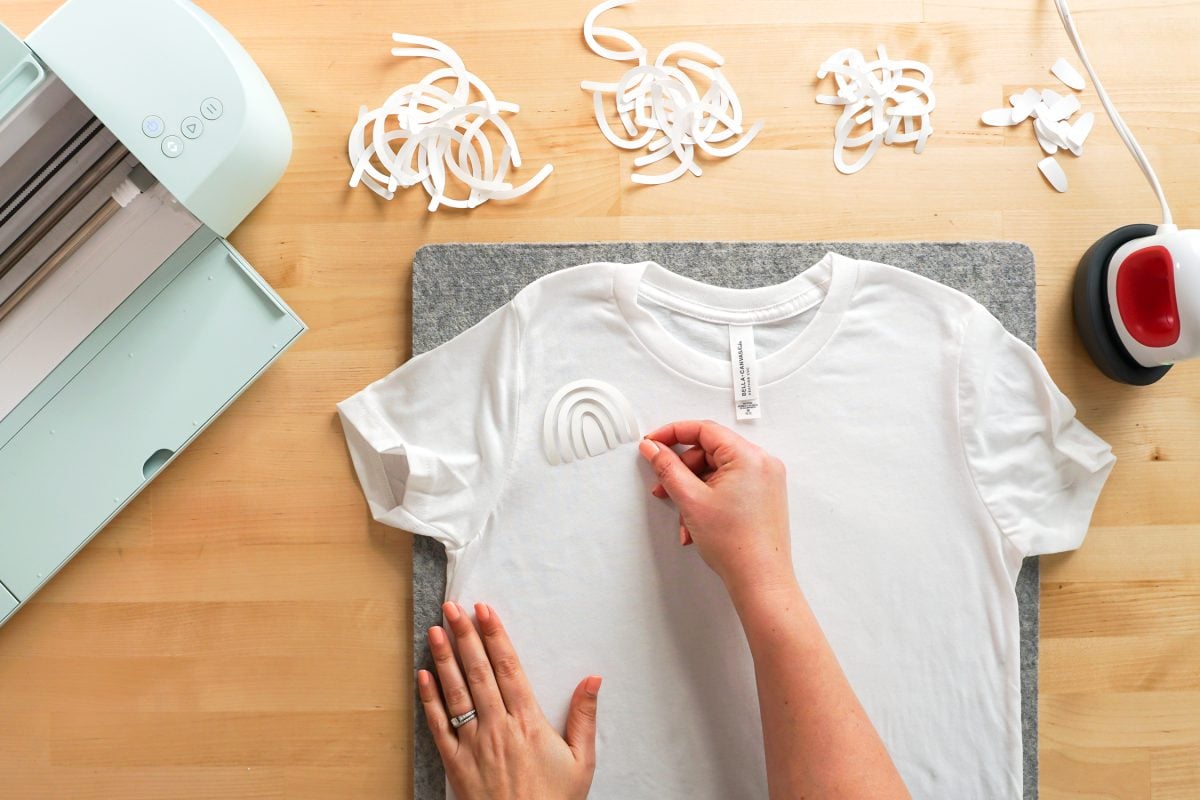
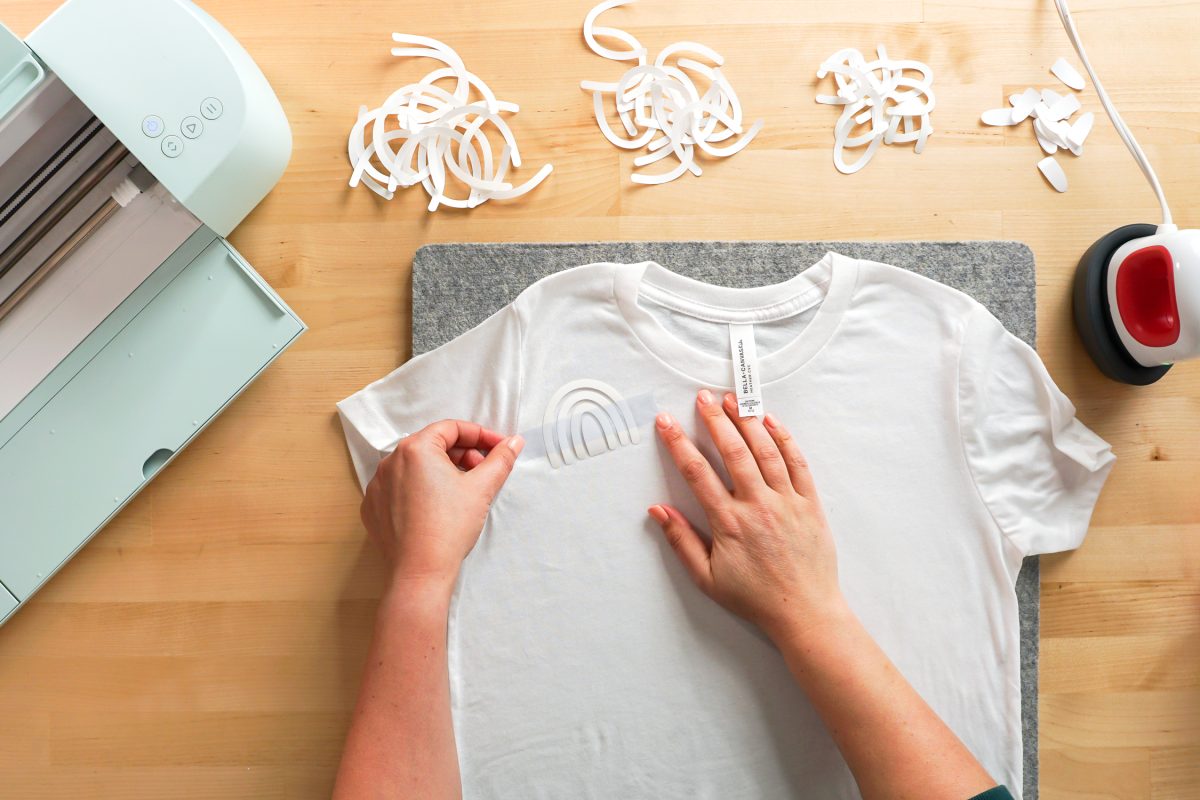
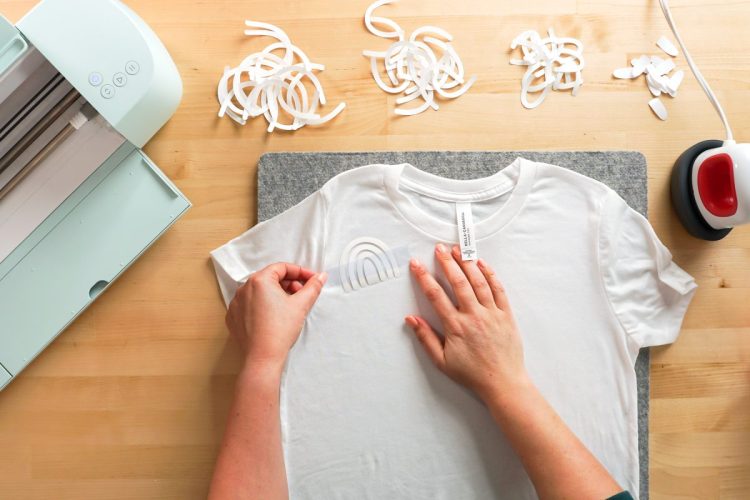
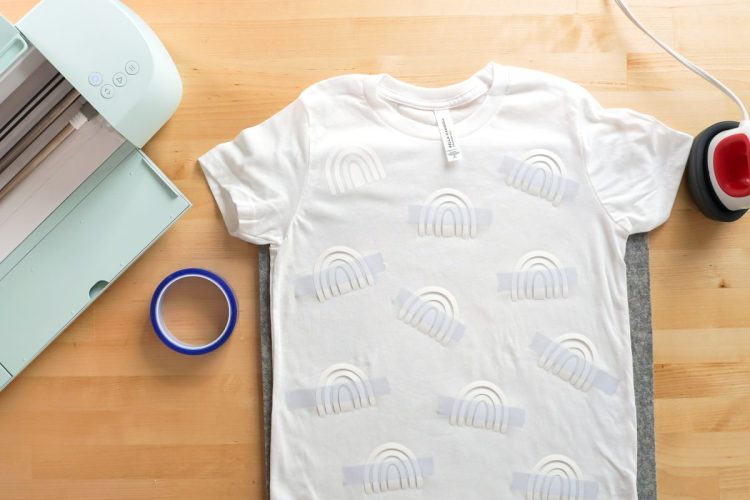
Use a piece of heat-resistant tape to secure your rainbow to the shirt and to make it easier to iron.
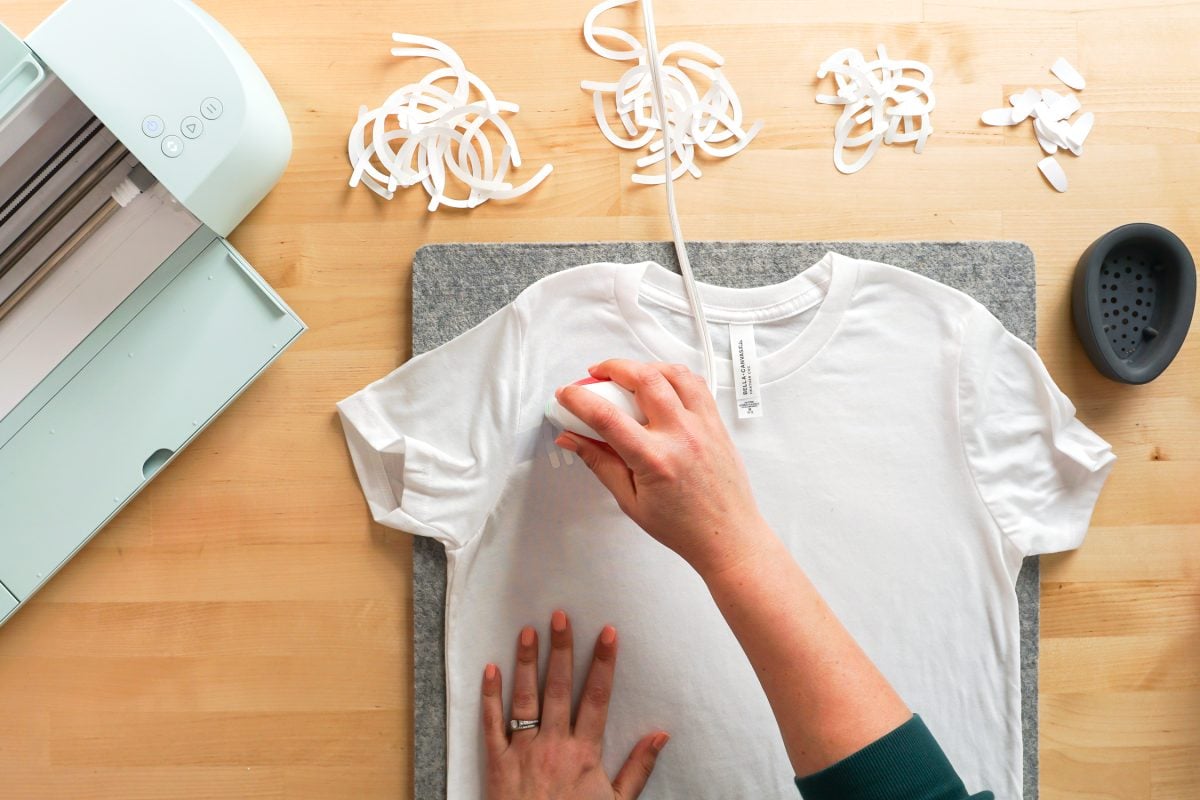
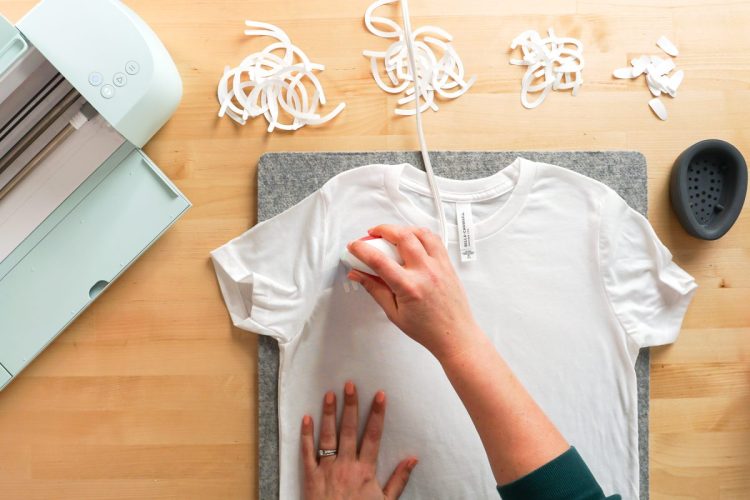
To adhere the HTV rainbow, I really like my EasyPress Mini. It allows me to move from one rainbow to the next and adhere them easily. You could also use a standard EasyPress or other heat press, but I do really love that Mini! With the Mini, I used the second heat setting and medium pressure.
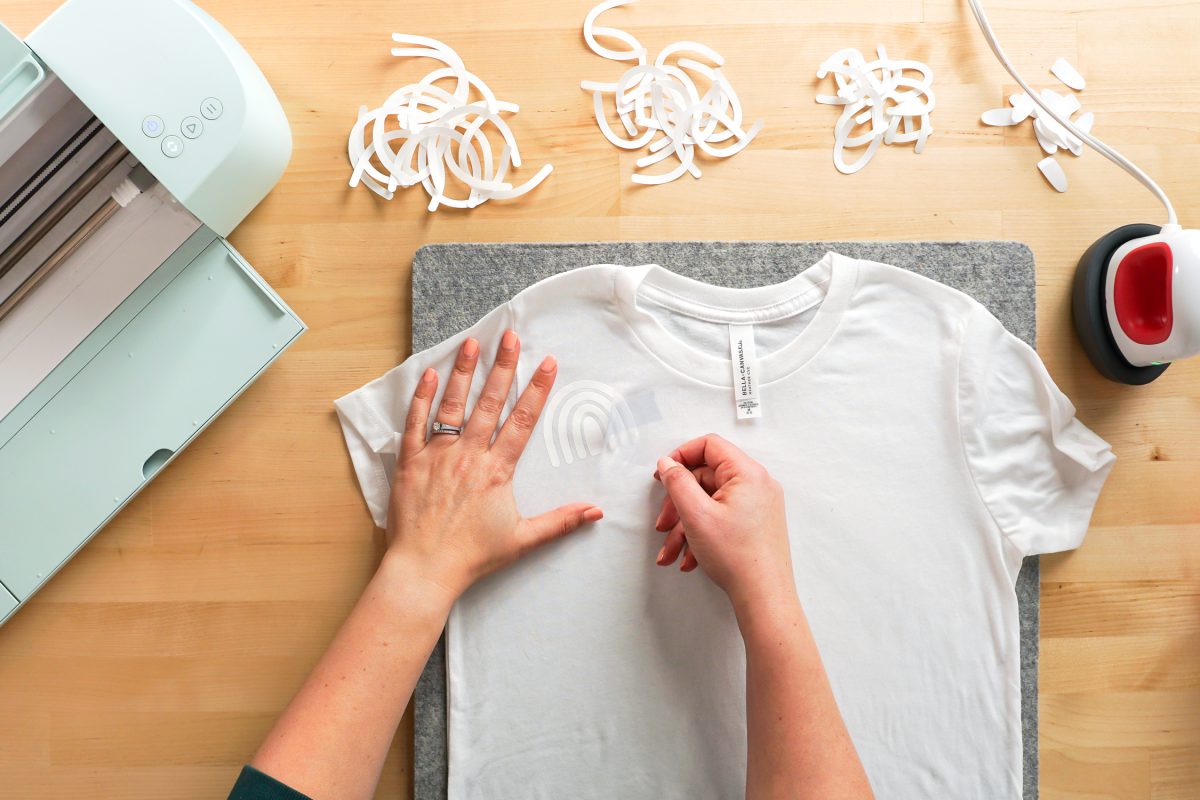
Then carefully peel back the carrier sheet and the tape. I found that I could peel up the ends of one side of the rainbow and “follow” it around the rainbow and both the carrier sheet pieces and the tape would come up at once.
Repeat with the rest of the rainbows. I taped the rest of them at once, and then ironed them all at the same time.
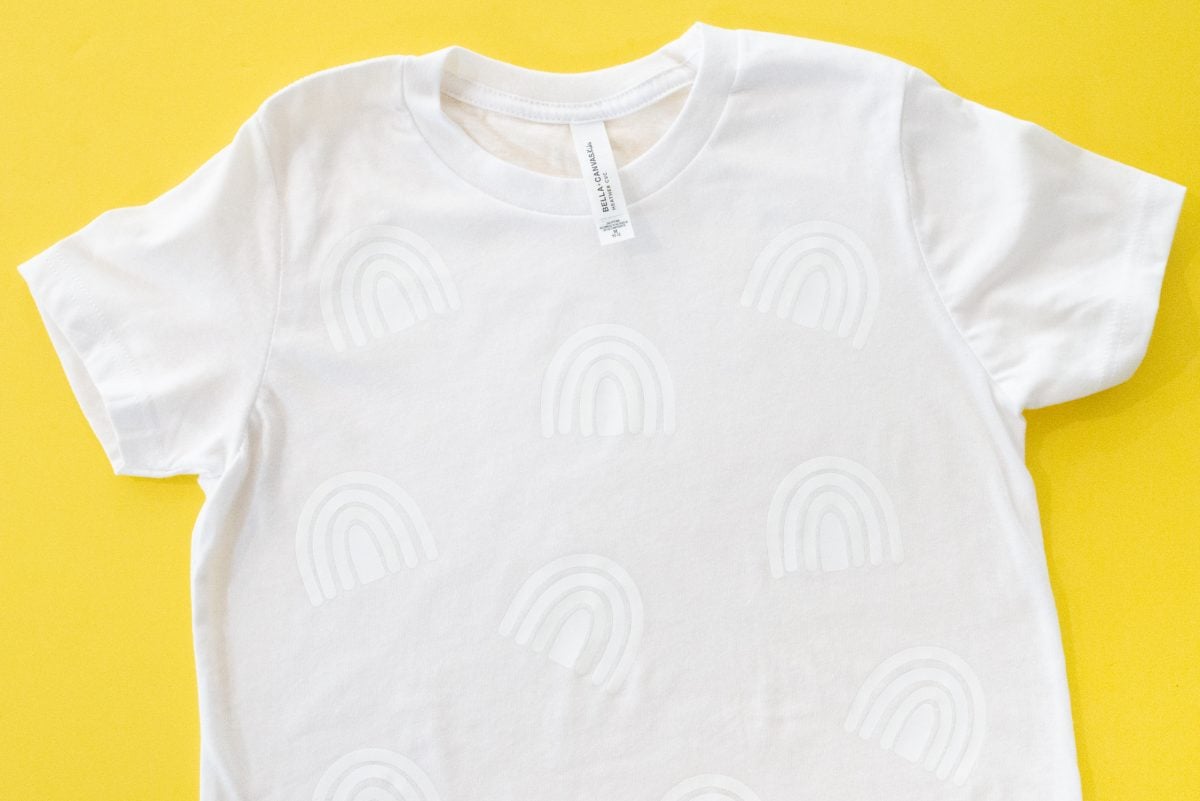
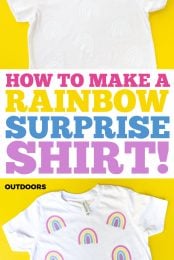
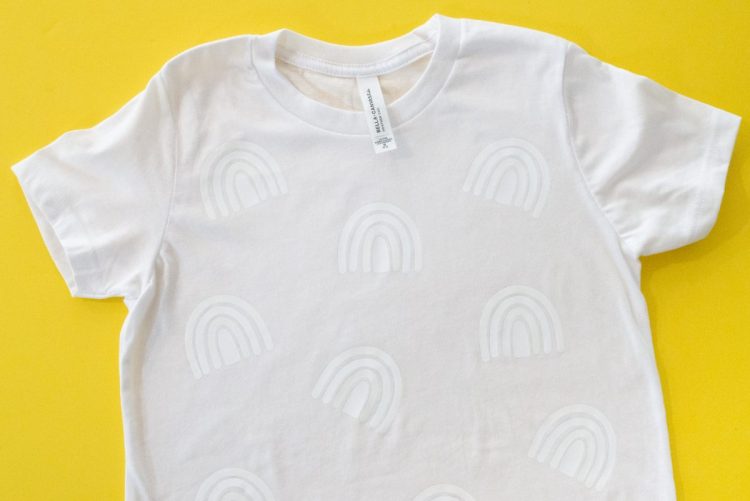
Made quick work of the rainbows! Here’s what the finished shirt looks like indoors.
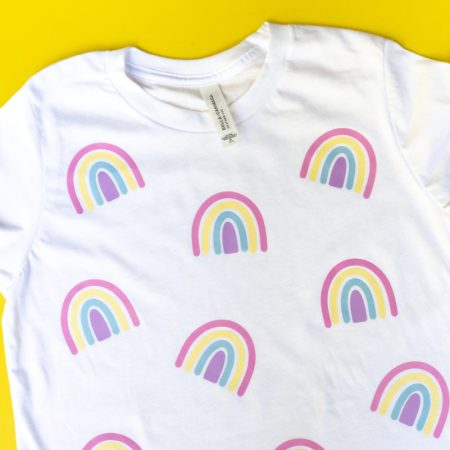
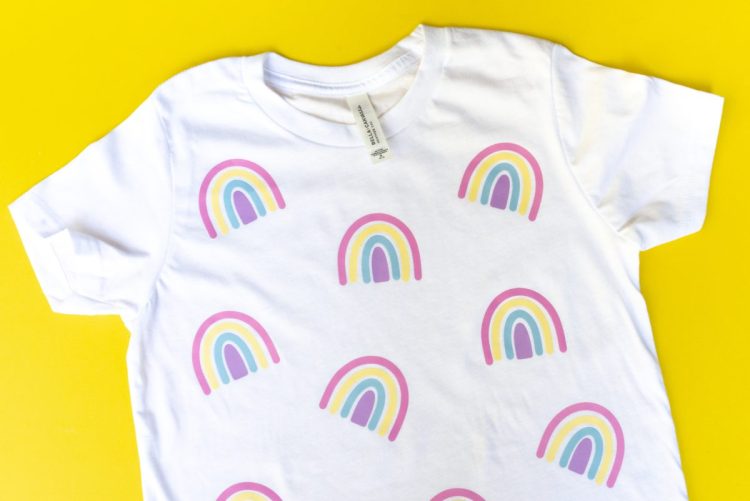
Then the magic happens! Take your new shirt outside and watch how quickly the sun turns the white rainbows into colored rainbows! Such vibrant colors—it’s hard to believe that it takes just a few seconds to return to white after you’re back indoors.

So cute! I love how this project turned out. My boys said that “S” is going to LOVE this shirt and she should wear it to the wedding we’re attending. Not so sure about that, but then again…how cute would it be with a tutu?
Caring for Your Color-Changing HTV Shirt
To make your color-changing shirt last as long as possible, I suggest a hand wash or delicate wash in the machine with a mild detergent. Let air dry.
If you want to make this project, make sure to grab a soft and comfortable BELLA+CANVAS tee!
HOW TO USE COLOR-CHANGING HTV
Equipment
- Cricut EasyPress Mini or other heat press
Supplies
- White Shirt or for this project using a
- BELLA+CANVAS kids' tee 3001YCVC
- Color-changing HTV in four colors
- The sunshine!
- Free Rainbow File #C463
Instructions
- Tips for Using Cricut Color Changing Iron-OnKeep your packaging! All of the colors look identical to white iron-on unless they are in the sunlight and you may end up using a color-changing HTV instead of regular white if you don't keep things in their packages or labeled well.Got your scraps mixed up? Buy a small UV light for testing your HTV.The HTV is not the same as hypercolor. It's UV-activated, not heat-activated. So when you press it with your heat press, it won't change color.Think about your garment's color—you want it to look good with both white and the color it changes into in the sun. BELLA+CANVAS has more than 300 colors to choose from, so there are a ton of options that will work for your project!
- What is the "Cut Through" Method for HTV?For this project, we are not going to be weeding the HTV. Instead, we are going to be using the "heavy cardstock" material setting to cut all the way through the carrier sheet. This allows you to place the rainbows on the shirt more easily, as you'll see! Plus it saves time because there's no weeding step.Let's make a shirt!
- Set up the file in Cricut Design SpaceUpload the rainbow file to Cricut Design Space (see this post How to Upload SVG Files to Cricut Design Space for more information). The rainbow will be very large.

- Resize the rainbow for your shirt. For this project small rainbows are being put all over the shirt, but you could also do one large rainbow if you'd like. The small rainbow for this project is 2.5" wide.

- Then the rainbow design was duplicated the so that there were 15 copies. If you're doing a larger rainbow, skip this step.

- Then hit Make It in the upper right to make your project. You'll first be asked how you want to load your material. In this case, we'll be putting it on a Cricut mat, so choose On Mat.

- Cricut Design Space will lay out all of your rainbow pieces on the mat.

- If you'd like, you can move your pieces around on your mat to save space. For this project this was done only on the yellow and pink mats—as it felt like the material savings on blue mat wasn't worth my time and effort, but you can do that if you'd like.Click Continue. In the Make Screen, choose Heavy Cardstock for your material cut settings. This will cut entirely through the carrier sheet of your material, leaving you with individual rainbow pieces.

- Cut Your RainbowsPlace your material on your mat with the shiny side down. You can see that the blue color-changing HTV just looks white right out of the package.

- Place your mat into your machine and press the blinking Go button. Your Cricut will cut your rainbow pieces. When you peel back the material from the mat, you'll see that the pieces remain on the mat. Remove the pieces from the mat as well, making sure to remove them carefully so they don't rip or stretch.Repeat with the other colors of HTV until you have all of your rainbow pieces.

- Assembling Your Rainbow ShirtThen place your shirt on the heat-resistant mat and assemble your first rainbow. You'll see that because we used the cut-through method, we don't have to iron each piece individually. We can adhere all four at once!

- Use a piece of heat-resistant tape to secure your rainbow to the shirt and to make it easier to iron.

- To adhere the HTV rainbow, A EasyPress Mini was used for this project as it allows movement from one rainbow to the next and adheres them easily. You could also use a standard EasyPress or other heat press, The second heat setting and medium pressure was used.

- Then carefully peel back the carrier sheet and the tape. I found that I could peel up the ends of one side of the rainbow and "follow" it around the rainbow and both the carrier sheet pieces and the tape would come up at once.

- Repeat with the rest of the rainbows. For this project the rest of them were taped all at once, and then ironed all at the same time.

- Made quick work of the rainbows! Here's what the finished shirt looks like indoors.

- Then the magic happens! Take your new shirt outside and watch how quickly the sun turns the white rainbows into colored rainbows! Such vibrant colors—it's hard to believe that it takes just a few seconds to return to white after you're back indoors.

- Caring for Your Color-Changing HTV ShirtTo make your color-changing shirt last as long as possible, It is suggested to hand wash or delicate wash in the machine with a mild detergent. Let air dry.If you want to make this project, make sure to grab a soft and comfortable BELLA+CANVAS tee!



Comments & Reviews
luxury transfers dubai says
We are offer seamless Luxury airport transfers in Dubai for both personal and professional trips.
Cheryl Casey says
I have been wanting to make this rainbow shirt ever since you posted but the vinyl has been back ordered forever. I received an email that the blue was available to order(last color I’m waiting on) at 2:30 am and when I opened at 7:30 am it was already out of stock again. Do you know what’s going on?