The basis of all vector artwork in Adobe Illustrator is paths, anchor points, and handles. Let’s learn more about these three elements and how they can be used for amazing SVG design.
Welcome back to my Adobe Illustrator for crafters series! In this series I hope you demystify Adobe Illustrator so you can design SVG files for your cutting machine, printables, and more.
I started off with an overview of the Adobe Illustrator Workspace, and today we’re going to dive into the building blocks of Adobe Illustrator’s shapes: paths, anchor points, and handles. These elements sound complicated, but I promise you’ll get the hang of it. Understanding these elements from the start means you’ll be able to modify and manipulate just about anything in Adobe Illustrator, including shapes, lines, text, and more.
I didn’t really understand paths, anchor points, and handles for a long time, but once I did my whole design world opened up. So I’m hoping that by teaching you these elements early on, you’ll have a better sense of what Illustrator can do going forward in other tutorials.
As always, I recommend starting to use keyboard shortcuts as much as possible. They will really speed up your workflow! I’ll be using shortcuts in this post in parentheses to help you get acquainted with them. You can also grab my free cheat sheet with all of the shortcuts I think are most applicable to SVG design.
Watch the Video
Want a video walkthrough of this entire tutorial? Click the play button below! Read on for a complete written tutorial.
Bounding Boxes
Let’s open up the new file we made in my Adobe Illustrator Workspace Overview. Mine is 1000px x 1000px.
Select the Ellipse tool (L) and draw a circle by clicking and dragging your mouse. If you hold down the shift key while dragging, it will constrain your proportions to a circle.
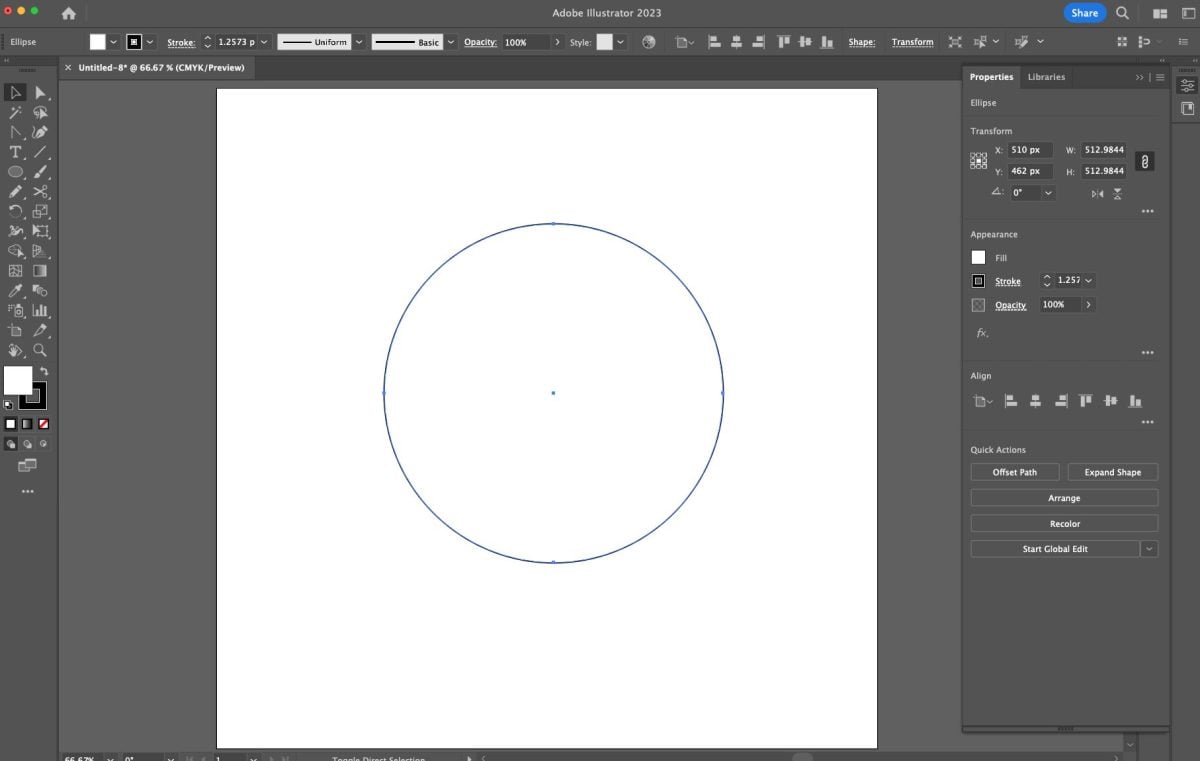
Before we get into paths, anchor points, and handles, select the Select tool (V). When you click on the circle, you’ll select the entire circle. You’ll also notice a box around the circle. This is called a Bounding Box. This is basically a rectangle that encloses your entire shape. You can use the bounding box to resize or rotate your shape.
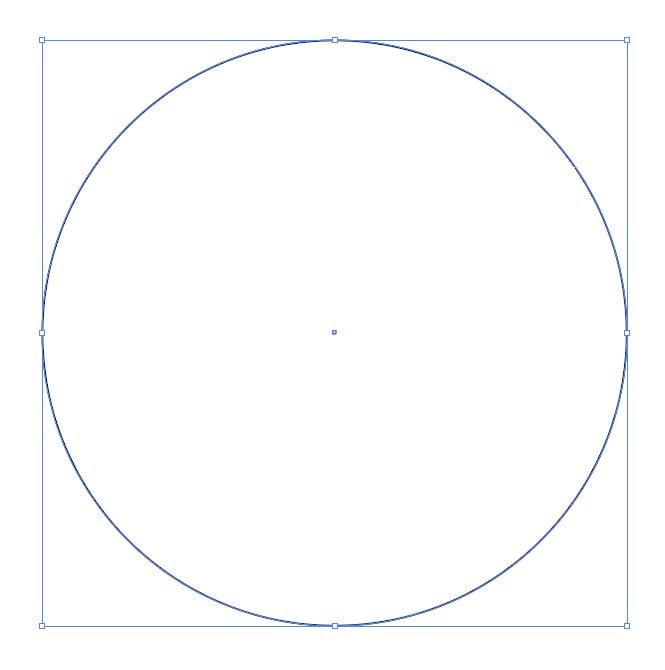
I just wanted to make it clear that a Bounding Box is different than all of the other elements we’re going to look at in this post.
Paths, Anchor Points, and Handles
Select the Direct Selection tool (A). This arrow allows you to select part of a shape vs. the entire shape.
Paths
Start by hovering over the line of the circle. You should see the word “path” in pink.

A path is basically a line in Illustrator. There are three types of paths:
- Open paths: A line with two endpoints.
- Closed paths: A closed shape with no endpoints, like our circle.
- Compound paths: Two or more closed paths. Compound paths are particularly important to designing SVG files, and we’ll be going into more detail about them in future tutorials.
With the Direct Selection tool (A), click and hold on a path and drag it around a bit.
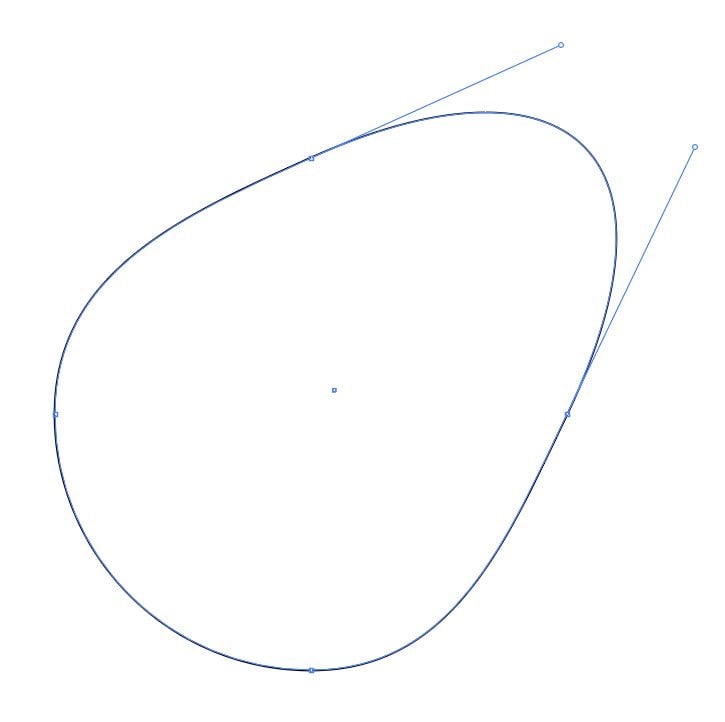
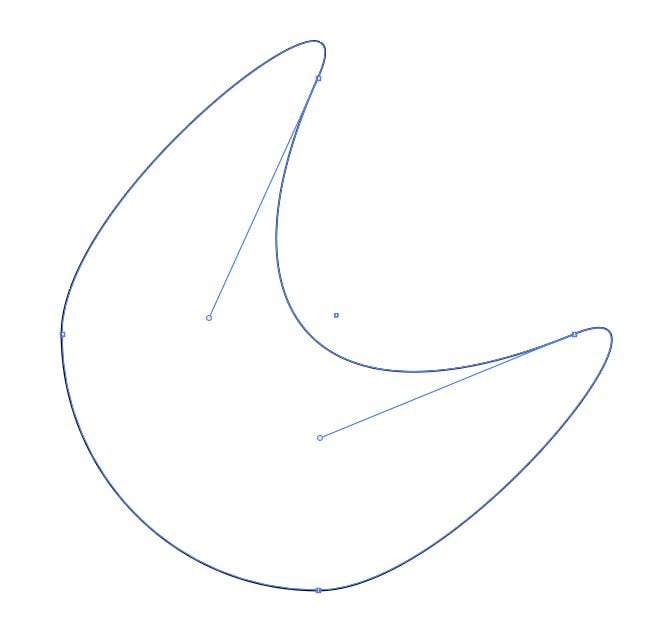
You can see how your circle warps as you move the path. This is one way to manipulate shapes. You will also see some handles (the lines coming off the sides of your shape) which we’ll talk about below.
Undo (Control+Z on a PC / Command+Z on a Mac) to undo until you have your circle again.
Anchor Points and Handles
I need to talk about anchor points and handles together, since they are inextricably related. This can be a bit tricky, but stick with me!
Basic Anchor Points
Select the Direct Selection tool (A). At the top of the circle you should see a tiny square. Hover over it and you should see the word “anchor.” That is an anchor point and it’s represented by a tiny square. Other folks might call these nodes or simply points.

With the Direct Selection tool (A), click and hold the top anchor point and drag it around a bit. You can see that you can make similar shapes as above.
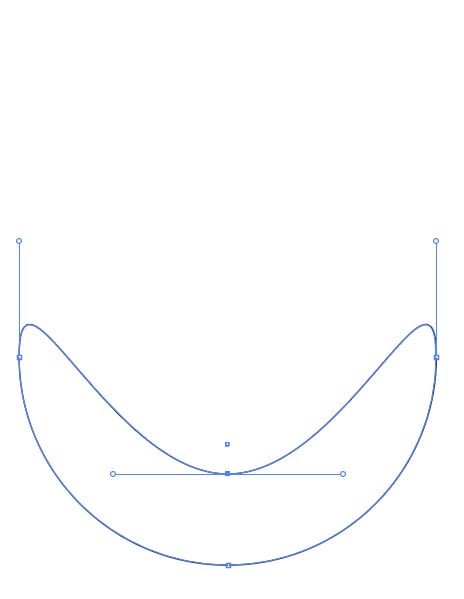
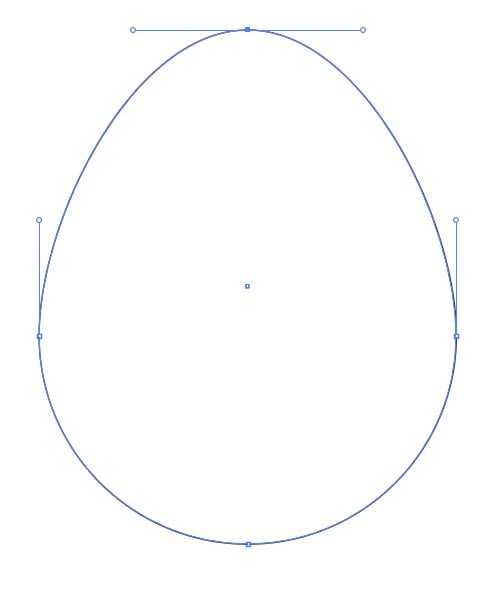
Basic Handles
As you move the anchor point around, you’ll also see lines coming off the anchor points, each with a circle at the end. They move and change as you move your anchor point around. Those are the handles.

In essence, anchor points are points along a path and handles control the curvature of the path at each point.
Types of Anchor Points / Handles
There are three categories of anchor points and handles. All of them are technically born out of the same anchor point, but depending on their handles, they will be:
- Smooth: these anchor points create a curved path on both sides of the anchor, like in our circle.
- Corner: these anchor points are straight on either side of the anchor, like in the corner of a square.
- Combination: this is where one side of the anchor point is a curve and one side is straight.
Let’s think about our circle. Our circle has four anchor points—one at the top, one at the bottom, one to the left, and one to the right. When you click on each anchor point with the Direct Selection too (A), you’ll see each of these anchor points has a set of handles that are pulled a set distance away from each anchor point. All of the anchor points have the same handles (you can’t see them all at once here just by the nature of how Illustrator has things selected), which is what creates the circle shape.
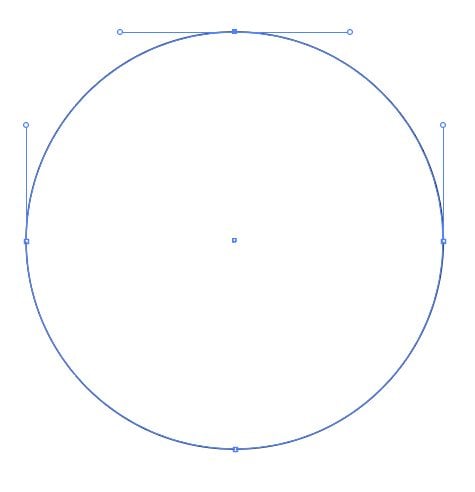
Select the Anchor Point tool (Shift+C).
Now simply click on one of the anchor points. It removes the handles and turns the smooth anchor point into a corner anchor point. And if you click on all four anchor points, you have a square (that is rotated 90°). Now all of the anchor points are corner points.
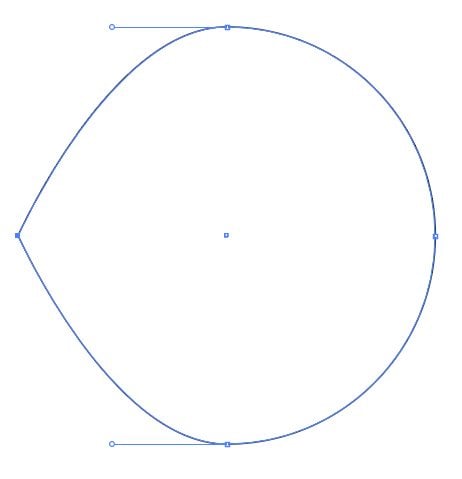
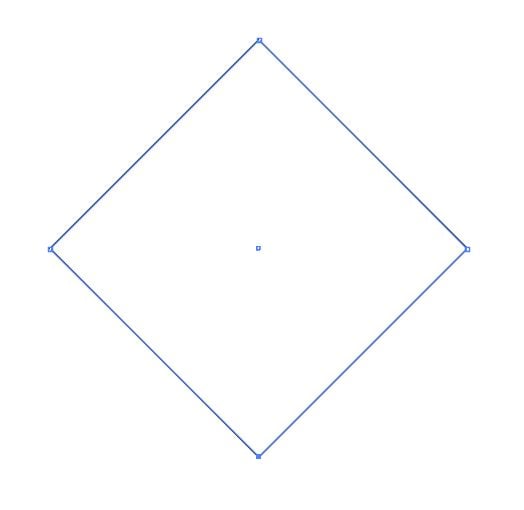
You can use the Anchor Point tool (Shift+C) to click and drag on those straight anchor points to try and pull them back into a circle. It’s a bit difficult to get exactly right (that’s why there’s a circle tool!) but you can see how you can go from a corner anchor point to a curved anchor point.
By using anchor points and handles, you can adjust the flow of each path to create all sorts of amazing shapes and images.
Manipulating Adobe Illustrator Handles
Length
Now let’s play around with the handles a bit more. Create another circle (L). Click on the top anchor point using the Direct Selection tool (A). You’ll see the handles pop out again.
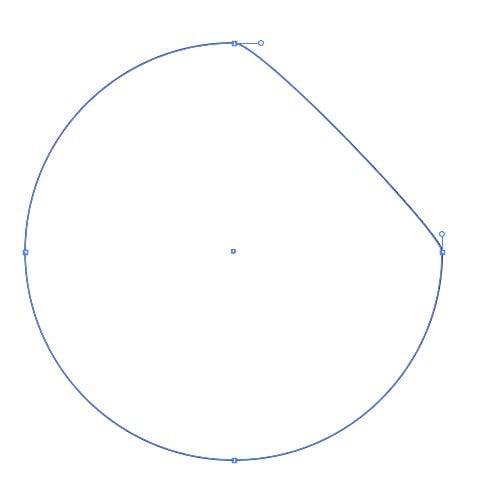
Pulling handles changes the length of the path. Click and drag the right handle toward the right edge of your artboard while holding the shift key. This will keep the handle horizontal and straight. You’ll see that your path gets longer and arc gets bigger.
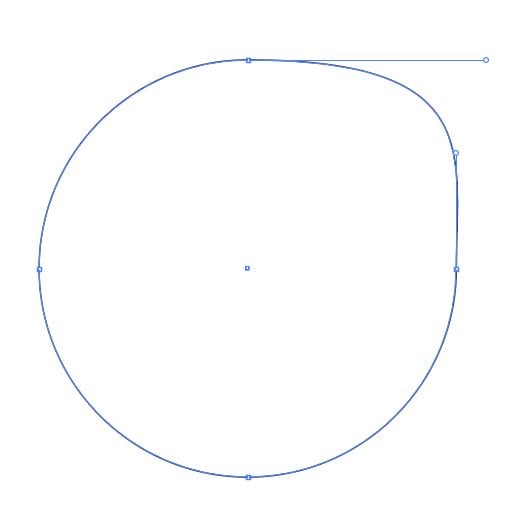
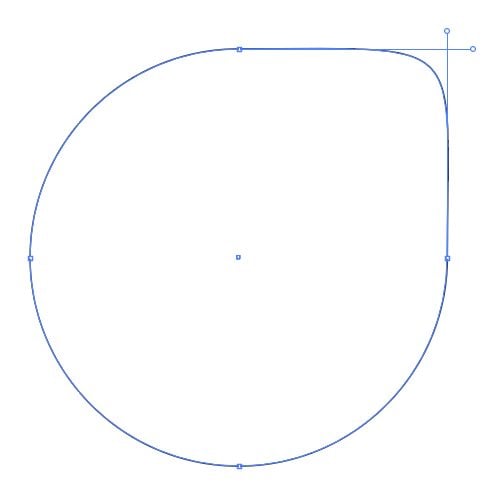
Click on the right anchor point and drag the top anchor toward the top edge of your artboard while holding the shift key. The arc will lengthen and pull up closer to a corner. Then pull both of the handles back toward each anchor point and you’ll see the length of the segment gets smaller. You can see how both handles affect the length of the path segment between the two anchor points.
Curves
Rotating handles creates curves. Start with your circle again (L), and then choose the Direct Selection tool (A). Click and hold the handle on the right side of the top anchor point and drag it in a circular motion above the anchor point. You’ll see that it creates a curve on both sides of the anchor point. The part of the curve above and to the right of the anchor point is being controlled by the now top handle, and the part of the curve below and to the left of the anchor point is being controlled by the bottom handle.
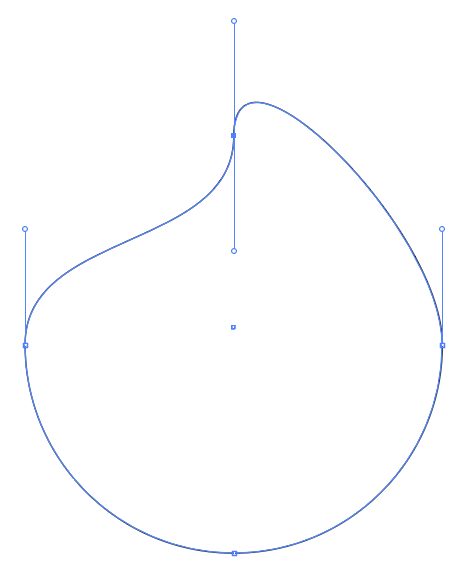
Play around with rotating each of the handles around the circle to create some interesting shapes.
Manipulating Individual Anchor Points
You’ll notice that a lot of times the handles on both sides of the anchor point move. This is to create smooth curves. But sometimes you don’t want to select both. All you need to do is hold down the Option key (Mac) or Alt key (PC) while clicking on a handle and it will select only the half of the handle you’re clicking on.
Adding or Removing Anchor Points
You can add or subtract anchor points by selecting the plus + or minus – while hovering over the path. Then click on the path to add an anchor point or click on an anchor point to remove it. This might be helpful if you can’t seem to make a curve do what you want or if you feel like you just have too many anchor points in an image. We’ll go more into this in future tutorials.
Homework
How about a little bit of homework! Play around with both rotating the the handles and changing the length of the handles. Start to be aware of how you can manipulate shapes using these elements. Try circles, rectangles, and the other shapes that are found by clicking and holding the Rectangle tool in the left-hand toolbar.
Right now paths, anchor points, and handles probably seems a bit nebulous—why are these things important? As we go through this series of tutorials, there will be a lot of times where I am “in the weeds,” manipulating paths, anchor points, and handles. We’ll do it when we’re working with text next week and we’ll do it when we start working to draw our own simple images with the pen tool later in this series, for example.
I wanted you to have a good foundation of what these three elements are so you can know what we’re doing when we work with them in upcoming tutorials.
Next week we’re diving into using fonts in SVG files in Adobe Illustrator! Fonts are way more fun than than this lesson was, I promise! We’ll learn how to create a few simple font-based SVG files. By the end of the lesson, you’ll have files you can cut on your cutting machine!


Leave A Reply!