Using Warp in Cricut Design Space makes it possible to turn single or multiple lines of text into a unique shape to create a one-of-a-kind design. Here’s how to use Cricut Warp, plus a few tips and tricks for making the most of this tool.
Cricut released a new tool for Cricut Design Space recently—Cricut Warp! This new tool allows you to warp both Cricut fonts and your system fonts in 24 pre-determined warp designs. This tool is available only on the Desktop version of Cricut Design Space. In today’s post, we’ll talk about using this new tool and what I personally like about it and a few things I find frustrating.
Visit my Amazon shopping list for everything you need to get started using your Cricut!
Available to Cricut Access Members
The Cricut Warp tool is only available for Cricut Access members. Cricut has been really pushing their Cricut Access subscription by adding more tools that are only available for Cricut Access members, like the Monogram Maker. Cricut Access members also have access to 300,000+ images, 700+ fonts, and other perks. At less than $10 a month, I do think Cricut Access is a good deal for most Cricut crafters.
If you don’t want to pay for Cricut Access, there are other software programs that allow you to warp text, including InkScape and Adobe Illustrator.
Accessing the Cricut Warp Tool in Beta
If you don’t see the Warp tool in your version of Design Space, you may need to switch to the beta version. To do so, go up to the menu on the left, click Settings, and ensure you have the Beta Application checked. Design Space will restart after you choose beta, so make sure you have anything you’re working on saved before switching.
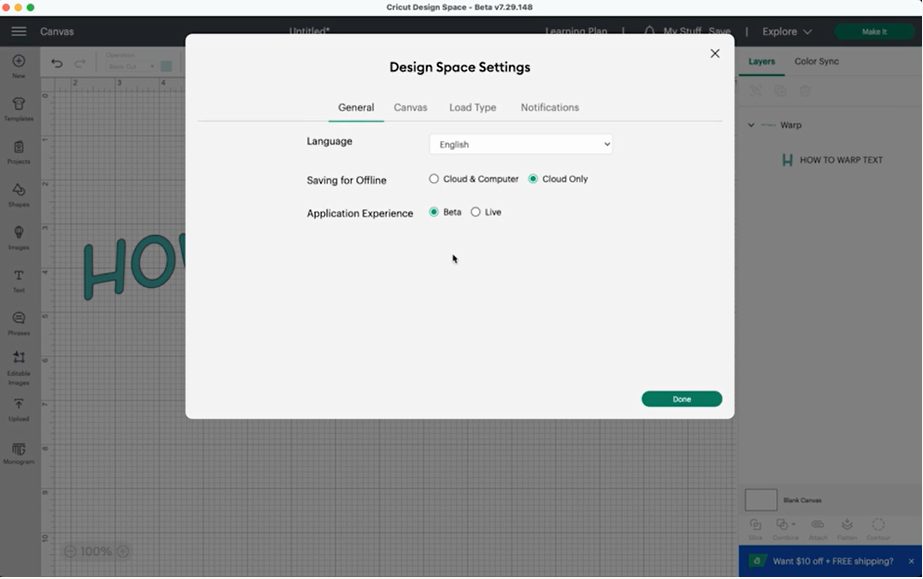
At some point this tool will be moved to the general feature set and you won’t need to have beta turned on to access it. That being said, I pretty much always run Design Space in beta because it allows me to see what’s new more quickly!
Warp in Cricut Design Space Video
Want to see this new tool in action? Check out my video on using this tool! Or read on for a written tutorial.
What is Cricut Warp?
The Cricut Warp tool allows you to change the shape of a text design in Design Space. You can warp both Cricut fonts and your own system fonts using this tool.
This tool expands the type of images you can make within Cricut Design Space, including cool retro designs that are really popular right now.
Where is the Warp Tool in Cricut Design Space?
On desktop (Mac and PC), the Warp tool is found at the top in the toolbar. It’s right in the middle next to Offset.

Cricut Warp Options
Here are the 24 different warp options in Cricut Design Space. You can see that some are better than others! Some of them are nearly unreadable, like the center one on the next to the bottom row.
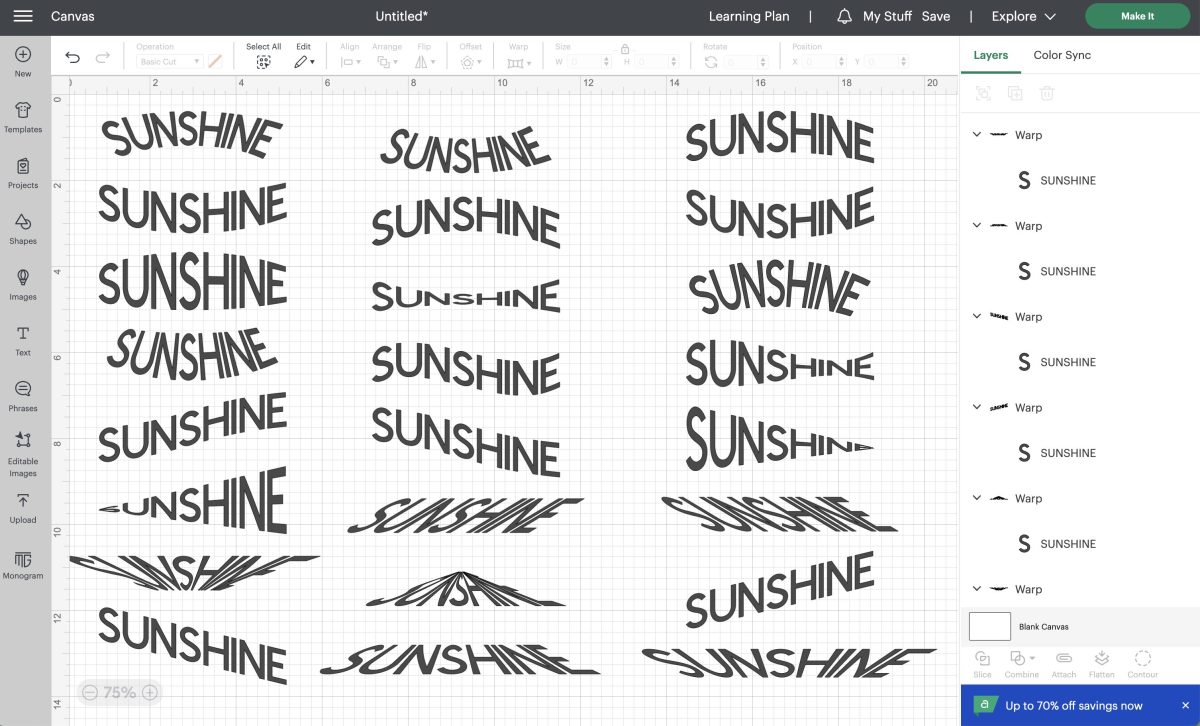
When I first tried out the warp tool, I was bummed that I couldn’t change the “amount” of the warp. Well, good news! That’s now an option! At the bottom of the warp selector, there’s a slider where you can choose just how much warp you’d like. This gives you a lot more control and feels more similar to other programs, like Adobe Illustrator.
It also depends on the word and font you are using. I find longer words look better. So do words in all-caps. And some fonts are way better than others as well—block letters are better than script.
Using Warp to Create a Retro Design
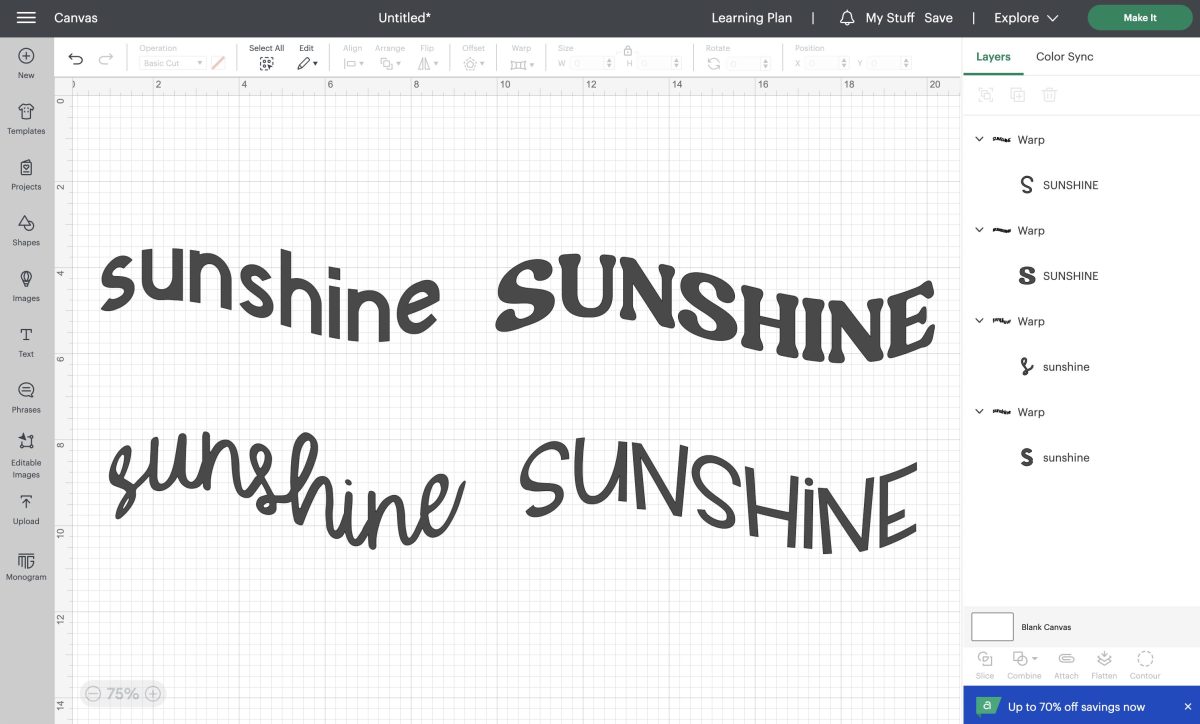
Let’s take a look at an example. Start by using the Text tool to add some text to your canvas. I added Sunshine three times in a single text box to create a popular retro design.
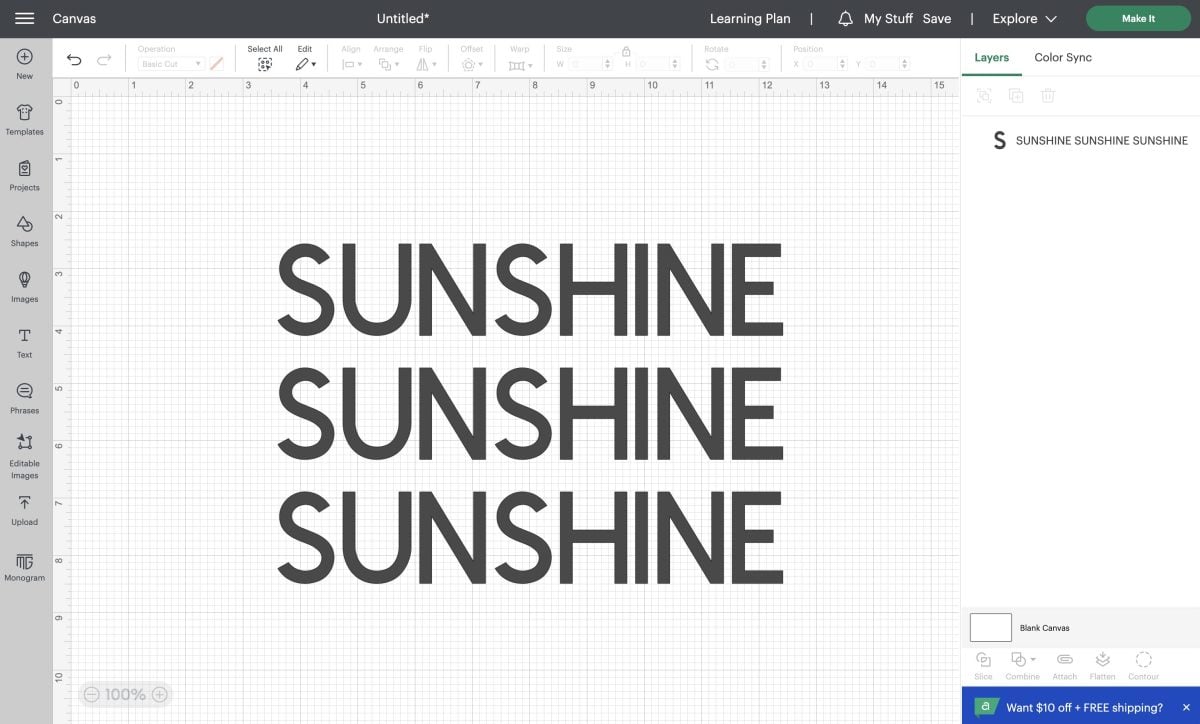
I then changed my font to something a bit more retro. The font I’ve used here is called Nellie. I use it a lot in retro designs in my shop!
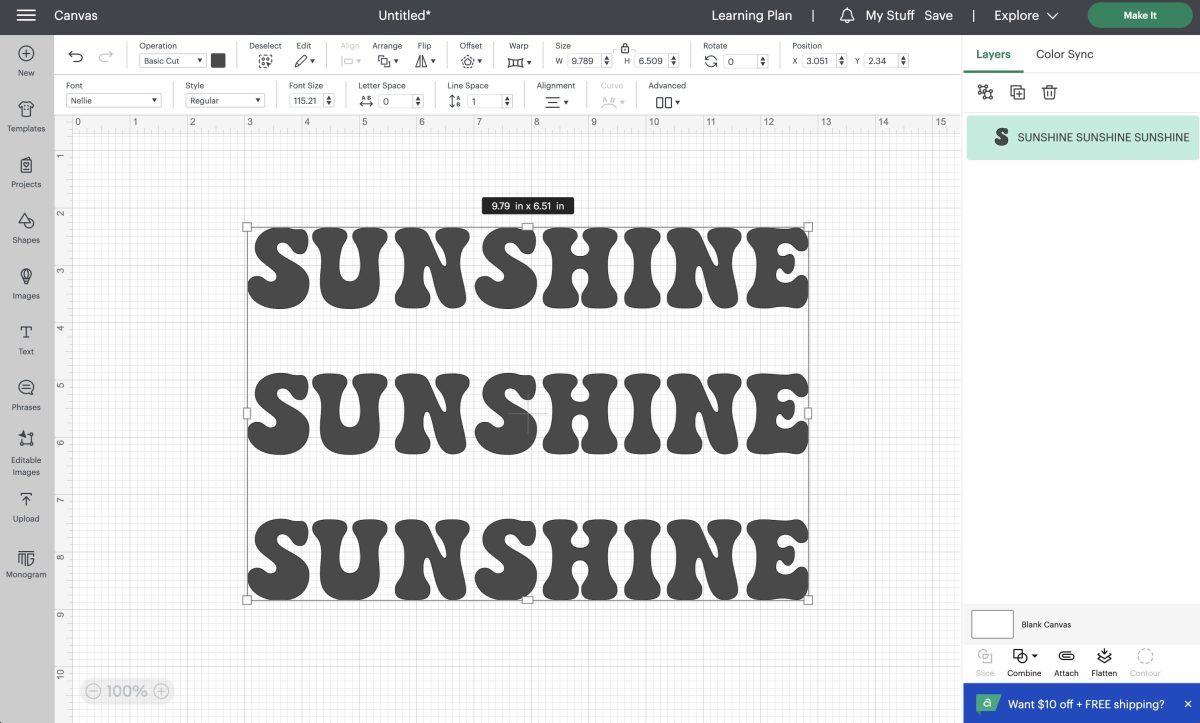
There was a lot of space between text so I decreased the amount of line spacing to -5, then selected the Warp tool from the top toolbar.
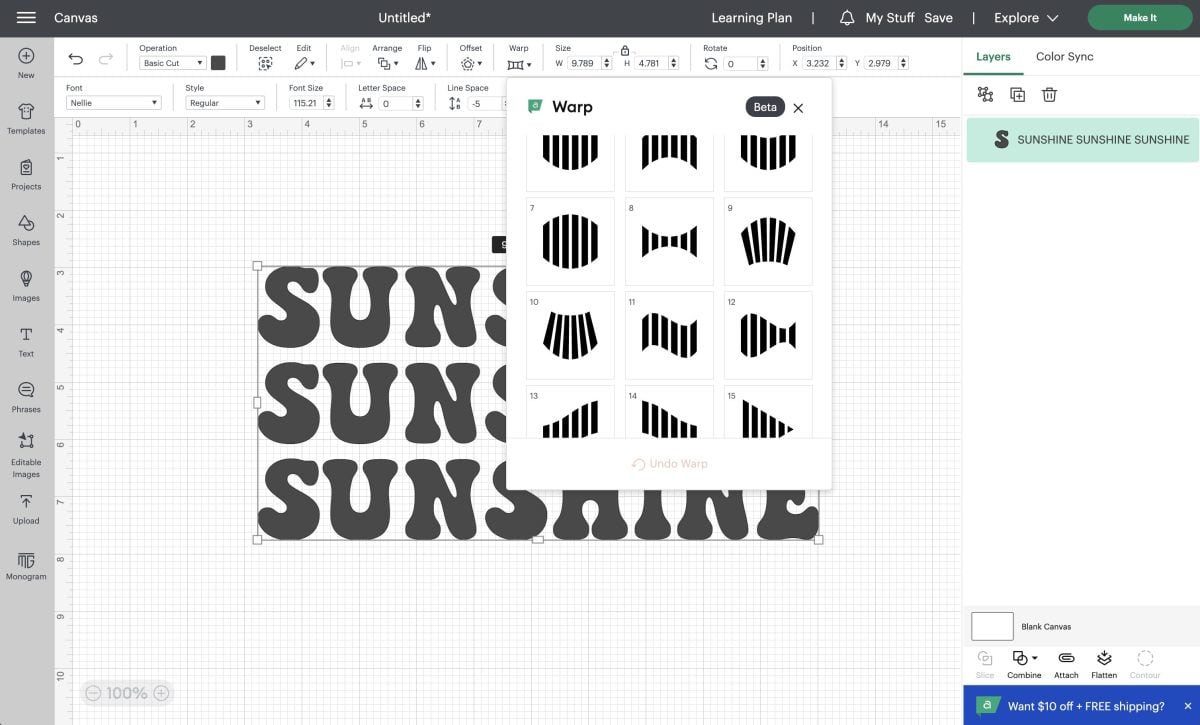
I selected this flag warp #11 (I really wish they had this same warp going in the other direction, too).
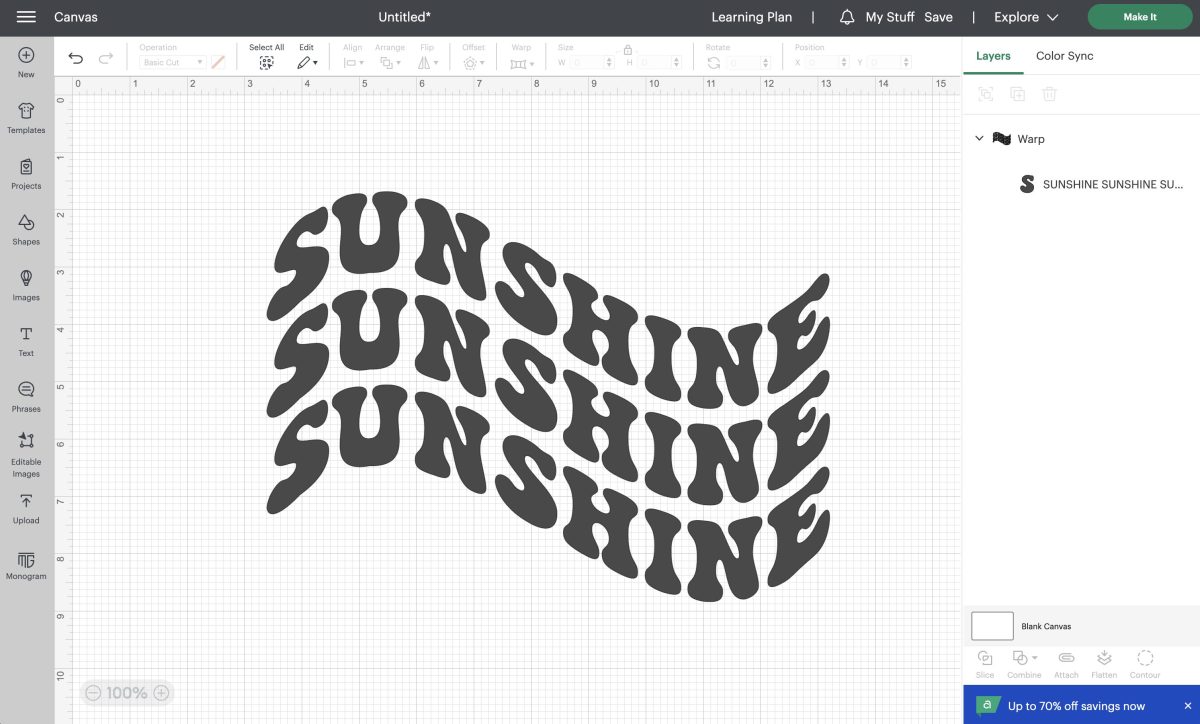
I thought the warp was a bit extreme (again, you can’t edit it), so I tried warp #13 and rotated it a bit to get this design. Not too bad.
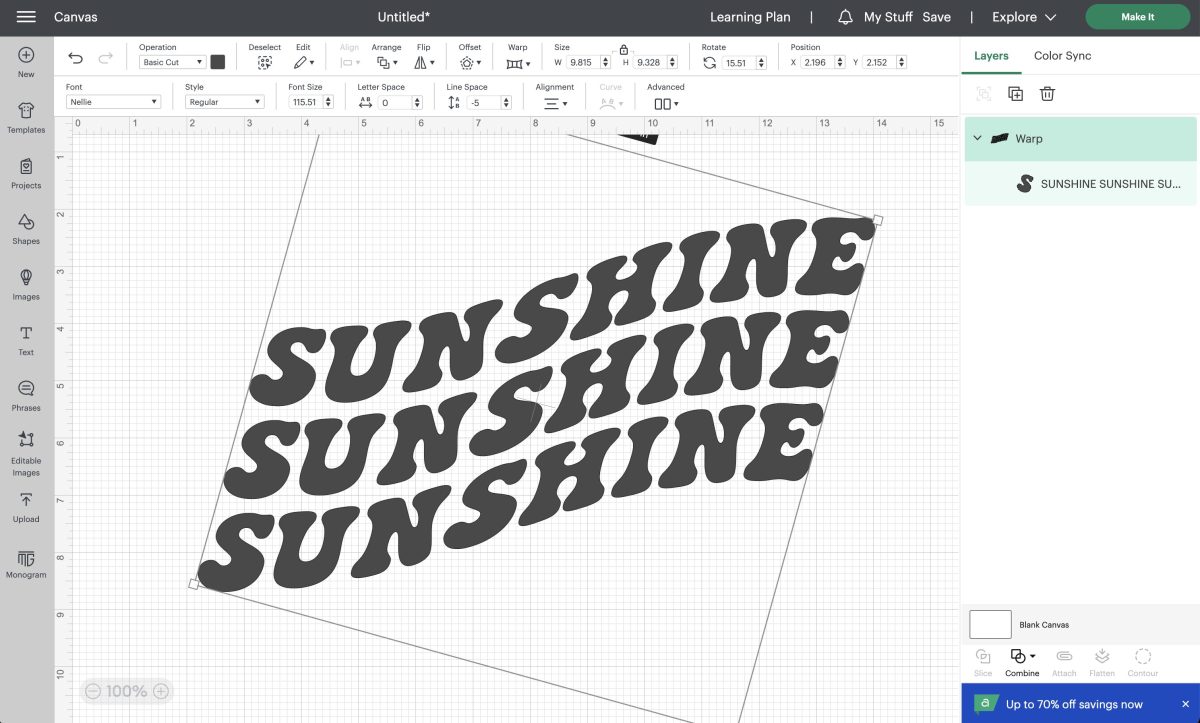
If you’re using a single text box like this, you can only use a single color in your design—there’s no way to contour this or edit certain parts of it individually. That can be limiting depending on what you’re creating.
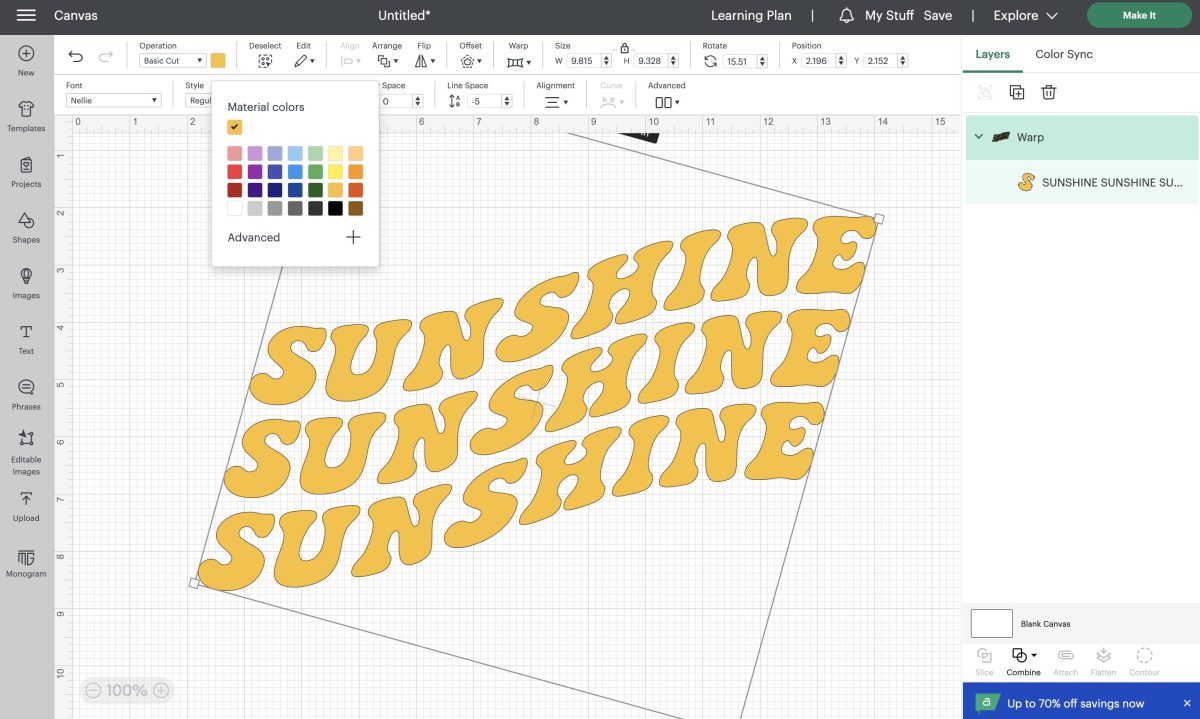
The Flatten tool is also grayed out, but you can make a Print then Cut file by going to Operation > Flatten.
One workaround to the colors issue is to add the words individually then warp. Then, select Align and Center Horizontally so everything is lined up correctly. You can see here that the warp is a bit different than it was when I had all three words in the same text box.
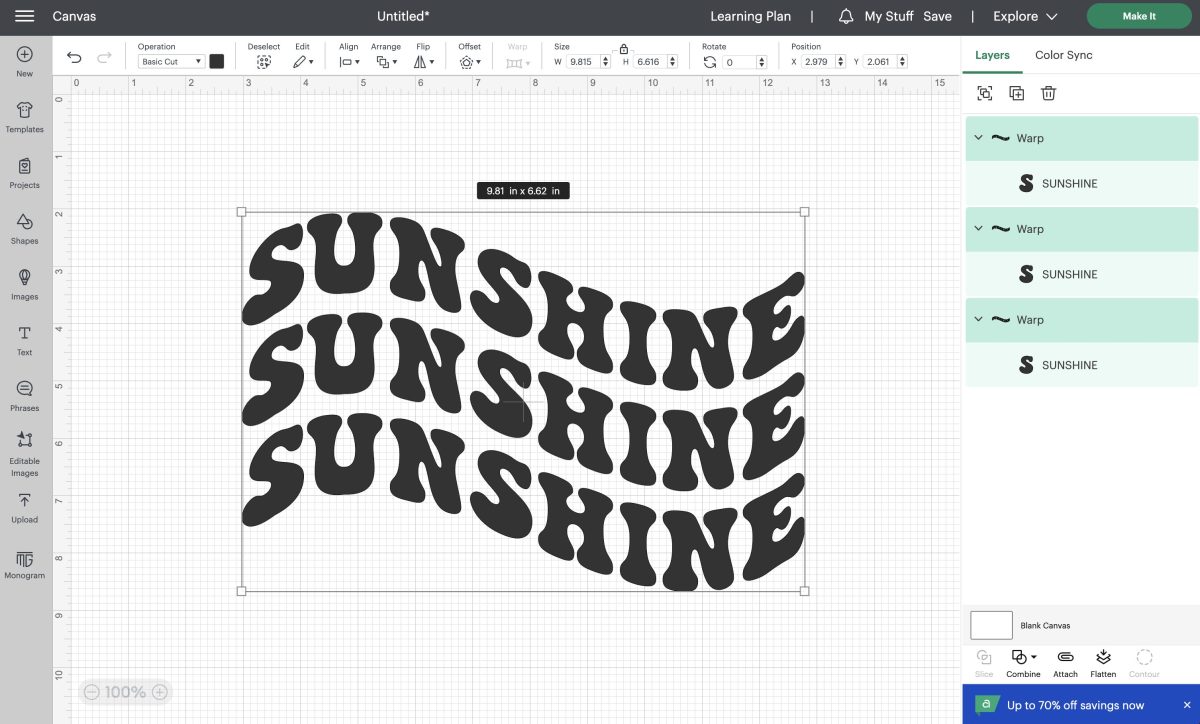
Now, you can change the colors individually!
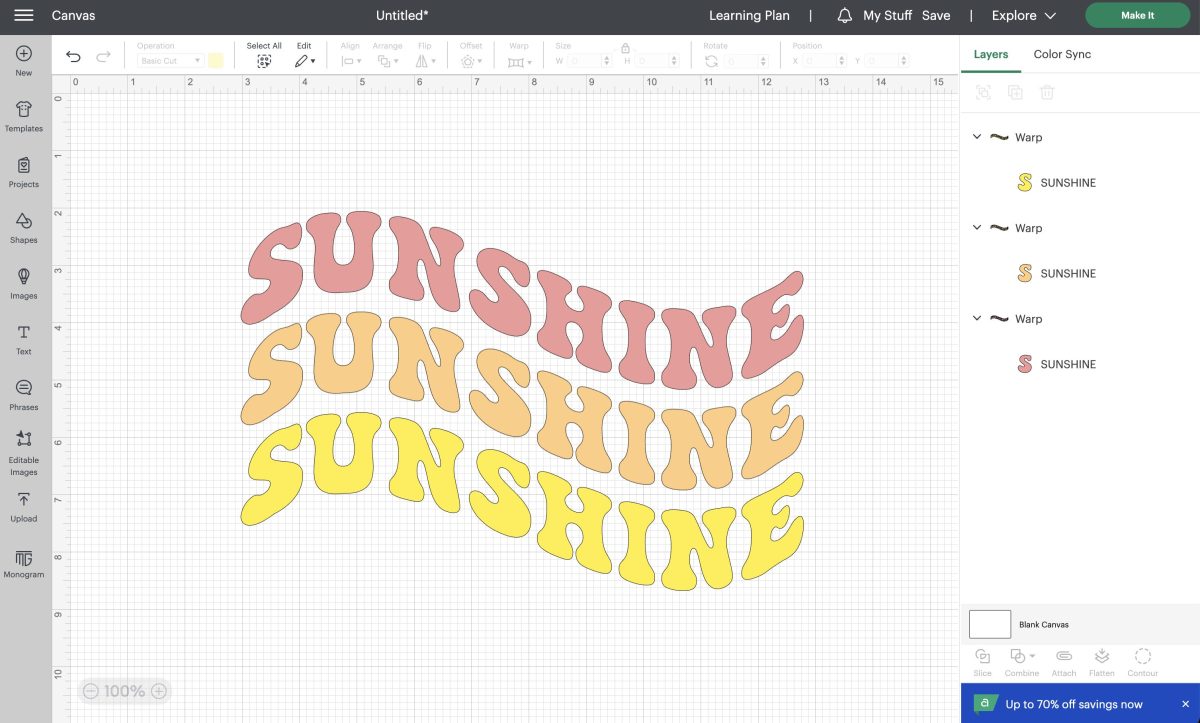
Overall, do I love the Warp tool? It’s…okayish. I think Adobe Illustrator is much more accommodating when it comes to creating designs and being able to control just how much Warp to use.
Frequently Asked Questions about the Warp Tool
Warp actually warps the text. All of the sizes are different, whereas with the Curve tool, the text remains all the same size, just on a curve.
In Illustrator you have much more control over just how much Warp you put on your design. Cricut Design Space is more limited.
Hope you learned a little more about the Warp tool today! Have questions? I’d be happy to answer them in the comments!


Comments & Reviews
Kristin Henry says
Can you warp a word with different color letters within the same word?
Cori says
Hi Kristen,
Unfortunately, at this time, that feature is not available :)
Linda says
I used the warp textfeature but it did not cut the text warped. Any idea why this didn’t work?
Cori says
Hi Linda,
The new warp feature in Design Space can be accessed by everyone to try, but you need to have Cricut Access to use the function for your design.