Have a Sawgrass printer? You can use Sawgrass Creative Studio to design and print sublimation designs of your own! Here’s a detailed look at how to use Creative Studio to create designs, as well as use the popular template feature to print just what you need!
Did you know that your Sawgrass sublimation printer comes with its own “ecosystem” of products? Not only do you get the printer and ink, but you also have access to their print and design software. They’re designed to “plug and play” nicely together (vs. a converted Epson printer, where you’re basically hacking together all the parts of the printing system).
Join our Sublimation Made Simple Facebook group for tips, tricks, support, and resources!
Sawgrass actually has two software programs—Print Manager and Creative Studio. You can read my Print Manger tutorial in my Ultimate Guide to Sawgrass Print Manager. In today’s post I’m discussing Creative Studio and all its capabilities.
Creative Studio is Sawgrass’ design software program. It’s similar to Cricut Design Space or Silhouette Studio in that it is designed specifically to work with their product. While it’s a fairly basic design program, it does have some unique features that make the sublimation printing process a bit easier.
Visit my Amazon shopping list to find everything you need to get started with your Sawgrass printer!
Logging into Creative Studio
I highly recommend that you schedule an appointment with a Sawgrass onboarding team member so they can install both Print Manager and Creative Studio on your computer (this is a free service!). That way it’s installed correctly the first time and they can troubleshoot any issues.
You will need to create a Sawgrass account (also free!) in order to access Creative Studio and log in each time.
Creative Studio is cloud based, meaning you do not install it to your desktop the way you do with something like Cricut Design Space. To Access Creative Studio, visit https://gocreativestudio.sawgrassink.com/home and enter your login credentials.
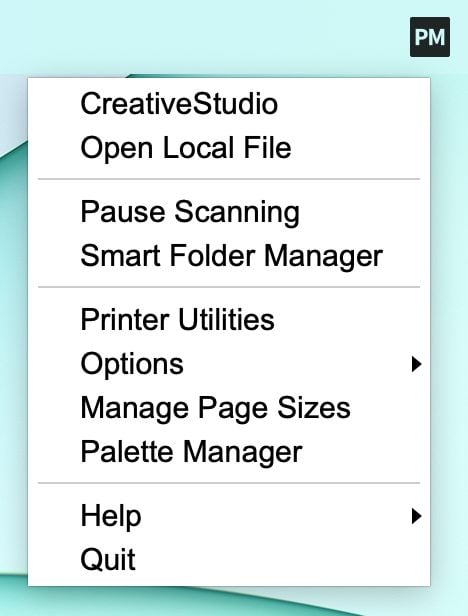
You can also access Creative Studio through your Print Manager. On a Mac, select the dropdown from your computer desktop, on a PC, use these instructions.
You’ll be directed to the homepage. I have a premium account and it looks like this:
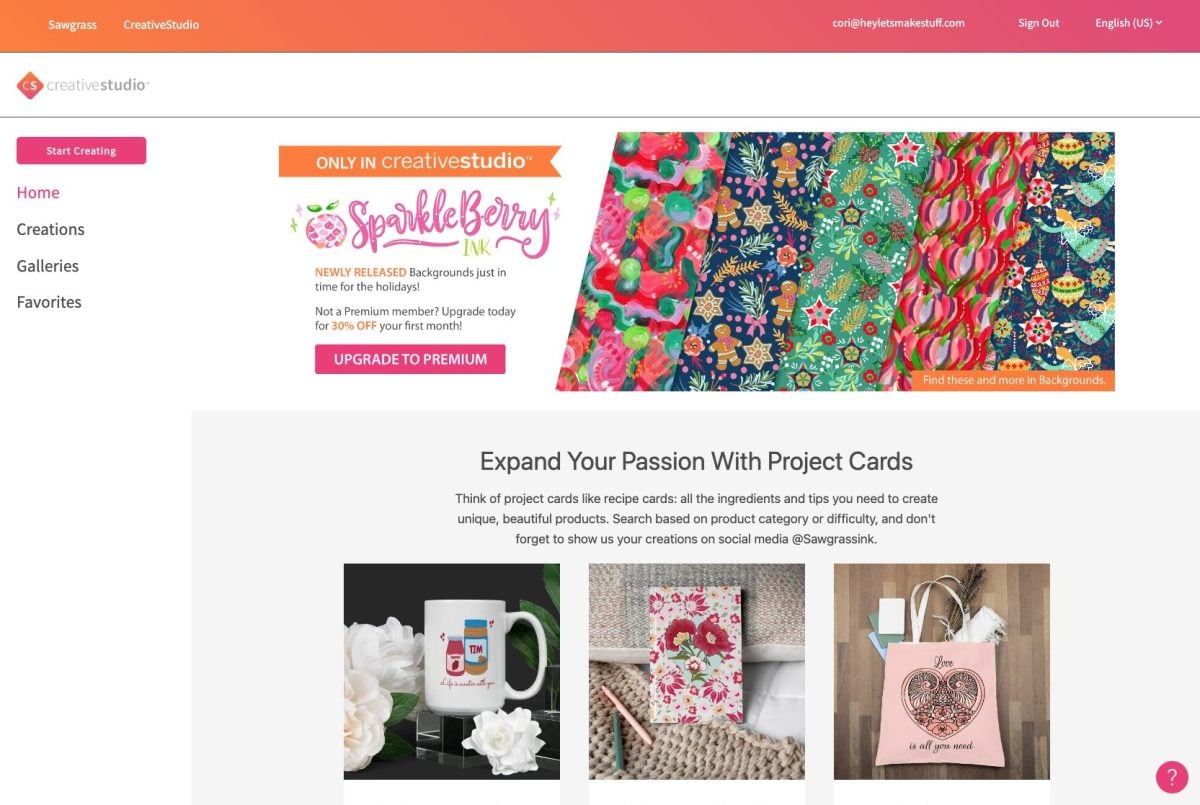
If you have a free account, the only difference will be a small button in the upper right to upgrade to the premium account. The premium account gives you access to designs, patterns, and more. It’s a similar concept to Cricut Access! If you want to purchase a premium account, you can use my code CORIXSAWGRASS30 for 30% off your first month!
Basic Layout of Sawgrass Creative Studio
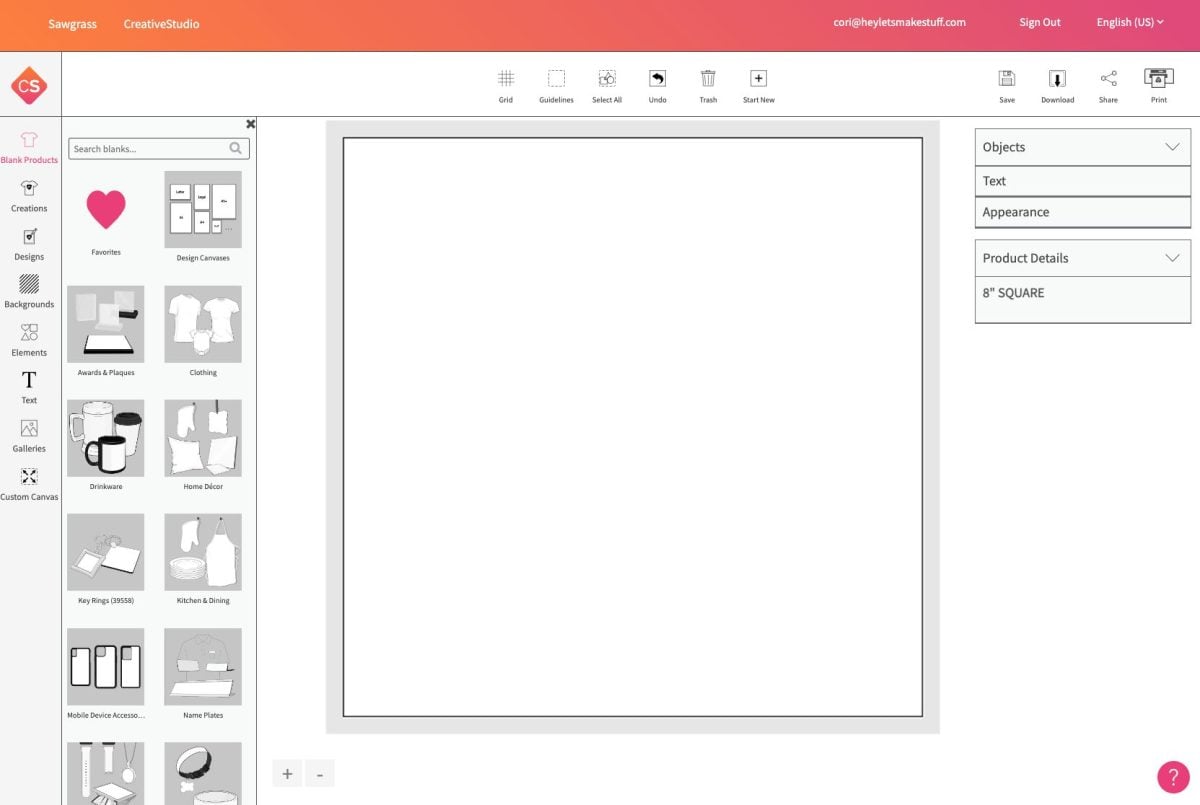
Let’s look at an overview of Sawgrass Creative Studio. To start, you’ll select the Start Creating button at the top left corner of the homepage. This will open up your project page. We’re going to call this your Canvas.
Left Sidebar
Blank Products: These are templates based on popular sublimation blanks (also known as substrates). For example, you can select Drinkware, then 11 oz. ceramic mug. This will open up a template, which is sized just right for printing on that product.
Pro tip: If you want to create a design that prints on an 8.5″ x 11″ piece of paper, you can choose that size under Design Canvases. I find it easiest to search for the number “11”, find it, and then favorite it by clicking the heart. This makes it easy to create a design on the size paper standard to your printer.
Creations: This is where your final designs are saved. You can create folders to organize your designs for easy access in the future.
Designs: Under My Designs, this is where you can upload PSD files for printing. You’ll also see a number of free and paid (premium) designs under this tab. The graphics are organized by category. Note that you’ll upload JPG/JPEG and PNG files in the Galleries tab.
Background: Creative Studio also has a number of free and paid design backgrounds you can use for your sublimation printing. Anything from animal prints to seasonal designs and more!
Elements: This is similar to clip art or images. There are both free and paid options for your designing needs!
Text: Here you can work with fonts that are already in Sawgrass CreativeStudio, or you can upload your own fonts (TTF or OTF).
Galleries: Upload your JPG/JPEG and PNG images here to add to designs (lots of images from design marketplaces like Etsy and Design bundles are these types of files). If you want to upload a PSD file, you’ll do that under the Designs tab.
Custom Canvas: If you have a unique item size, this is where you’ll set that up. You can choose to size in millimeters or inches.
Top Bar Tools
At the top of the screen, you’ll see some basic tools, like adding a grid to your canvas, selection and trash tools, as well as saving and downloading files. These are all basic functions that should be familiar to you if you’ve used a design program.
Right Sidebar
On the right are some options, including Objects, Text, Appearance, and Product Details. These will change depending on what you have selected.
How to Use Blank Product Templates
Sublimation products come in a range of types, shapes, and sizes. Creative Studio has tons of these substrates built into their software so it’s easy to create prints for just about any product you might want to sublimate.
Let’s say we wanted to create a mug. Click Drinkware and choose your mug. You’ll see actual brands, as well as more generic versions. I chose a 15oz ceramic mug. You’ll see the mug on your canvas and you’ll see those product details on the right, including suggested heat press settings.
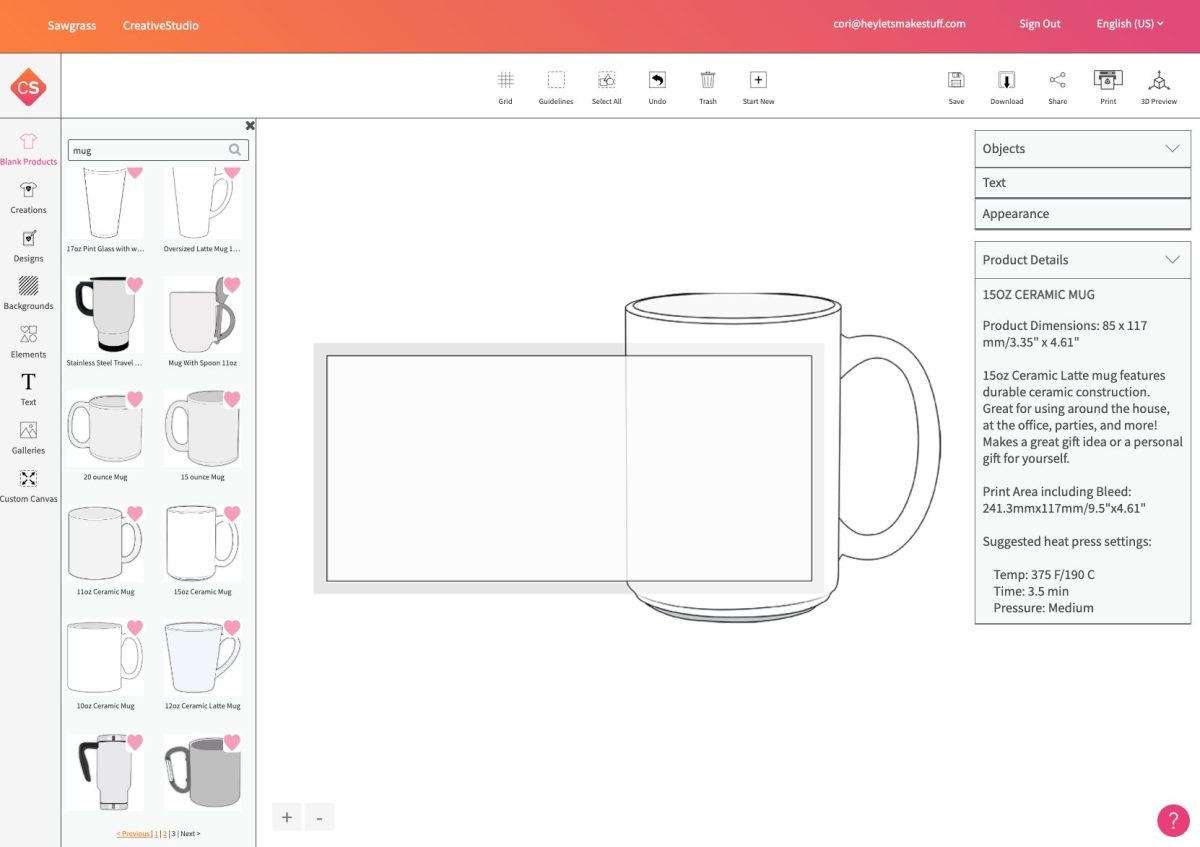
From here, you have two options depending on the type of file you have. If you have a PSD file, upload it in the Designs tab. If you have a JPG/JPEG or PNG, upload it in the Galleries tab. I have a PNG, so I’ll use the Galleries tab.
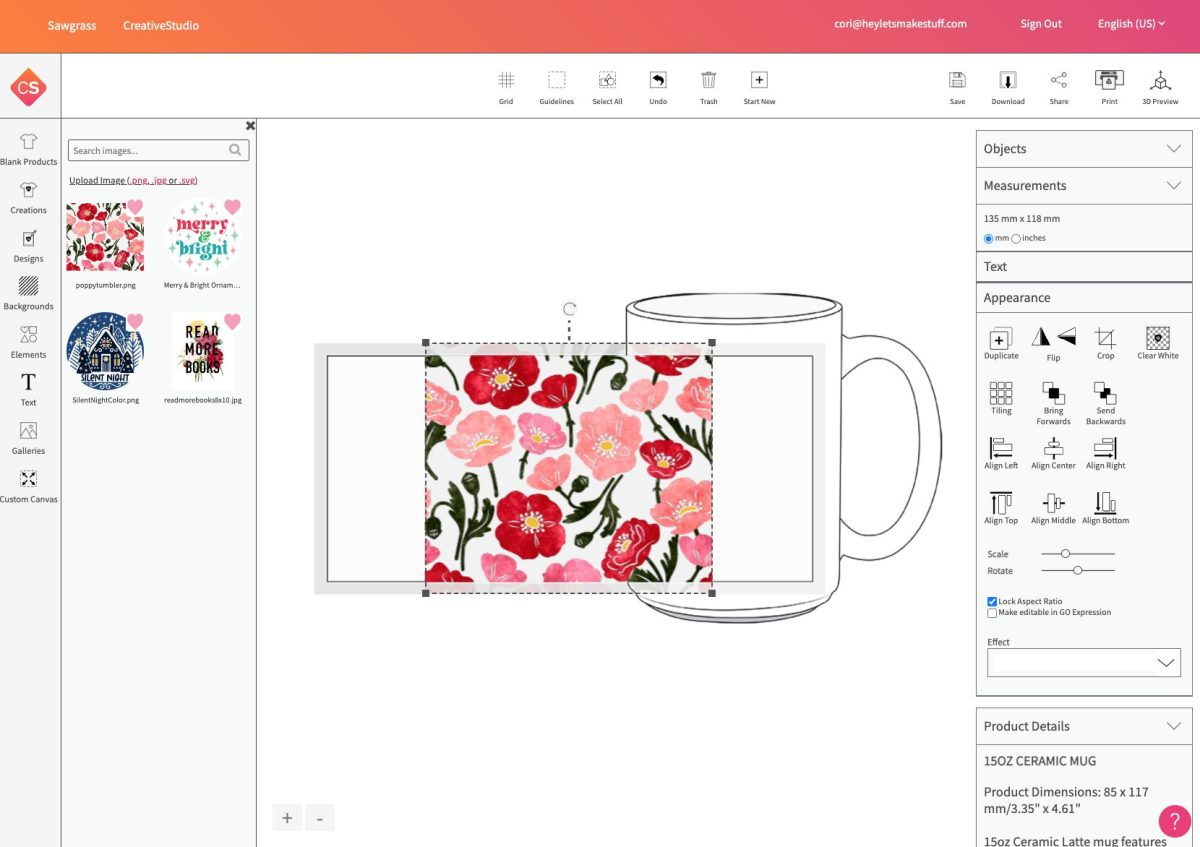
You can see that the design doesn’t fit. You can click the handles in the corners of the image to resize it to fit your template.
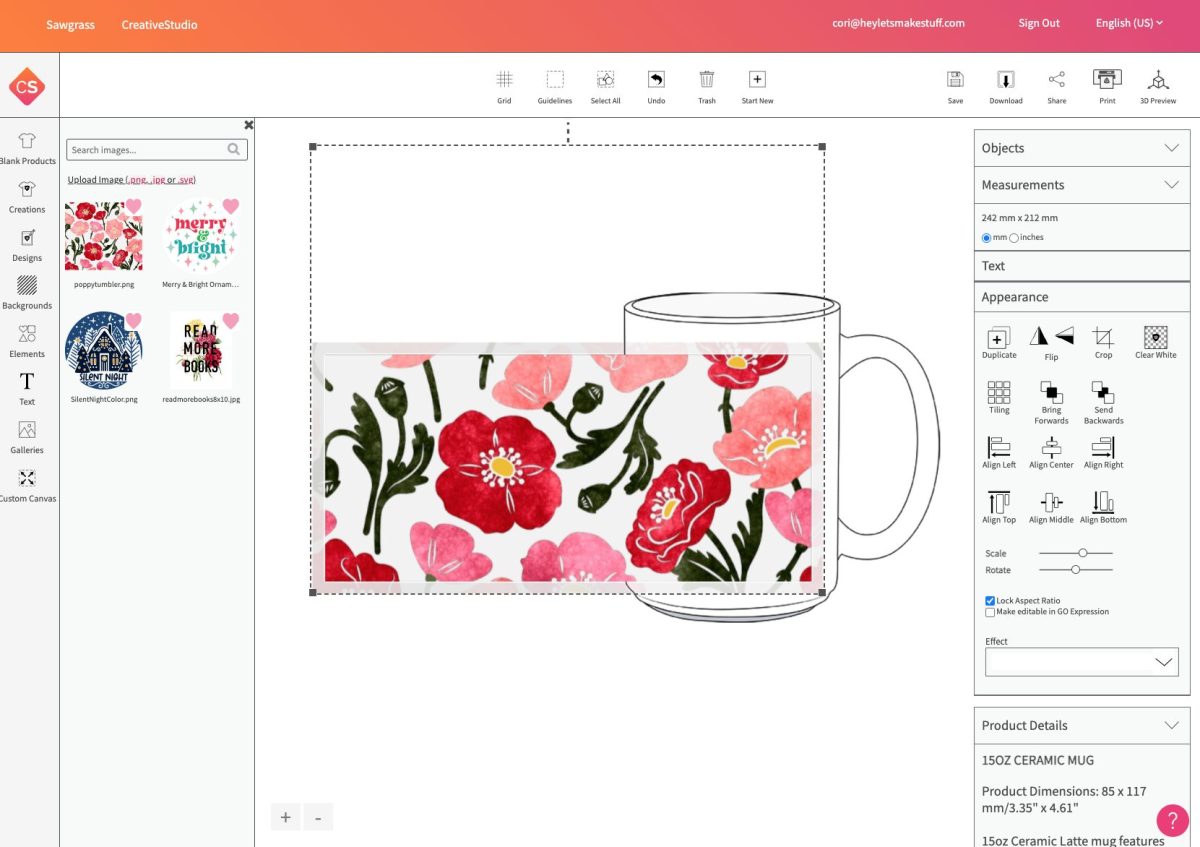
You’ll also see you have more options in your sidebar.
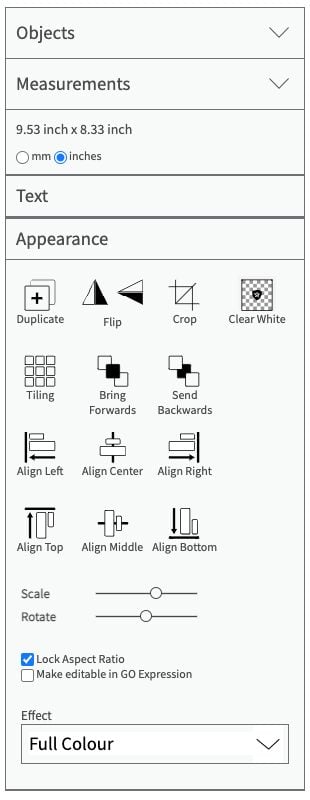
You can see the measurements and change the increments to inches if you’d like. And hen there are quite a few options that are pretty standard to most design programs, like aligning and flipping your images. A lot of these only work if you have more than one image on your Canvas.
One important one you might want to note is Clear White. If your image has a white background this tool will erase that background and make it transparent. This is helpful because some designs have huge white backgrounds and you can’t seem to resize them to fit your template. Just clear the white and the image will be much easier to work with.
Once you’ve finished your template, you can click Print.
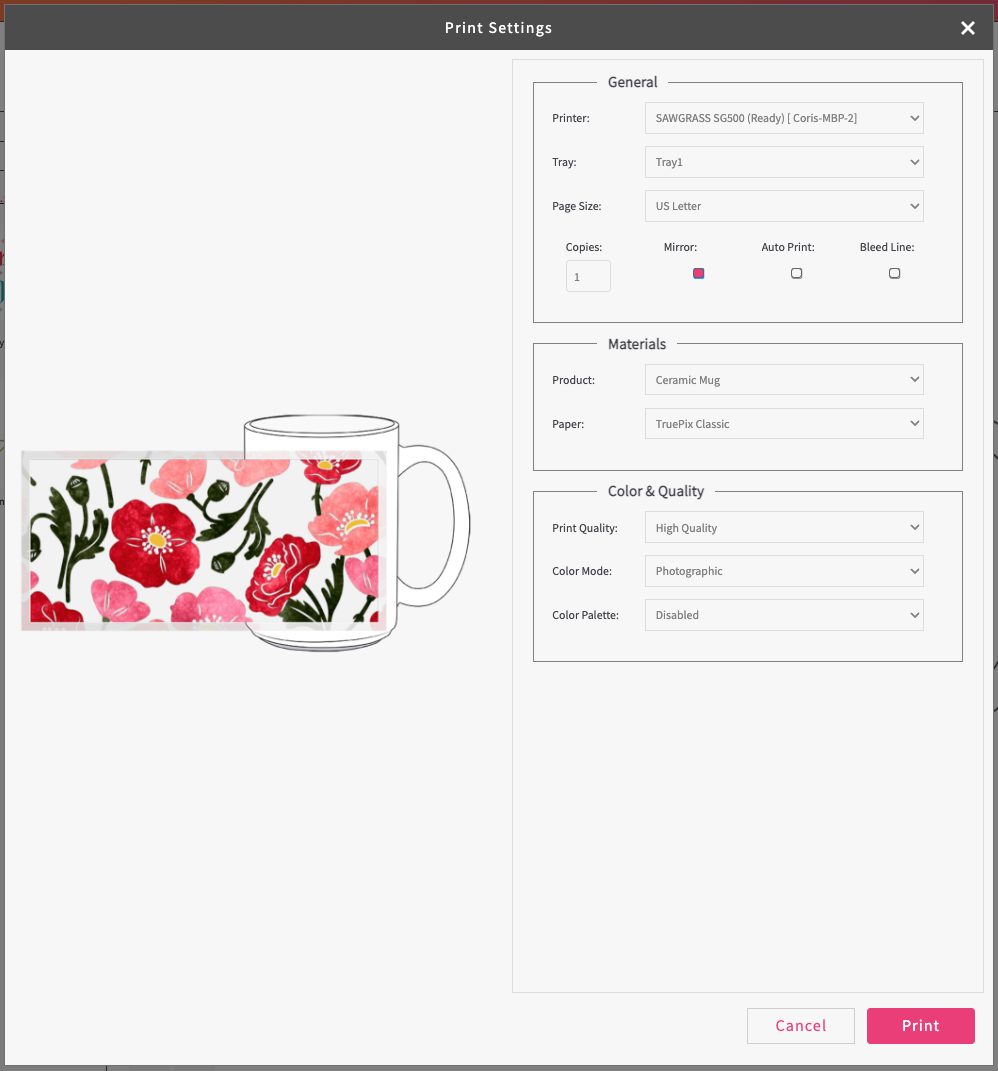
This will open up the Creative Studio print options. If you’re using a template, everything should be automatically selected for you. But check over the settings anyway to make sure they look right.
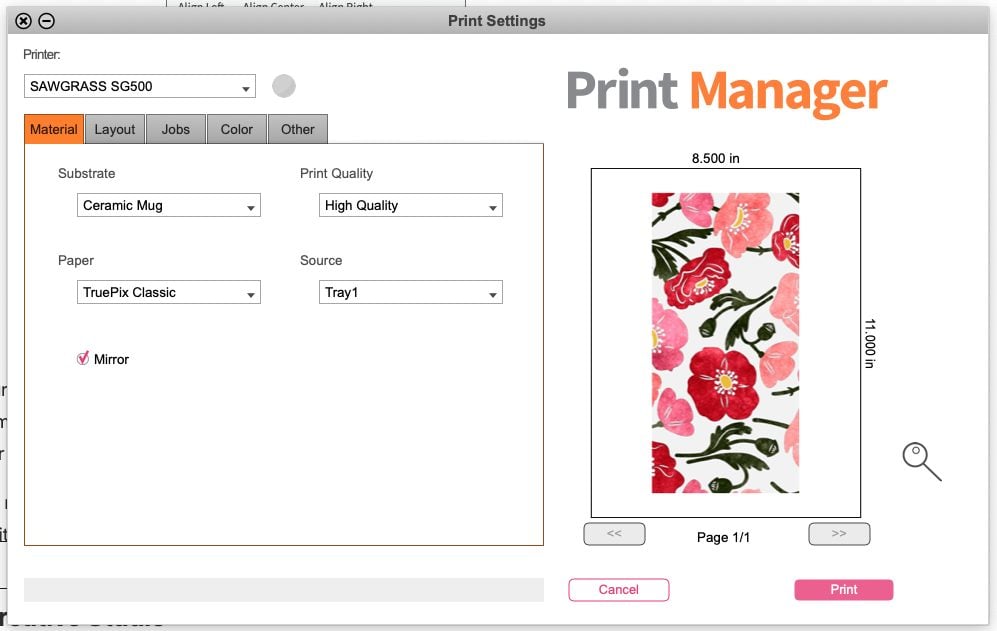
When you click print, this will actually open Print Manager (sometimes it takes a while—be patient!). Again, double check your settings and click print to send the image to your Sawgrass printer. Again, I have an overview of Sawgrass Print Manager if you need more help with that software.
How to Create a Custom Canvas
If you need to create a size that doesn’t exist in the Blank Products tab, you can create a custom size. This is especially useful if you are sublimating onto something that isn’t a standard size. For example, I like using the PYD Life blanks from Amazon, and sometimes the sizes of those blanks are a bit different than standard sizes.
Important: You can’t save a custom canvas! So you’ll have to repeat this process every time you want to do a new print.
Let’s say we are making their metal mason jars. The size is 3.4″ x 7.8″. So let’s create a custom size for our image.
First, select Custom Canvas in the left sidebar.
In most cases, you’ll use inches, rather than millimeters. I’ve selected that above on the right. Enter the sizes into the Width and Height fields, then select Create. You canvas will now look like this:
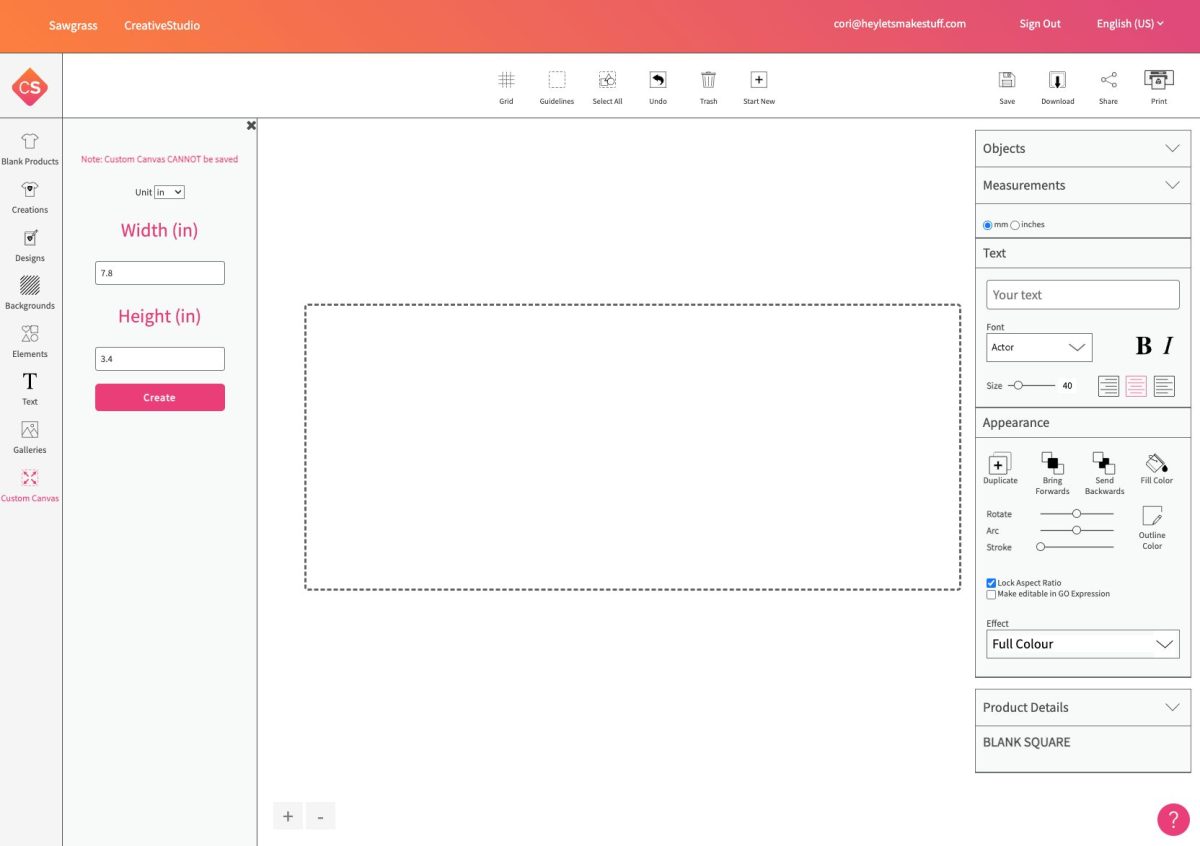
Now you can use this like any other template. I uploaded a rainbow design for it.
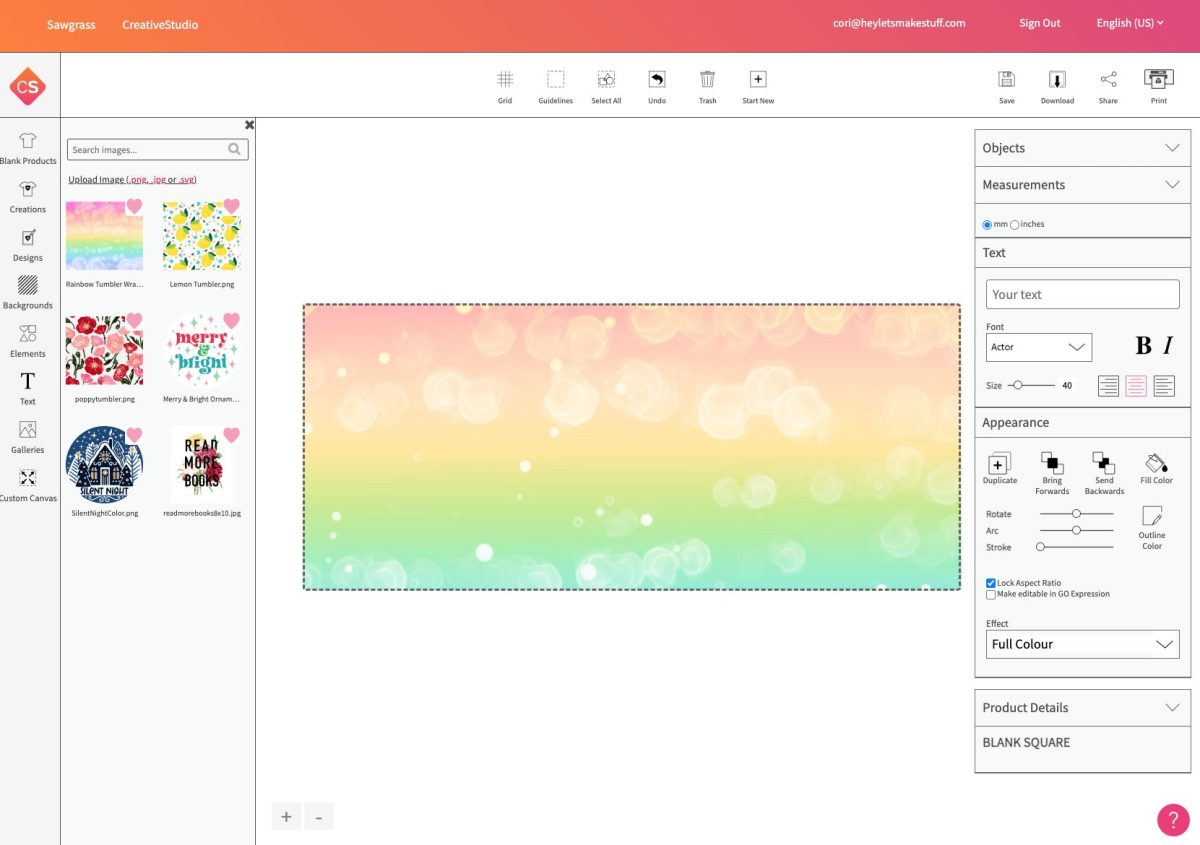
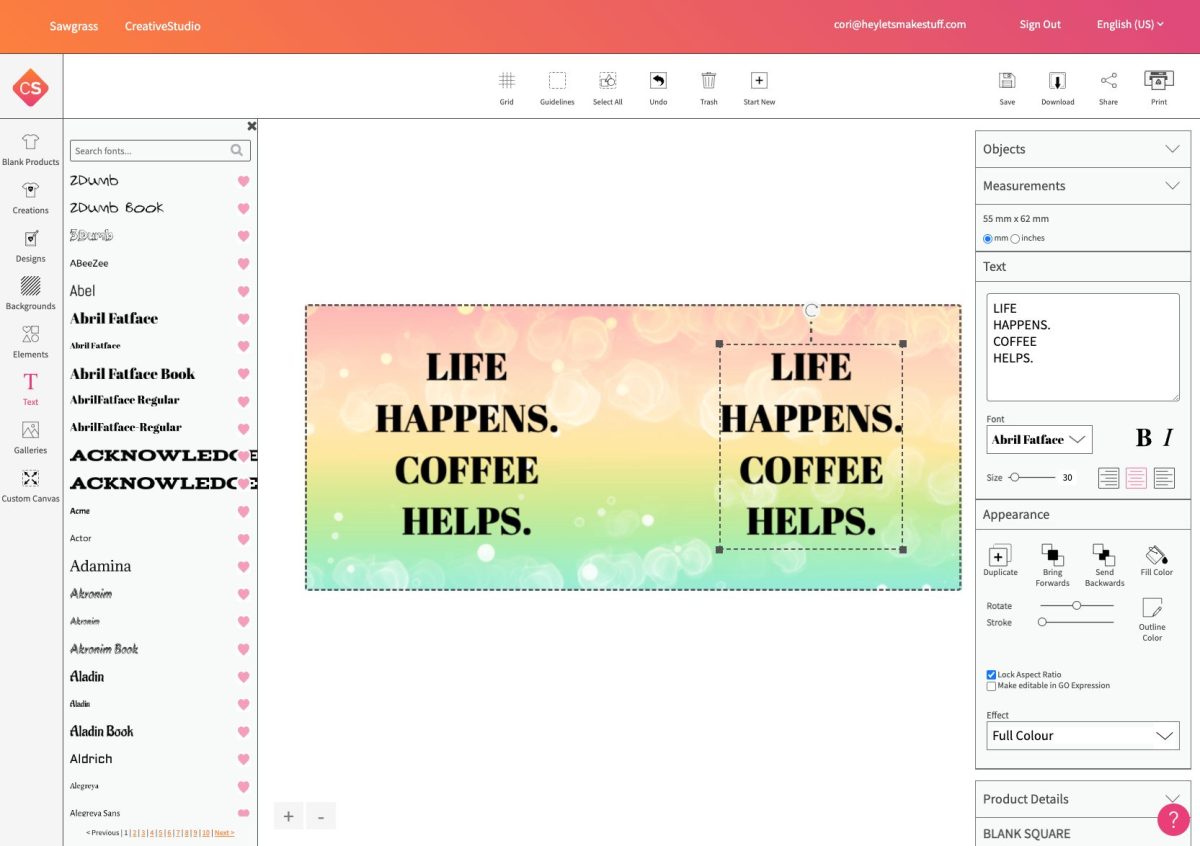
And then used that Text tool to add a funny saying to each side of my mason jar in Abril Fatface, which is a font in Creative Studio.
Once you’re happy with the way your project looks, it’s time to print!
Now it’s time to take your sublimation print and add it to your substrate. If you need additional help, be sure to check out my Ultimate Guide to Sublimation Printing and Crafting.


Leave A Reply!