Make all sorts of stickers using your Cricut Maker or Explore and the offset feature in Cricut Design Space! Learn how to turn ANY image into a print then cut Cricut sticker with this fun tutorial.
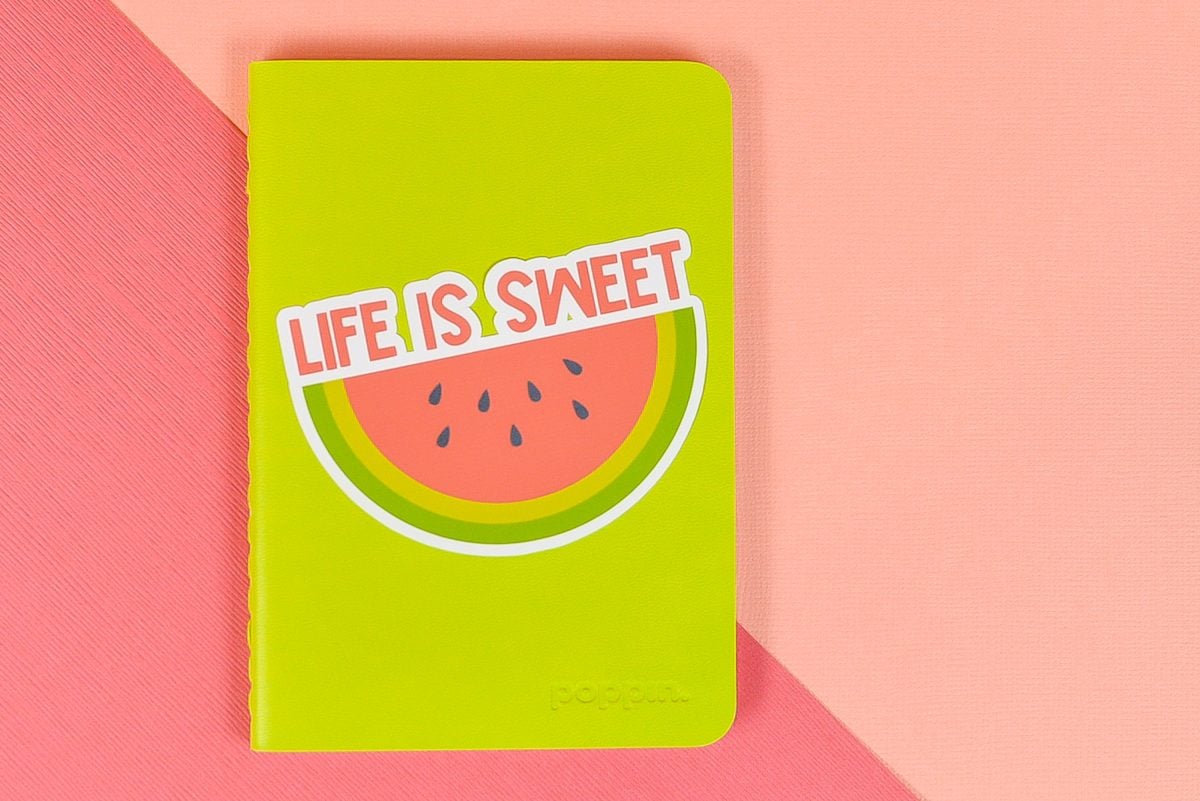
Have you made stickers with your Cricut yet? In today’s tutorial, I’m going to go over how to turn ANY image into a sticker that you can cut using your Cricut Explore or Maker!
With the recent addition of the Offset Tool to Cricut Design Space, creating Cricut stickers is even easier. I know a lot of newer users can be intimidated by Print then Cut as well, and making stickers is a great place to start!
Here’s what we’re going to cover in today’s post:
- Creating a sticker using the Cricut Image Library
- Creating a sticker by uploading an image
- Creating a sticker by uploading a photo
- Creating a sticker by uploading a pattern
- Using Print then Cut to make stickers
Stop pulling your hair out and start creating confidently with your Cricut! Finally understand how to use your Cricut with my Learn Your Cricut eBooks!
Creating a Cricut Sticker Using the Cricut Image Library
Let’s start with using an image from the Cricut Image Library. You can use basically any image you’d like to make stickers using these methods—today my theme is watermelons!
Start by clicking Images on the left side of the Canvas and searching for “watermelon.”
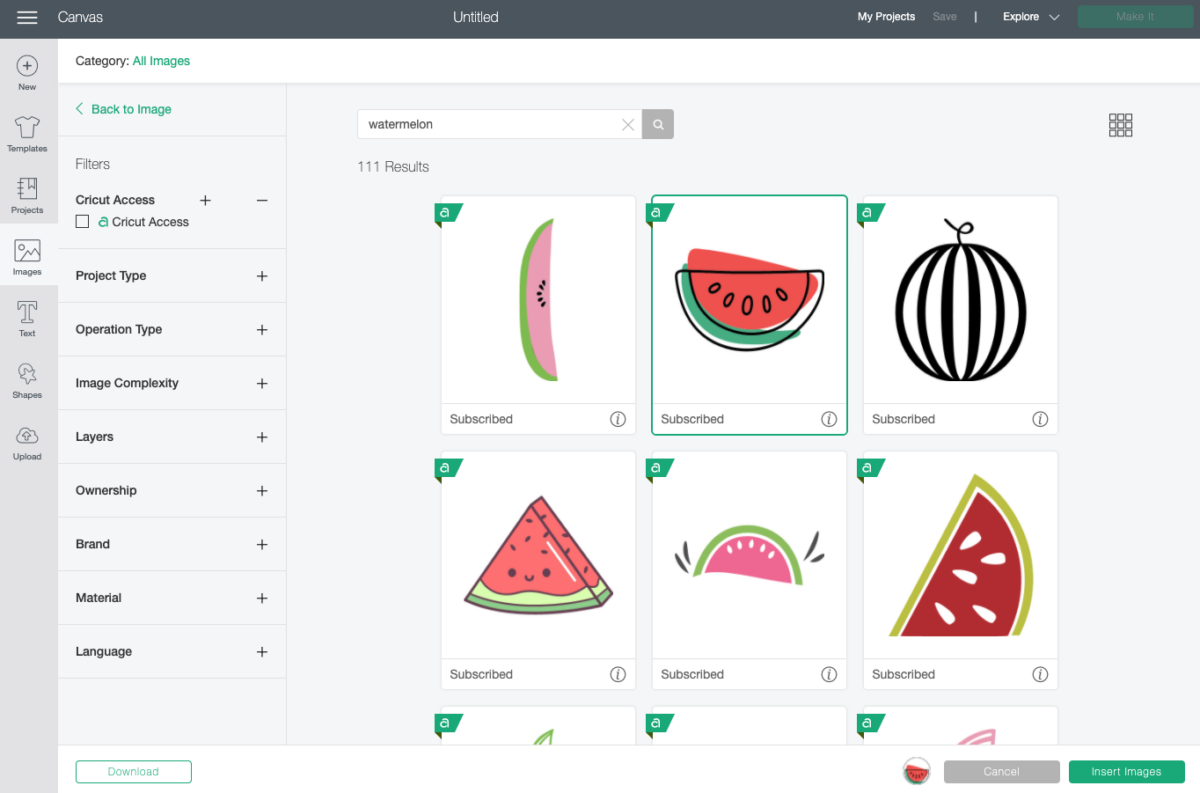
Select the image you’d like to use and insert it onto your canvas. Mine is a cut image (see how it says Basic Cut for each layer on the right) but you can also use a Print then Cut image if you’d like. If you use a cut image, you can change the colors if you’d prefer.
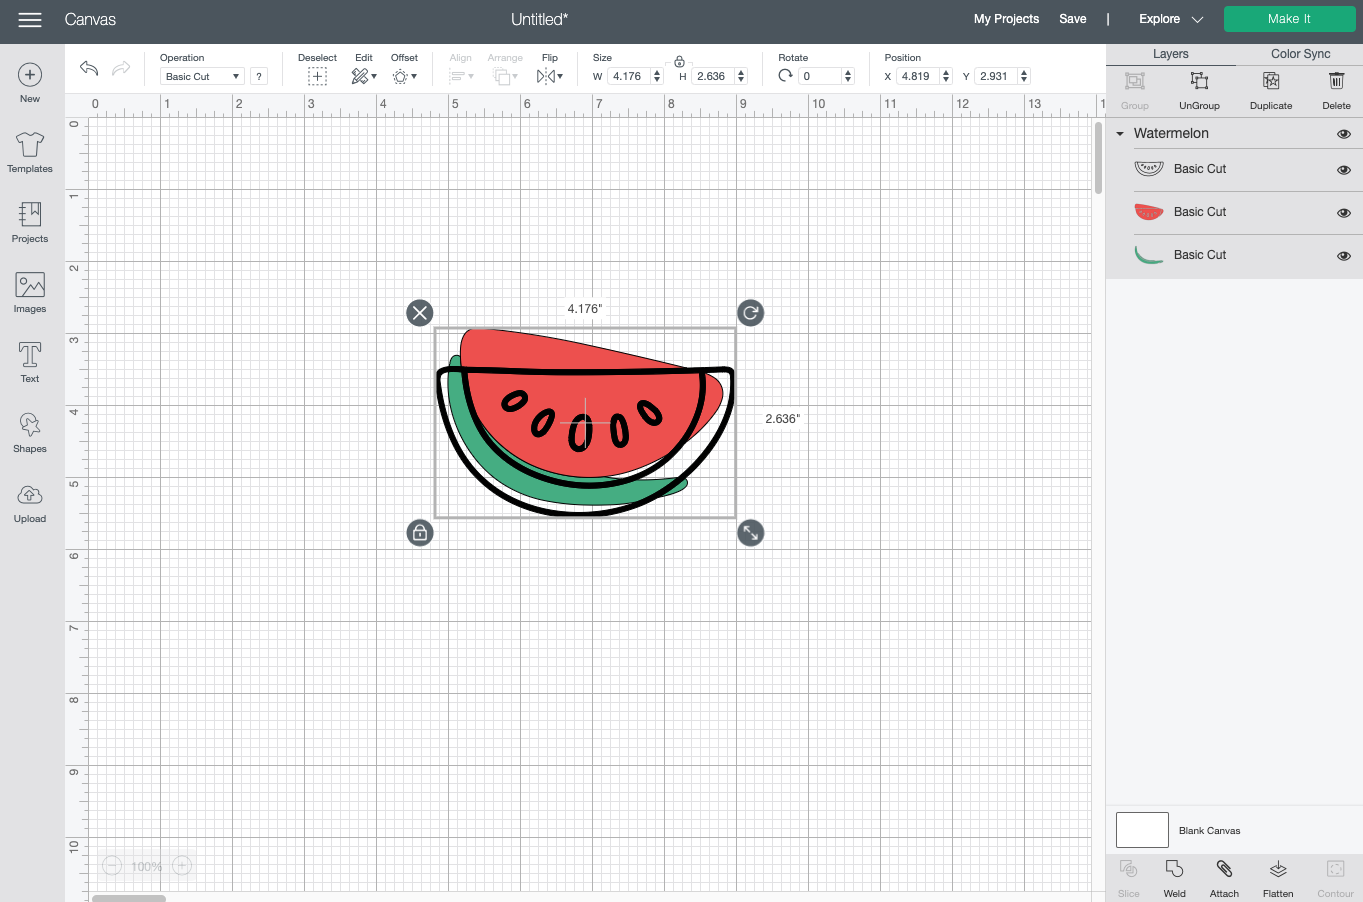
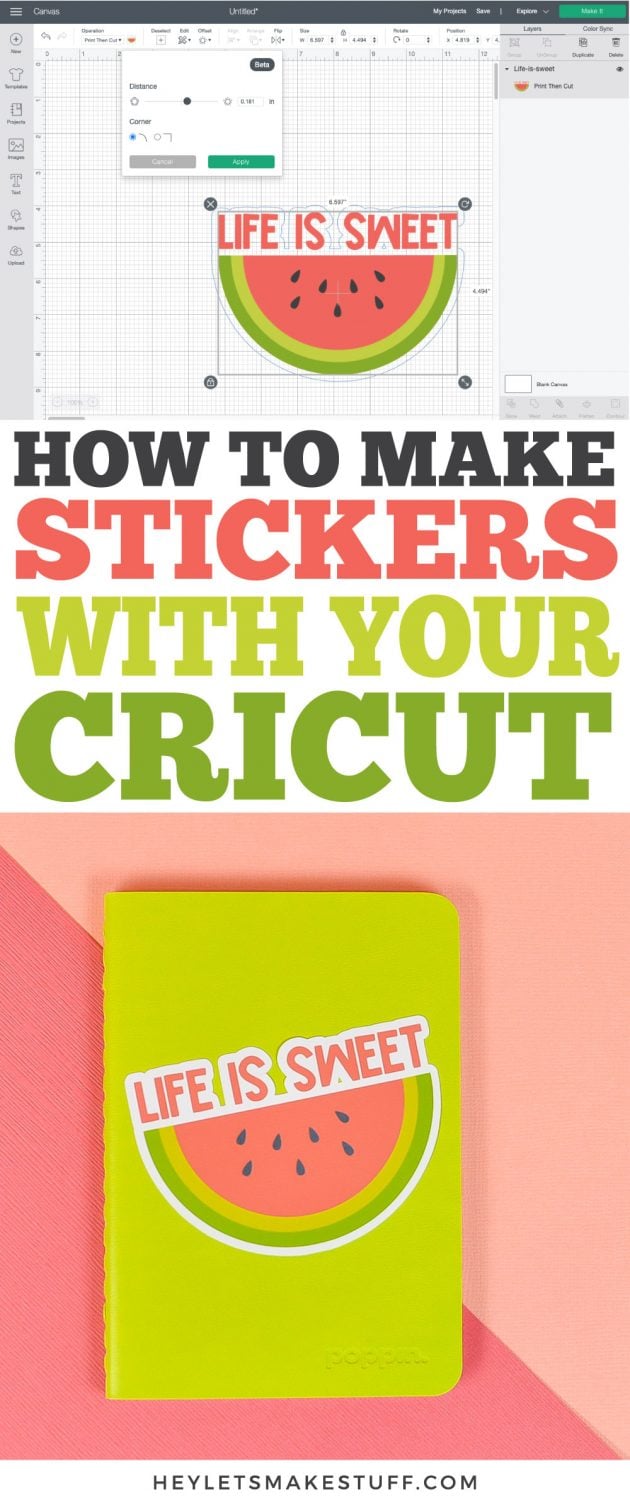
Select your image and click Offset in the toolbar at the top. A dropdown full of tools will open. You can read more about each of these in my post Using the Cricut Design Space Offset Tool.
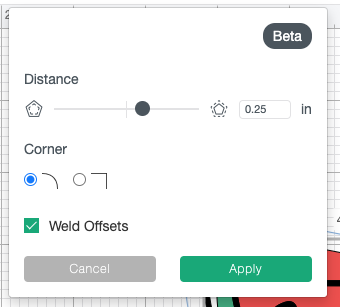
For this one, I selected a .25″ offset with round corners. I also had it “weld offsets” which treats all three layers of my image as a single piece (as opposed to creating three separate offsets).
Once you click apply, the offset will be created in its own black layer.
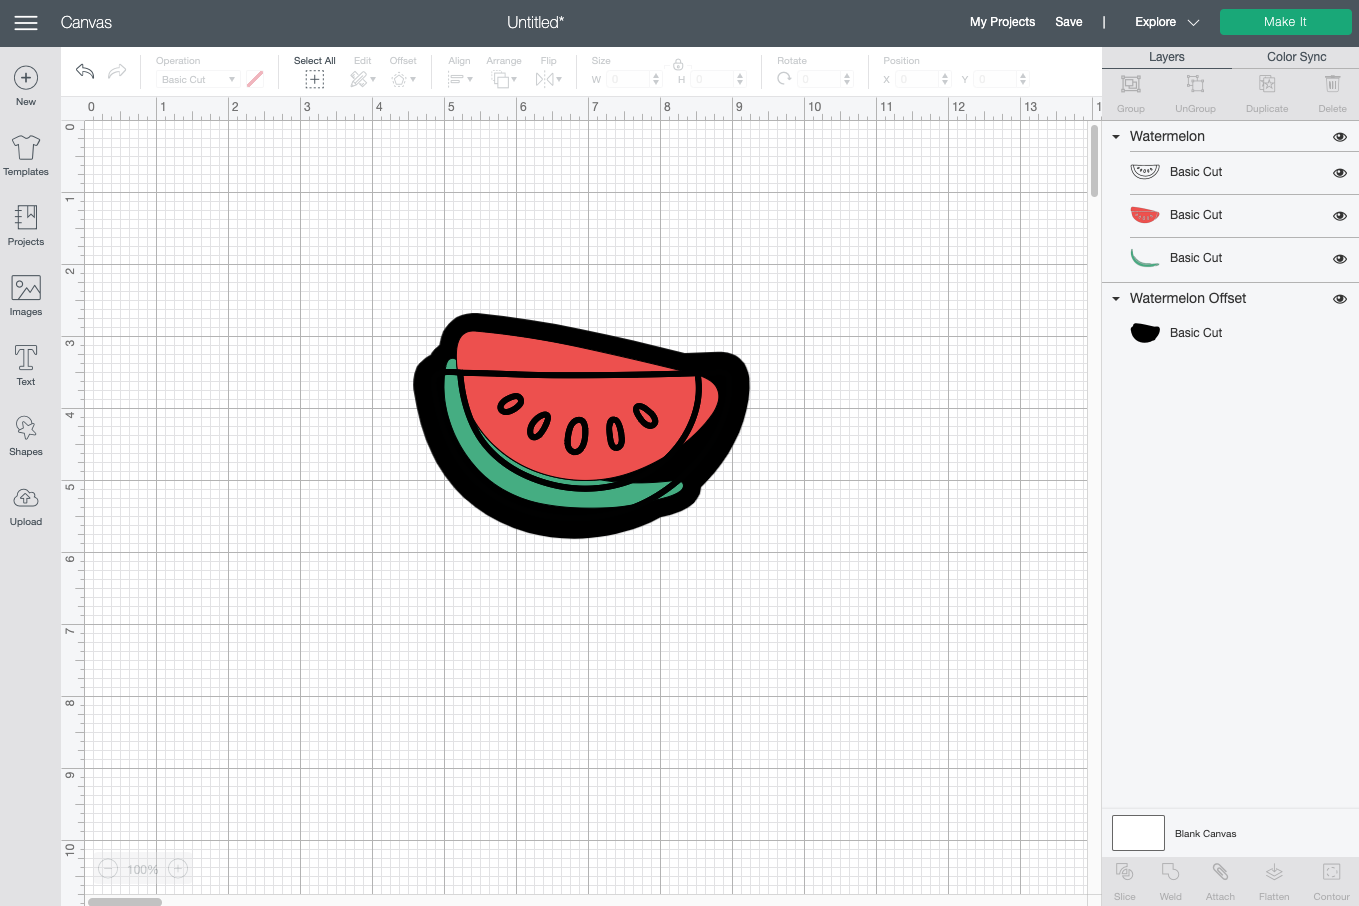
I don’t really want the offset to be black (though that would work on other images) so I selected that layer and changed it to white in the dropdown in the toolbar at the top.
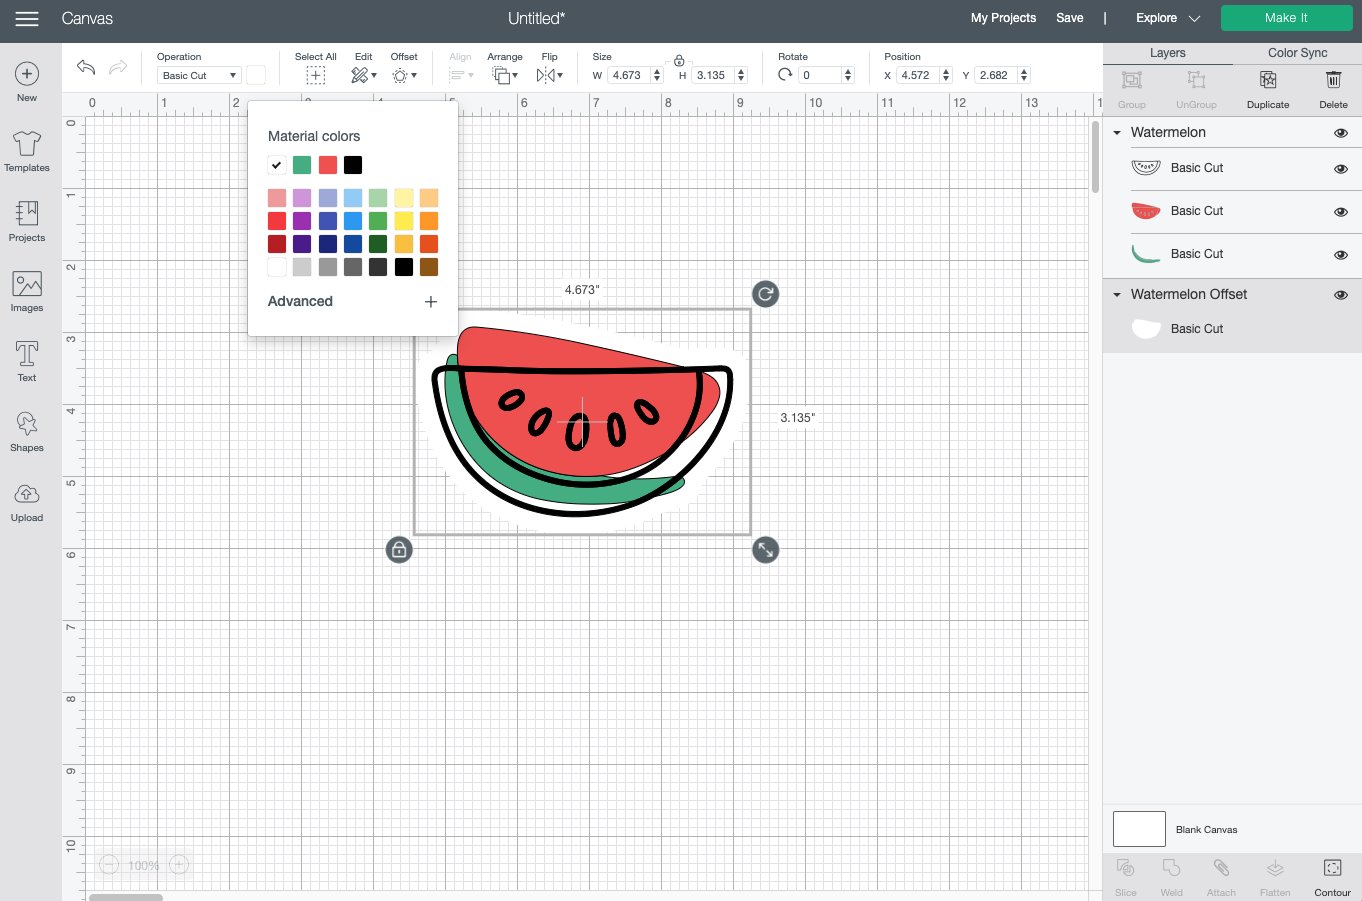
Then select all four layers, including the offset, and click “flatten” in the bottom of the Layers toolbar on the right. You will see that it’s a single Print then Cut image in the Layers toolbar.

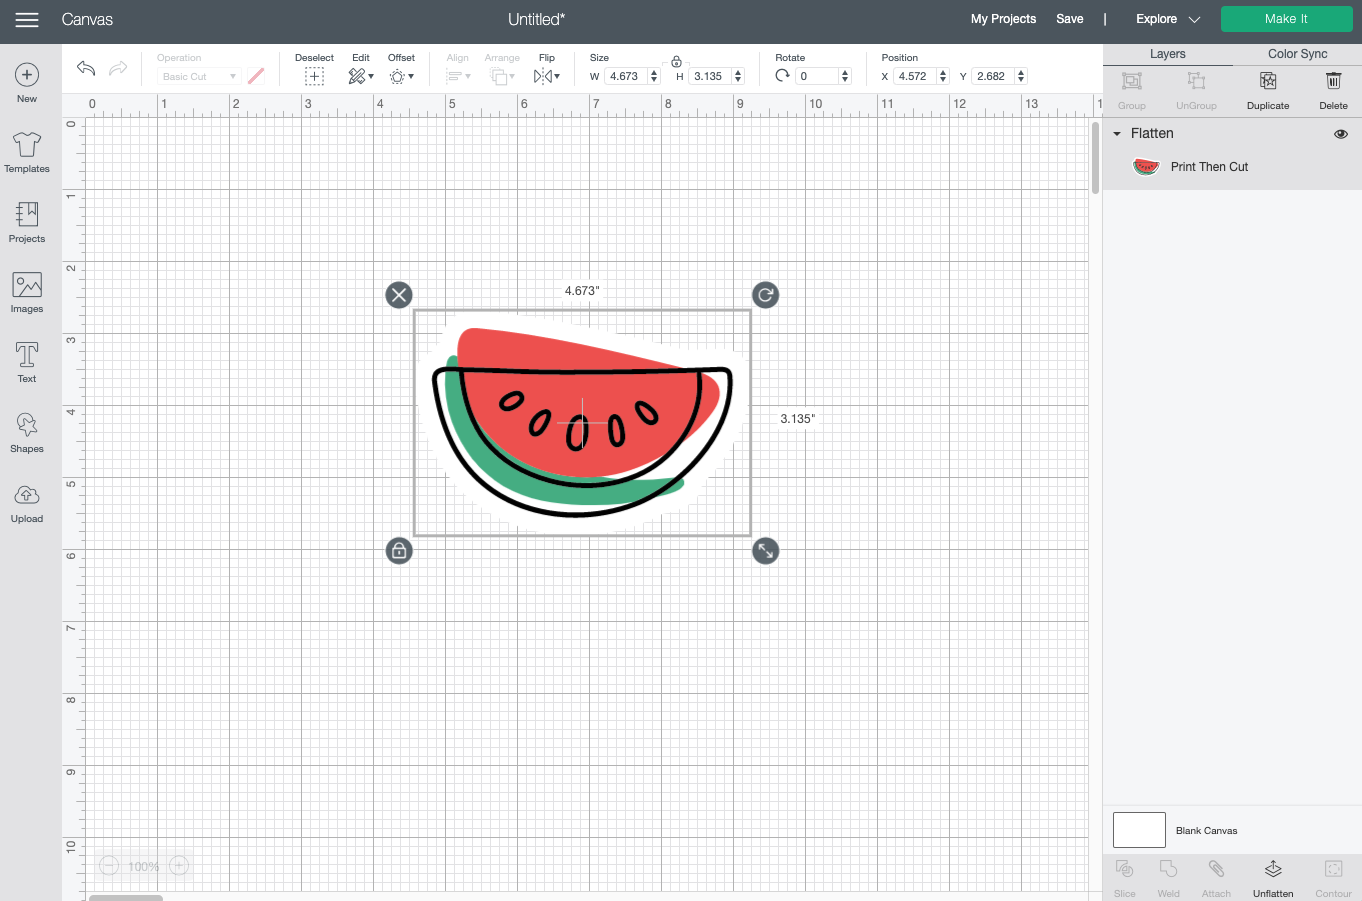
This is ready to print then cut! I’m going to detail three more options, and then we’ll cut all four at the end of this post.
Creating a Sticker by Uploading Images to Cricut Design Space
Next, let’s upload a clip art image and turn it into a sticker. This can be a JPG, GIF, PNG, BMP, SVG, or DXF.
There are so many places you might find cute images to turn into stickers. Here are a few of my favorite resources:
- My own shop!
- Creative Fabrica
- Design Bundles
- Creative Market
- Pineapple Paper Co
- The Country Chic Cottage
- Happiness is Homemade
- That’s What Che Said
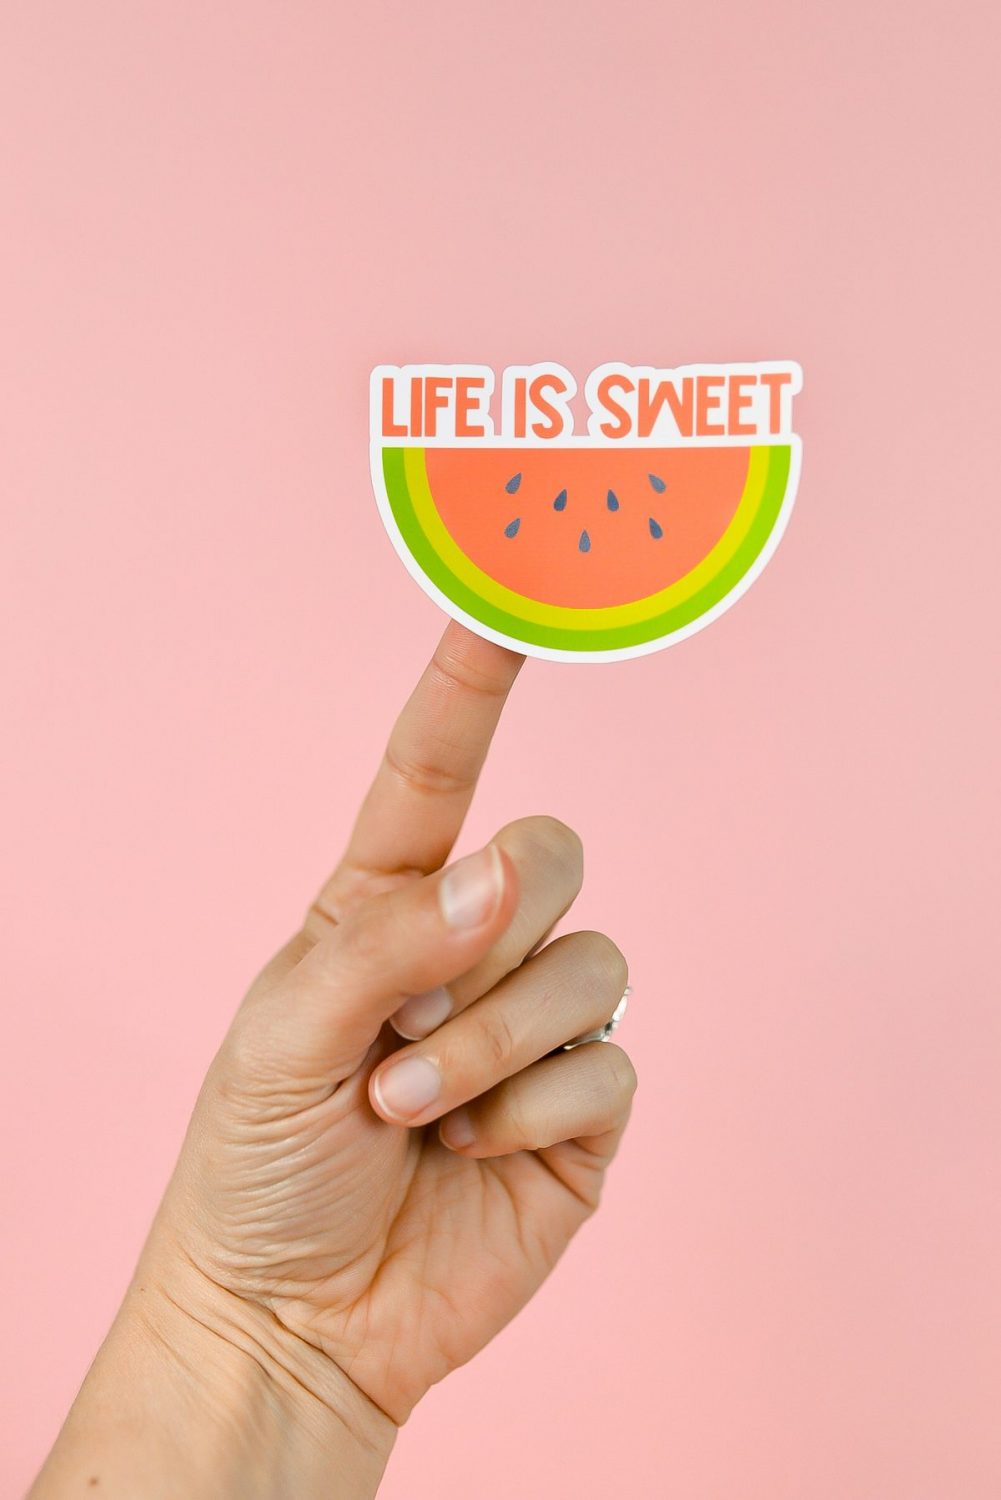
For this file, I’m uploading this cute Life is Sweet watermelon image from my shop. To show you how you can delete a background, I’ll upload the JPG, which has a white background, vs. the PNG which as a transparent background.
Click Images on the left and upload the file to Cricut Design Space. You’ll see three options: Simple, Moderately Complex, and Complex. You can click on each of these to see which one makes the most sense for your file—pick the one that looks the most true to the original. For me, it was Complex in this instance.
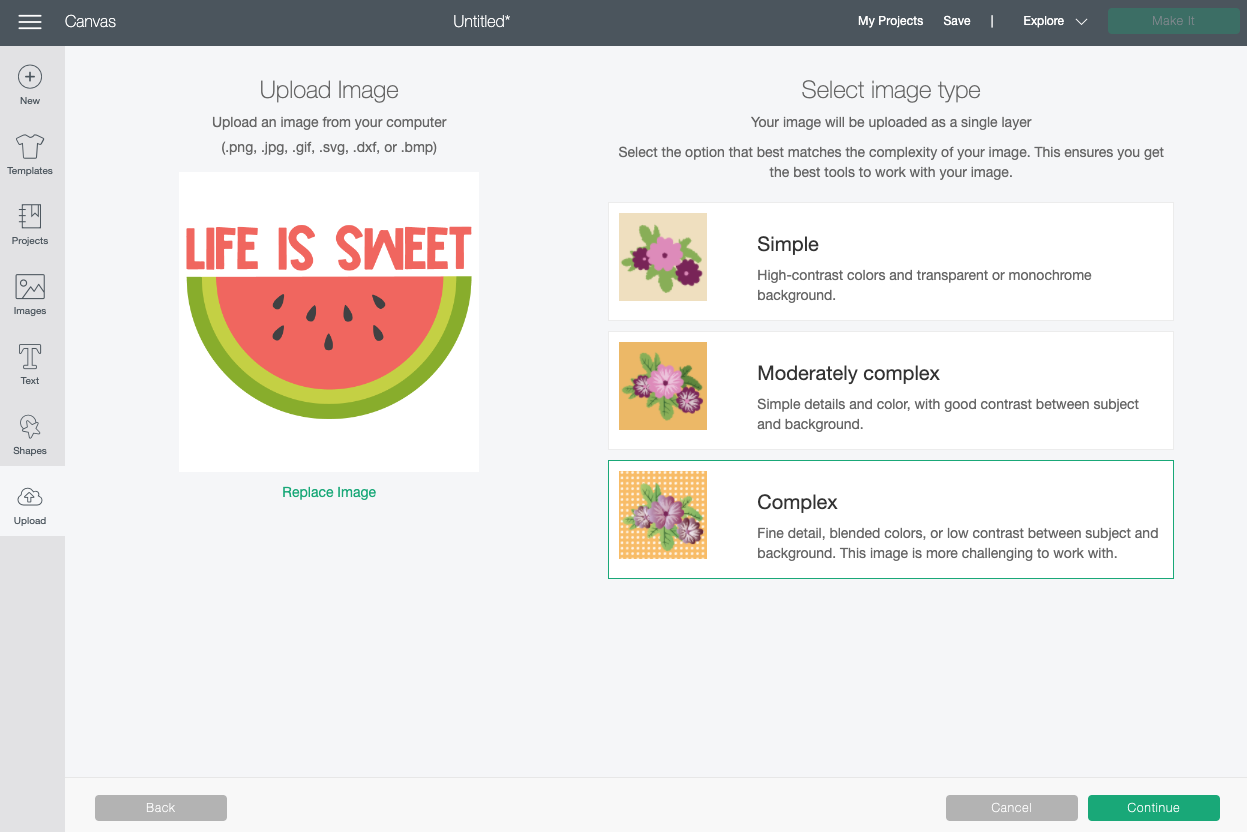
Next, in the Select and Erase screen, you’ll see that the background behind the image is white. If you imported this as is, it would have a white square behind it, which isn’t what we’re going for.
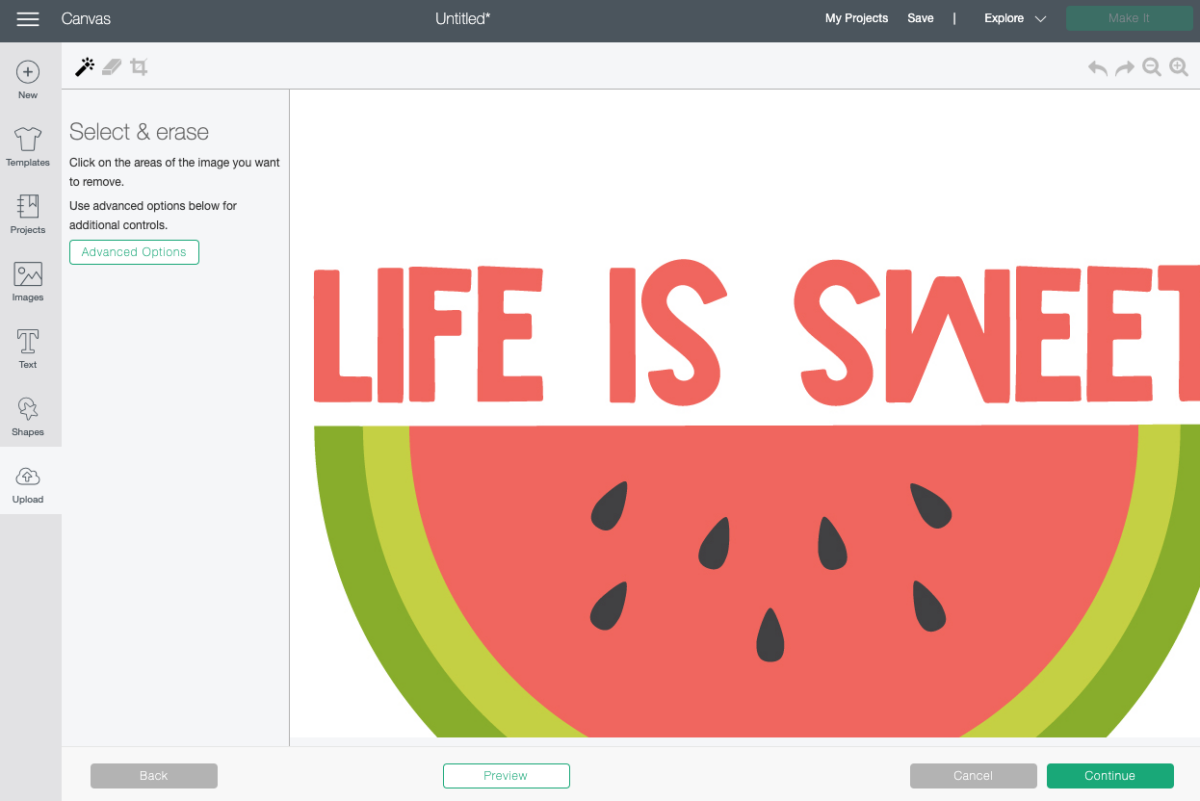
So use your mouse to click on the white background. This will turn the whole background into a grid, which means it’s transparent. If you’re using an image that has, for instance, letters with “centers” like O or R, make sure to delete the background out of those as well.
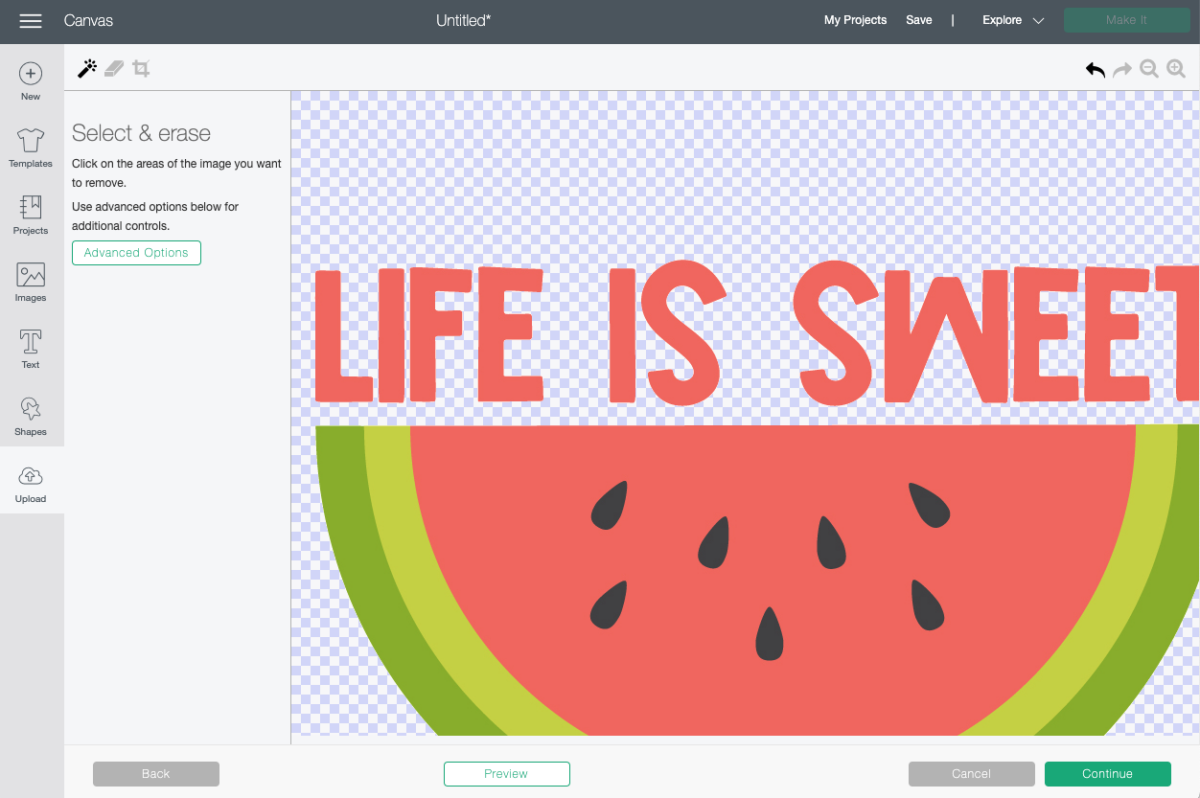
Once you’ve deleted the background, click continue. In the next screen, choose Print then Cut image.
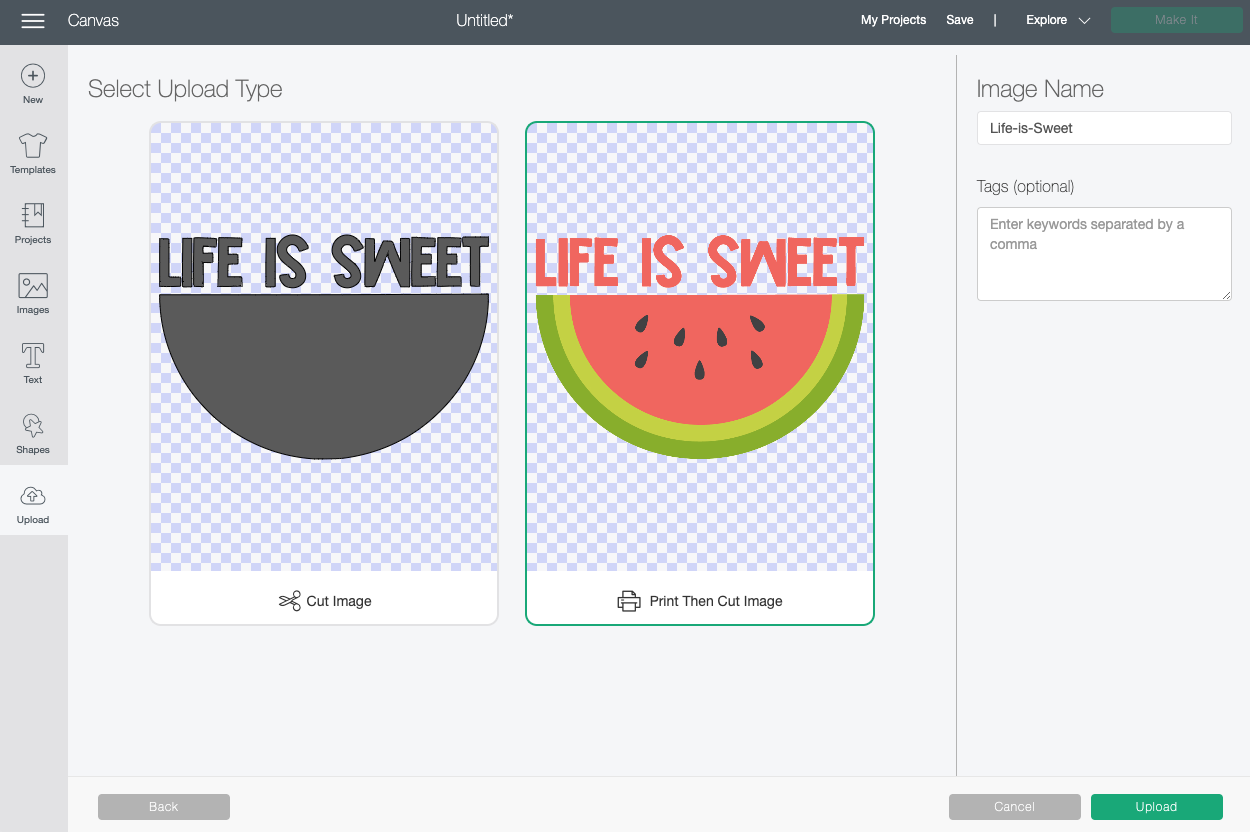
Once on your canvas, you’ll repeat the same process you did with the Cricut Design Space image above. Select the image and go to offset, and choose your settings.
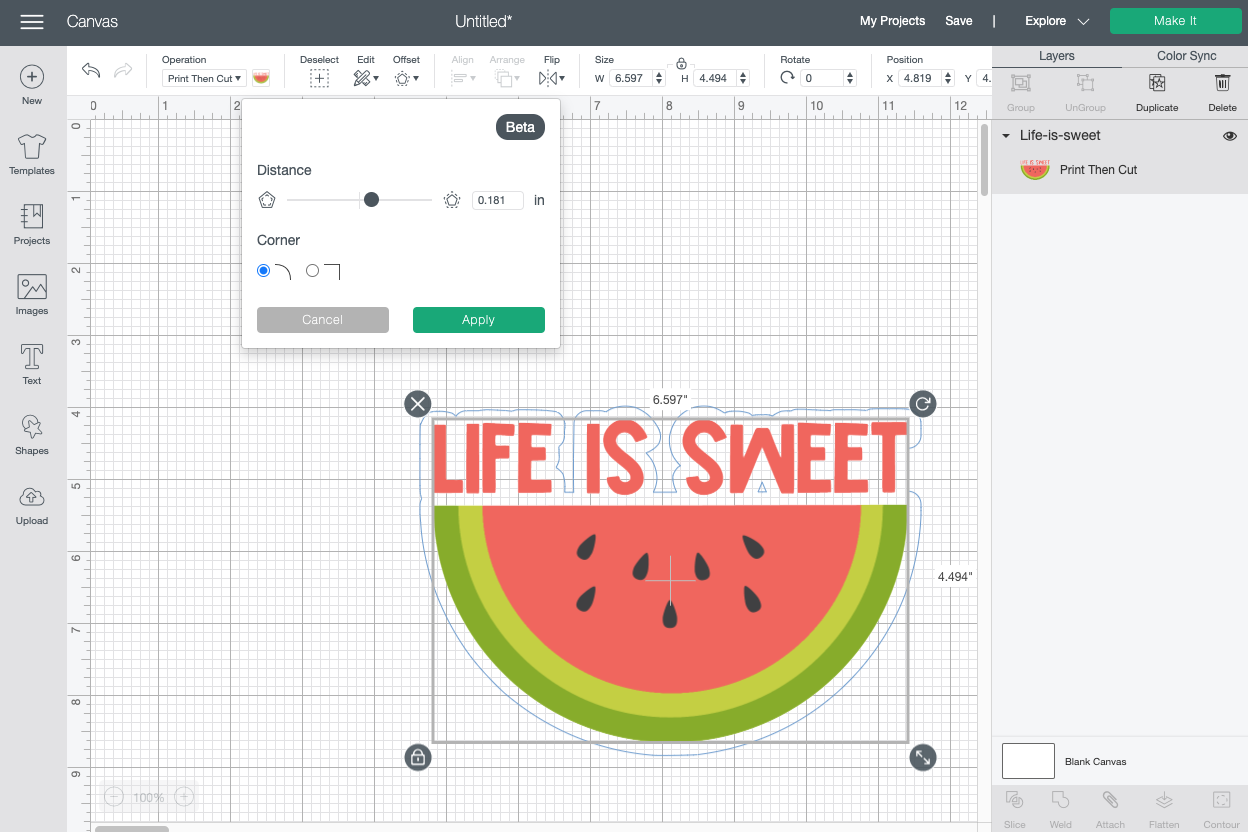
Then click apply.
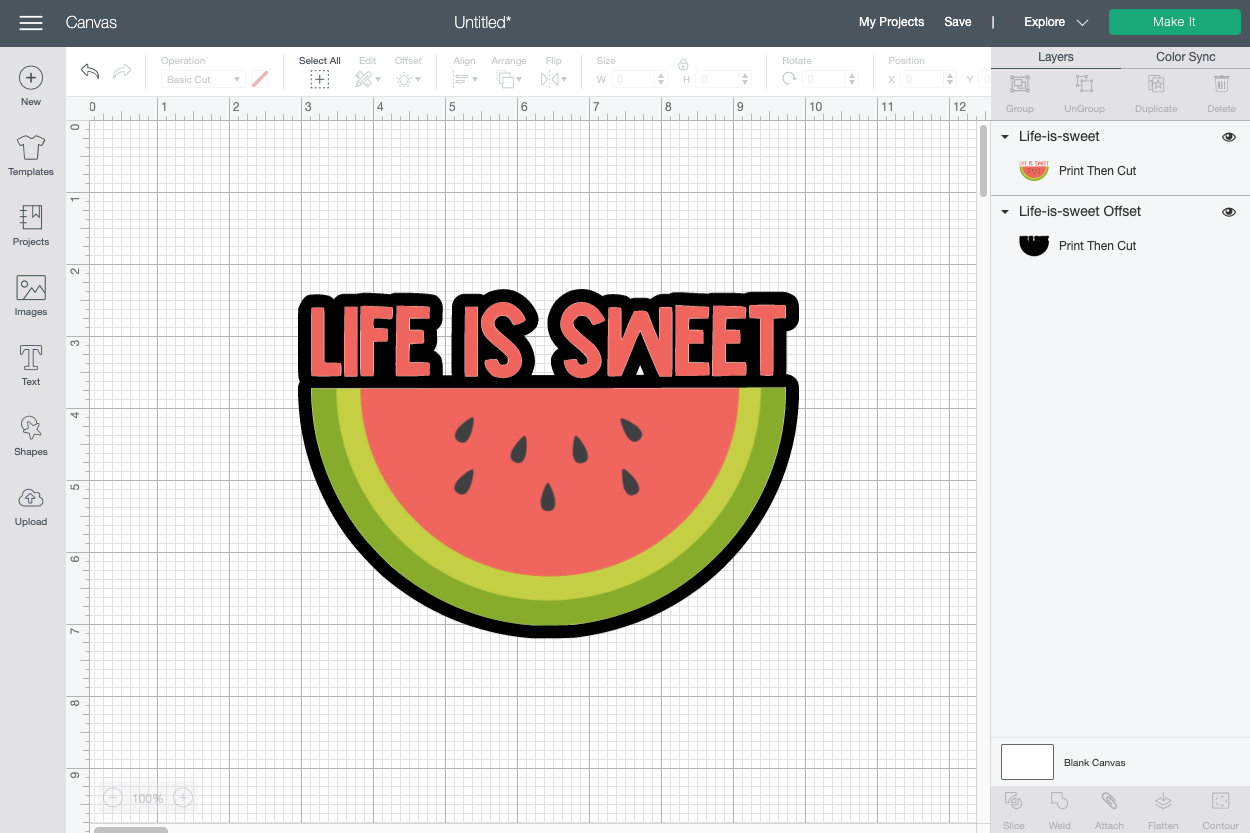
Change your offset layer to white or whatever you’d like.
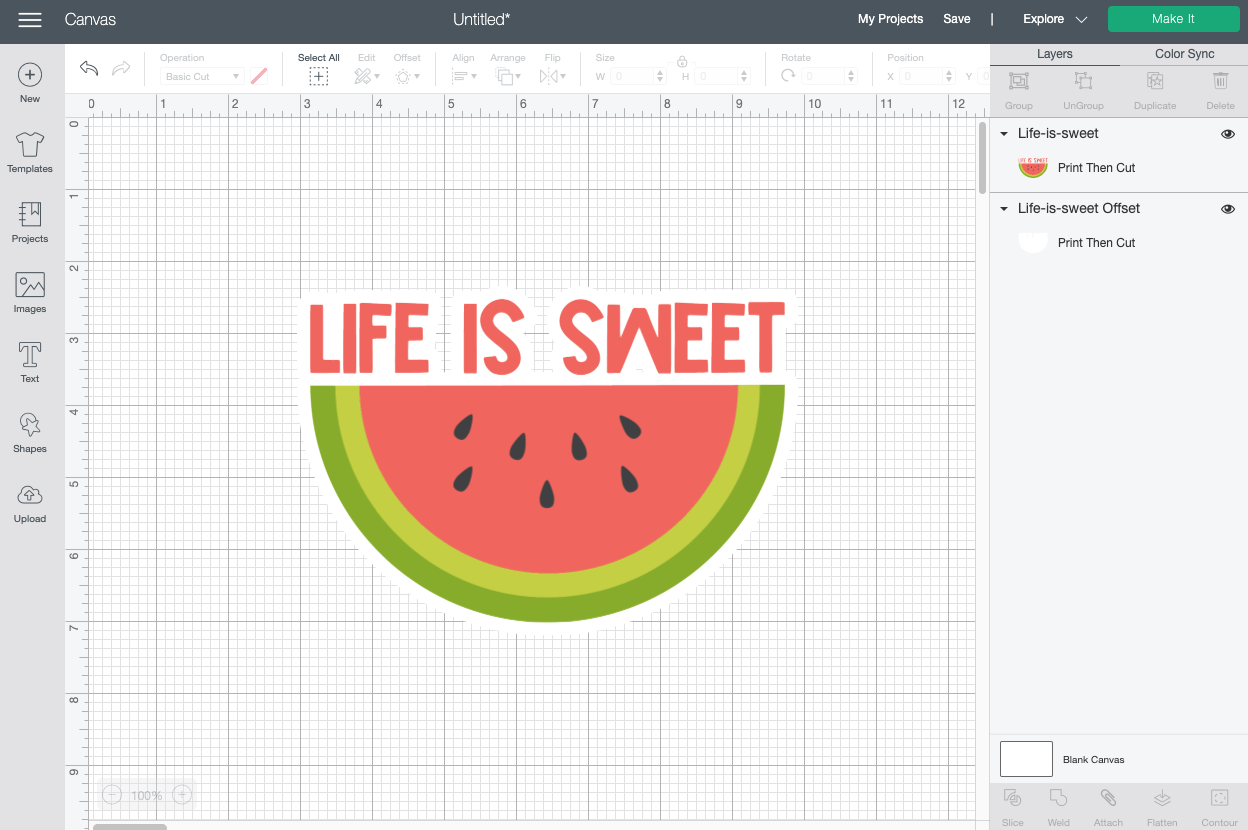
Then select both layers and click Flatten in the lower right to make it a Print then Cut image.
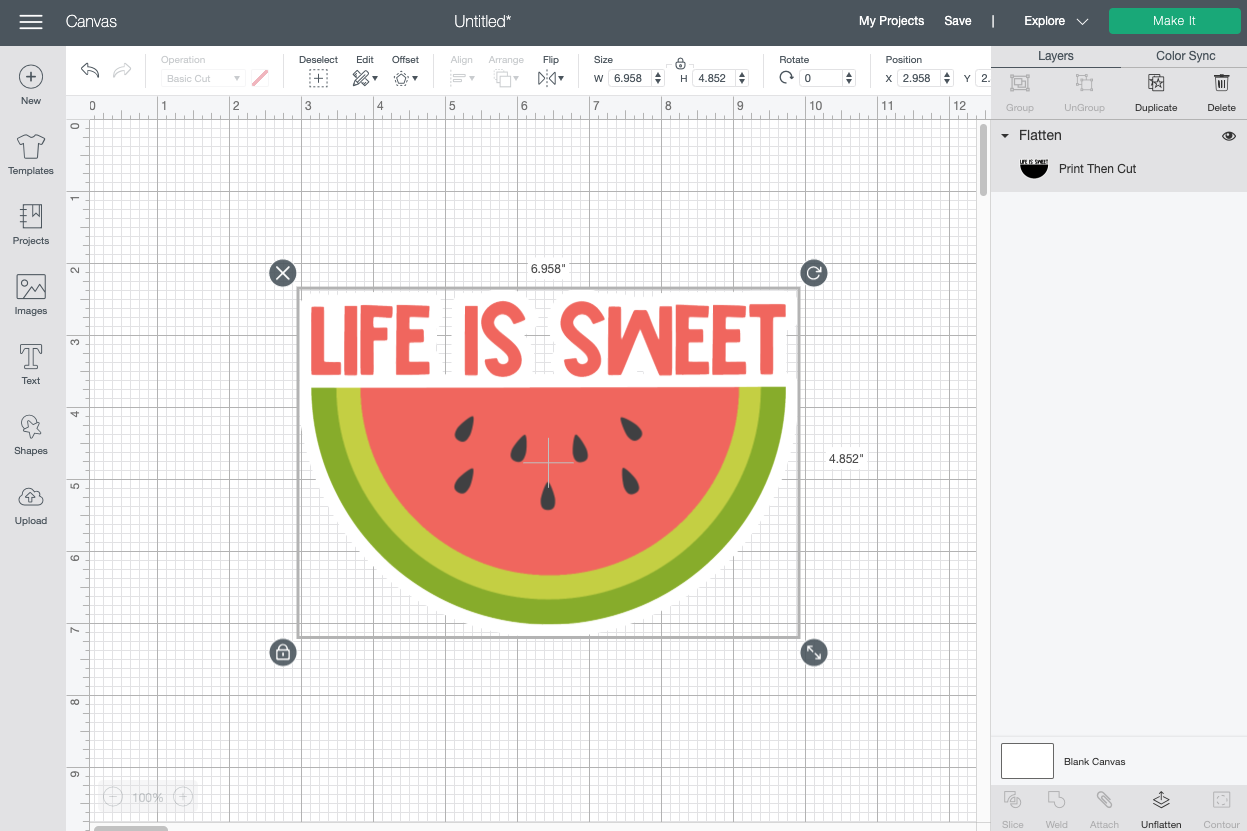
Again, we’ll cut this in a bit. But first, let’s look at using a photo next.
Creating a Sticker by Uploading a Photo to Cricut Design Space
Uploading a photo is a trickier than uploading another image to make Cricut stickers. I have tried with several photos to create a clean outline using the offset tool and I’ve yet to have a workable file. Because the pixels around a photograph are just not nearly as smooth as those of a graphic. Therefore the mathematics behind creating an offset get very…messy, as you can see here:
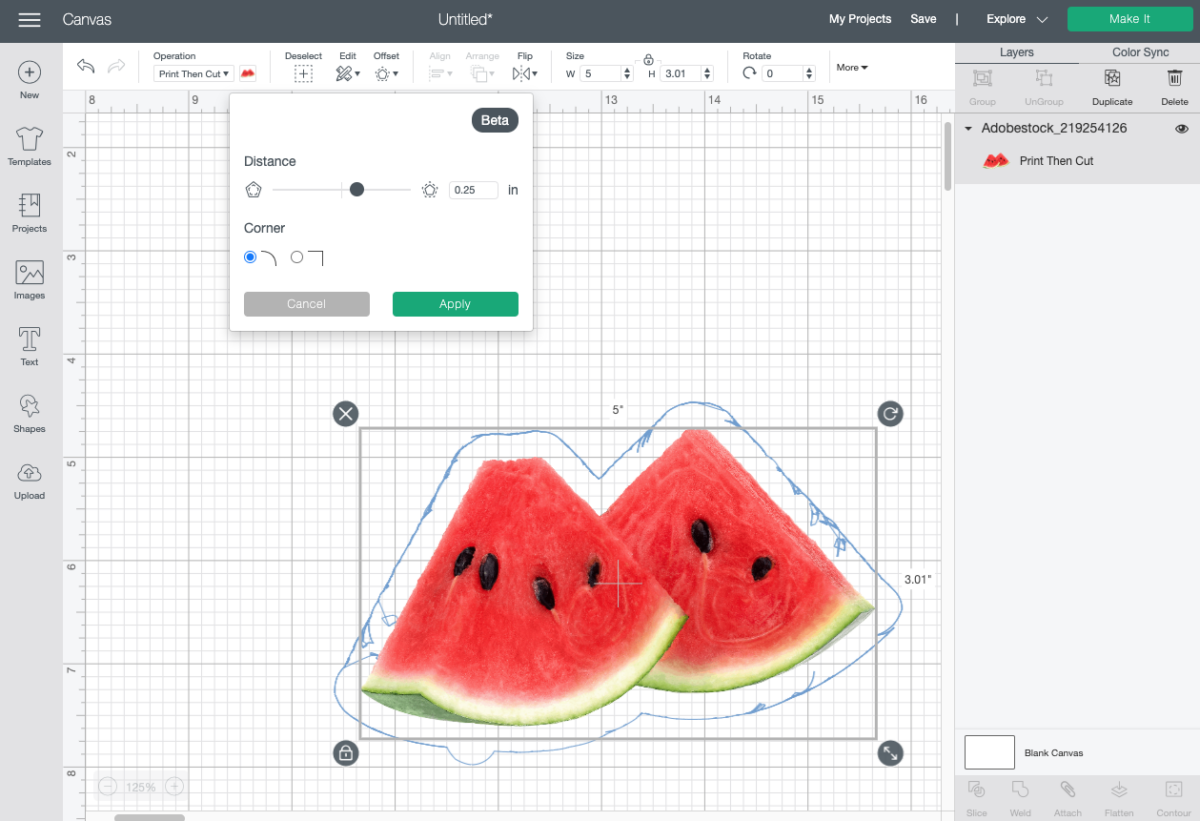
I’ve also tried using the Erase tool to delete a white background on a photo leaving a white edge, and it is still not great.
Instead of the offset, you can create a shape behind the photo. It’s not quite as cool as an offset, but it works to create stickers using photos.
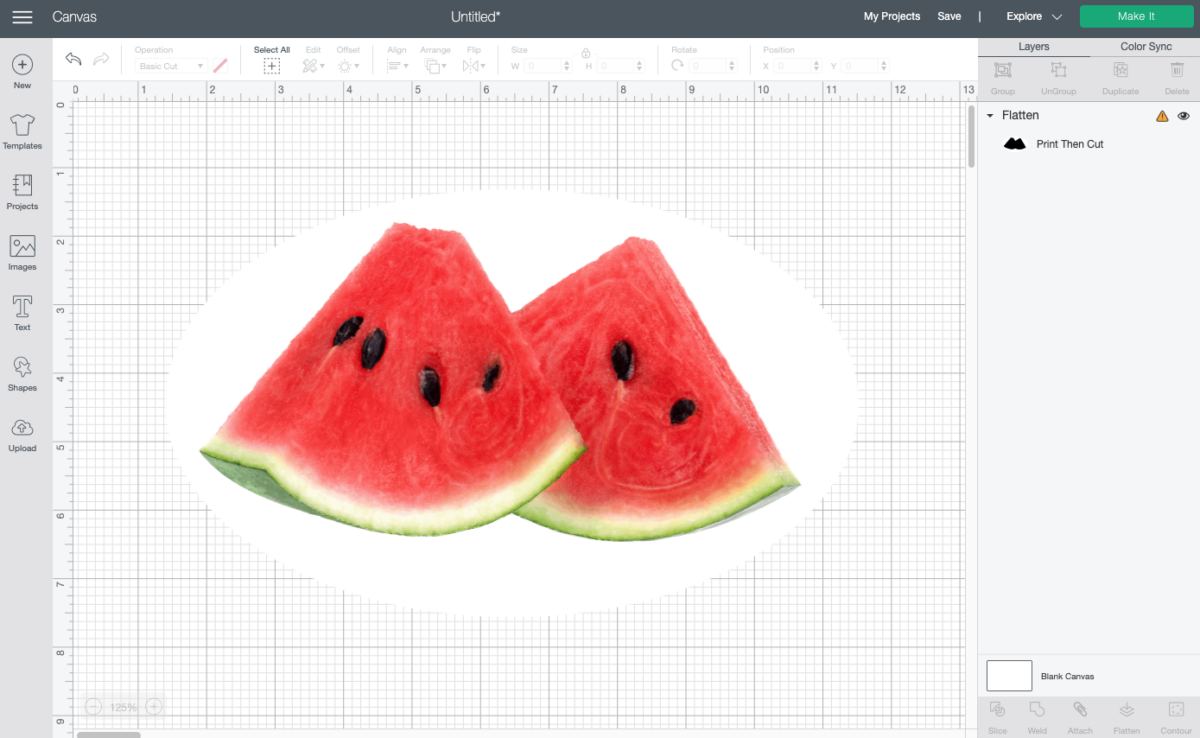
Upload your image to Cricut Design Space, and then choose a shape that makes sense behind your image. For this one, I clicked Shapes on the left and inserted a circle. I then clicked the little “lock” icon on the bottom left of the circle so I could resize it into an oval that fit nicely behind the watermelon slices. I also changed it to white.
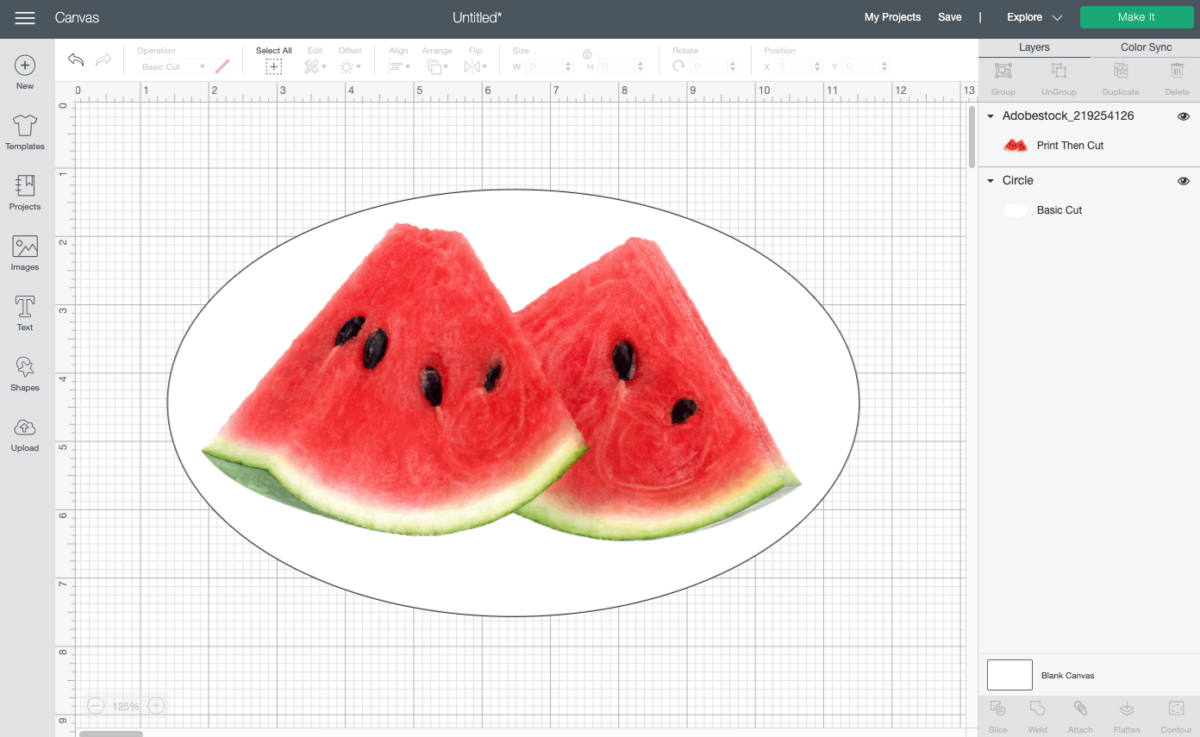
Then select your image and your shape and click Flatten in the lower right to make it a Print then Cut image.
Creating a Sticker by Uploading a Pattern to Cricut Design Space
One additional way to create a sticker in Cricut Design Space is to utilize the pattern functionality. In this instance, we’ll upload a pattern and apply it to a shape to create a fun sticker. You can upload all sorts of things as patterns. You may find them referred to as “digital patterns” or “digital scrapbook paper.” Creative Market is a great place to find lots of these types of files!
If you click Images on the left in the Canvas, you can choose to upload a Pattern Fill. Note that you can upload a JPG, GIF, PNG, or BMP as a pattern—but not an SVG or DXF. Patterns are their own thing!
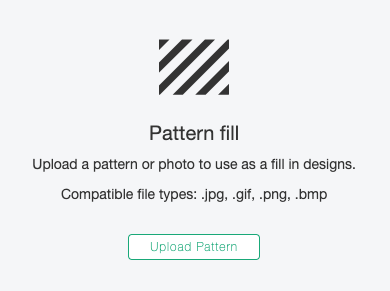
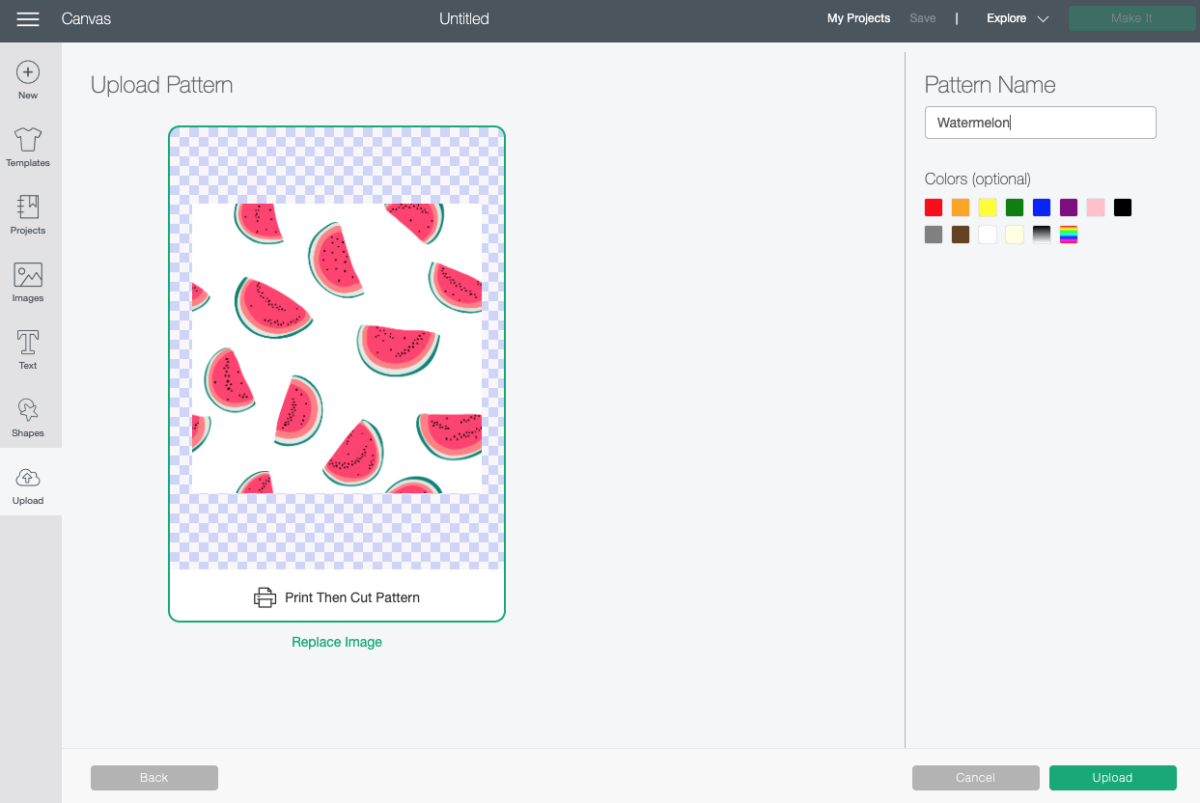
Once you have your pattern uploaded, you can give it a name and choose which colors it has if you’d like. Then click Upload.
Now go to your canvas. Your pattern will not show up here yet. To apply that pattern to a shape, create any shape using the Shapes Tool. I created a heart. You can actually apply patterns to text too, if you’d like! Follow this same process.
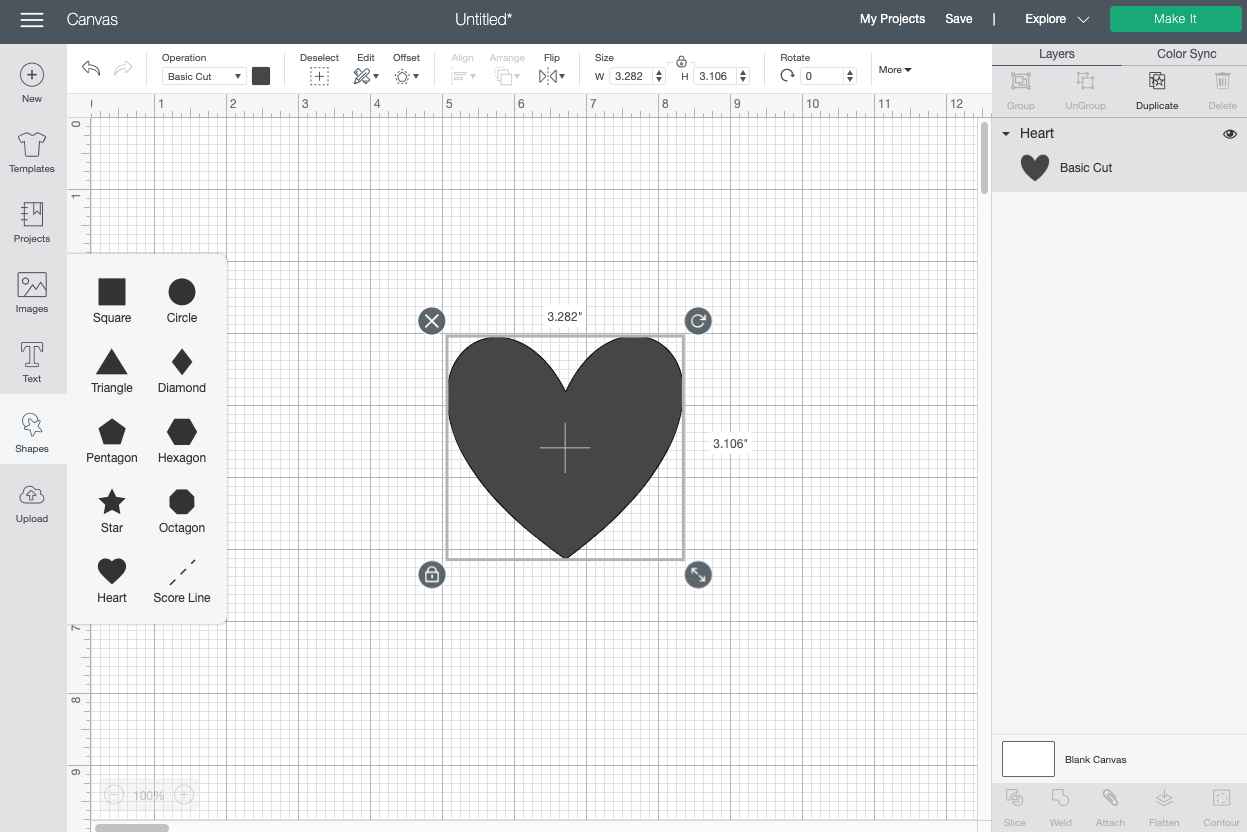
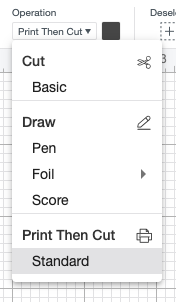
To be able to apply a pattern, you need to change your image (or text) to Print then Cut. Select the image and click the Operation dropdown to select Print then Cut > Standard. (This makes me wonder if Cricut has something new planned soon—something that is not “standard”? Who knows!)
Once you’ve changed your file to be Pring then Cut, you can click the little color box next to the Operation dropdown and change the Print Type to Pattern. Your uploaded pattern will show up here.
The watermelons on my heart are pretty cute, but I feel like this could be even cuter if the scale was different.
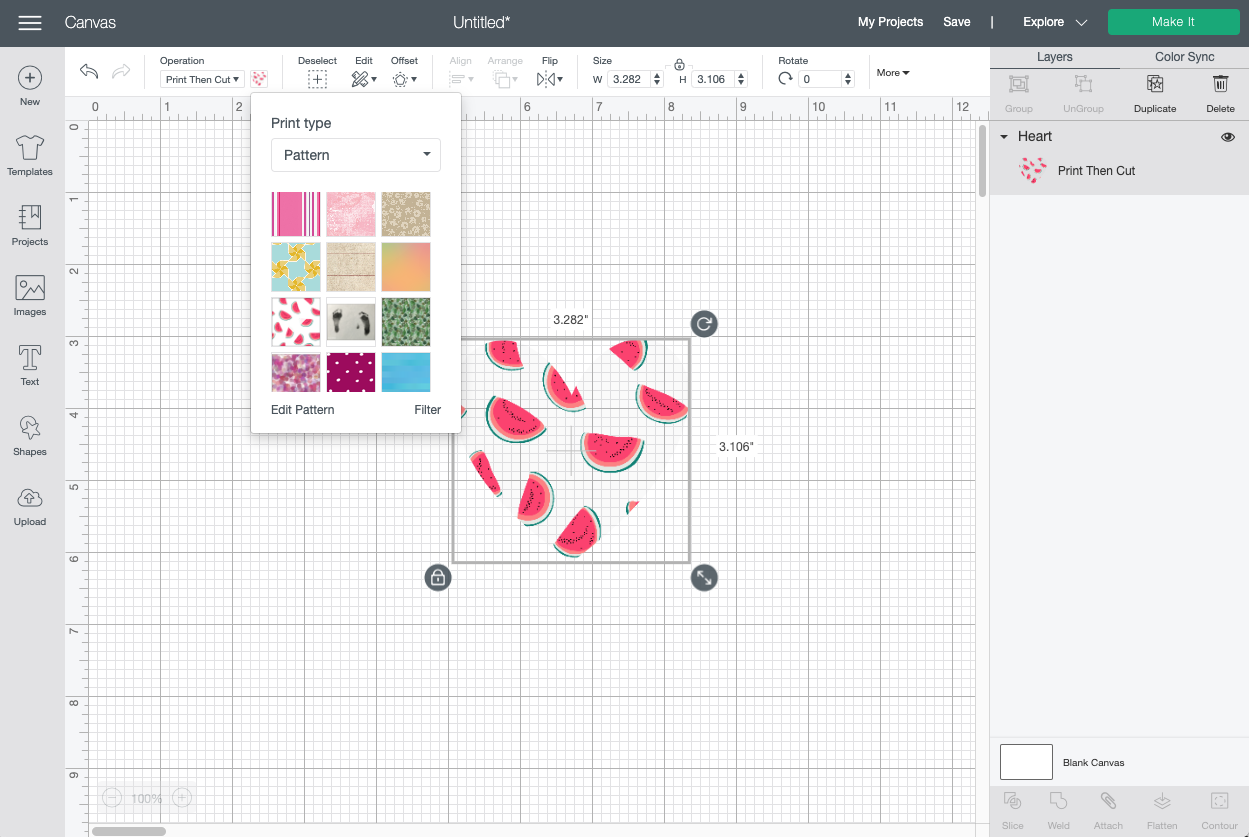
Click Edit Pattern. You can change all sorts of elements in your pattern.
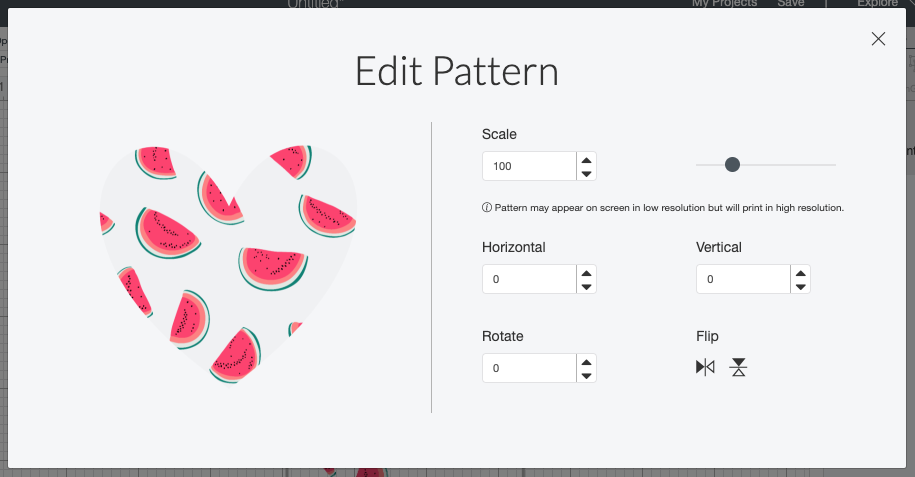
I changed my scaling from 100 to 31 (meaning it’s a much smaller scale). I think the tiny watermelons are both cuter and render the heart shape better than the larger watermelons.
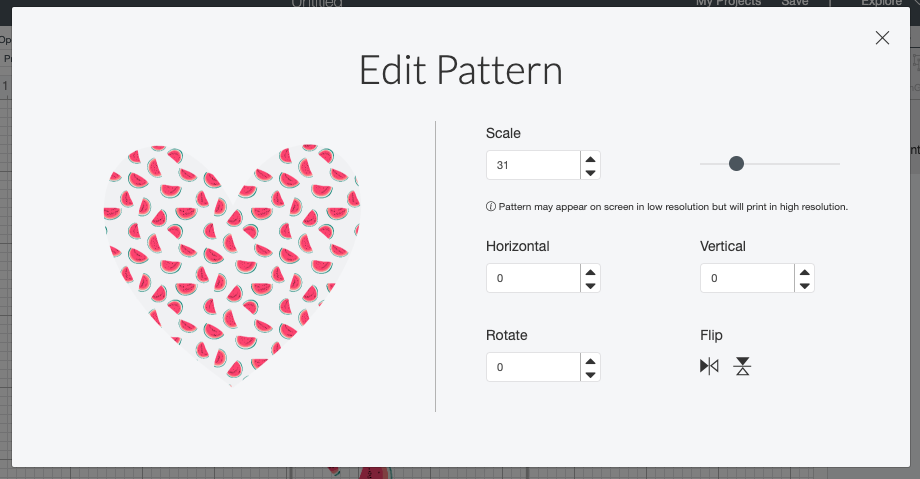
Click the X to exit the Edit Pattern screen and your changes will be applied to the pattern on your shape. From there, you can add an offset to your shape just like you did with the other images above.
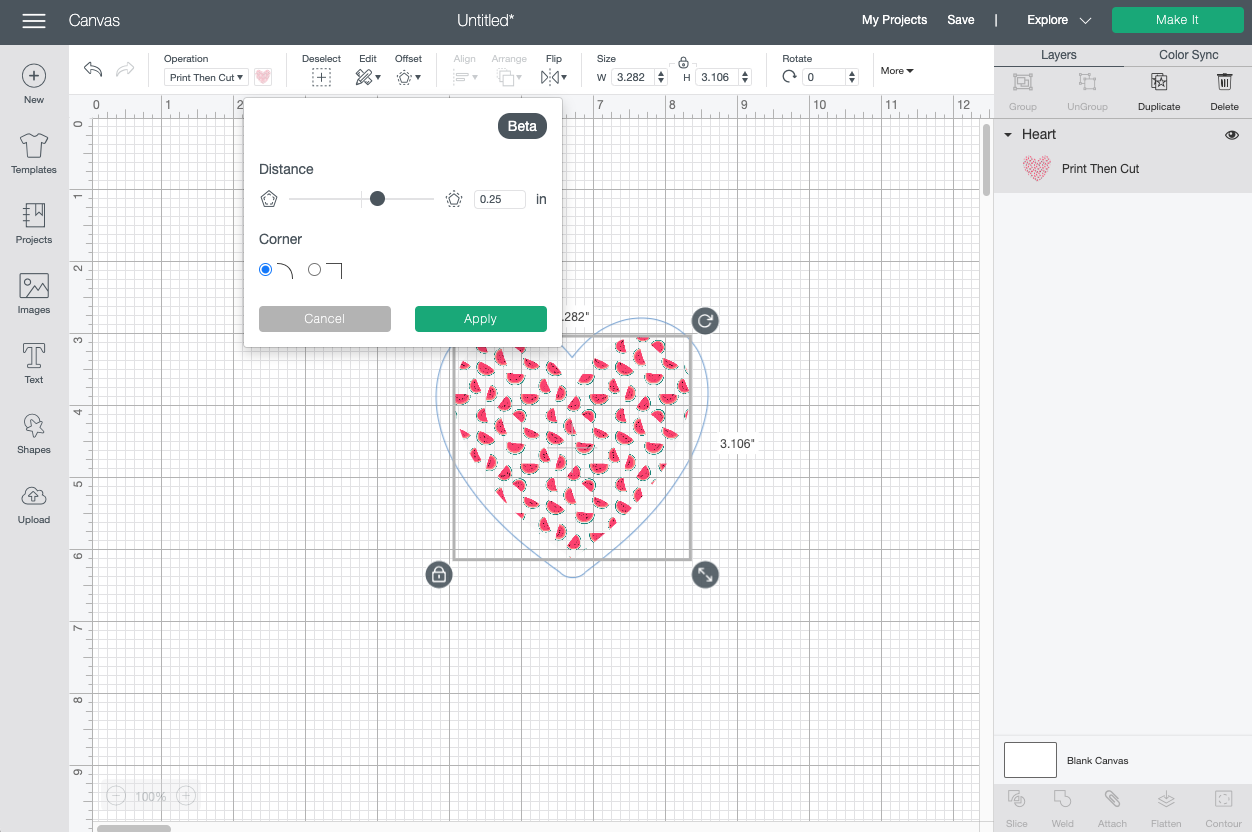
Then flatten your image and your offset to create your sticker.
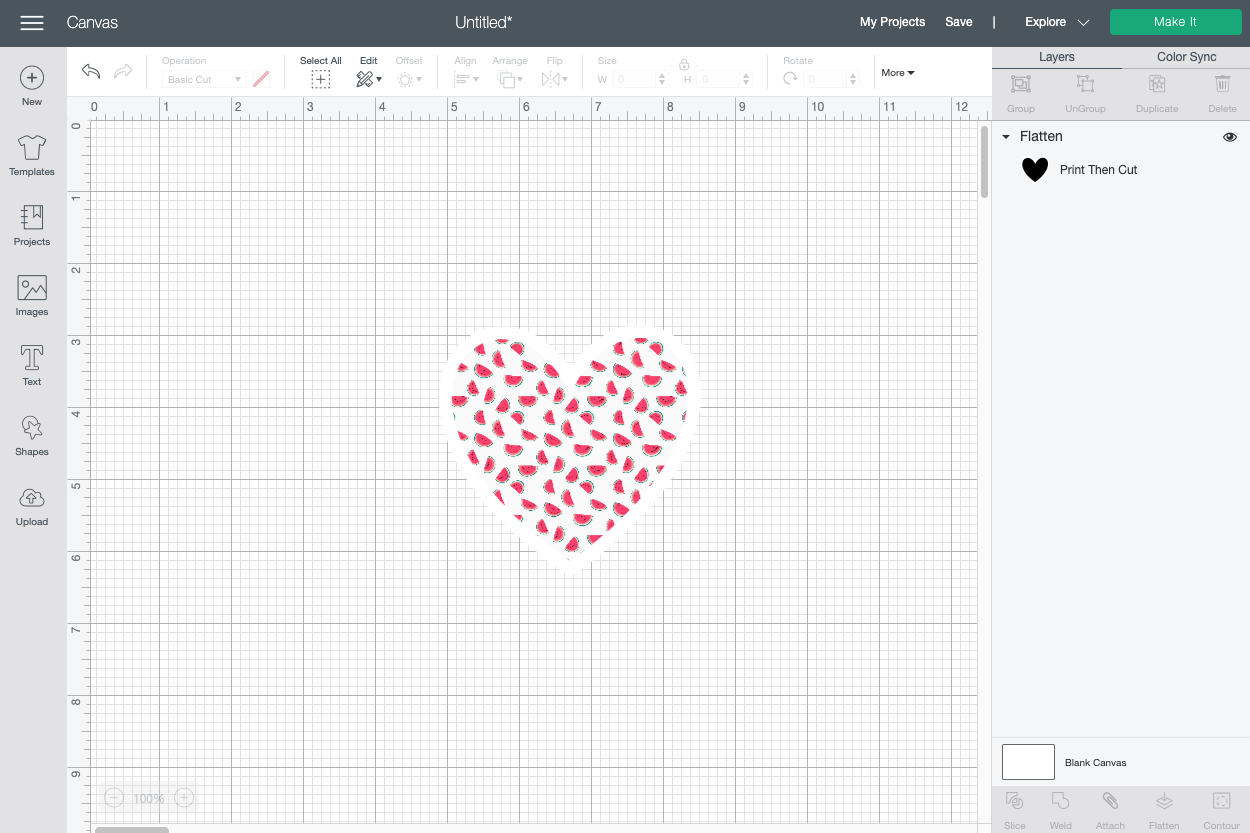
Check out my post How to Use Pattern Fill / Patterns in Cricut Design Space for even more information.
Okay, we’ve designed four watermelon stickers—now let’s cut them!
Using Print then Cut to Make Cricut Stickers
I copied and pasted all of my stickers so they are on a single canvas. This is new! When Cricut announced updates in March 2021, one of them was being able to select an image and copy it to another Canvas while on desktop. It’s easy! Just select the image/images you want to copy and click Control/Command-C to copy them. Then open your new Canvas and click Control/Command-V to paste. I love this small update!
I also resized my images so they would be the size I wanted my stickers. You can make yours whatever size you’d like!
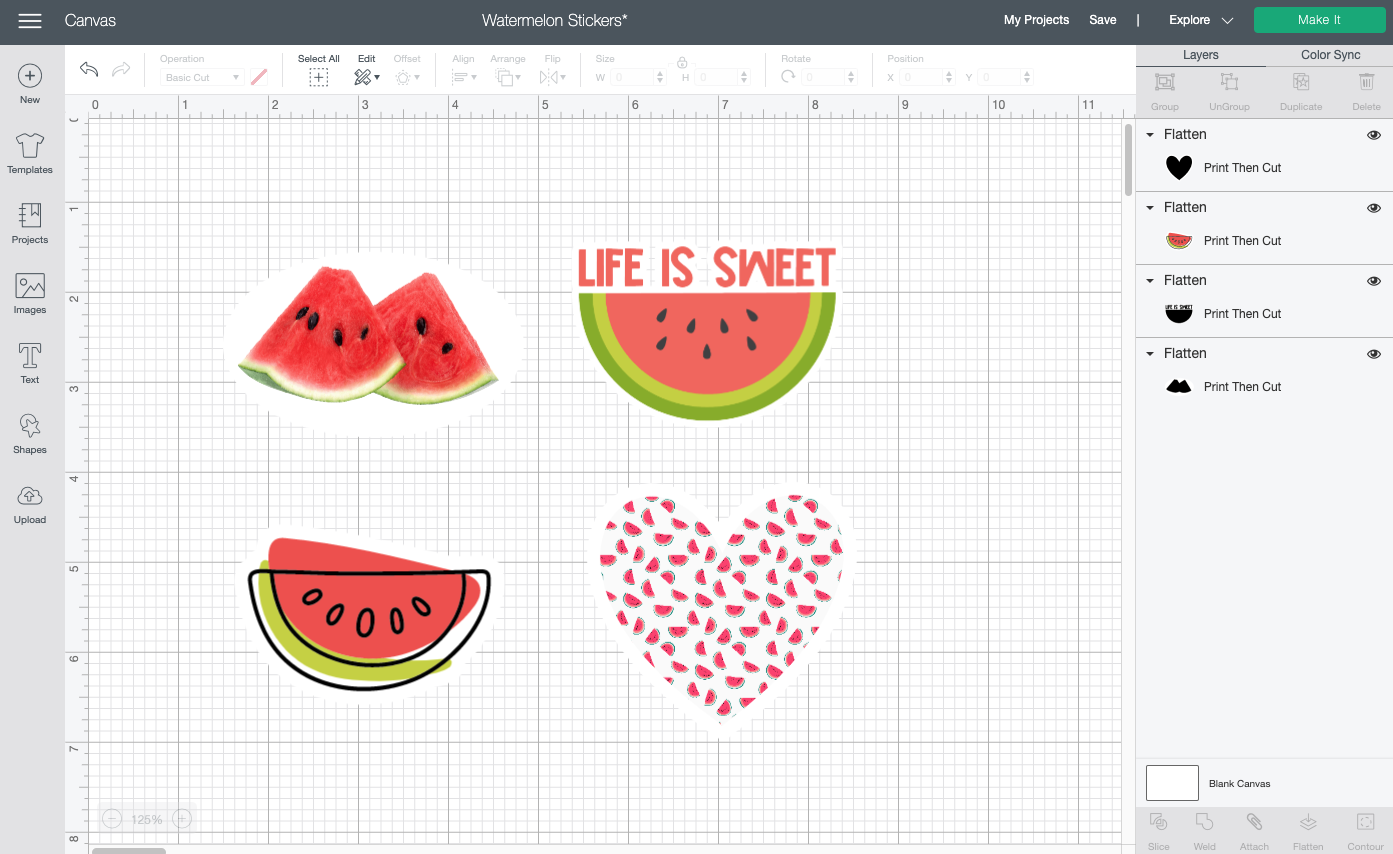
Make sure that all of your images say Print then Cut and then click Make It in the upper right.
You’ll see all of the images laid out within a black box. This box (also called a “registration box” is placed there by Cricut Design Space and is used by your Cricut to read the precise location of your images so they can be cut properly. Note that Cricut Joy does not support Print then Cut—it doesn’t have the same sensors.
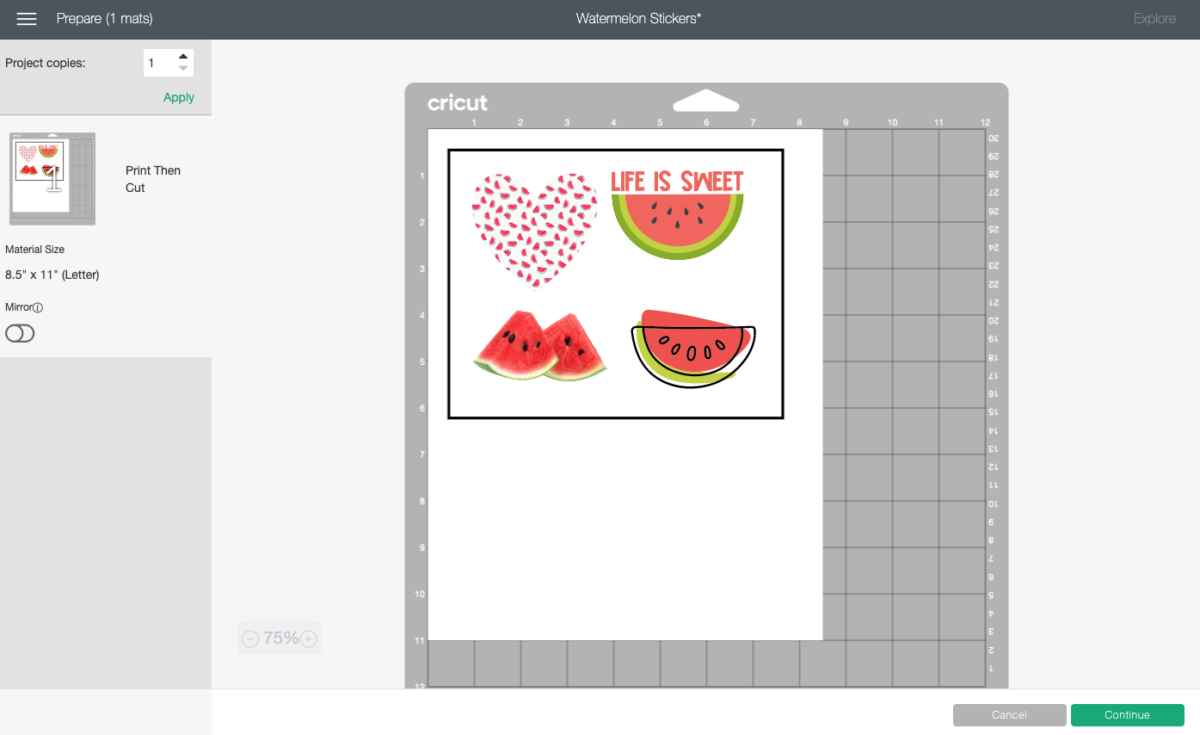
Click Continue and you’ll be taken to the Print Setup screen. From here, you can select your printer. In most cases, including this one, you’ll leave Add Bleed checked. You can either click Print, or you can check the “Use System Dialog” to get to more printer settings. I always do that because I like to choose the type of paper I am using as well as the print quality. Note that that dialog box will most likely open behind your Design Space window, so you’ll have to go hunting for it.
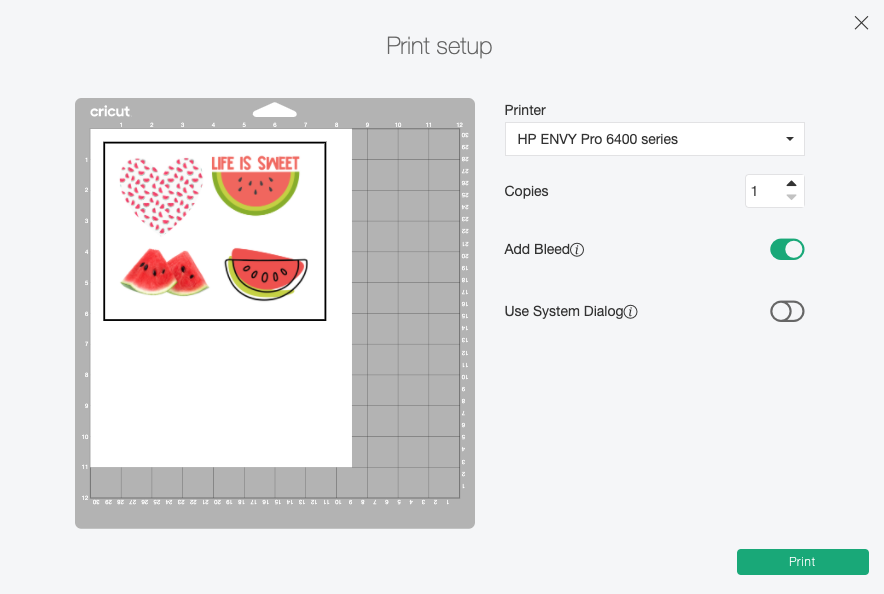
Then place your printable material in your printer so your image can print. I prefer the Printable Vinyl over the Printable Sticker Paper. The vinyl has always printed fine for me, but that sticker paper tends to both jam my printer and the printing is never as consistent if it does make it through the printer.
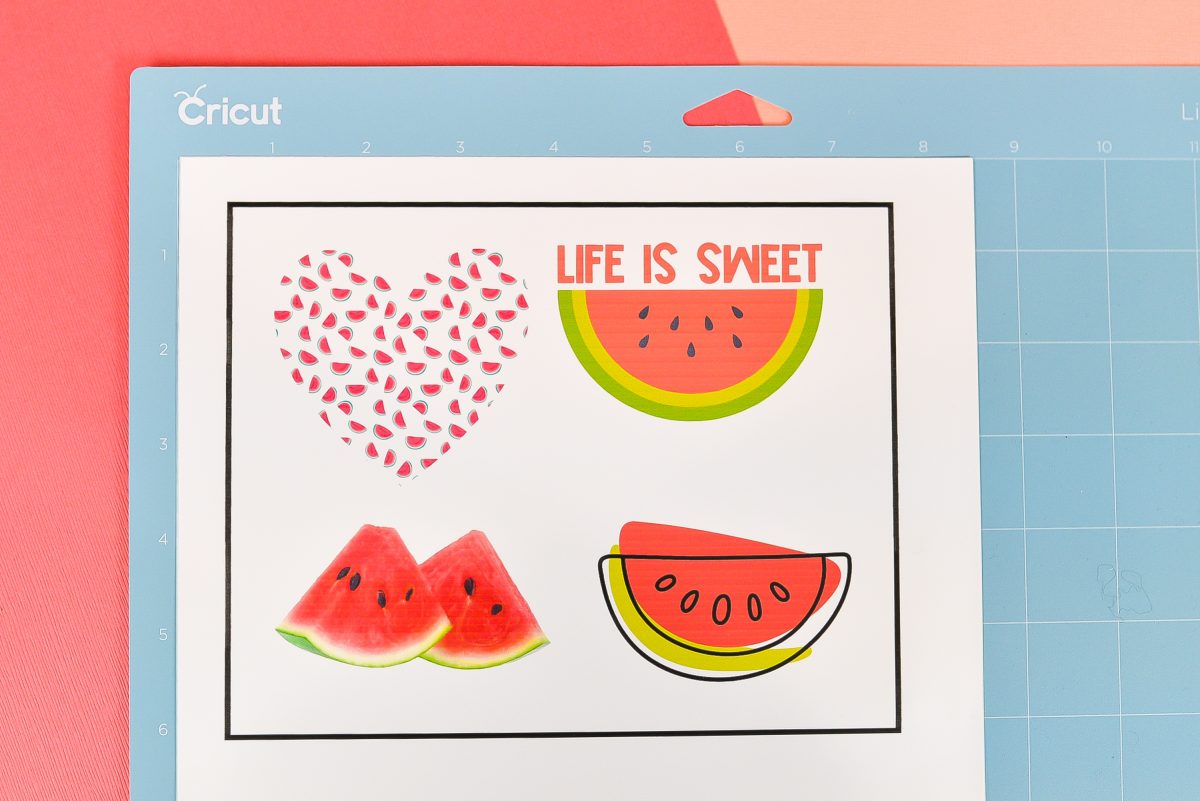
Once your image is printed, place it on a Cricut Mat in the upper left corner, as shown on the Preview Screen. Insert the mat into your Cricut, change your material to Printable Vinyl (or whatever material you are using) and click the blinking C on your Cricut.
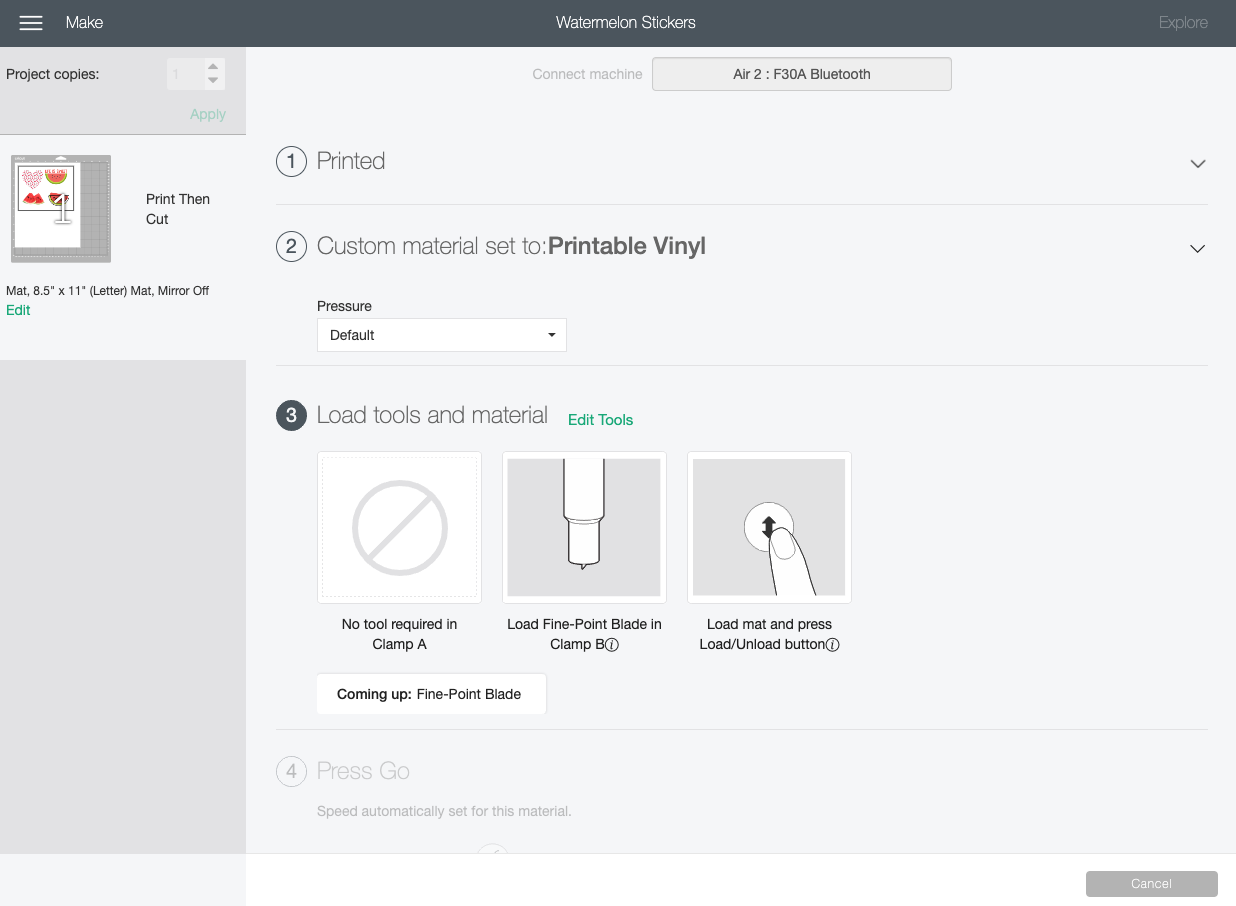
Your Cricut will take some time to read the black registration box around your image. It will then cut your stickers around the offsets you created! Once it’s done, you can just peel your sticker off the baking sheet just like you would any other sticker!
Note that stickers made with these materials are generally not waterproof so they are not good for using on things that you may wash, like water bottles. You may want to try a waterproof sticker paper, though I haven’t tested a product like that so I can’t speak to the durability.
Hope you found this helpful! Need help making Cricut stickers? Leave a comment!


Comments & Reviews
Mici says
Okay loved your tutor oral but have another question. I have bought some files off etsy. However they don’t have cut files. Should I just:
add offset around each one to make single sticker
or
1 pull up file
2 select shape to fit behind design
3 flatten
4 attach
5 print and cut
Cori says
Hi Mica,
Either process will work it just depends on the look you want to achieve :)
Laurie Perez-Lester says
Hi Crystal! Thank you for the wonderful tutorial but I have a question. I added a clip art to Cricut Design Space and I deleted the white background. I chose the offset button and flattened my image, but when I cut, there is a black square around my image. What am I doing wrong? Thank you.
Crystal Summers says
Hi Laurie,
Did you change your offset color to white? It will default to black. but you’ll want to change it to white before you print!
Hope this helps,
Crystal, HLMS Community Manager
Julia says
What printer do you use? I’m trying to figure out which color printer to buy for my projects (just at home hobby stuff) but I don’t know what’s best. I don’t want to buy more than I need (i.e. large output workhorse) but I also don’t want something that will disappoint with low grade results. Any suggestions on middle shelf products?
Crystal Summers says
Hi Julia,
Cori uses an HP Envy Pro 6400. That machine was replaced with the HP Envy Pro 6455, which has the same basic features. Here’s a link (affiliate): https://amzn.to/2Vi0vw9
Happy crafting,
Crystal, HLMS Community Manager
Mimi Philpott says
Is there a way to make the background of the offset clear? Thank you for the detailed instructions. They were a great help!
Crystal Summers says
Hi Mimi,
Clear in Design Space? Unfortunately, no. However, if you’d like to create a sticker with a clear border, you could print on clear sticker paper!
Hope this helps!
Crystal, HLMS Community Manager