These are great tips and tricks for using the Cricut Design Space or Illustrator to convert your doodles, writing, and other hand-drawn images into an SVG that you can cut on the Cricut Explore!
One of the cool things about the Cricut Explore is that you can upload your own images, even images you’ve drawn yourself! I have two methods I use to do this, one using Illustrator and one using the Cricut Design Space.
Importing a Sketch
Whether or not you use the Cricut Design Space or Illustrator, you will first need to import your image into your computer, as a JPG or PNG file. How you do this will depend on how you created it.
If you hand-draw on a sheet of paper, you can scan that paper and it will create a file on your computer. You can also take a photograph of it with your phone and use the image. I’ve done both and both work well. You can see how I used a phone photo of my boys’s footprints to make a cut file.
If your drawing was hand-drawn on a tablet or other device, you should be able to save the file as a JPG or PNG and import to your computer.
Today I’m going to be using a super cute hand-lettered “be brave” design from my friend Erin over at Printable Crush. If you love my blog, you will definitely love hers!
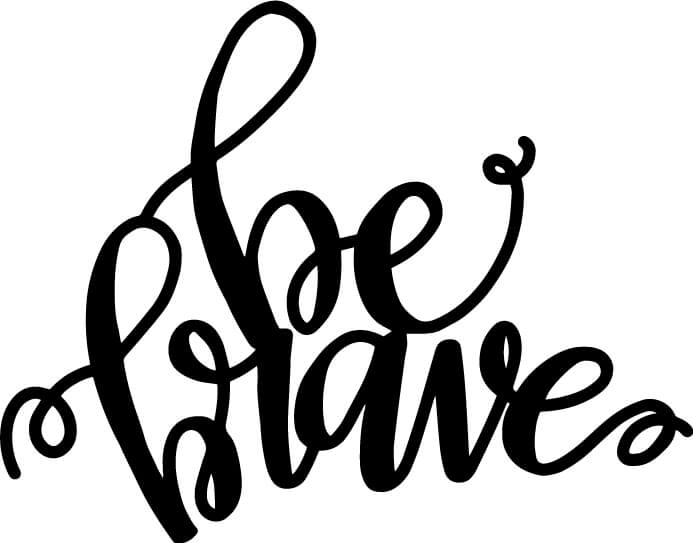
Seriously, guys, she drew this. On an iPad. Makes me really want to learn how to hand letter! This is a JPG file she sent me and I’ll show you how to make it into a file you can cut using both Cricut Design Space and Illustrator.
And as a bonus, here’s the file for you to download, ready to go on your Cricut or Silhouette!
Get the Free File
Want access to this free file? Join my FREE craft library! All you need is the password to get in, which you can get by filling out the form below. The file number is: C35.
Converting a Sketch using the Cricut Design Space
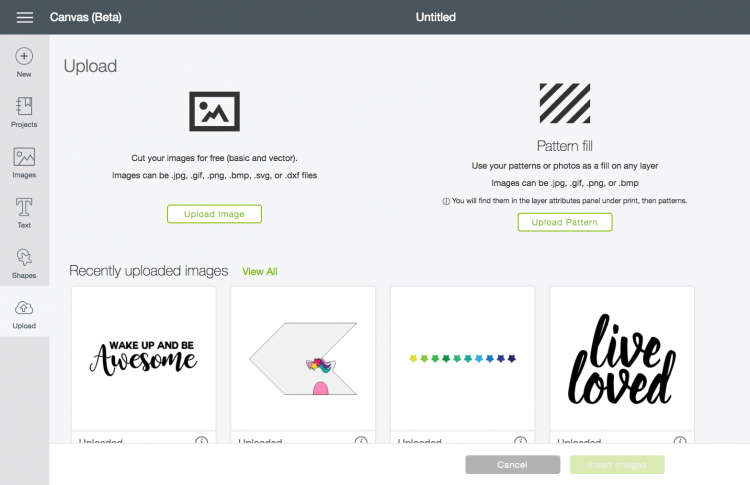
First let’s look at the process in the Cricut Design Space. Open the Cricut Design Space and upload the PNG using the upload tab on the left-hand side.
Once you have the image uploaded, you’ll be asked to select the image type. This is a simple file with lots of contrast between the black and white.
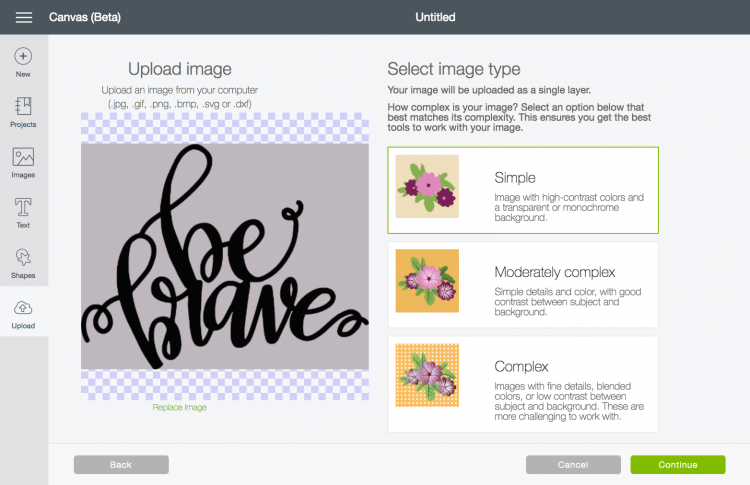
Then click on the areas in your artwork that are not part of the artwork itself. This will tell the Cricut not to cut those parts.
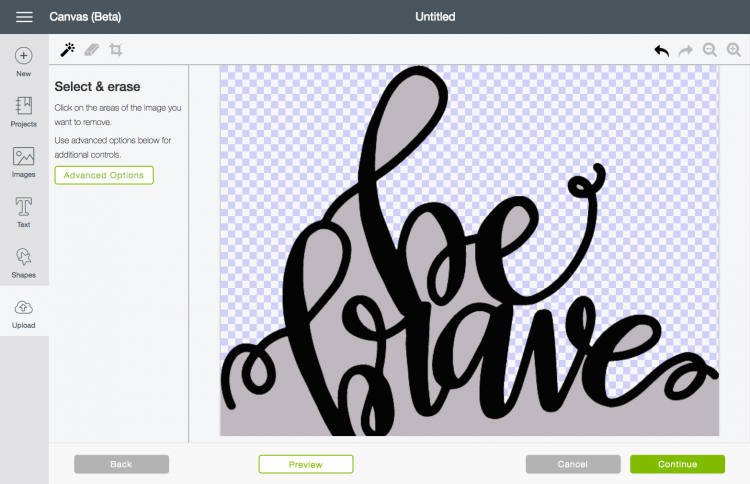
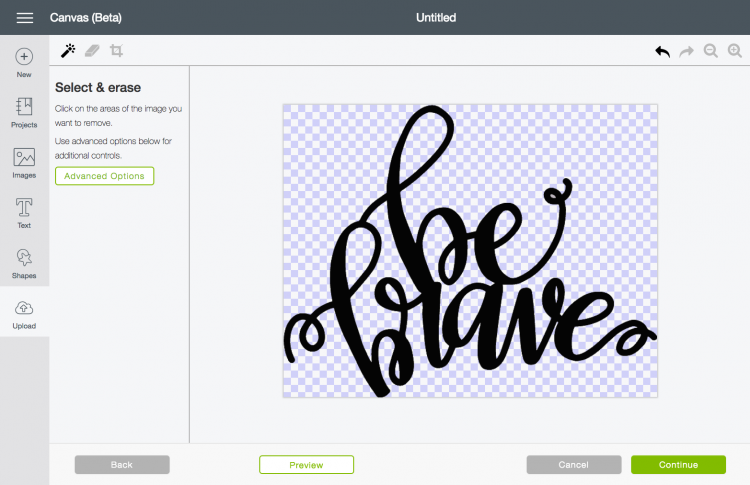
Click continue and choose to save your image as a cut image. Then click save.
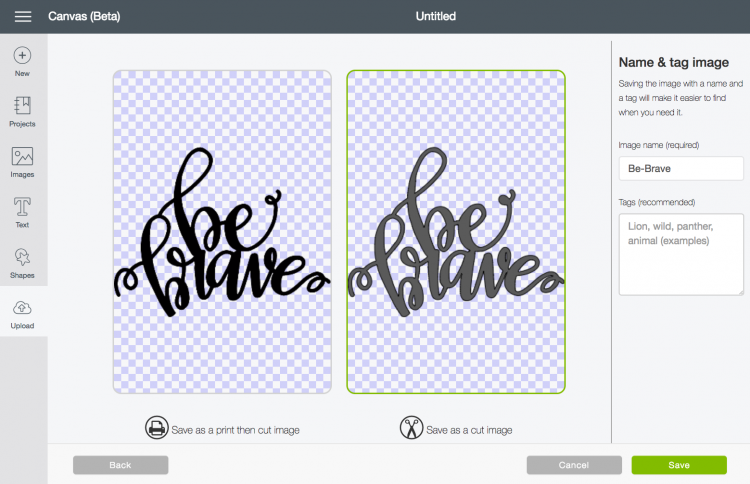
Easy peasy. Now your JPG image has been turned into a cut file.
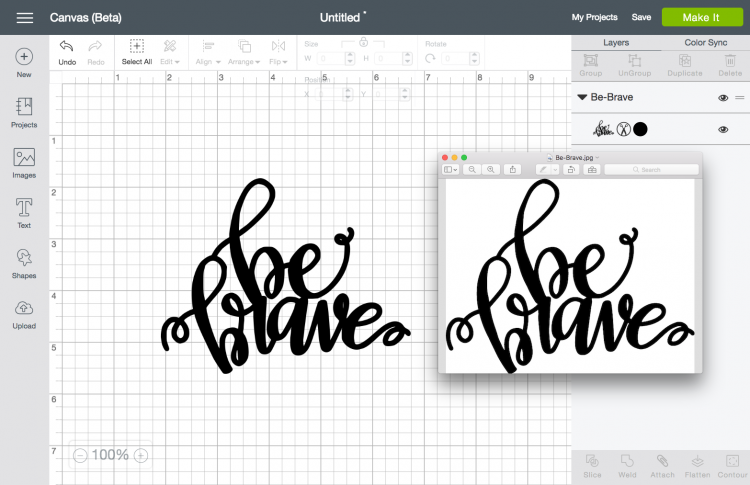
You’ll notice, however, when I compare the file that Erin sent me and the file that the Cricut Design Space made for me, that it’s not perfect. We’ve lost some definition in the image, especially in the curlicues. It’s pretty good, but it’s not great.
Converting a Sketch using Illustrator
The loss of definition in files is the main reason that I prefer to use Illustrator to convert my hand-drawn images into an SVG file. I feel as though Illustrator is more capable when it comes to creating files like this and you can work on certain areas of a file if they aren’t rendering well.
And remember to use those shortcuts when working in Illustrator! You’ll really speed up your process if you learn them. Shortcuts are in teal in this post.
Start by placing your JPG into a new Illustrator file.
File > Place (shift+cmd+P)
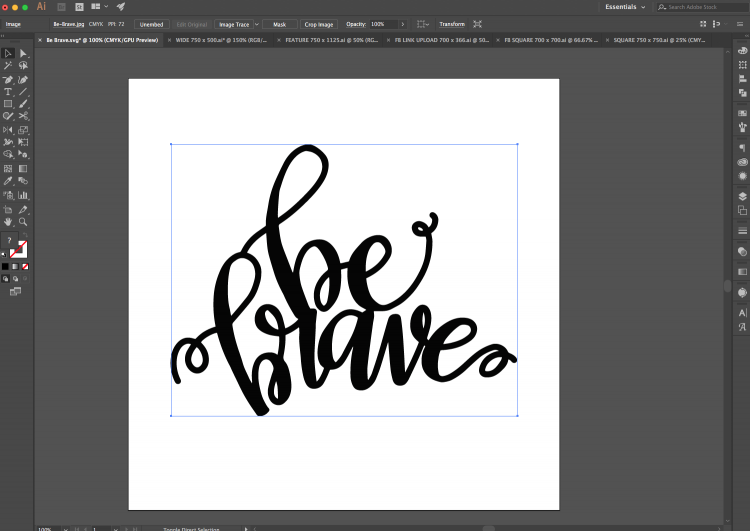
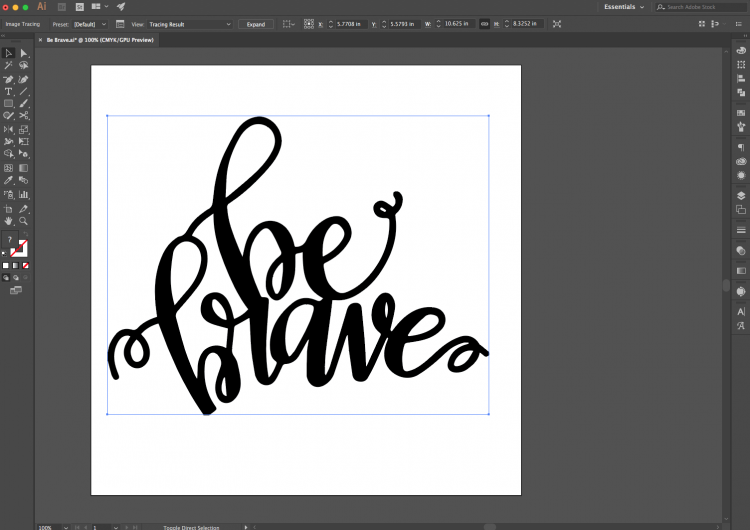
At the top of your screen click the button labeled Image Trace. This will create a general outline of your image — you’ll notice everything becomes a little smoother. Open the Image Trace panel: Window > Image Trace
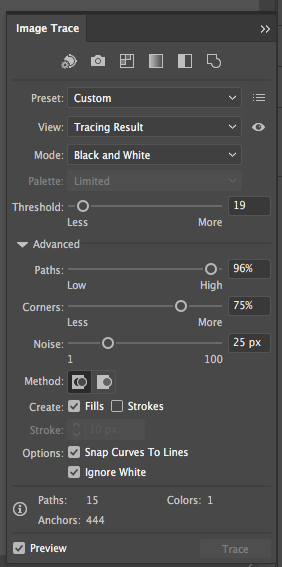
In the image trace panel, you can do two important things. The first is to adjust the sliders. I often find that for files like this, taking down the “threshold” and bringing up the “paths” helps me get as close to the original image as possible. On files with less contrast, I often have to increase the threshold. Just play around and see which result you like best (the artwork will change as you adjust the sliders).
IMPORTANT: You will also want to check the box down at the bottom that says “Ignore White.” This is the most important step! It will leave you with an outlined image. If you don’t click this, it will outline the entire artboard and you won’t be able to cut your file.
Once you are happy with how your image looks, click Expand in the top toolbar (where you clicked on Image Trace earlier).
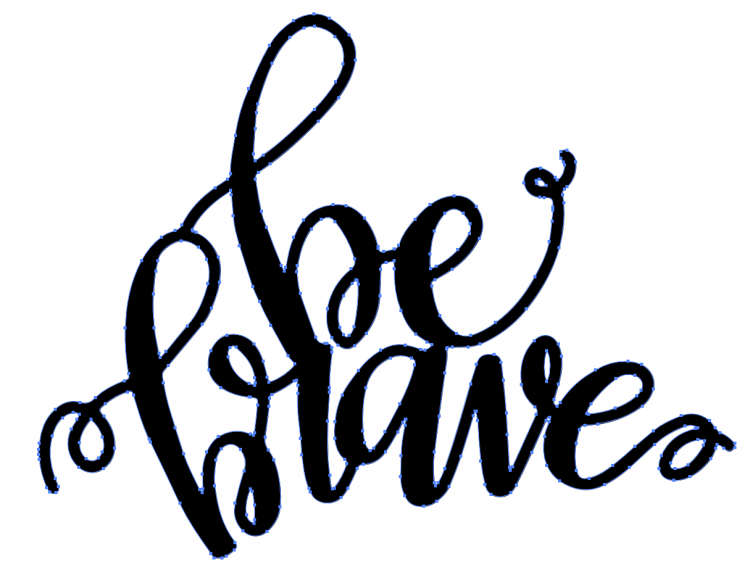
Select your image and see that it’s now outlined. The little boxes all around the image represent “nodes” — these tell the Cricut where to turn the blade to create your cut file. Too many of these = bad (see a good example here).
What we ended up with in this file isn’t too bad, but you’ll notice some extra nodes, like at the start of the curlicue in “brave.” The Cricut can cut this, but we can make it easier if we reduce the number of nodes in this file.
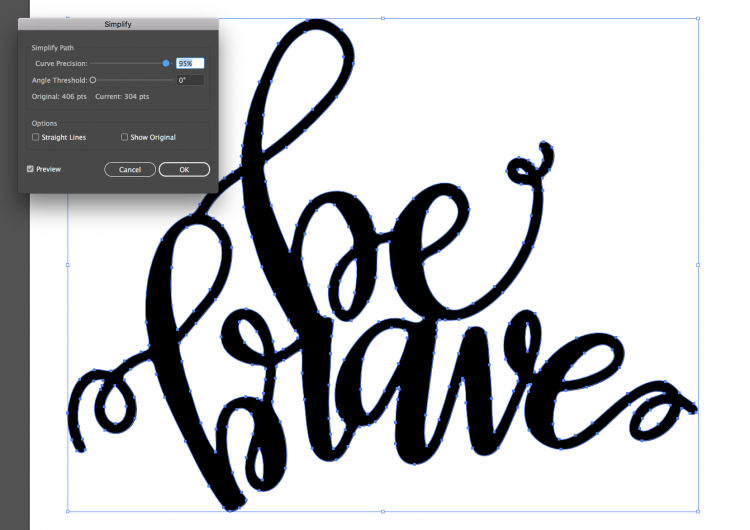
To do this, go to Object > Path > Simplify. Click the Preview box so you can see the changes being applied. Here you can change how mathematically simple your file is. I find that I can often knock it down to 95%, reducing the number of nodes but keeping the integrity of the image. Again, this is something you can play with to see how much you want to simplify something. You’ll notice, for example, that the curlicue to start the word “brave” is much simpler.
Then save your file! Go to File > Save As and choose a SVG from the dropdown menu.
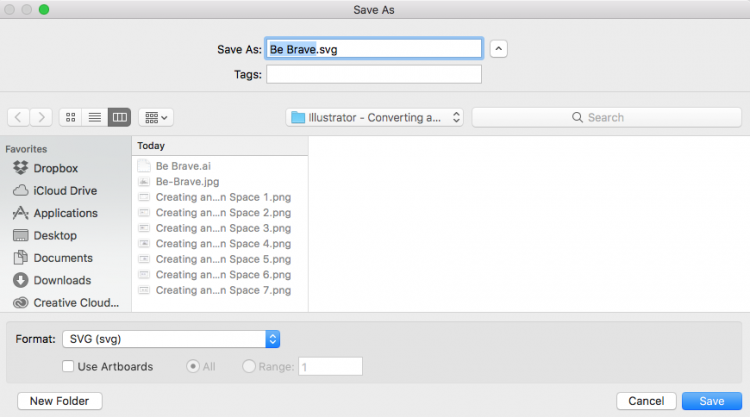
Tada! Your SVG will import natively into the Cricut Design Space — you won’t have to select the type of image or delete any of the negative space. Let’s take a look at all three files together.
First is the Cricut Design Space file, second is the Illustrator file, and third is the original:
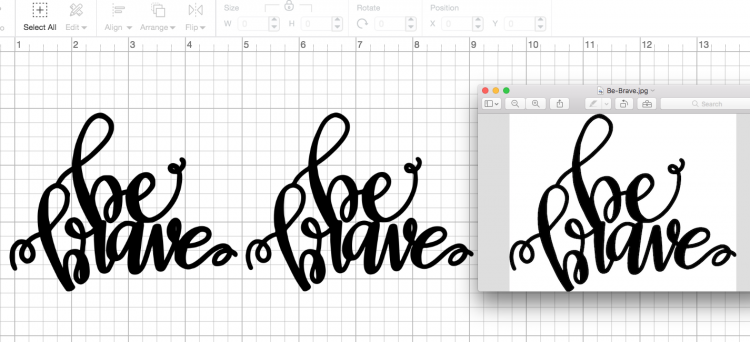
You can see that the Illustrator file is just a bit more true to the original artwork that Erin created. The lines are thinner and you have definition in the letter loops. Both methods are awesome, but Illustrator just gets you a bit closer to the original.
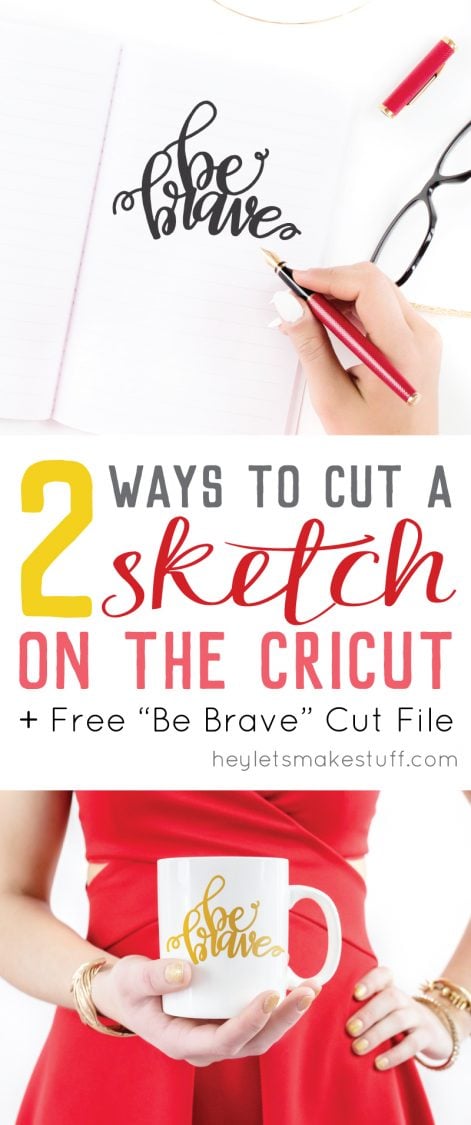
Once you cut it, you can put it on whatever you’d like! Heat transfer for a t-shirt or bag, paper for a scrapbook layout, or regular vinyl for a cute mug!



Comments & Reviews
Michelle Stone says
Hi there
Can you use this method to cut a shaped hole out of a piece of card? So for example the words would be holes that you can stick fabric behind for some wall art? Thank you so much!
Nicole says
I have followed these steps exactly when trying to cut a hand drawn image, but for some reason even using the select and erase tool, it won’t remove the entire background. It leaves bits and pieces of background, that are smudgy and impossible to erase without using the little eraser tool, but then I risk ruining the lines of my image.
This is so frustrating, and I don’t understand why it’s happening, but it happens with several of my hand drawn images and I can’t figure out why.
Zaheer says
I want to draw a series of scribbles that I want to use in design space as part of an image where I want these scribbles to show as ‘censored’ text. The rest of the image is actual text. Whatever I use png/jpg/svg shows as print and cut but I just want to print the lines and not print&cut. Any ideas?
Cori George says
Try flattening the scribbles using the Flatten button in the lower right corner — that should turn the scribbles into just printing. Let me know if that works!
kweenbee_612 says
I was uploading images/quotes ALL weekend & did NOT enter them into CDS like this. :( When I was going along w/ you for this tute, my CDS did NOT offer me the page/option to click parts I didn’t want cut. I’m not sure what that option is for. Is there any way you could explain it using a crayon? LOL!! Or easier yet, using layman’s terms?
Cori George says
What type of file are you uploading? I’ll try and troubleshoot for you :)
Courtenay says
can this be done with more complicated images? I have used sketches on my ipad to draw and color some characters that i want to turn into stickers. when i cut them with my circuit it makes way to many cuts. i think that your process may work for my needs but have never used illustrated before.
Sara says
I’ve got the same question. I have a children’s illustration (drawn in Procreate on the iPad Pro) that has a total of 4 colors (including black), so there are a few differently-weighted brush strokes, outlines, etc. When imported into Design Space, it tries to cut 20+ different cuts. I’ve gone through the Illustrator process outlined above and saved it as an SVG.
Cori George says
There are different ways you can play around with the tracing feature in Illustrator, limiting the number of colors it traces. It still is not the best but it can work if the artwork isn’t too complicated.
You can also create an all-black illustration in ProCreate and then colorize it in Illustrator (my preference).
I feel like a friend said recently she had another process for ProCreate and SVGs—I reached out to her and if I get a response, I’ll let you know!