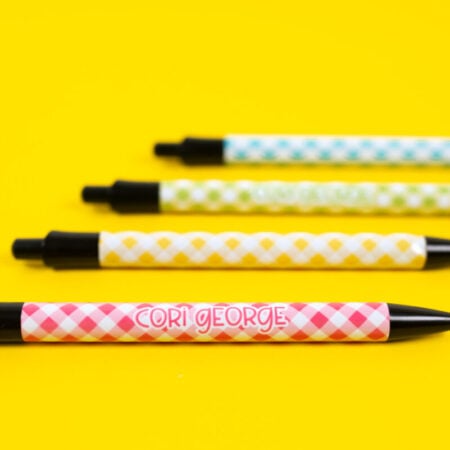
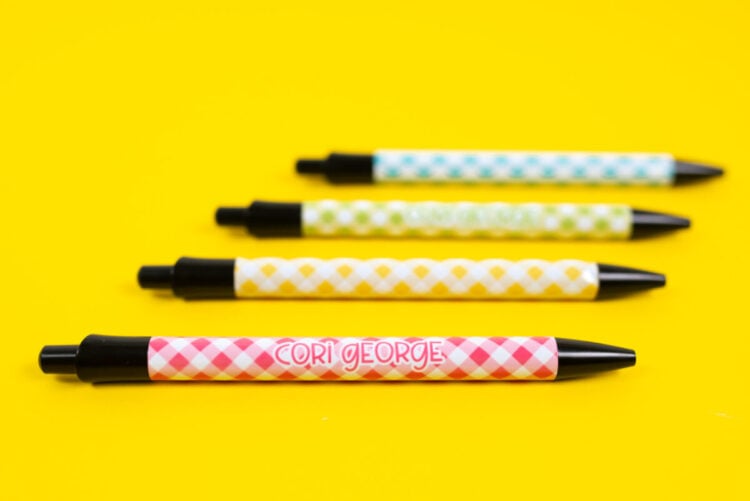
Use sublimation to make cute pens for your desk or as gifts! Here’s how to sublimate pens in a sublimation or convection oven, plus add a name to customize them!
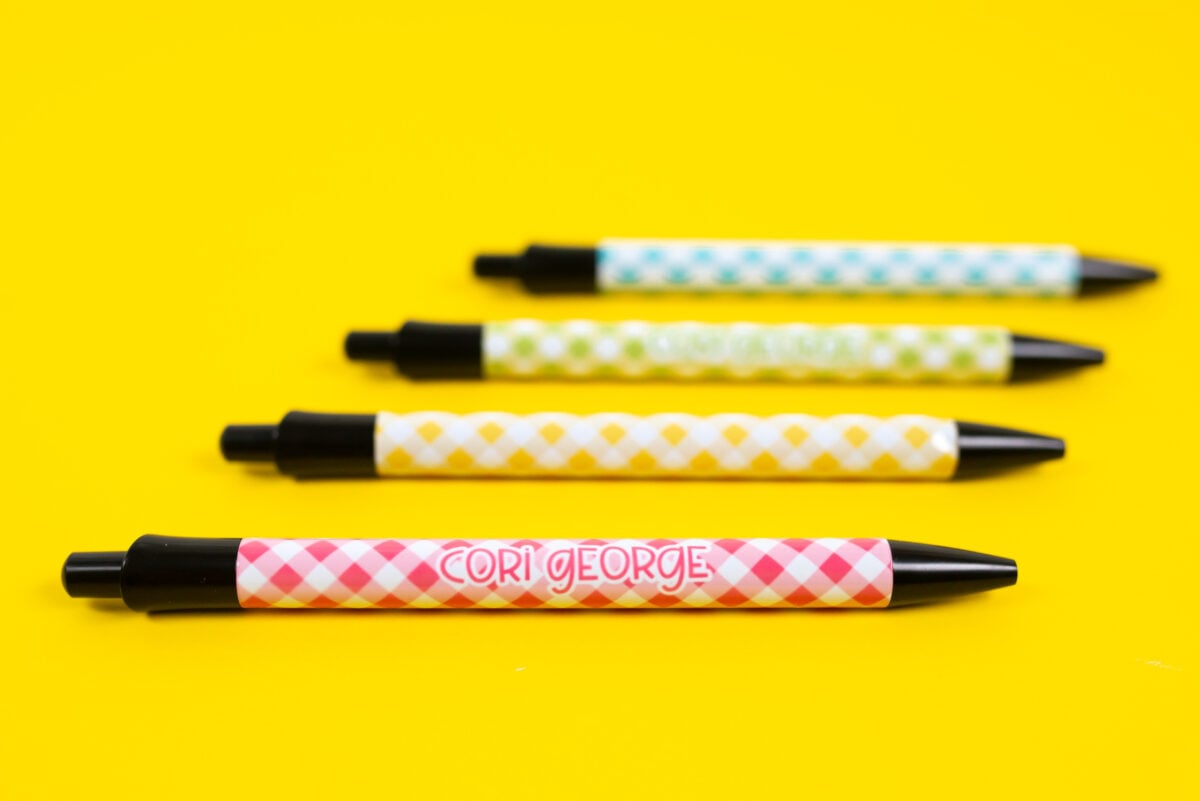
There are so many sublimation blanks to choose from these days and one of my new favorites is pens! They are relatively easy to make, the aren’t expensive, and you can endlessly customize them.
In today’s post, we’re going to talk about how to sublimate pens, plus I’ll give you tips and tricks for adding a name and getting the image wrapped tightly around the barrel of the pen. I’m using my J-Trans sublimation oven, but you can use any convection oven you have set aside specifically for sublimation crafting (never use an oven you use for food for sublimation!).
Let’s get started!
Watch the Video
Click play below to watch a video of me sublimating pens! Or keep reading for a written tutorial.
Get the Free File
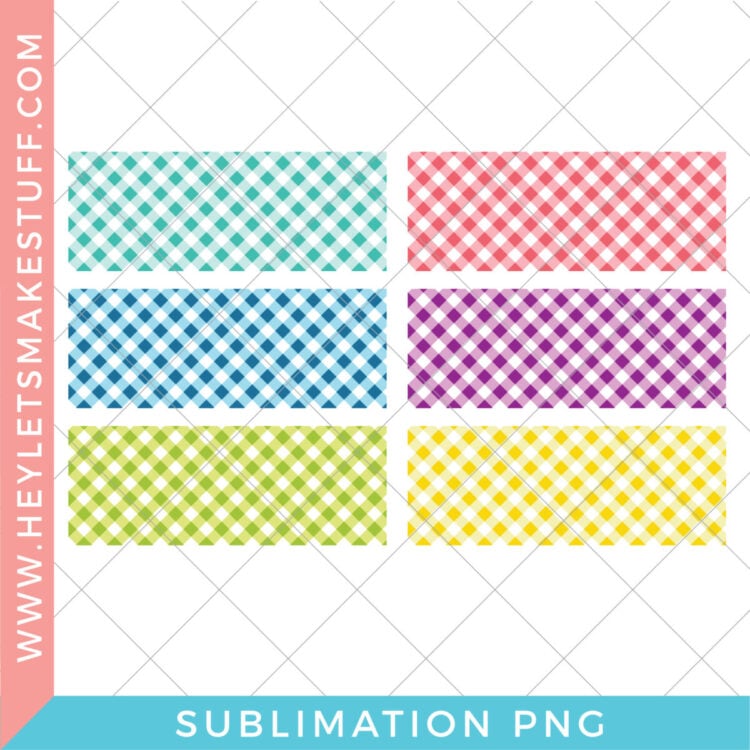
Want access to this free file? Join my FREE craft library! All you need is the password to get in, which you can get by filling out the form below. The file number is: S33.
Supplies for Sublimating Pens
Get everything you need to sublimate pens in my Amazon Shop!
- Sublimation pens (these should come with specialty shrink wrap)
- Heat-resistant tape
- Heat-resistant gloves
- Alcohol and a microfiber cloth
- Sublimation oven
- Weeding hook or scissors (optional)
- Heat-resistant mat
How to Sublimate Pens
You can use the free file above as is to create non-personalized pens, but let’s hop into Cricut Design Space to add a name. Skip this first part if you don’t want to add text to your pen.
Adding a Name to Sublimation Pens
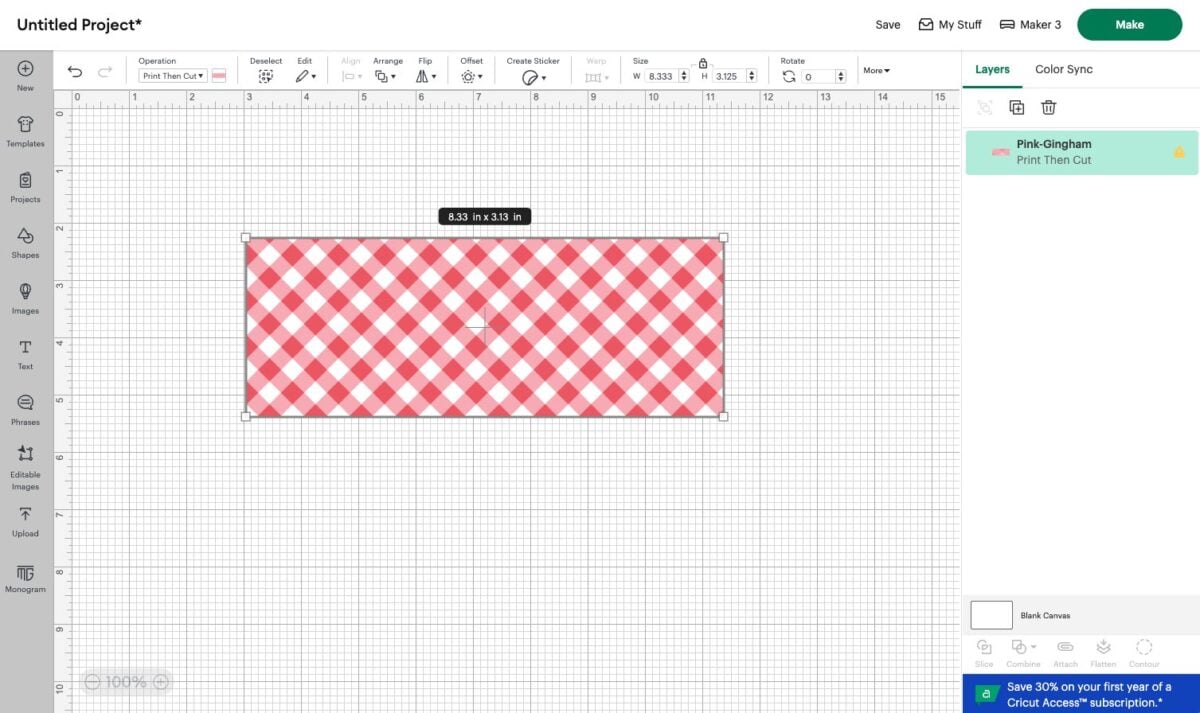
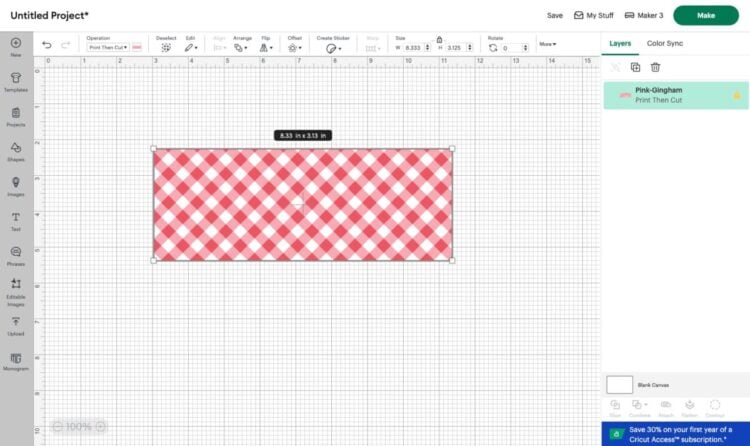
Upload your PNG file to Cricut Design Space. Despite designing these in the correct size, Cricut Design Space will bring it into the Canvas too large. We’ll re-size it before we make our project.
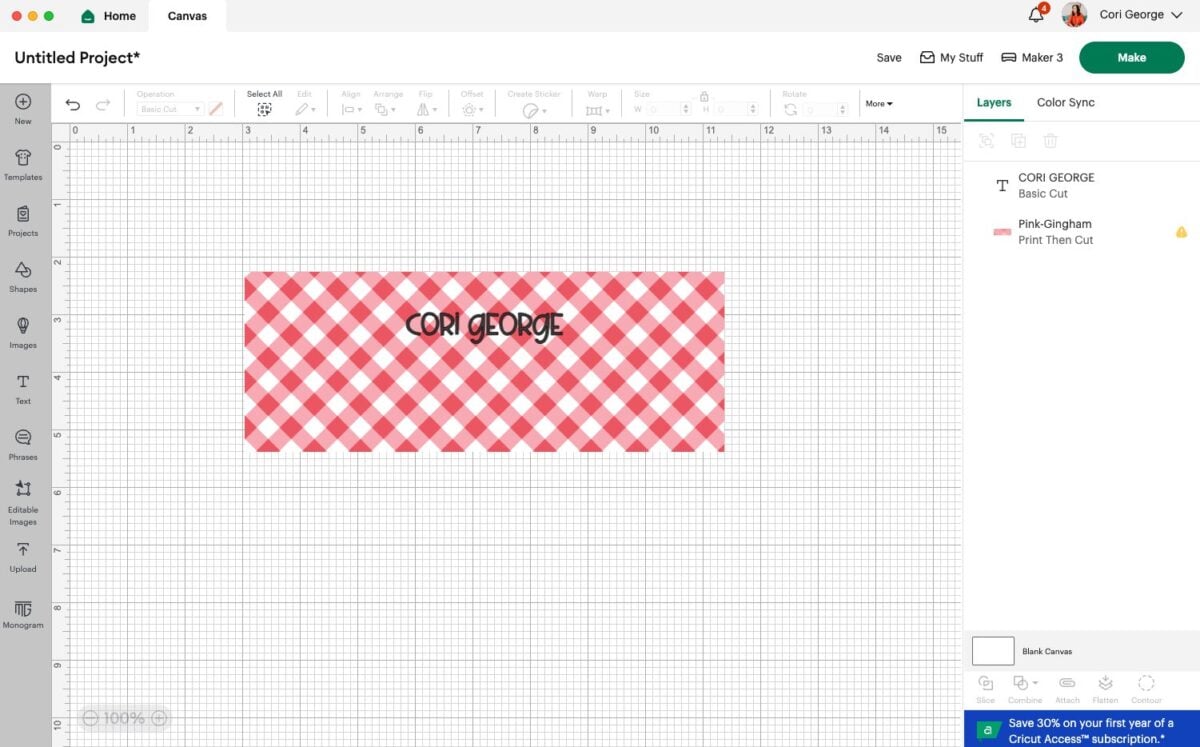
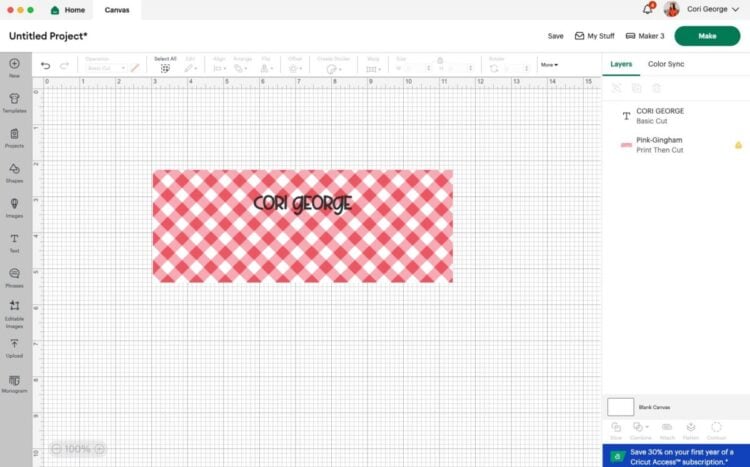
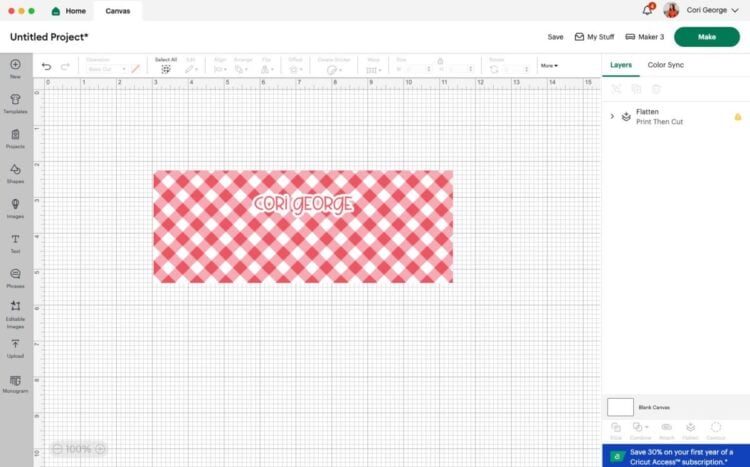
Type your name or other text, and then resize the text and place it about 2/3 of the way up on the background image.
If you’d like, change the color and add an offset.
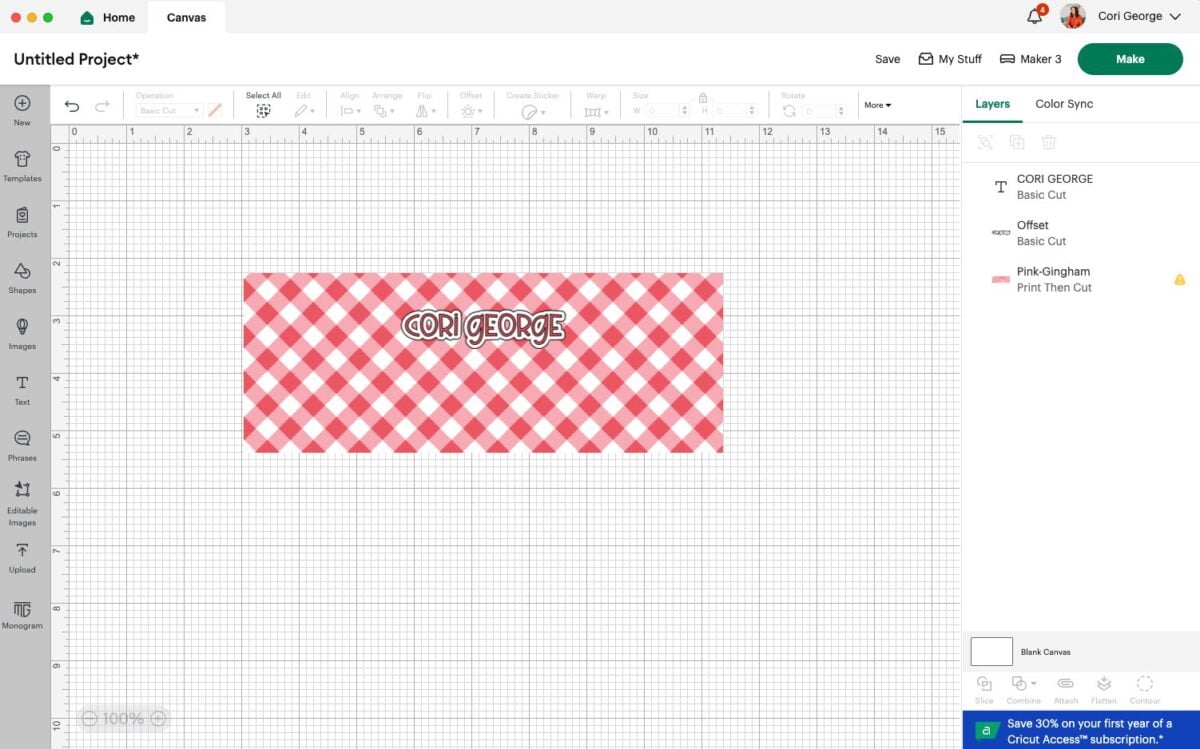
Select the text, offset, and background and click Flatten in the lower right.
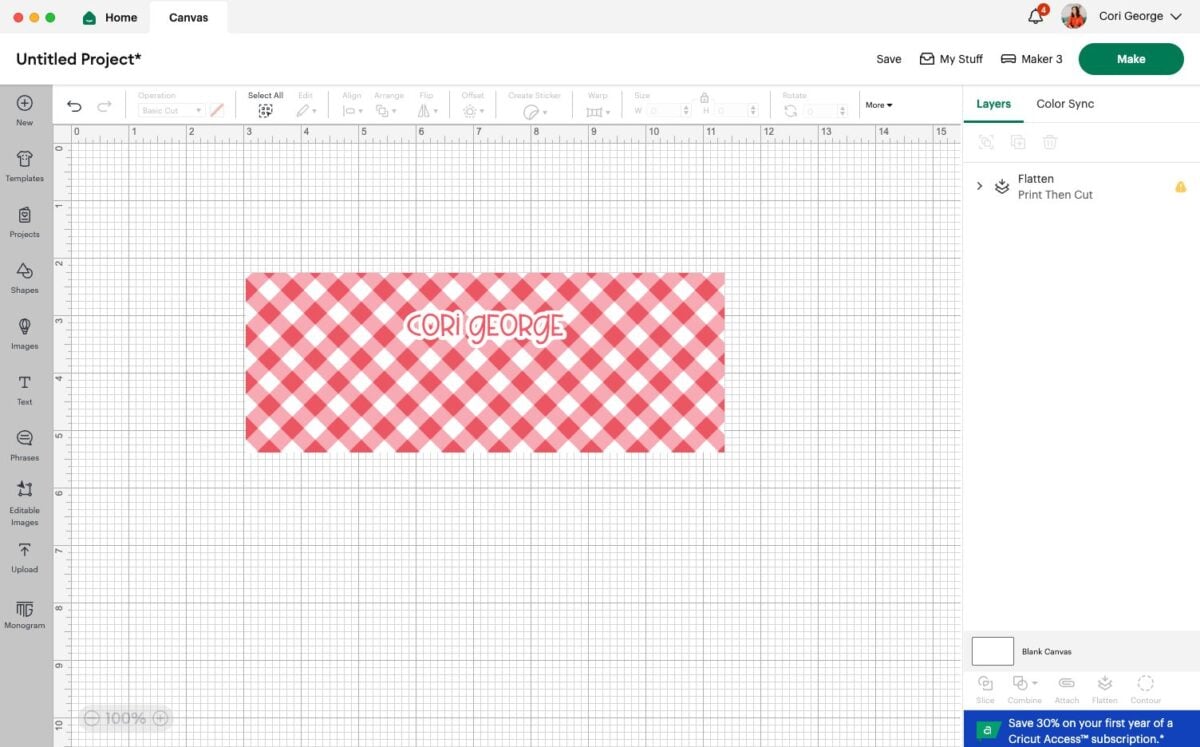
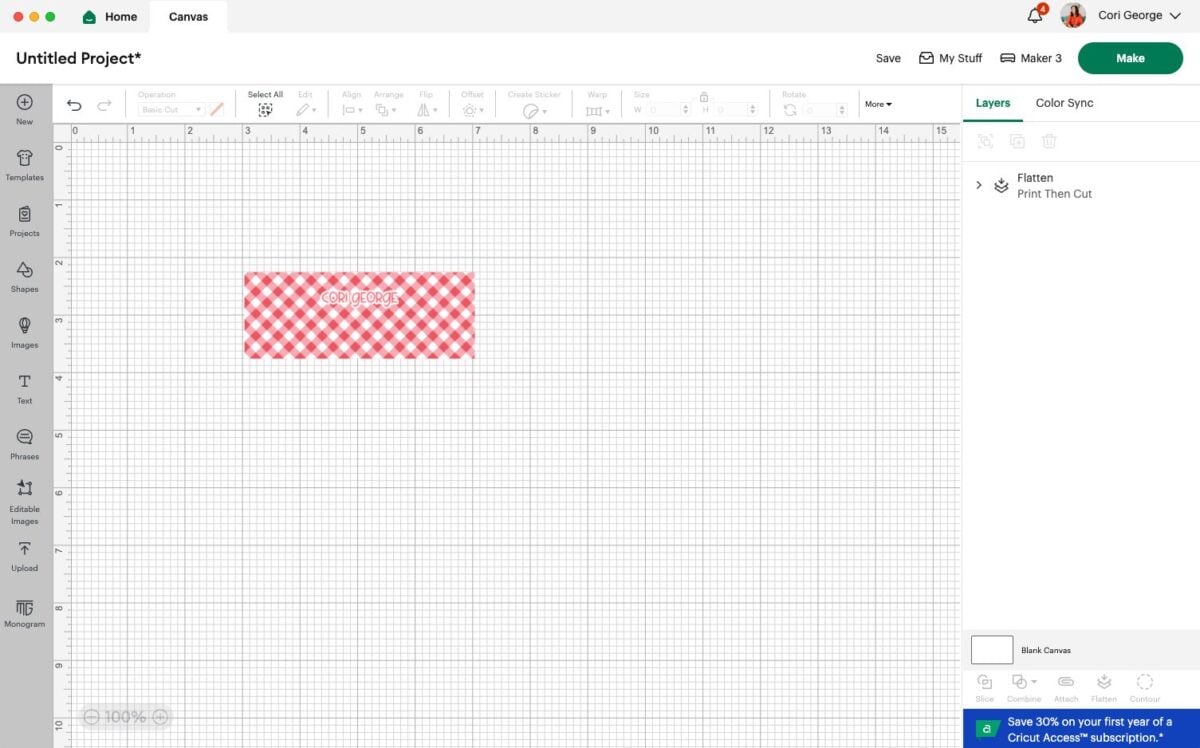
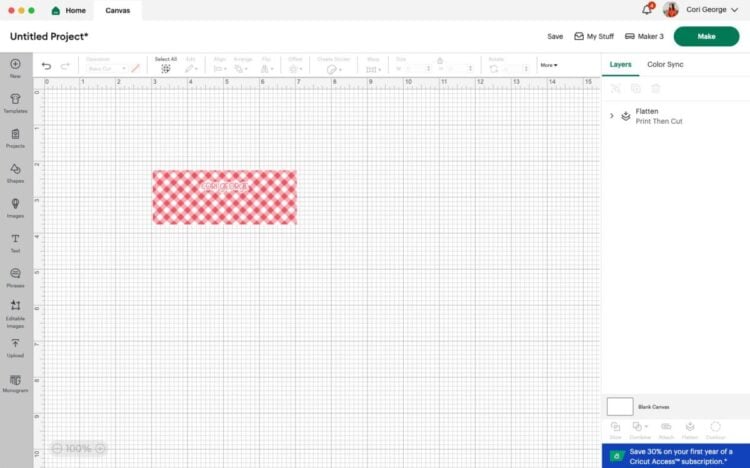
Re-size the project to be 4″ wide.
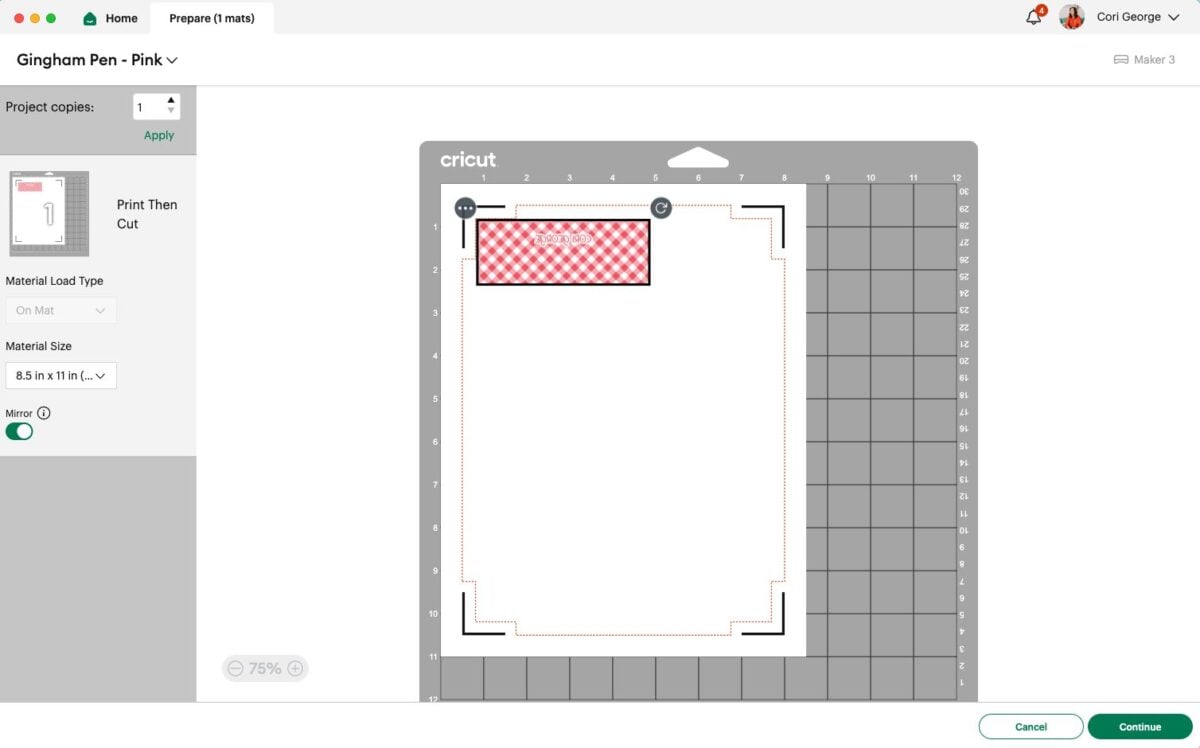
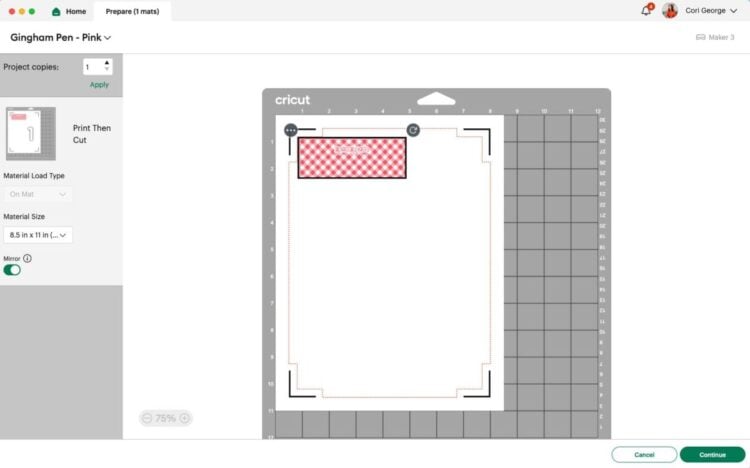
Click Make It. On the Prepare Screen, mirror your image.
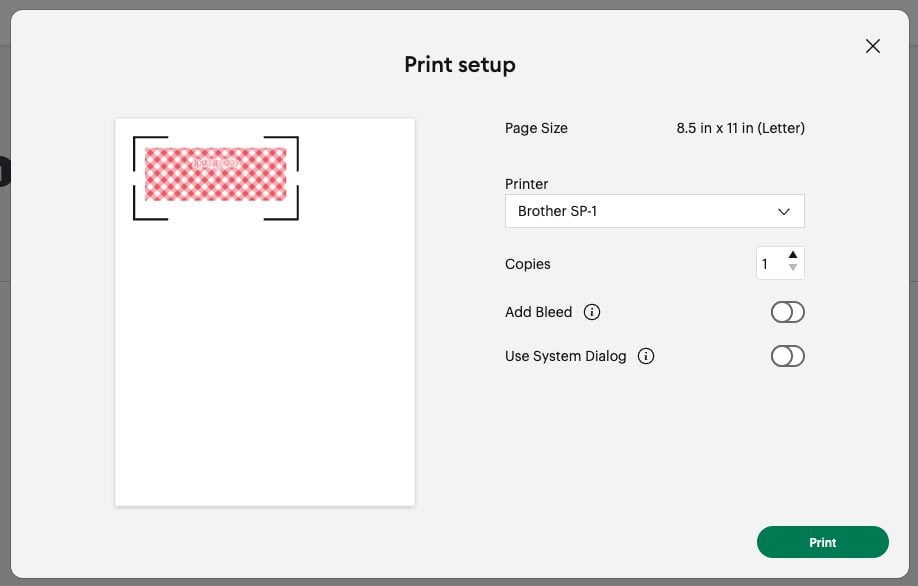
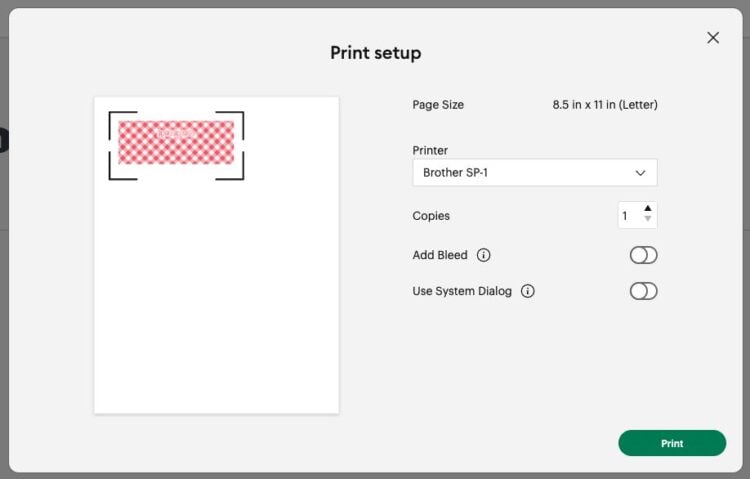
And then print with your sublimation printer with the Bleed turned off.
Sublimating Pens in a Convection Oven
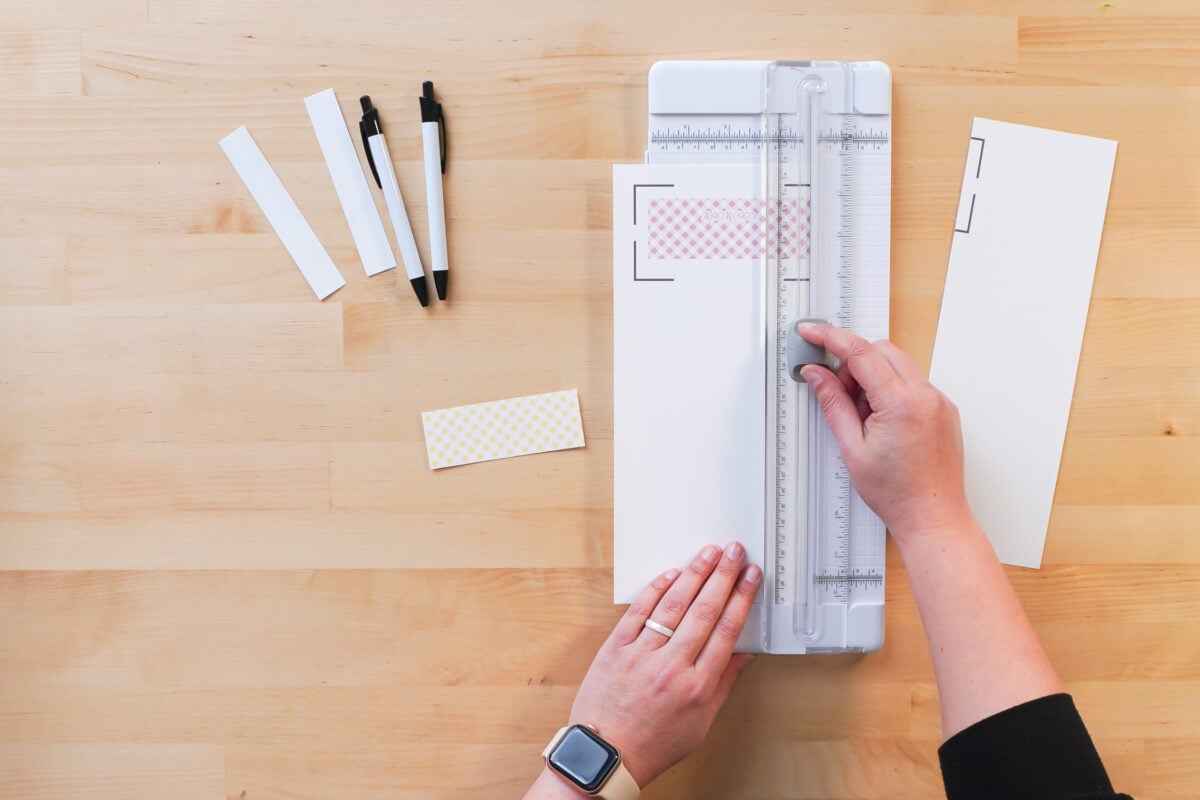
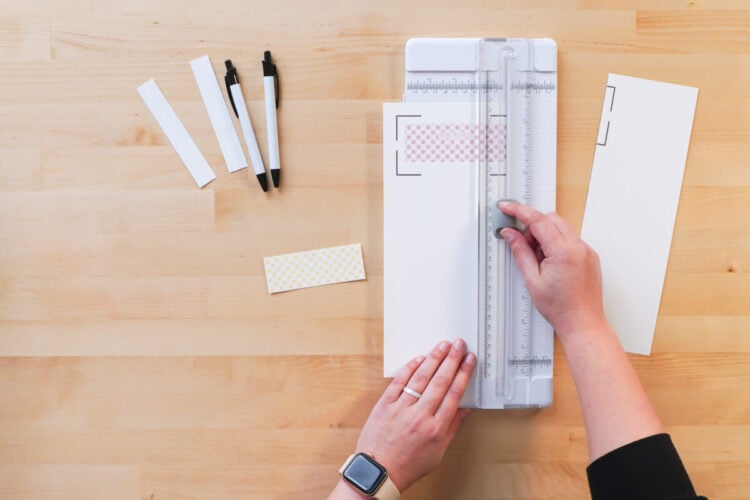
Start by cutting out your transfer. I’m not using my Cricut for the cutting—I just cut my transfer down using a paper trimmer.
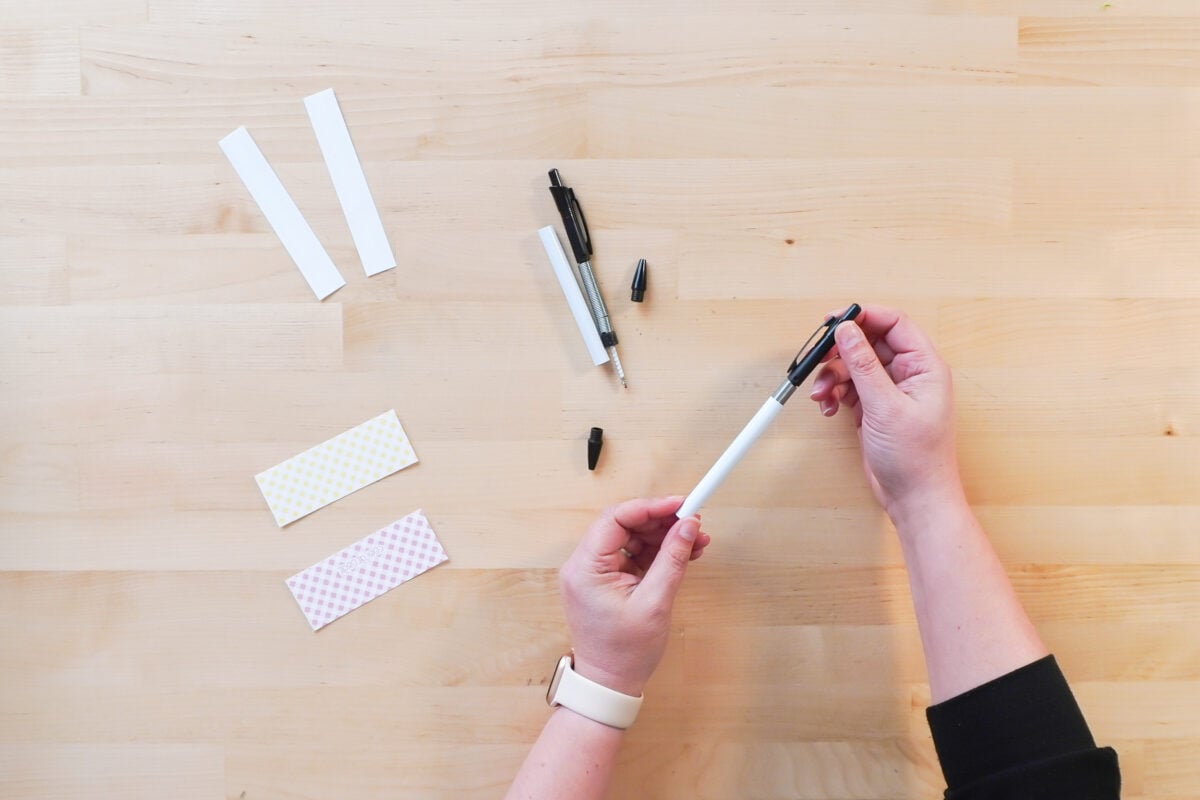
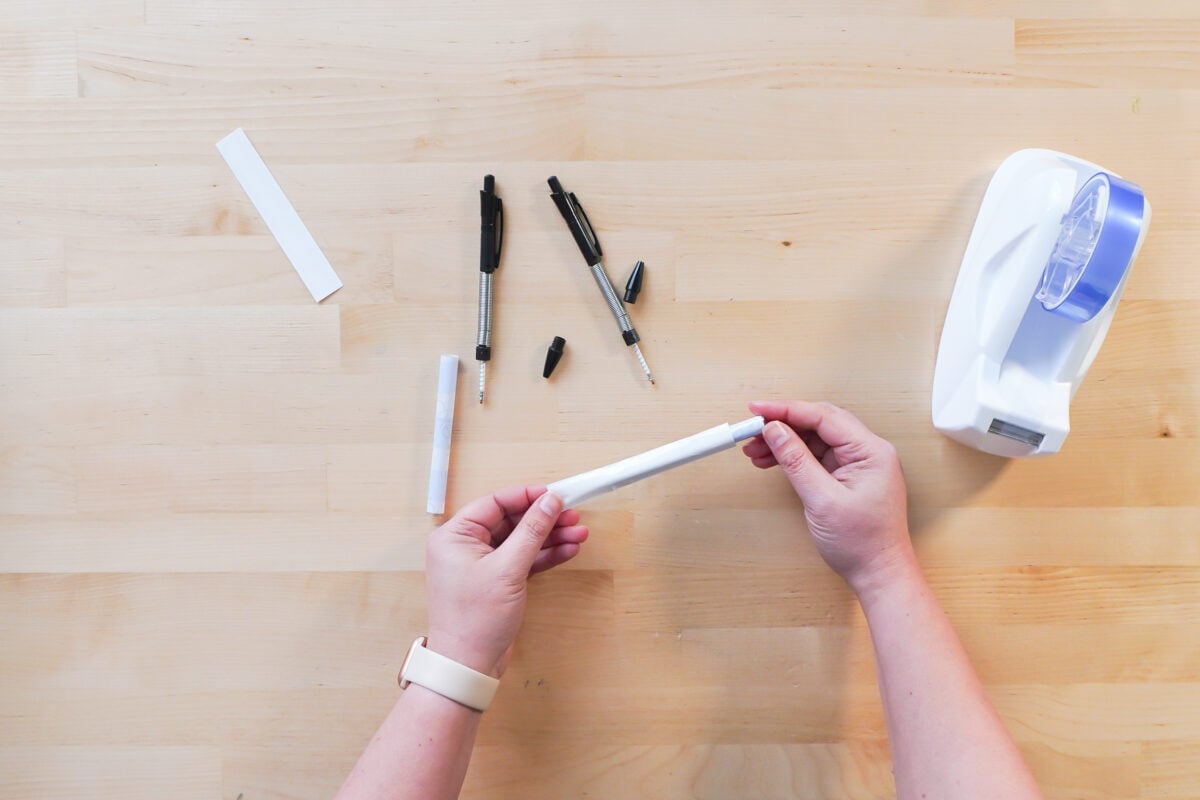
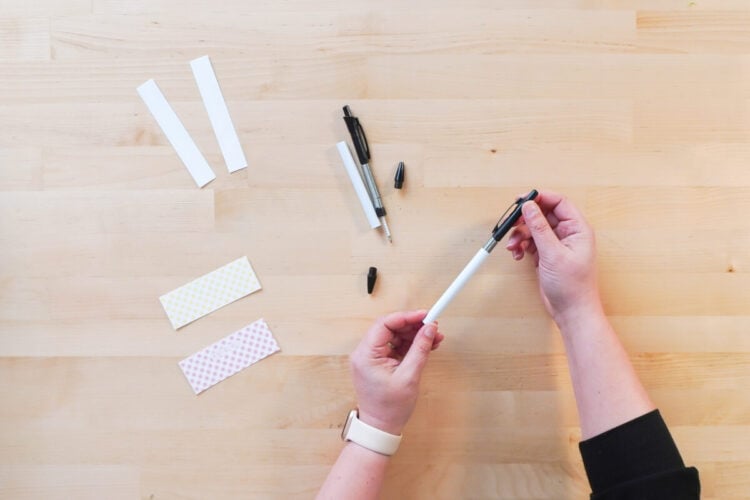
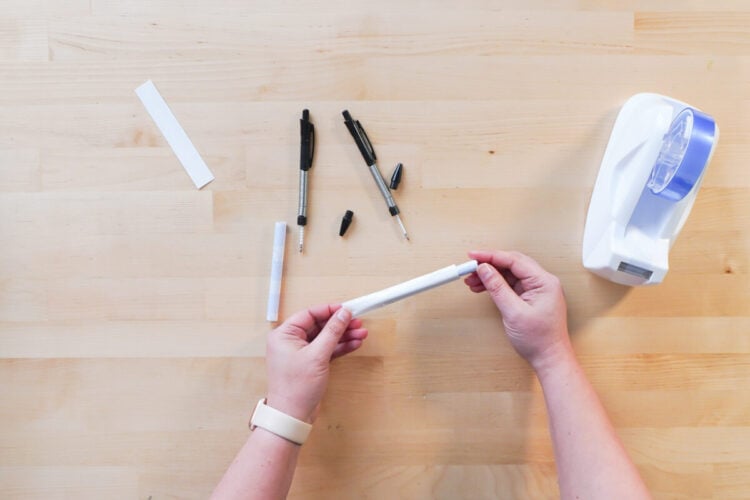
Loosen the screw part of the bottom of the pen and remove the inner workings. Make sure to not lose any of the small pieces.
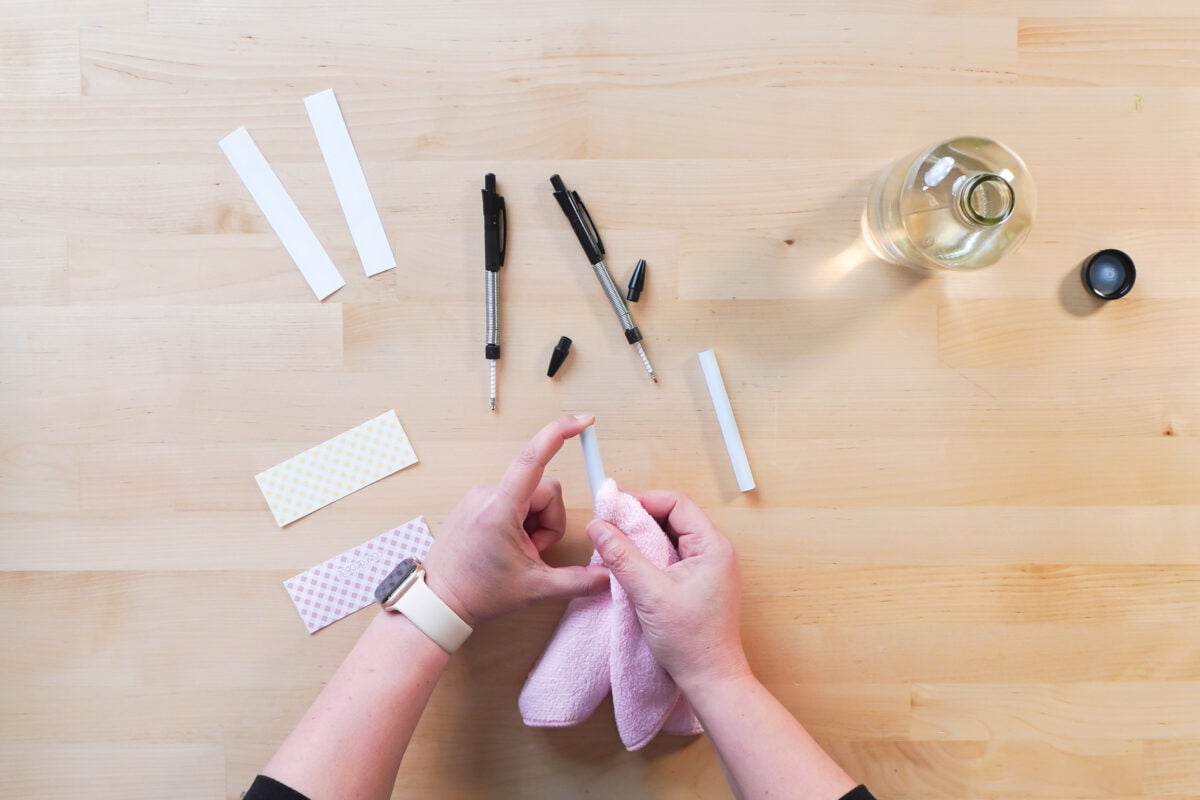
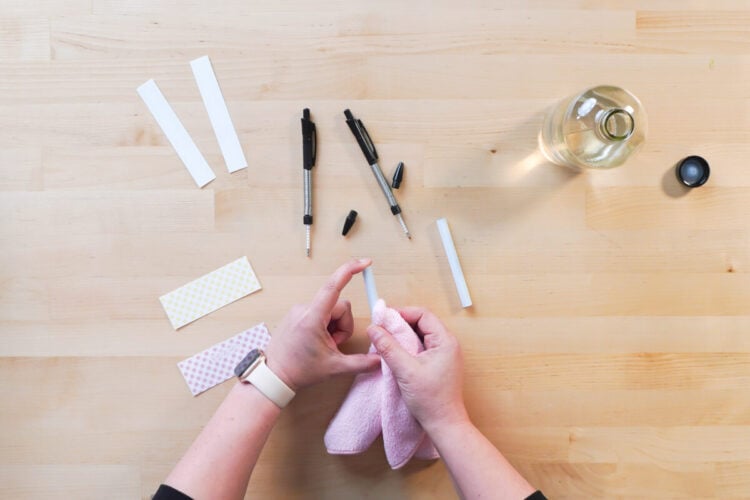
Clean your barrel with alcohol and a microfiber cloth.
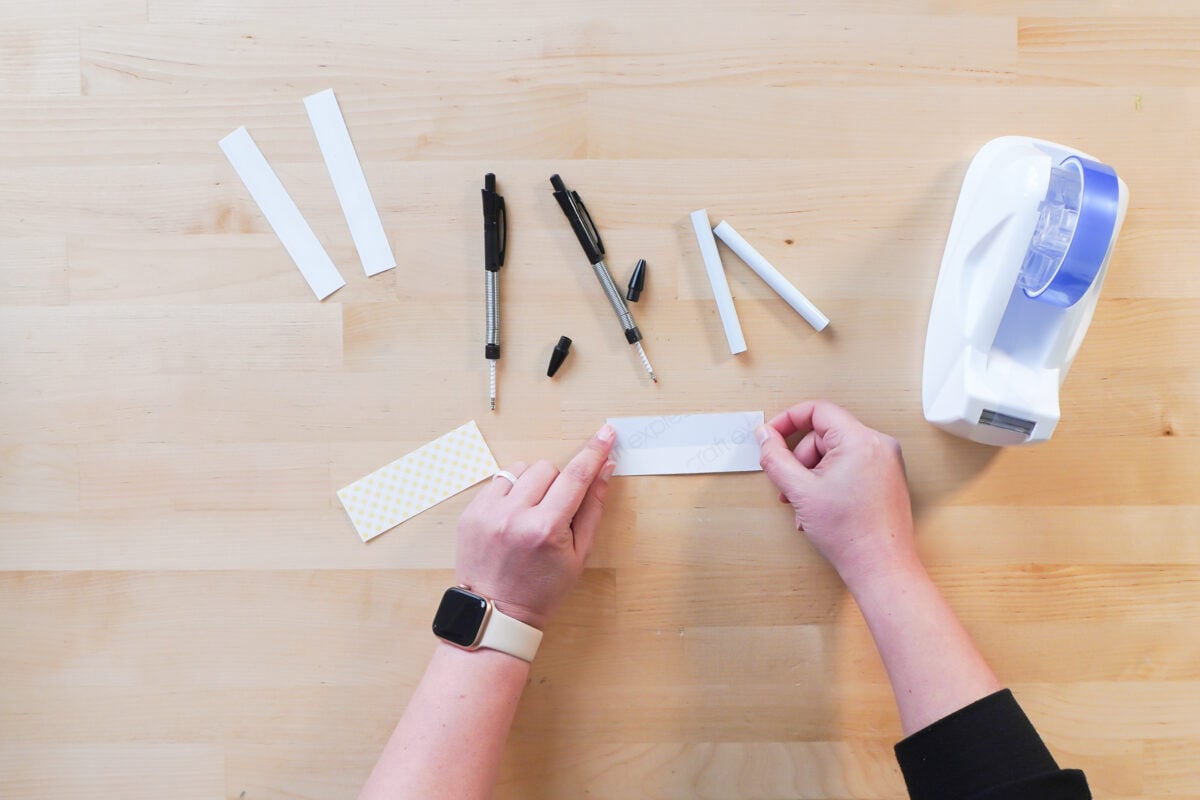
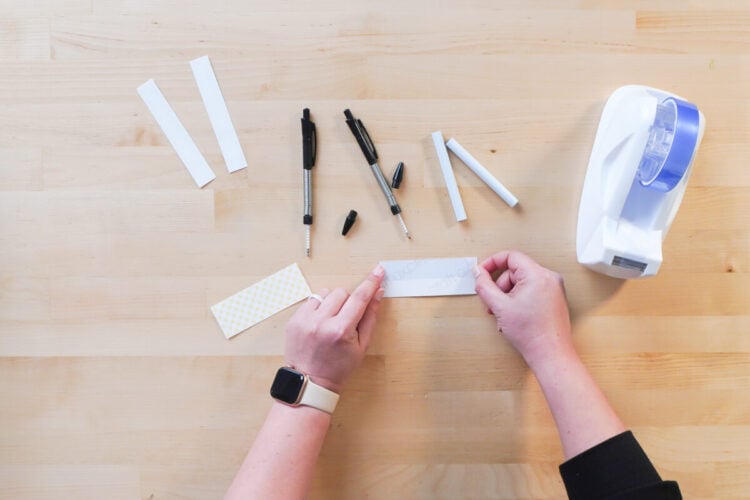
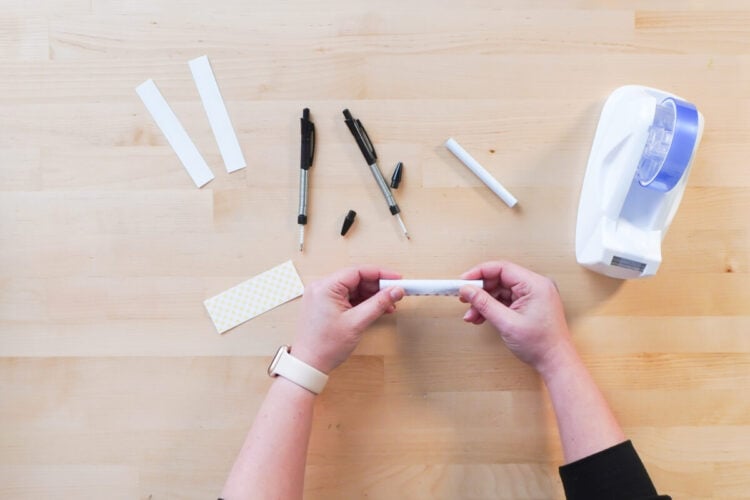
I am using a trick I learned from Angie Holden for taping tumblers. Add a piece of heat-resistant tape along the long edge on the back of the transfer. The transfer is slightly bigger than the circumference of the barrel, and this will keep the sublimation ink from bleeding through both layers.
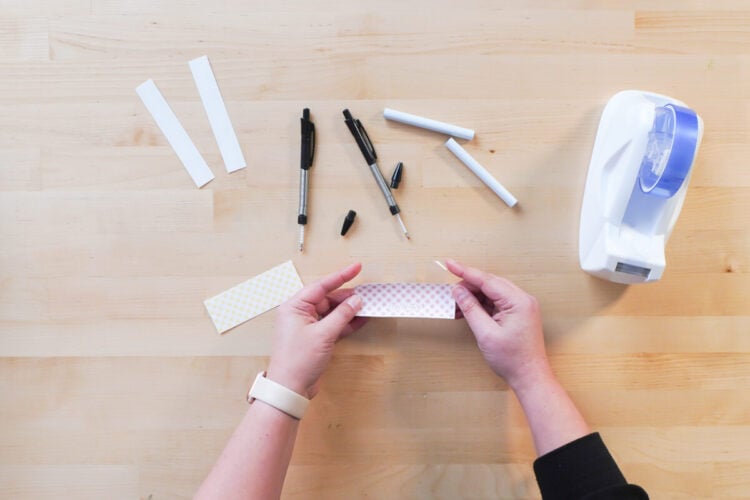
Now wrap your transfer around the barrel with the image facing the barrel. We’re not taping yet—we’re just trying to get the paper to “remember” that it needs to curl like this.
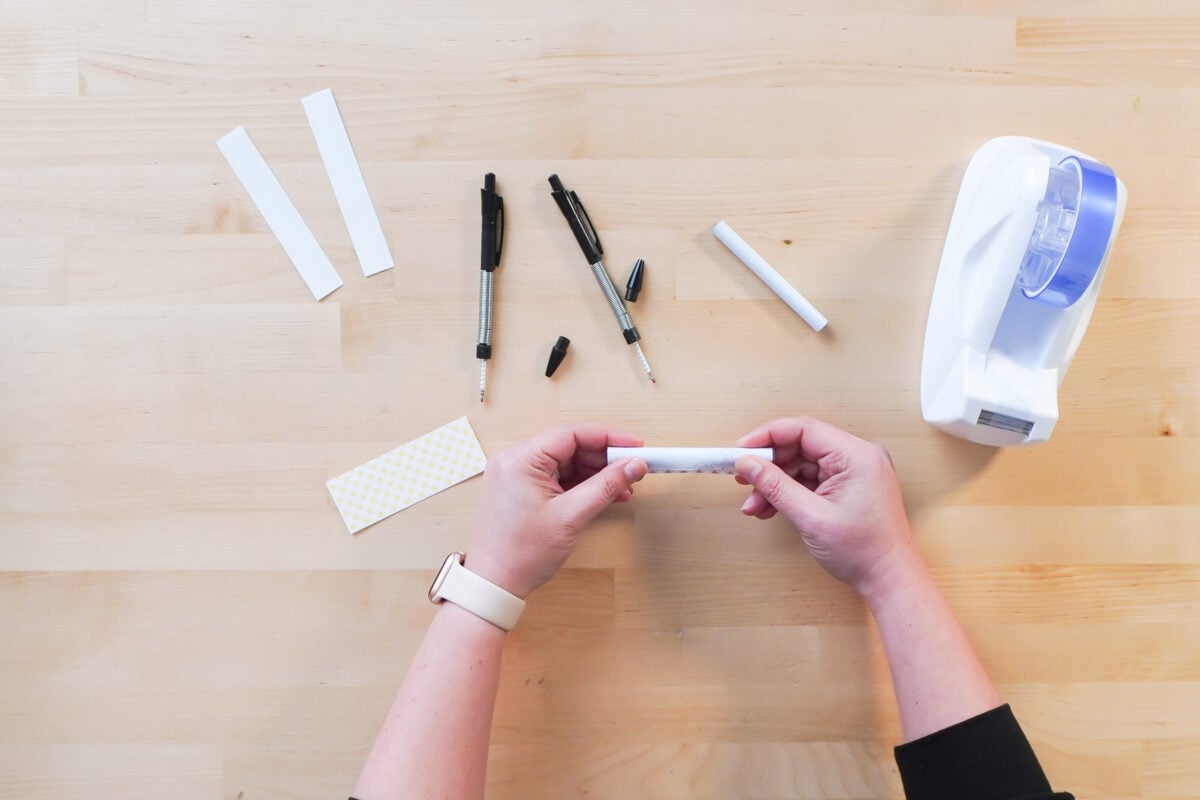
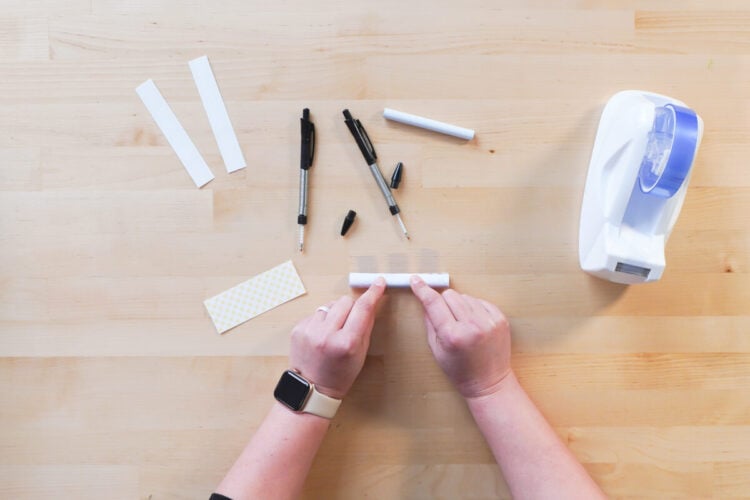
Add three pieces of tape on the back side of the transfer, with half of each piece off the transfer. Do this on the side that does not have that first piece of tape we used.
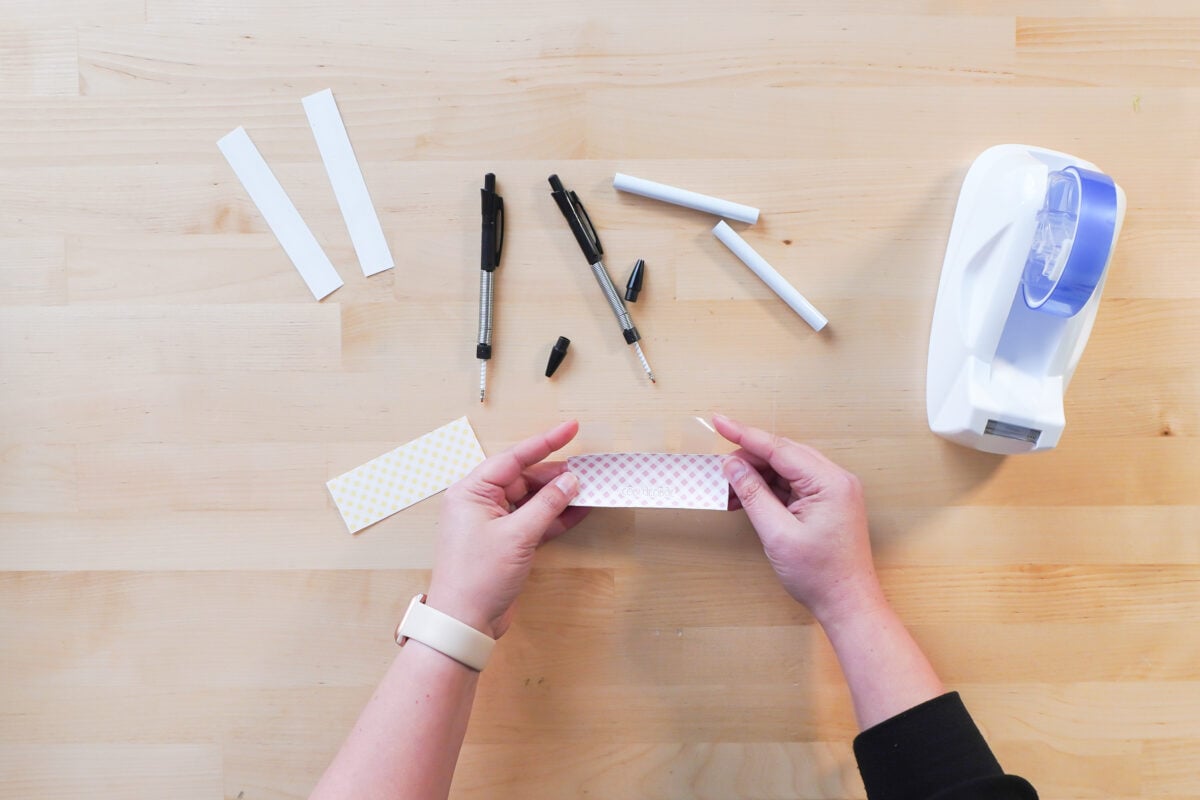
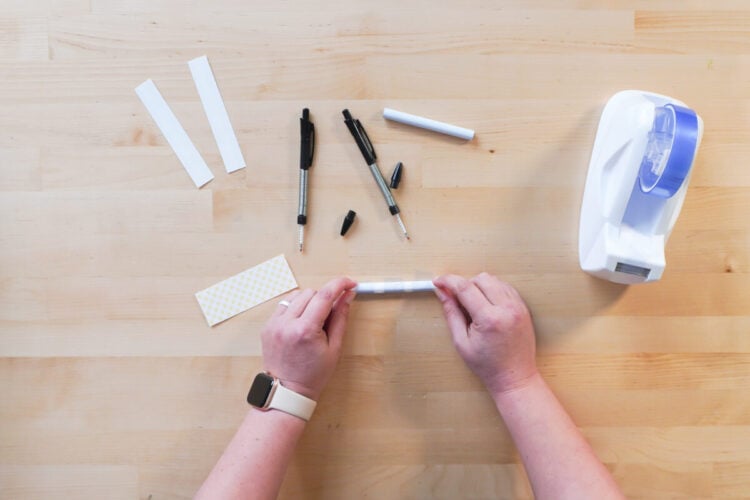
Now use your hands to roll the transfer around the barrel, tucking the side with the long piece of tape under as you roll.
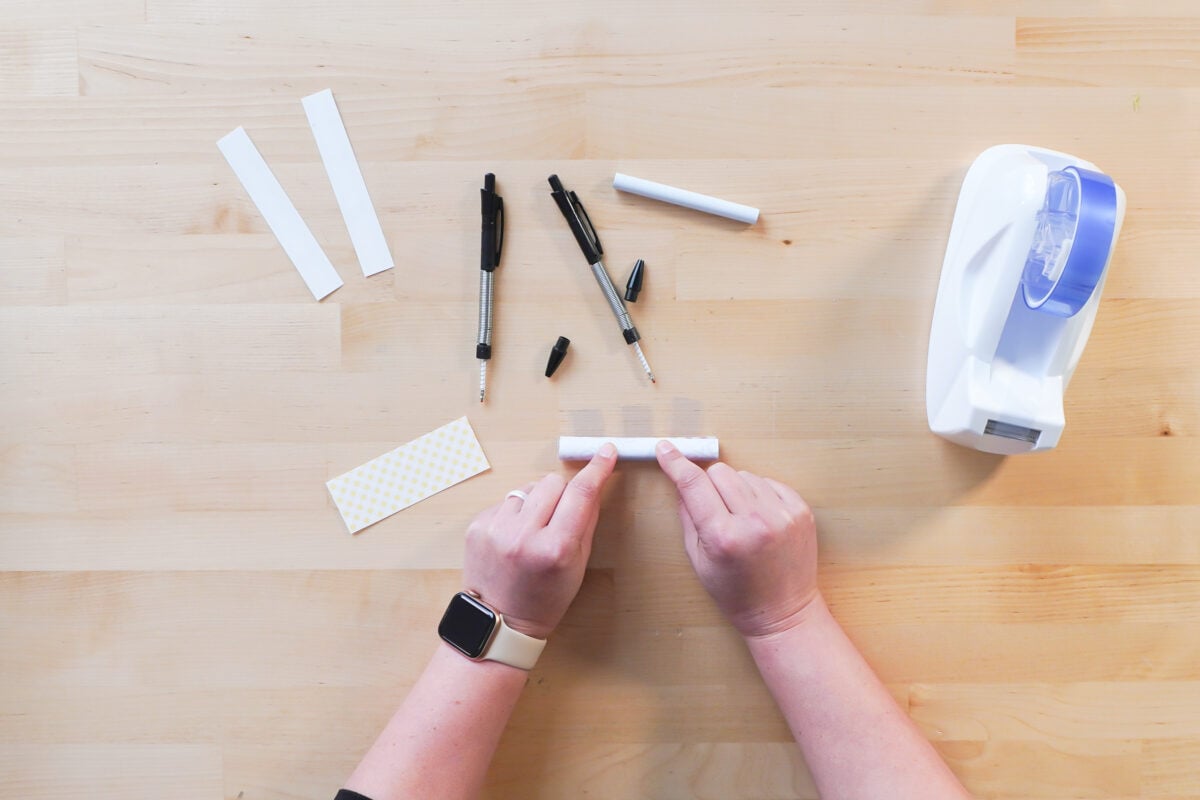
Keep rolling and the three pieces of tape will nicely secure your whole barrel at once!
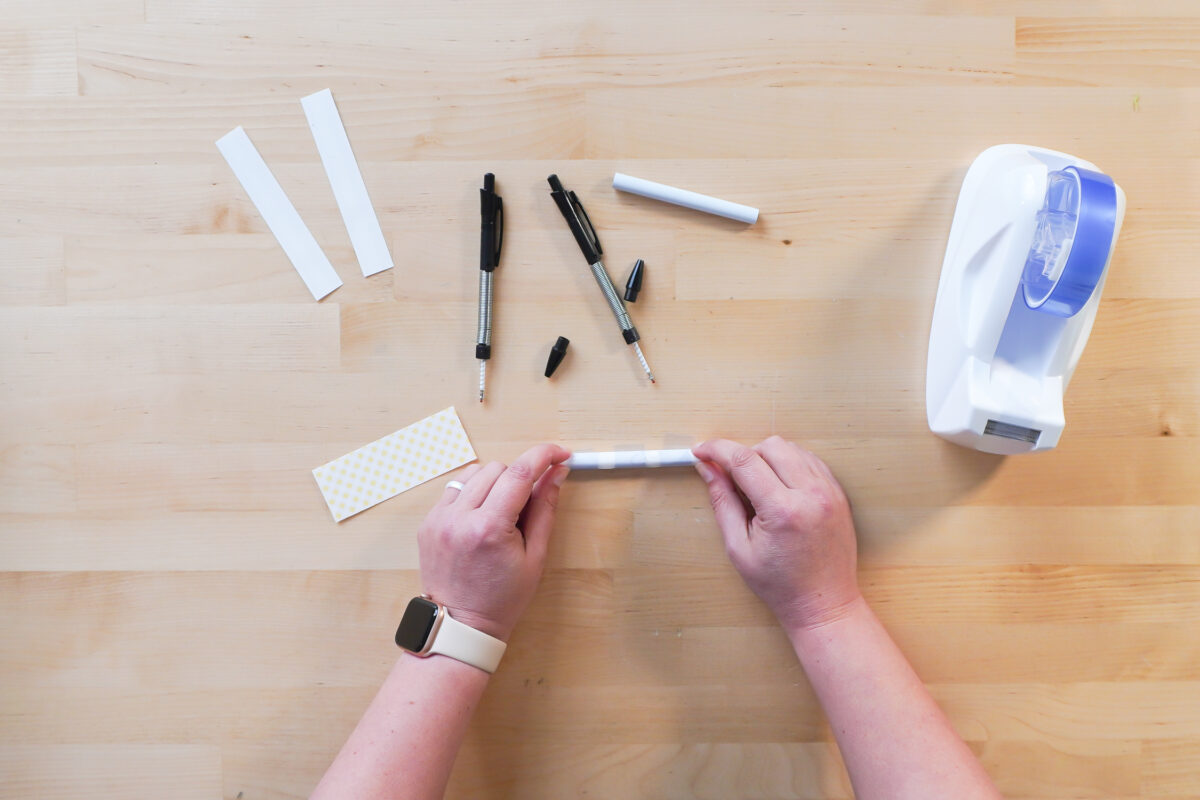
Add your pen to a shrink wrap sleeve.
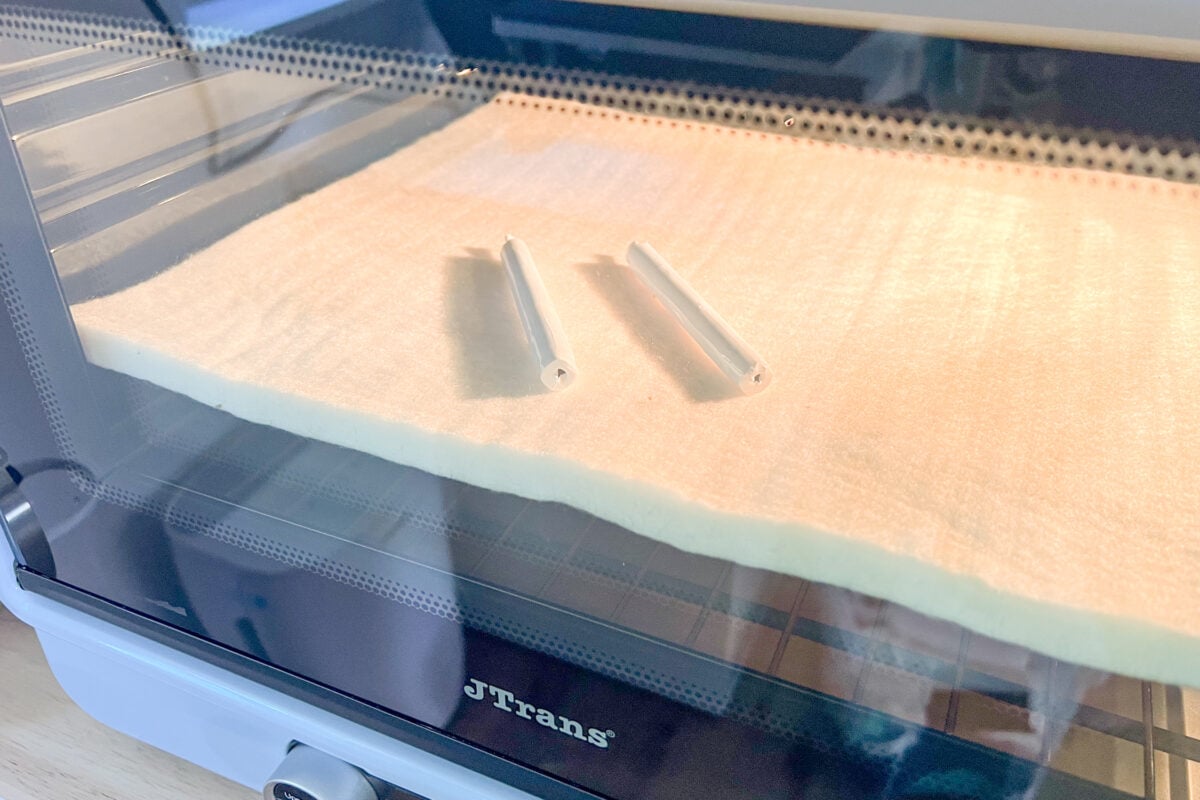
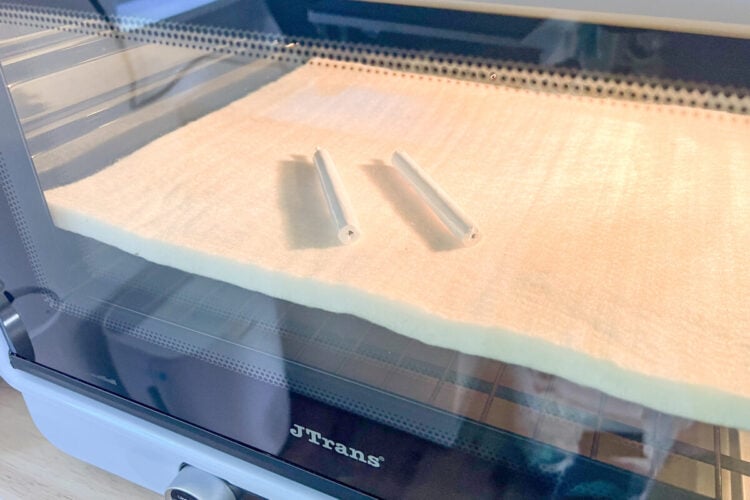
Bake your pens in your sublimation oven for 5 minutes at 375°, rotating halfway through.
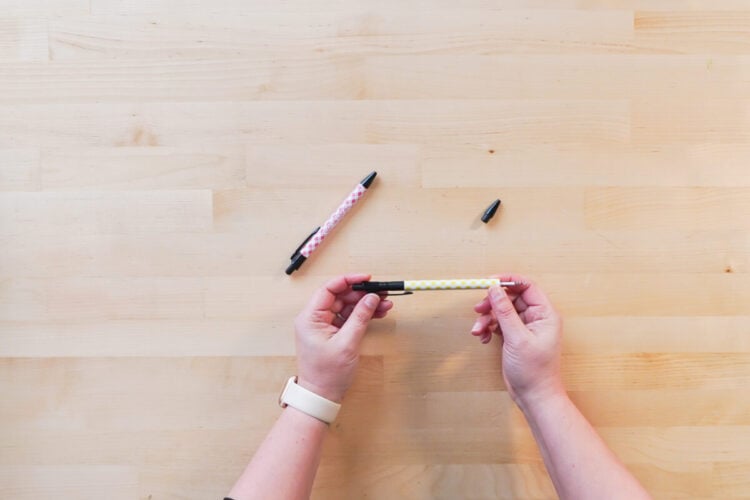
Remove the shrink wrap and transfer (this is where the weeding hook or scissors come in handy) and add the inner workings of your pen back into the barrel.
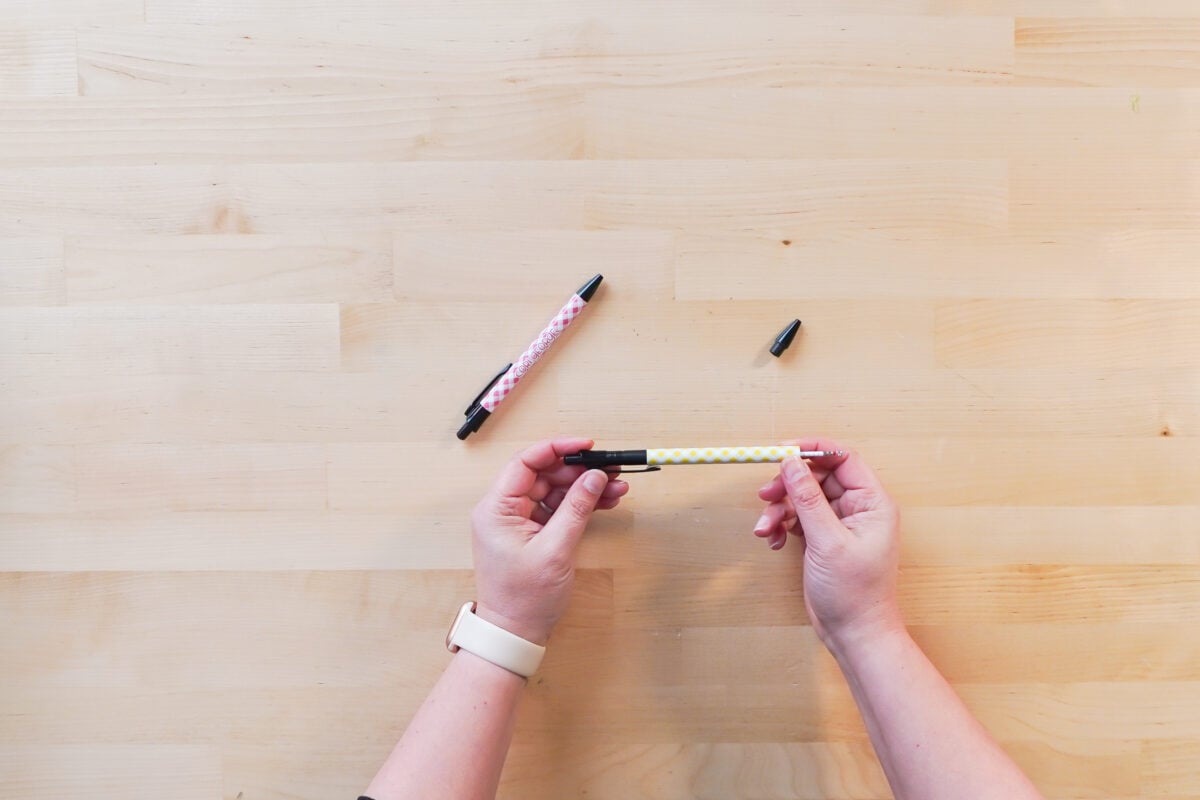
That’s it! You’re done with your sublimated pens!

Hope you found this tutorial for sublimating pens helpful! If you need any help or have any comments, please leave them below!
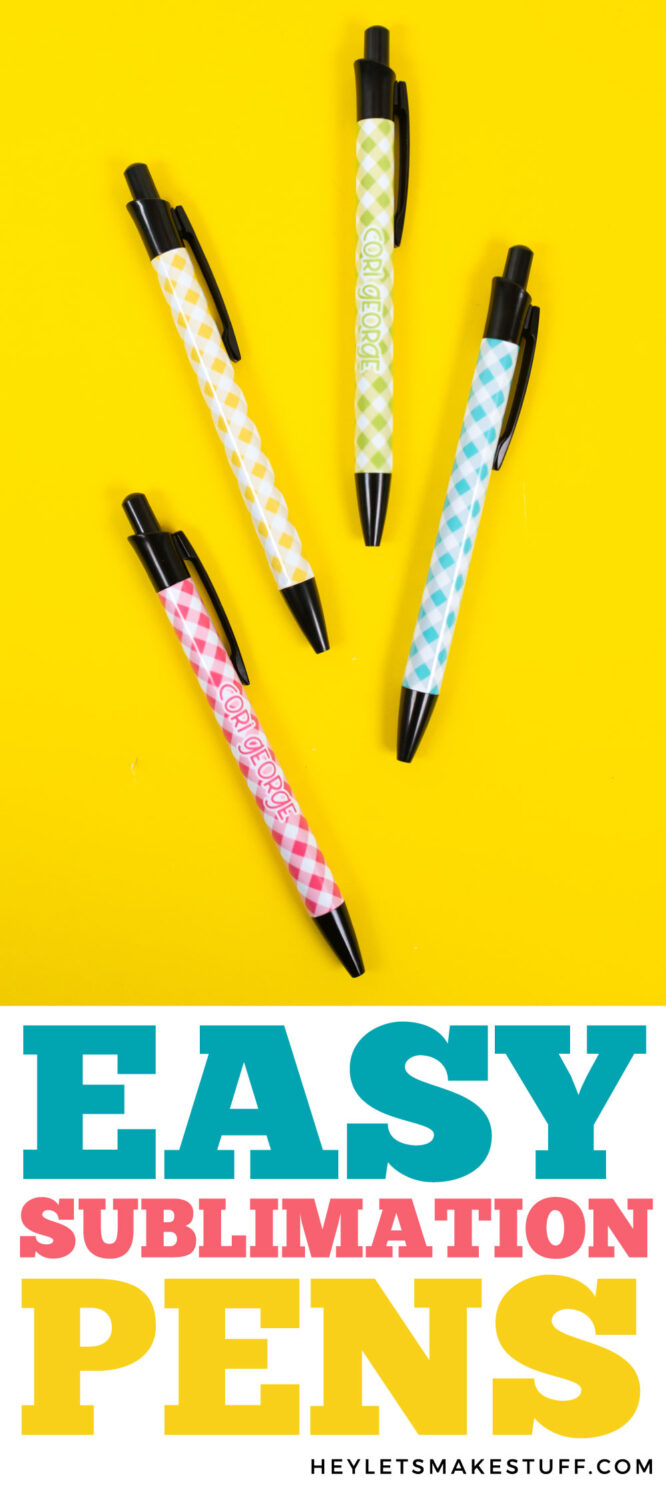
HOW TO SUBLIMATE PENS IN A CONVECTION OVEN
Equipment
- Weeding Hook or
- Scissors (optional)
Supplies
- Free Sublimation Pen Bundle #S33
- Sublimation pens (these should come with specialty shrink wrap)
- Heat-resistant tape
- Alcohol and a
- microfiber cloth
Instructions
- How to Sublimate PensYou can use the free file above as is to create non-personalized pens, but let's hop into Cricut Design Space to add a name. Skip this first part if you don't want to add text to your pen.

- Adding a Name to Sublimation PensUpload your PNG file to Cricut Design Space. Despite designing these in the correct size, Cricut Design Space will bring it into the Canvas too large. You'll have to re-size it before making the project.

- Type your name or other text, and then resize the text and place it about 2/3 of the way up on the background image.

- If you'd like, change the color and add an offset.

- Select the text, offset, and background and click Flatten in the lower right.

- Re-size the project to be 4" wide.

- Click Make It. On the Prepare Screen, mirror your image.

- And then print with your sublimation printer with the Bleed turned off.

- Sublimating Pens in a Convection OvenStart by cutting out your transfer. For this project Cricut was not used for the cutting. Just cut your transfer down using a paper trimmer.

- Loosen the screw part of the bottom of the pen and remove the inner workings. Make sure to not lose any of the small pieces.

- Clean your barrel with alcohol and a microfiber cloth.

- Add a piece of heat-resistant tape along the long edge on the back of the transfer. The transfer is slightly bigger than the circumference of the barrel, and this will keep the sublimation ink from bleeding through both layers.

- Now wrap your transfer around the barrel with the image facing the barrel. Not taping yet—just trying to get the paper to "remember" that it needs to curl like this.

- Add three pieces of tape on the back side of the transfer, with half of each piece off the transfer. Do this on the side that does not have that first piece of tape that was used.

- Now use your hands to roll the transfer around the barrel, tucking the side with the long piece of tape under as you roll.

- Keep rolling and the three pieces of tape will nicely secure your whole barrel at once!

- Add your pen to a shrink wrap sleeve.

- Bake your pens in your sublimation oven for 5 minutes at 375°, rotating halfway through.

- Remove the shrink wrap and transfer (this is where the weeding hook or scissors come in handy) and add the inner workings of your pen back into the barrel.

- That's it! You're done with your sublimated pens!




Comments & Reviews
Barbara Cranford says
@ skeletal shenanigans: Wow! These pens look so beautiful. I want to make them give to my friends.