
The FLUX beamo is the smallest CO2 laser on the market—but don’t let its size fool you! This mighty little machine is perfect for crafters who want the capabilities of a CO2 laser in a small space.
Machine was provided by FLUX but all opinions are my own.
I’ve reviewed a lot of lasers over the years—everything from entry-level diode machines to large, powerful CO2 lasers. And every time I test a new one, I update my free Laser Comparison Chart so you can easily see how they all stack up side-by-side.
Today, I’m taking a closer look at the FLUX beamo (yes, the company name is all caps and the product name is lowercase), the smallest CO2 laser currently on the market. If you’ve wanted the power and precision of a CO2 laser but don’t have the space or the budget for one of the larger machines, the FLUX beamo might be the perfect fit. It’s compact but can still cut materials that diode lasers can’t, making it an great choice for crafters working in tighter spaces or with smaller budgets.
In this post, I’ll walk you through everything you need to know about the FLUX beamo: specs, features, materials it can cut and engrave, software compatibility, pricing, and my honest thoughts after putting it to work in my studio. Let’s dive in and see what this compact laser can do!
Watch the Video
Want to get a video overview of the FLUX beamo? Just hit play below! Or keep reading for a written tutorial.
What is the FLUX beamo?
The FLUX beamo is a CO2 crafting laser, which is designed to cut, score, and engrave a wide variety of materials, including wood, acrylic, leather, and more. This laser is considerably smaller and less expensive than other CO2 lasers on the market, which means it’s more affordable and more accessible for a wider variety of users.
There is also an additional rotary tool for making projects like tumblers and mugs, which I will show you how to use in a separate post.
Machine Cost
The FLUX beamo retails for $1995. But FLUX is always having sales, so you should pay less. At the writing of this post, the sale price is $1690. Compare this to the $2500+ you’d pay for a larger CO2 laser, and you can see the savings is significant.
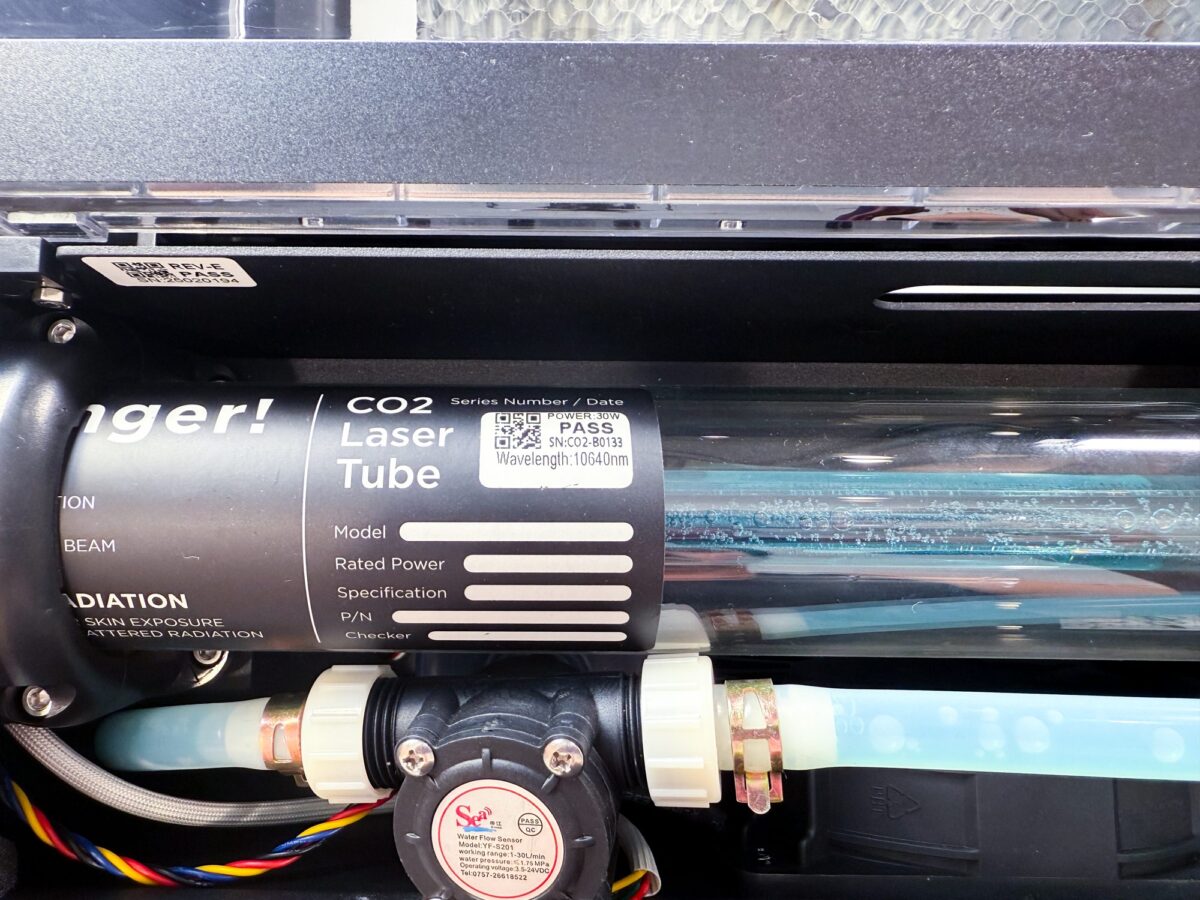
Type of Laser
The FLUX beamo is a 30W CO2 laser, which means the infrared laser is powered by a tube of CO2. It’s designed to cut and engrave wood, all colors of acrylic, coated metal, and a wide variety of other materials. It is a bit slower than my 45W to 55W CO2 machines, but it’s significantly faster than my 10W-20W diode machines.
Many of the other machines I’ve reviewed here have been diode lasers, which are on the blue spectrum and cannot cut blue, white, and transparent acrylic (learn more in my post How to Cut Acrylic with a Diode Laser). This is unfortunate for many crafters who would love to cut those acrylics but can’t afford or don’t have space for a larger machine.
The FLUX beamo sits in the gap nicely. It’s a smaller, less expensive machine with the capability to cut all colors of acrylic.
Note that this laser cannot engrave non-coated metal. You’ll need an IR laser for that.
What’s in the Box?
The box is packed well, and it was relatively easy to unbox by myself. Here’s what you’ll find inside:
- FLUX beamo machine
- Power cord
- USB cord
- USB adapter (turns the USB-A to USB-C)
- Ethernet cable
- Vent pipe with clamp ring
- Double-sided tape
- WiFi dongle & antenna
- Hex wrench
- Regular wrench
- Funnel and lubricant
- Basswood for test project
If you have purchased accessories with your FLUX beamo, you may have other parts not listed above.
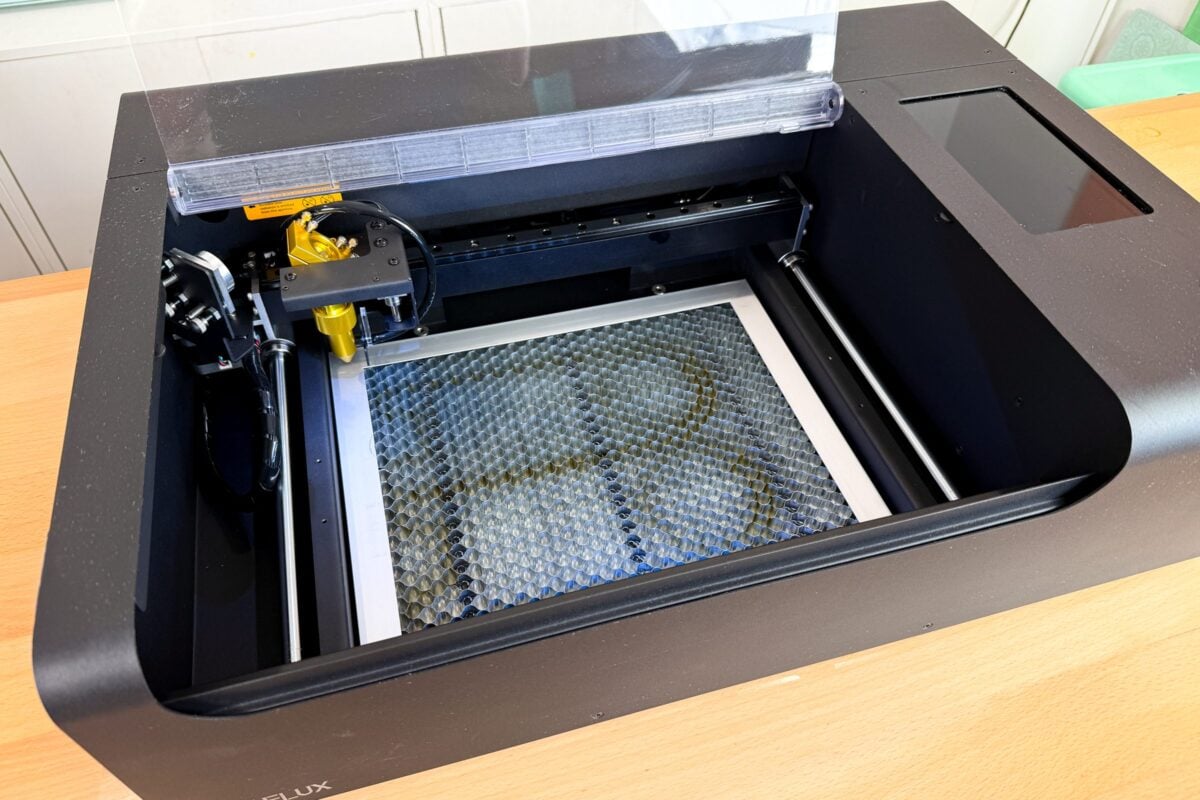
Set Up
Setting up this machine was pretty easy! It isn’t huge and you don’t have to assemble a bunch of pieces to put it together.
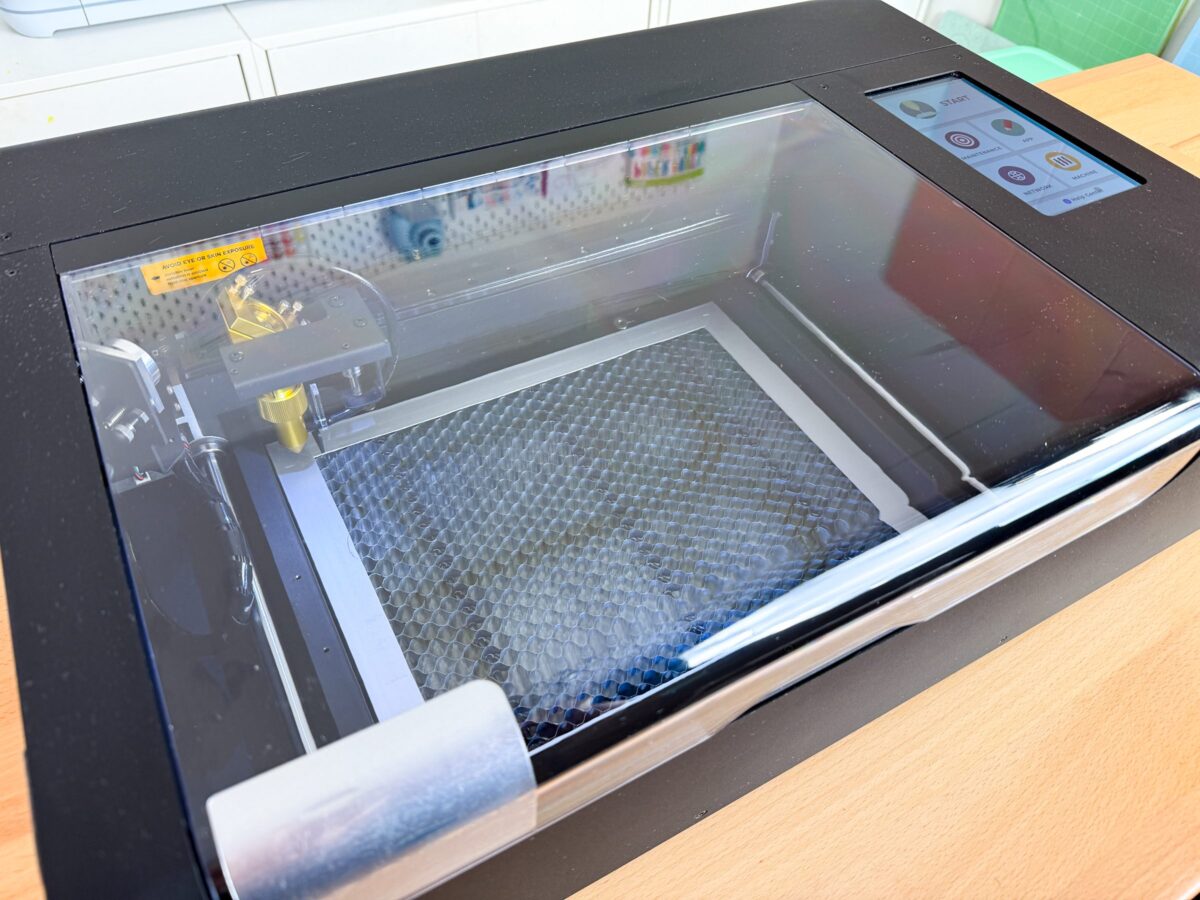
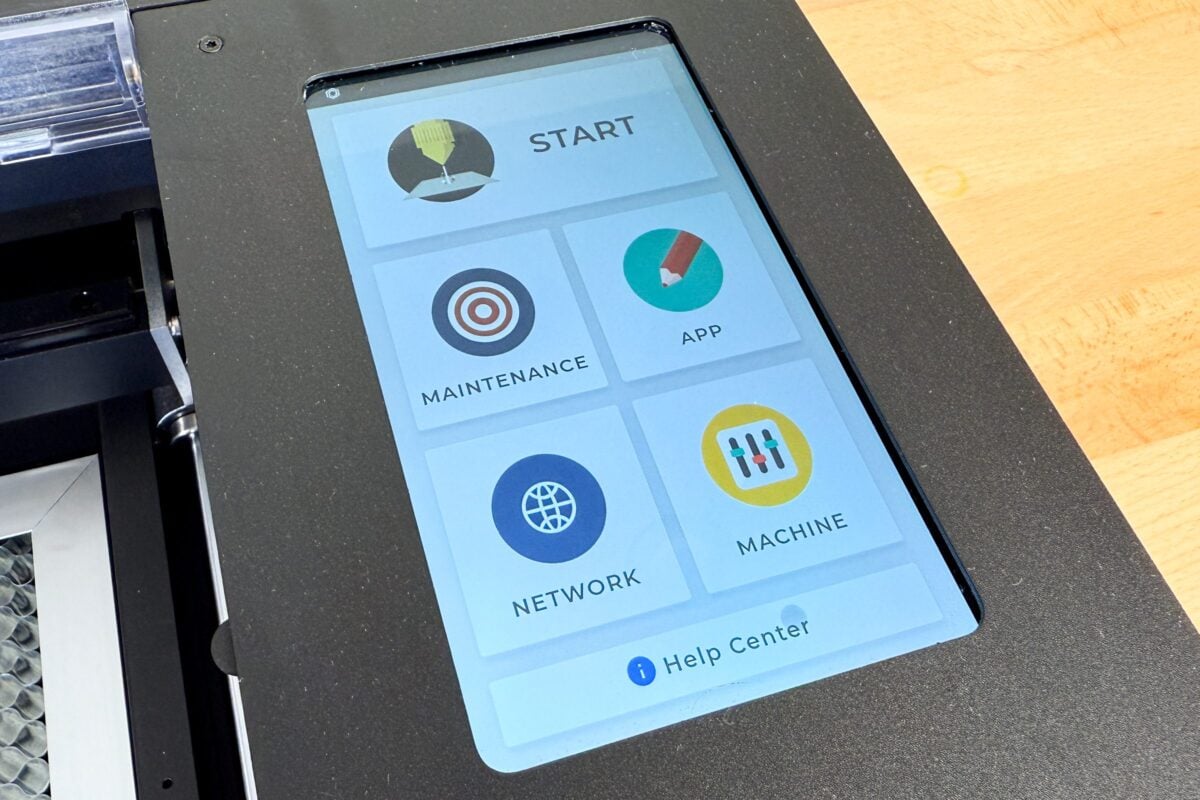
It was, by far, the easiest machine I’ve ever set up in my craft room when it came to WiFi. Because it has an LED screen, I was able to connect to the WiFi using the screen, as opposed to having to find my laser via WiFi on my computer. I am not sure what the problem is with my particular WiFi, but connecting via the machine was super easy.

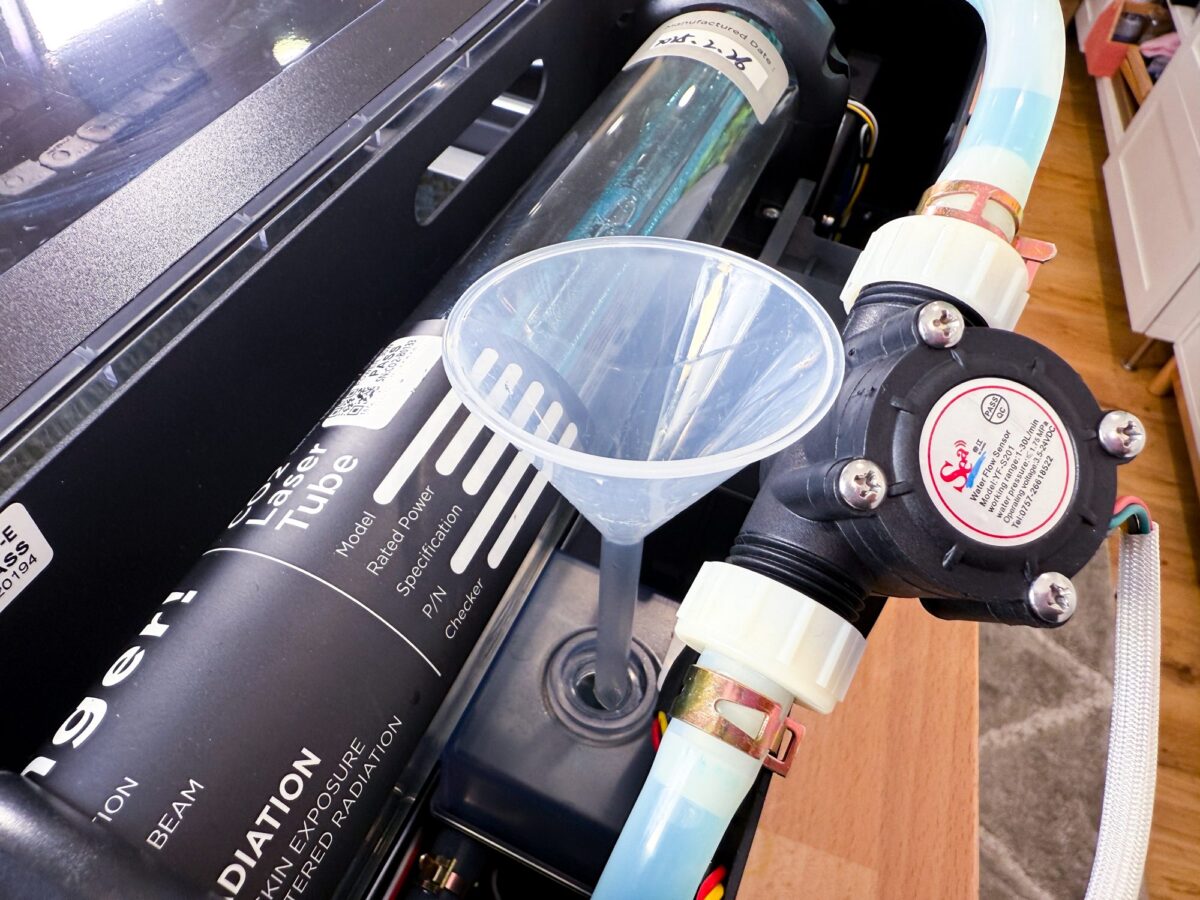
One thing that I didn’t think was mentioned clearly was the need to add distilled water to the CO2 unit for cooling (a big thank you to my friend Jenn Crookston for pointing it out to me!). It’s not in the Quick Start Guide and it’s not until page 174 of the user manual. But don’t skip this step! You’ll want to follow the directions to add distilled water to the water tank in the back of the laser, near the laser tube. The tank should be about 80% full to maintain a cool enough environment for the CO2 unit to run without overheating.
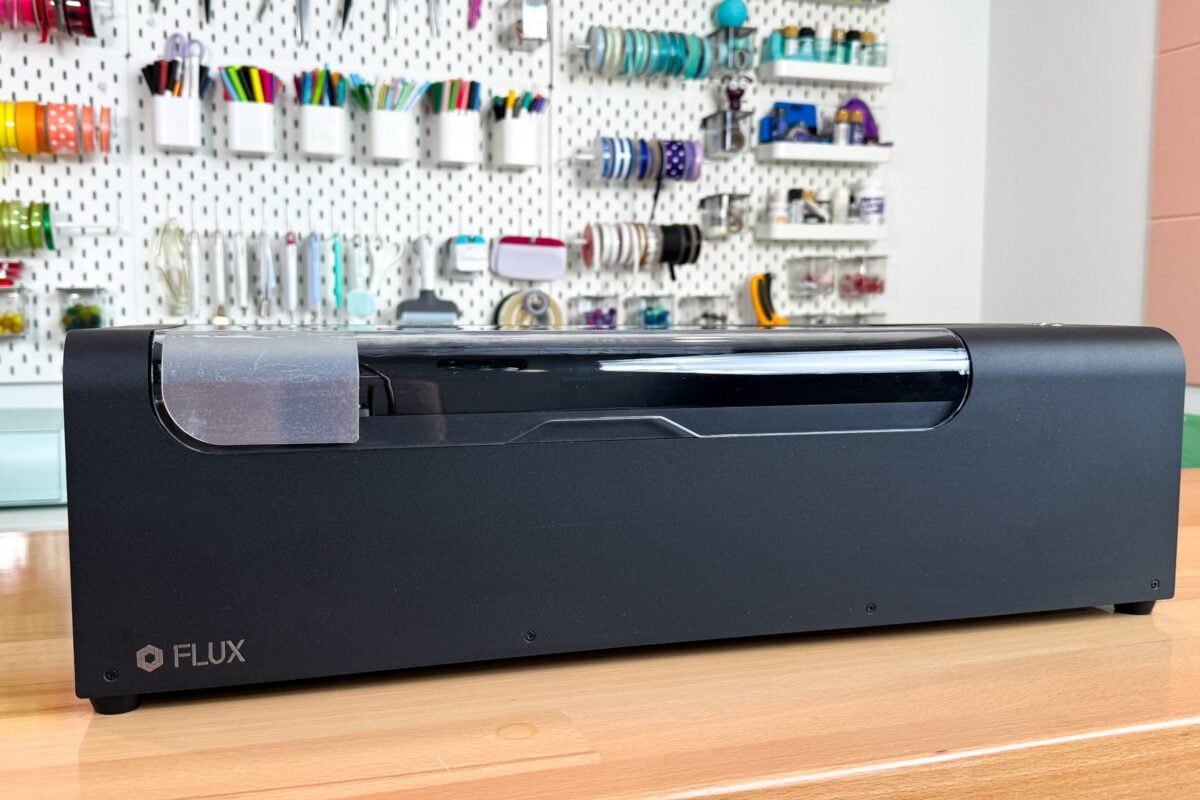
Size and Dimensions
The FLUX Beamo is much more compact than larger CO2 machines. It measures 24.2″ x 17.5″ x 7″. Compare that to my xTool P2S, which is 39.4″ × 25.1″ × 10.6″. The FLUX beamo is much smaller!
It’s also less than half the weight of my larger CO2—the FLUX beamo is just 48lbs vs. 100lbs. 48lbs is a bit heavy, but I am able to move it around without help, especially because of the smaller footprint. You may want two people, depending on your capacity.
Even with the smaller footprint, the size of the working area is decent 11.8″ x 8.2″. A standard 12″ x 12″ or 12″ x 20″ piece of laser material will not fit in this laser, but Flux does have a variety of materials in smaller sizes, as do places like Houston Acrylic, who can do a made-to-order size of 9″ x 12″ that will work inside the beamo.
Safety
I’m always looking out for safety features on lasers, to keep me, my family, and our home safe. The FLUX has the following safety features:
- It’s classified as a Class 1 Laser Product, meaning it is considered a safe laser under normal working conditions.
- It’s fully enclosed, though it doesn’t have an eye-safe cover. So if you want to watch the laser process your projects, you’ll need a pair of laser safety glasses.
- The laser automatically stops when you open the lid.
I also always have a fire extinguisher and fire blanket, just in case. You can read more about everything I have on hand when I’m using my laser in my post Must-Have Laser Supplies.
Venting
All lasers need to be vented. The scoring, engraving, and cutting processes create fumes and smoke and debris and you’ll need to vent your laser so all of that doesn’t end up in your craft room and lungs.
This is one of the few things on the beamo that I think could be done better. The vent pipe itself is pretty thin flimsy and I managed to rip a hole in it while I was setting it up. So I had to add a piece of tape to the pipe to keep it from leaking.
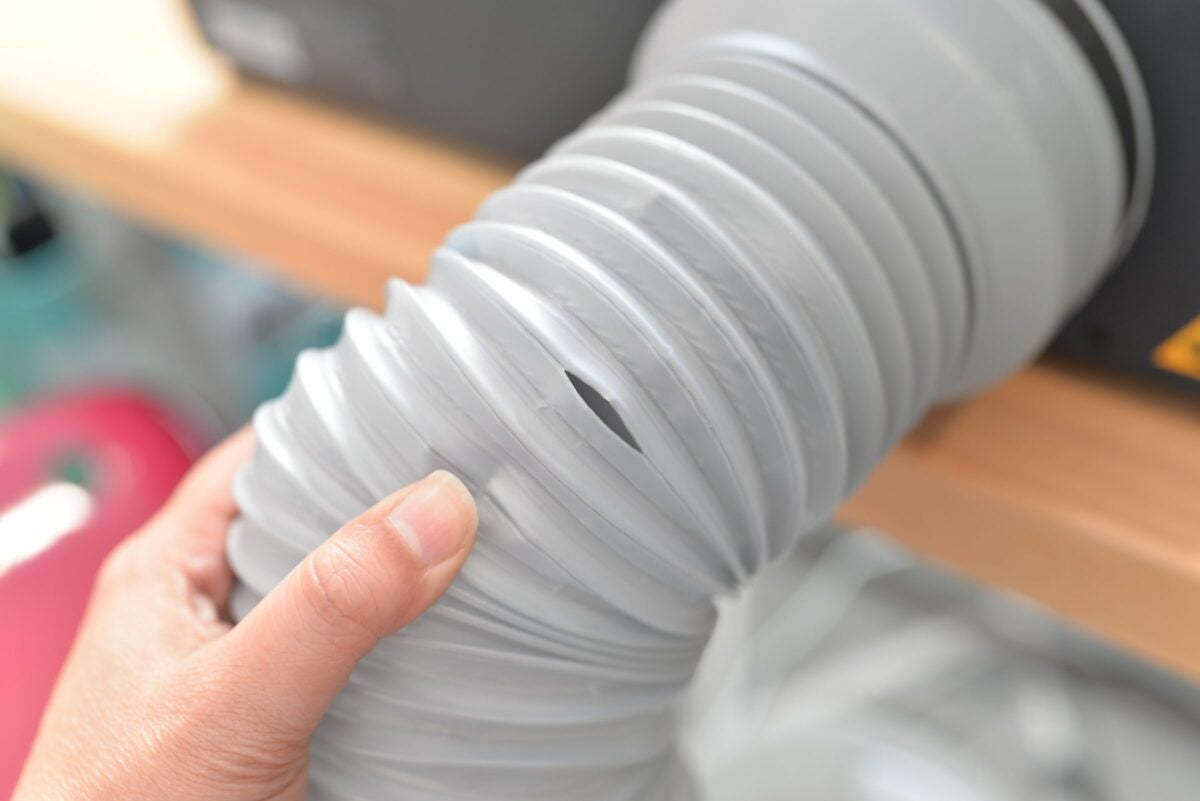
After talking with FLUX, their rep did tell me that they are reworking that vent pipe to be more sturdy, so hopefully we’ll see a new pipe from them soon!
Then to actually vent the machine, there are two options:
- Venting out of a window: you can run the vent pipe out of a window, making sure to seal up the window with an old blanket or piece of cardboard so the smoke doesn’t work its way back inside.
- Venting into a personal filter: if you don’t have access to a window, you’ll need an air filter. I am using another brand of air filter I have on hand, but FLUX also makes the Beam Air filter which works seamlessly with the beamo.
What Materials can the FLUX beamo Process?
So what can you cut and engrave with the FLUX beamo? Lots of projects with more than 100 different materials!
Cutting:
- Wood (including basswood, pine, cherry, walnut, birch, and more)
- All colors of acrylic, including clear
- Leather
- MDF
- Felt
- Paper
Engraving:
- Everything I mentioned above
- Glass
- Slate and other natural stone
- Coated metal (like powder coated tumblers or metal that has a coating like Cermark applied to it)
- Rubber
- Cork
These are just the primary materials—there are more!
What Software Works with the FLUX beamo?
The beamo uses Beam Studio, which is FLUX’s software for their machines. It’s not incredibly robust (most laser software isn’t), so I think it’s better for uploading designs vs. creating designs from scratch. They do have a huge library of elements for you to choose from, and their Design Market where you can get free and paid designs. They also have a QR code generator and box generator and other fun and helpful features.
Then there is a free Beam Studio plugin that you can use in a variety of design software programs. I tried this in Adobe Illustrator (my software of choice) and I loved it!! I was able to create my design in Adobe Illustrator and send it directly to Beam Studio to process without having to save it, find it, upload it, etc. This is a small thing but will save time and mental energy and I’m all for that. This plugin also exists for Adobe Photoshop, Affinity Designer, AutoCAD, SketchUp, SolidWorks, Sketch, Corel Draw, and Rhinoceros. If you use one of these programs to design, I highly recommend this little plugin!
Special Features
For each laser that I review, I try and point out some features that make it stand out from other lasers on the market. Lasers often have very similar features, and so these special features might make you choose one laser over another. A few great features of the FLUX beamo I’ve mentioned already and there are a few others as well!
Compact Size & Lower Price
The biggest difference between this and my other CO2 lasers is the size and price! The smaller footprint and lower cost definitely set this one apart from the crowd. Maybe you’re a Cricut user who wants to get into laser crafting without having to spend a fortune on a big machine. Maybe you’re a sublimation crafter and you want to add customized sublimation acrylic projects but you don’t have the space for a large laser. This really is a great bridge between the smaller crafting machines and a large powerful laser.
Precision Camera Preview
Most lasers have a single camera that overhangs the bed of the laser. Because of the angle, this camera often utilizes a fisheye lens, which means that you end up with somewhat distorted image of your material in the bed of the laser, especially toward the edges.
Instead, FLUX put the camera on the laser head itself. You can drag and drop a photo area and the camera will move and take tiled photos of the bed of the laser. It’s definitely slower than a single fisheye lens photo, but it’s way more accurate. You can get images really close to the edge of your material without having to worry that the camera distortion is going to ruin your project.
LED Screen
Very few of my lasers can be controlled from the laser itself instead of from my computer, and none quite like the FLUX Lumos. The LED screen, as I mentioned before, was integral in setting up my WiFi connection quickly and easily. You can also perform maintenance tasks and change settings. You can also pull up recent projects and process them directly with the laser, without having to go through the software.
Easy Manual Focus
Most lasers have autofocus, which is great, and you can actually get an add on module for this laser so that it can auto focus. But the manual focus is actually really easy and accurate—my guess is that they went with this to keep the cost down. Just place your material in the bed of the machine, pull down the little clear lever, and then adjust the height of the laser module. I found it really easy to do and for a machine that doesn’t come with autofocus standard, the manual focus was simple.
Computer Start
This is a small thing, but instead of having to walk over to the laser to press a start or go button, you just click the play button in the Beam Studio software and your project will process. Of course you don’t want to leave your project unattended while it processes, but it does make starting projects faster when you don’t have to stand up to press a button.
Integration with Popular Software
Like I said above, you can use a simple free plugin to send your designs from your design software (like Adobe Illustrator) directly to Beam Studio. I love this feature and I am excited that it’s going to save me so much time!
FLUX beamo Project Results!
I cut a bunch of different cat-themed projects using a variety of materials with the beamo, and all of them turned out great! I was really impressed overall with the quality of the cutting and engraving, as well as the speed.
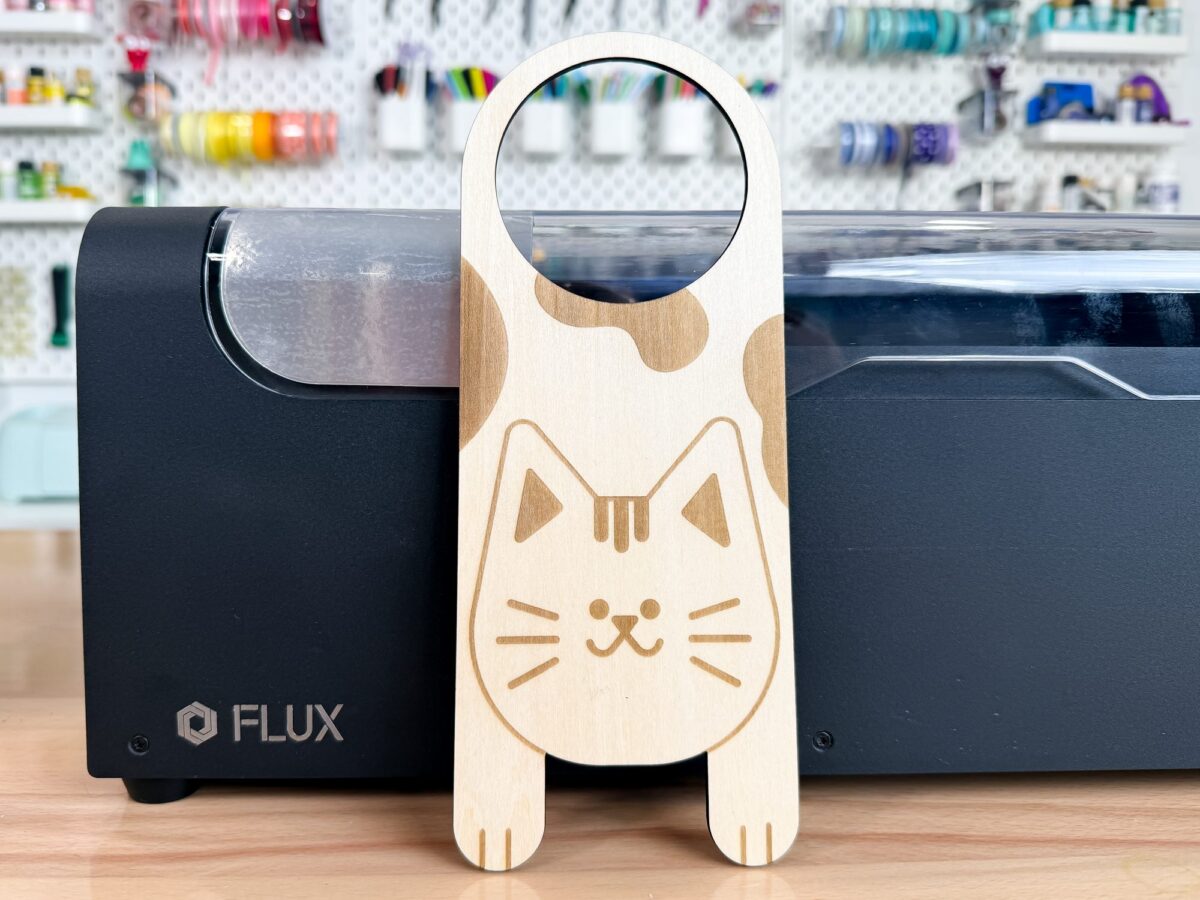
Wood Cat Door Hanger
This was free design in the FLUX Design Market and it turned out so cute! I always do a basic basswood project when starting out with an new laser just to get a feel for how it’s going to cut and engrave. This is the second version I made. For the first one, I used the built-in 1/8″ wood settings in Beam Studio. It turned out out pretty good but I thought the power was a bit high—I had a little bit of charring around the edges of the engrave. I lowered the power setting a bit and got this absolutely perfect result.
This one was immediately stolen by my boys and put on their bedroom door!
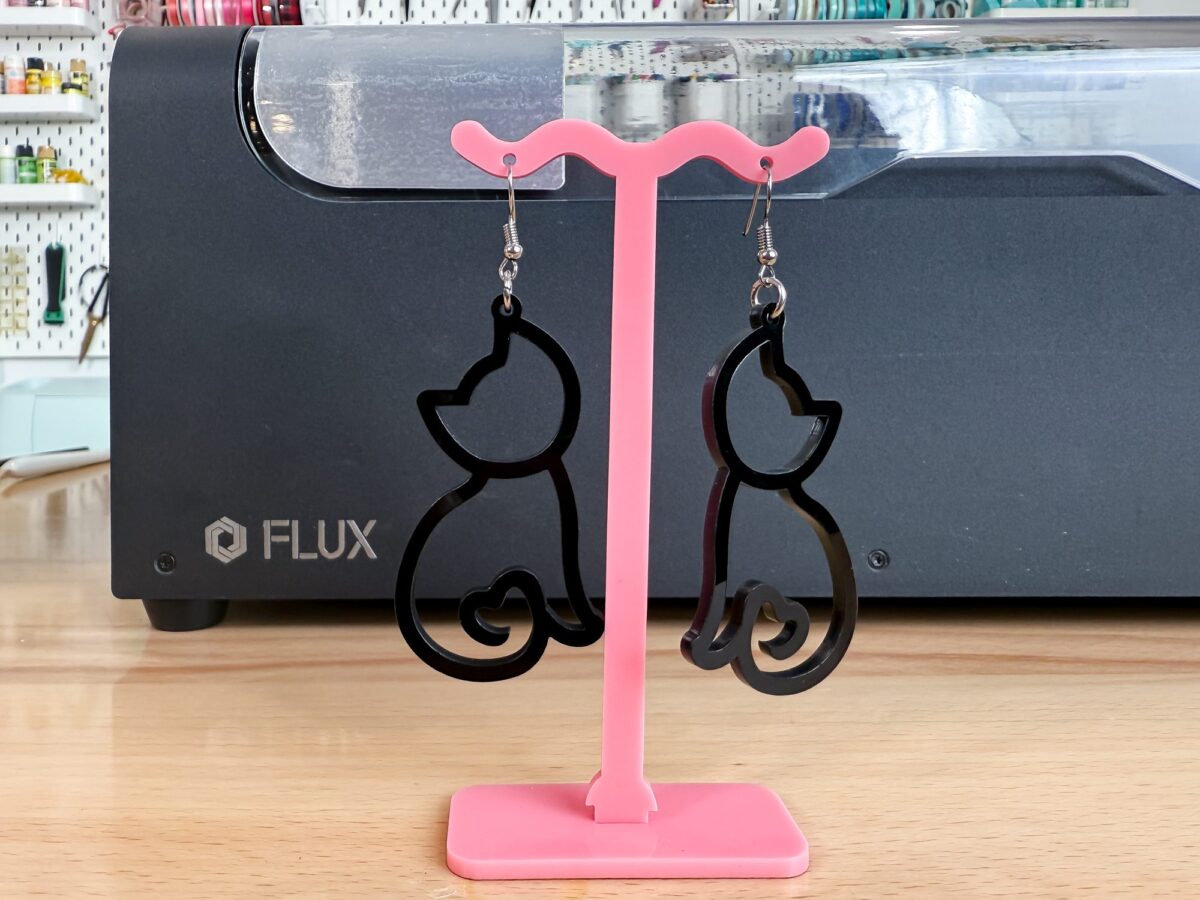
Black Acrylic Cat Earrings
Next up was an opaque black acrylic. This is a material that can also be cut using a diode laser, but it’s a good test to see how well a machine can cut a basic acrylic. I used the built-in 1/8″ acrylic setting in Beam Studio and these cut perfectly the first time. You can find these cute cat earrings at Creative Fabrica.
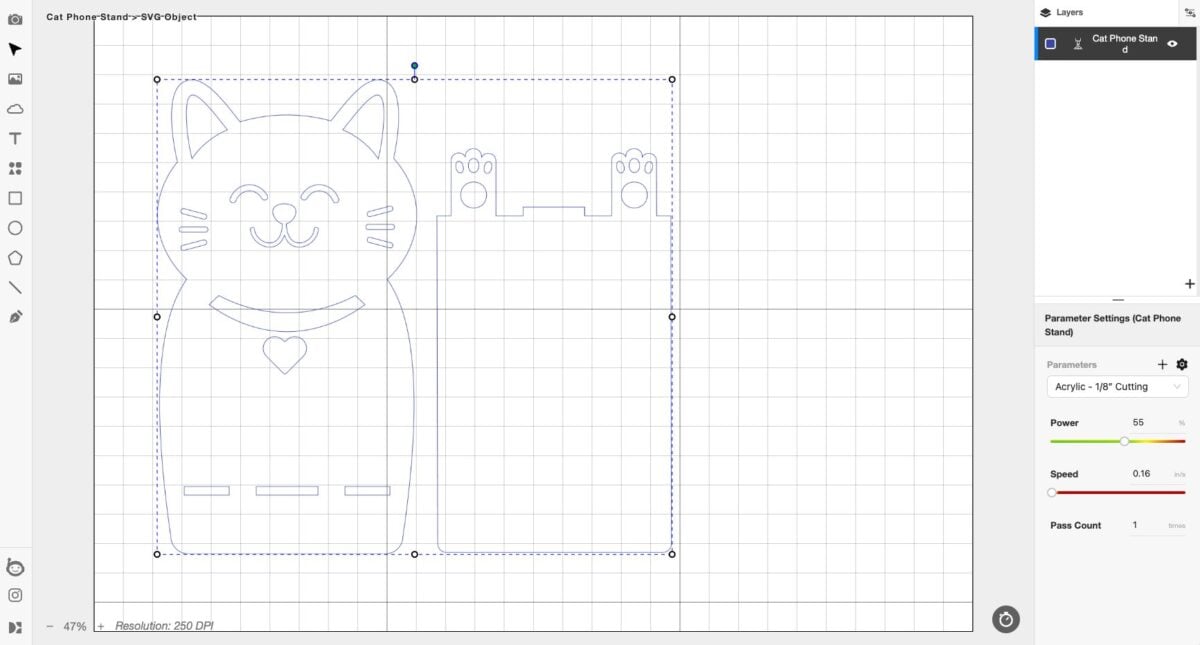
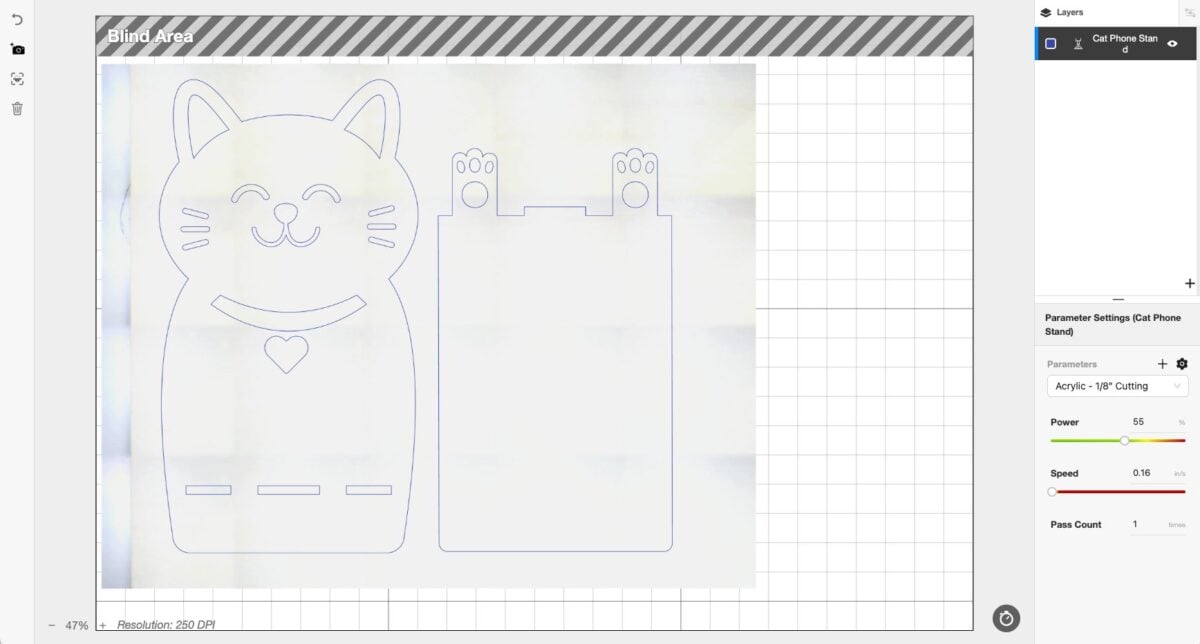
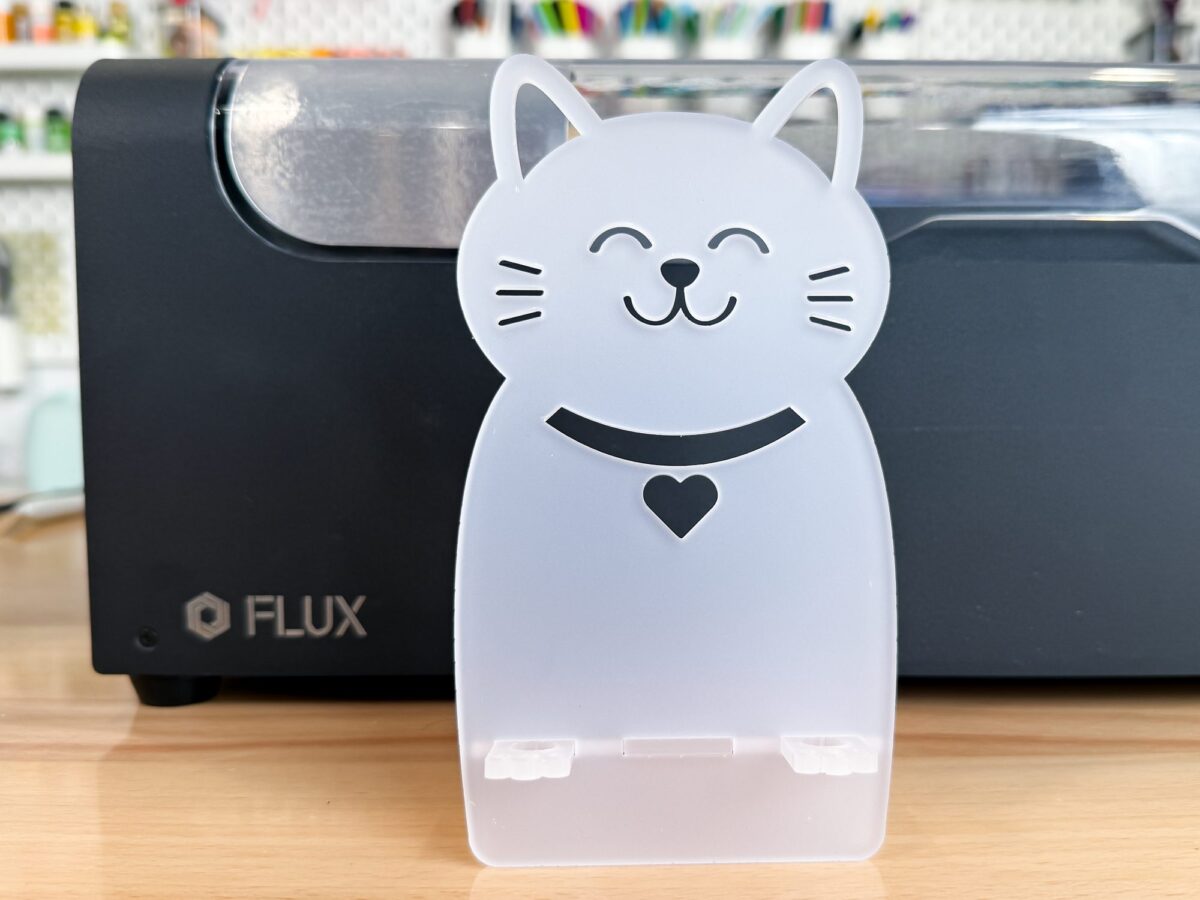
Frosted Clear Acrylic Cat Phone Holder
Cutting and engraving clear acrylic is one of the biggest differences between a CO2 laser and a diode laser. A diode laser can’t do it, but the FLUX Lumos had no problem using their 1/8″ acrylic setting! I used frosted clear acrylic, but it will cut and engrave completely transparent acrylic as well. This cat phone holder is a cute 3D project, also from Design Bundles, that just snaps together.
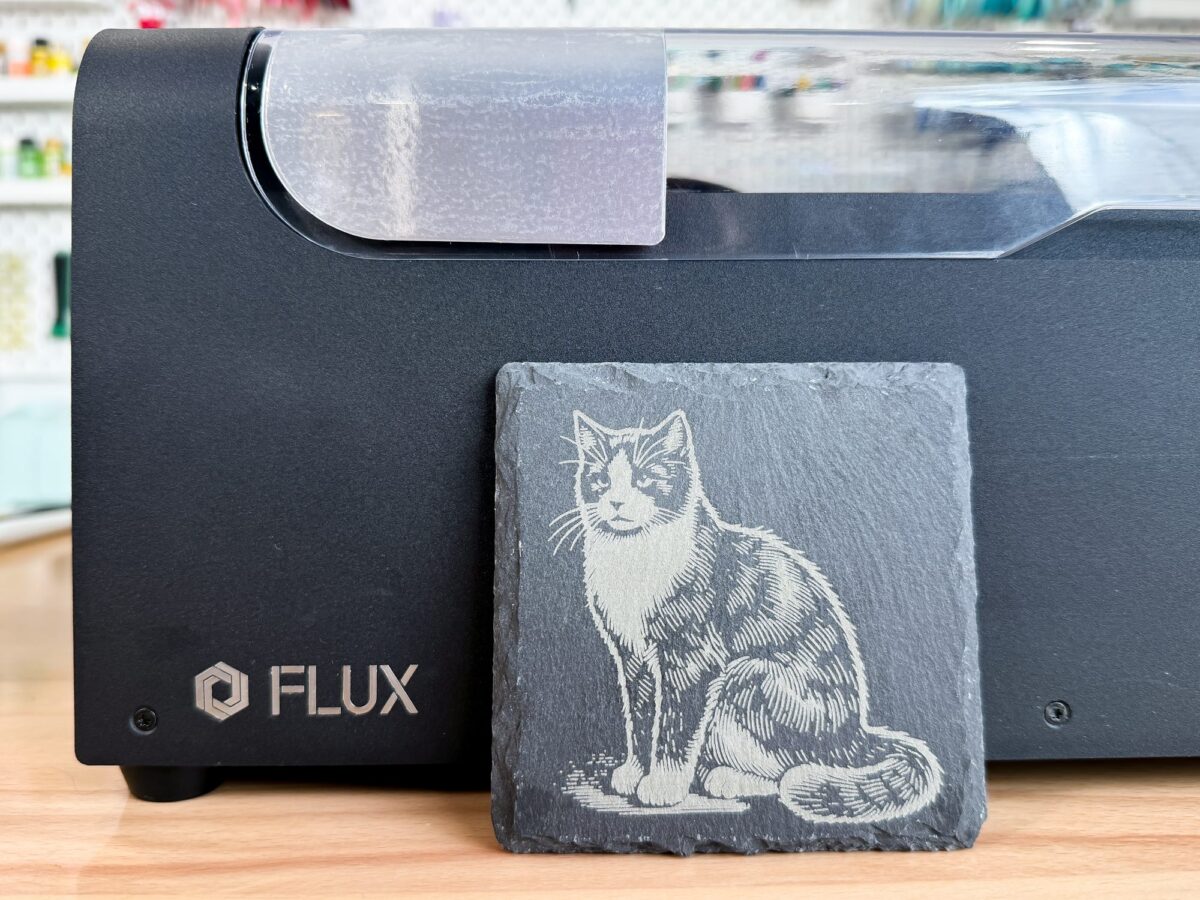
Engraved Cat Slate
Engraving slate is one of my favorite projects and I thought the FLUX beamo did a great job using the built-in slate engraving settings! This was a fun find as far as files to, too. Most of the time, you need to invert a file (reverse the black and white) for engraving on slate, but Design Bundles had a file that had this cute cat already inverted for this type of project!
FLUX Beamo Pros
I think this is a fantastic laser that bridges the gap between diode machines that can’t cut all colors of acrylic and larger, more expensive CO2 machines. It’s also a great option if you are a cutting machine crafter (like Cricut or Silhouette) and want to dive into laser crafting or combine your crafts.
Here are the things I liked:
- The size is great—much smaller than my bigger CO2 lasers and I can move it around myself
- The price is fantastic, even better than some diode lasers
- It cut everything I tested in it, including materials like paper and leather that I didn’t feature in this post
- It’s easy to set up and use and is less intimidating than larger CO2 lasers
- You can process a wide variety of materials, including all colors of acrylic
- You can remote start it instead of pushing a physical button on the machine
- The camera, while slow, gives you a very accurate picture of your material in the laser bed
- Beam Studio integrates with Adobe Illustrator and other popular software programs
- Make even more projects with the rotary tool (post coming soon!)
FLUX beamo Cons
There were a few things that I didn’t love, but none of these things make me not recommend it.
- The vent pipe! This was my only frustration with the machine and I had some fume leaks that had to be closed with duct tape. I’m glad to know that FLUX is working on a sturdier version.
- There was no clear instruction to make sure the distilled water tank was full
- You do need to seek out smaller laser materials that will fit in the smaller bed of the laser. The standard 12″ x 12″ and 12″ x 20″ materials won’t fit. Check out FLUX, Glowforge, and Houston Acrylics for smaller options.
Is the FLUX beamo Worth It?
Yes! I liked the FLUX beamo a lot and I think it is a fantastic way to get into CO2 laser crafting (particularly cutting all colors of acrylic) with a more affordable machine in a smaller footprint. I found it easy to use and it cut and engraved beautifully. This is my 11th laser, but because of it’s size and price, it’s definitely in its own category.
Again, make sure to visit my Laser Comparison Chart for more information on all of the lasers I have reviewed!
I hope you found my review of the FLUX beamo helpful in your buying decision! If you have any questions about this CO2 laser, please leave them below and I’ll be happy to answer


Leave A Reply!