
Let’s make a felt wreath with a Cricut! This is an easy felt wreath DIY—just cut the leaves on your cutting machine, pin or hot glue, and add felt balls! A felt bow finishes this easy Christmas wreath.

A big thank you to Benzie Design for the felt for this project!
Today I’m having fun with one of my favorite materials to cut on my Cricut—felt! I have a detailed post on cutting felt with the Cricut, including the different types of felt you might use, as well as which blades and mats work best. And now I’m putting all of that to use to make this easy felt wreath for Christmas!
What type of felt is best for making a DIY felt wreath?
This project requires three 12″ x 24″ mats—that’s a lot of felt! Your best bet is to grab a full yard (36″) of felt off the bolt.
My favorite felt shop is Benzie Design. For this wreath, I went with a retro palette of Julep teal and Coral, along with some small white felt poms. You can also shop your local craft store.
What Cricut blade and mat should I use to cut felt?
If you are using your Cricut Maker: Use the rotary blade with a large 12″ x 24″ StandardGrip mat (I generally save the old junky ones for felt!).
If you are using your Cricut Explore: The Explore is best at cutting Cricut-brand felt. Problem is, Cricut felt only comes in samplers, so buying six samplers to get enough of a single color of green to make this wreath is generally cost-prohibitive. Plus, it’s not exactly soft and pretty. So I recommend sticking to a wool-blend for this project.
With the wool-blend, use the FinePoint blade with a 12″ x 24″ StrongGrip mat. The Cricut Explore cuts wool blend felt…medium good. You may find you need to finish the cut with a sharp pair of scissors. Make sure you’re using a new blade and do a test cut to see if you need to increase the pressure settings while cutting.
DIY Felt Wreath Supplies
- Large 12″ x 24″ Green StandardGrip or Purple StrongGrip mat
- 1 yard felt off the bolt for your leaves
- 8″ x 5″ felt for your bow
- Brayer (optional but helpful)
- Foam wreath form
- Hot glue gun and hot glue (you can also use pins if you prefer)
- Baubles for decorating your wreath (felt balls, bells, etc.)
- Felt Wreath SVG File
Get the Free File
Want access to this free file? Join my FREE craft library! All you need is the password to get in, which you can get by filling out the form below. The file number is: C248.
Making Your Wreath in Cricut Design Space
Create a new project in Cricut Design Space. On the left, click Upload. Then navigate to the wreath file you downloaded above.

Click Save.
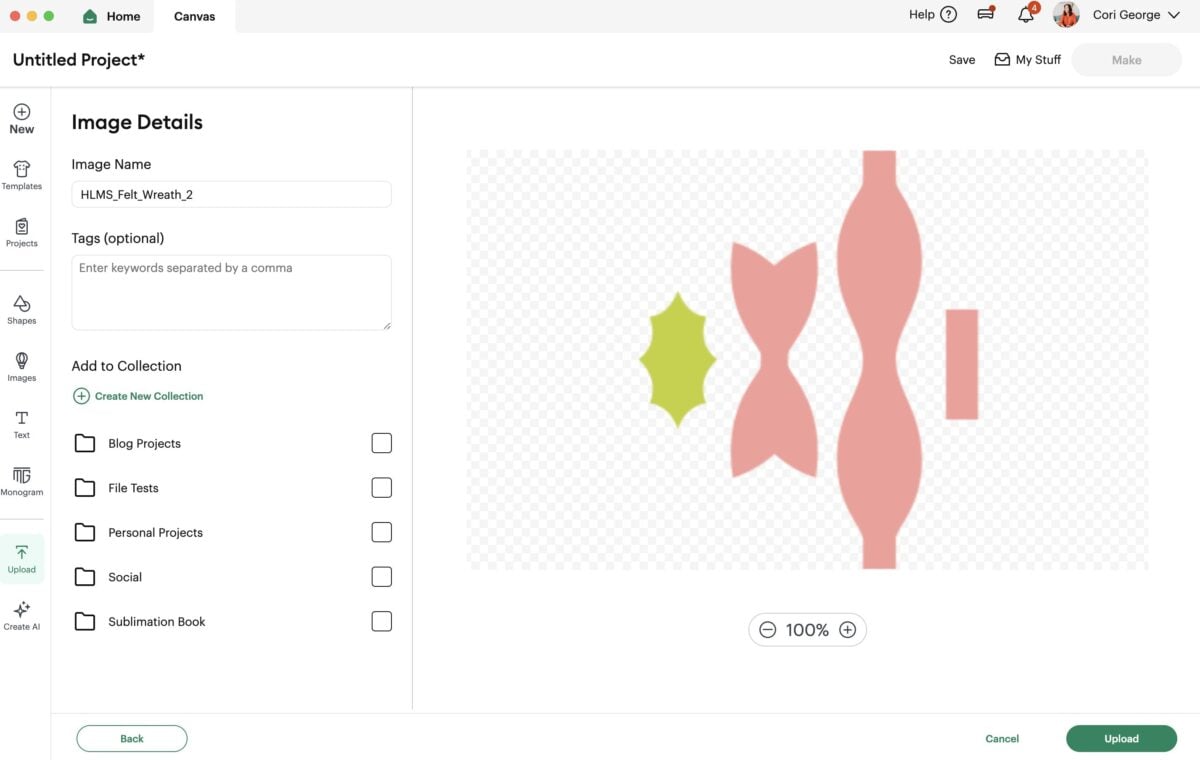
Then select the file you uploaded and click “Insert Images” to bring it onto your canvas.
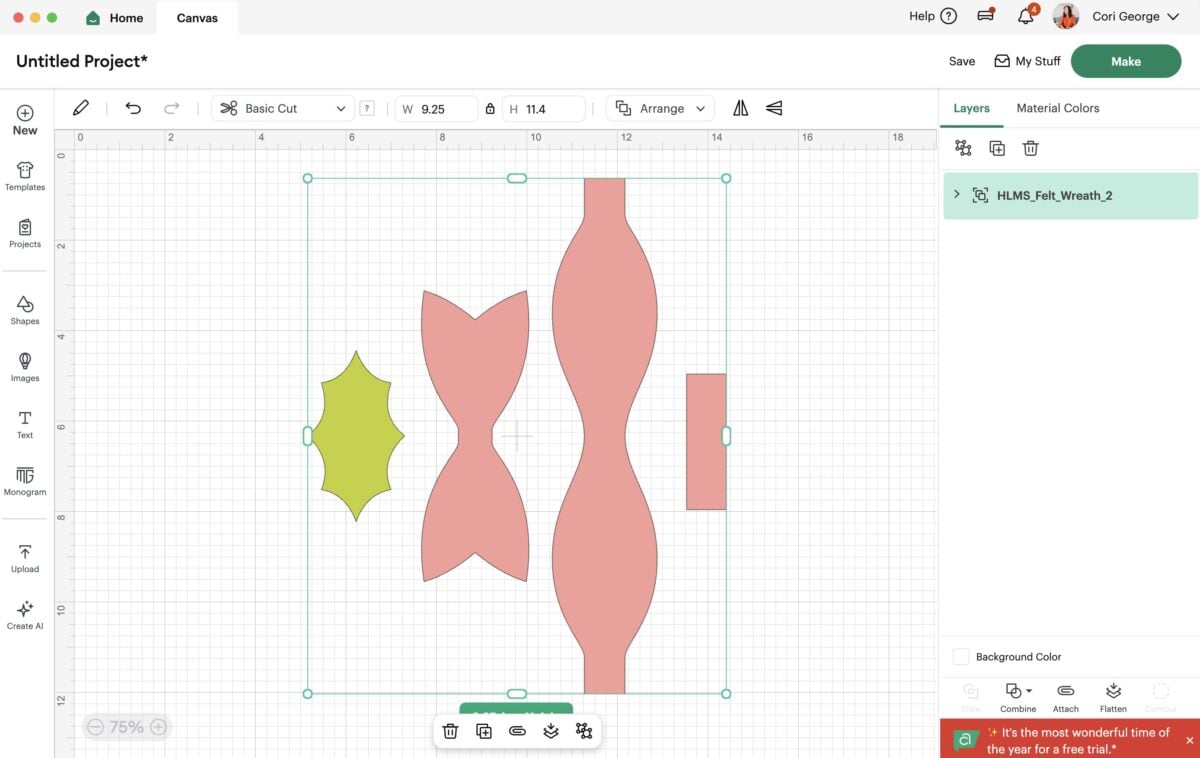
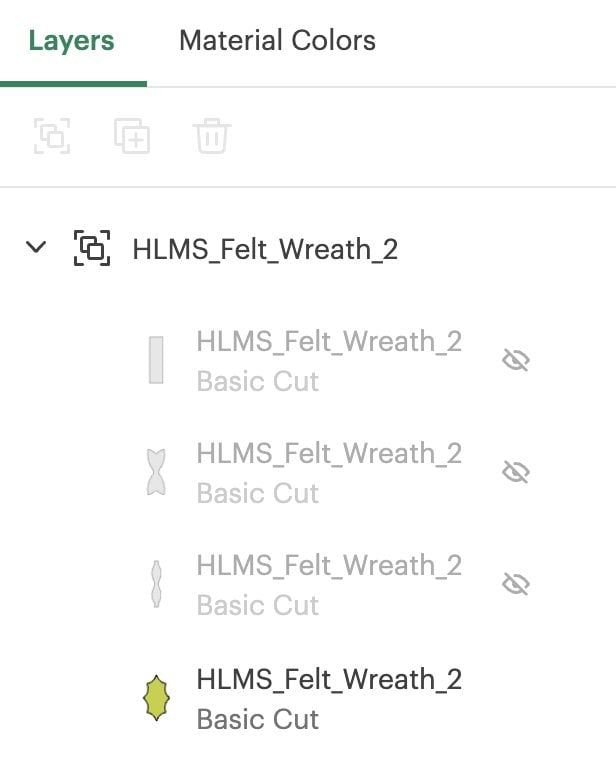
We’re going to cut the two parts of this wreath separately, so click on the “eye” icon next to each pink bow piece in the layers panel to hide it.
This leaves just the holly piece on your canvas. Click Make It in the upper right. Choose On Mat and set your mat to the 12″ x 24″ mat.
In the upper right of the Prepare screen, change “Project Copies” to 120.

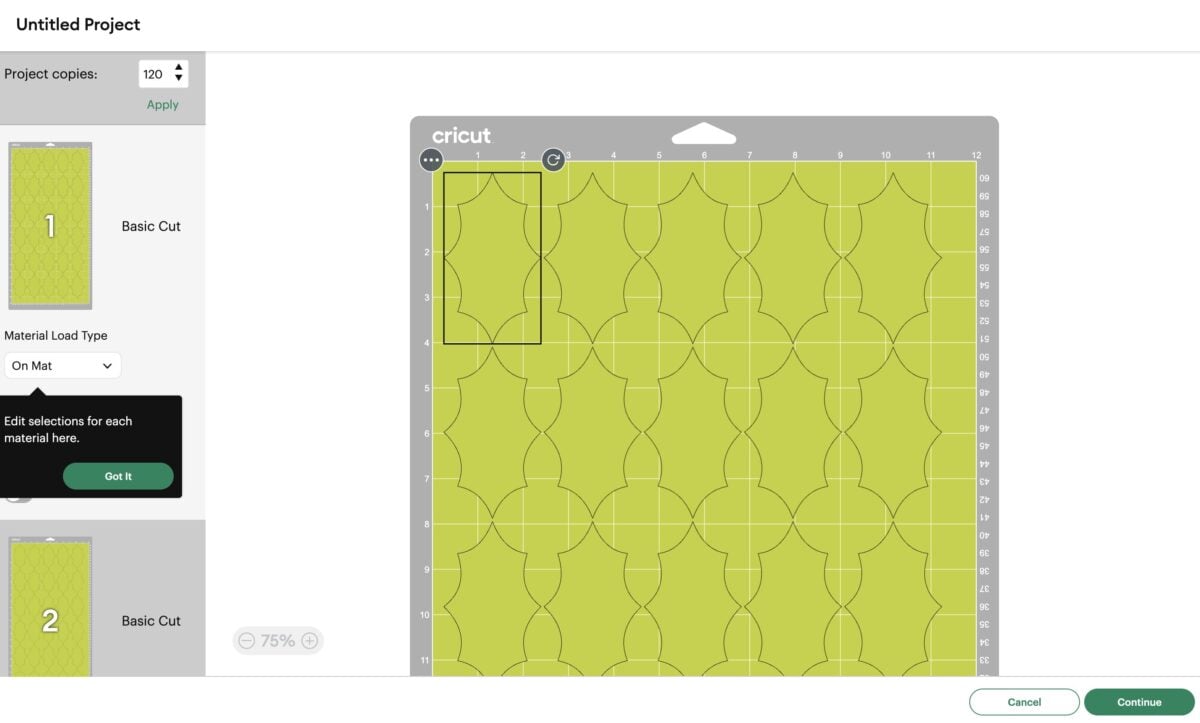
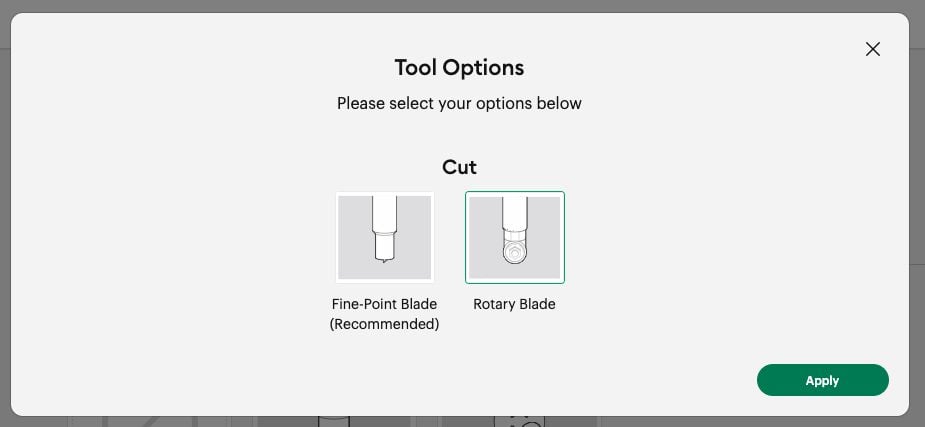
Click Continue to be taken to the Make Screen. Choose your material. I chose wool felt as my material.
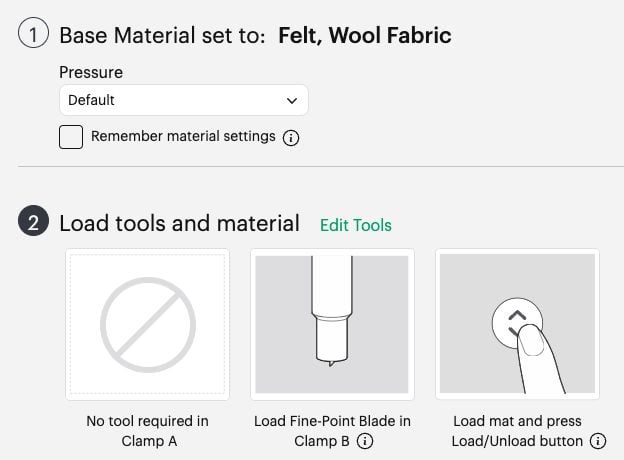
Cricut Design Space will default to the FinePoint blade. Instead, click Edit Tools and select the rotary blade.
Now you’re ready to cut and assemble your wreath!
DIY Felt Wreath Instructions
Cut your yard of felt into three 12″ x 24″ pieces. Depending on the width of the bolt, you will probably have a strip leftover that you can use for future projects.
Press your felt to your 12″ x 24″ mat using the brayer or your hands. Place your mat under the guides and press the blinking arrow to insert your mat into your machine.
Press the blinking “C” and your Cricut will cut your felt!

Once your pieces are cut, you have two options for attaching your leaves to the wreath form—pins or hot glue. I have done both and honestly I don’t have a preference. Hot glue is a little faster but pinning allows you to move leaves if you don’t love the placement.
Whichever method you choose, pin or glue from the bottom of the leaf and attach to the wreath form.


Continue this process around the entire wreath. Do the front and sides, but not the back—that will remain flat for hanging.
I suggest binging a show on Netflix while you’re working on it—we’re loving Jack Ryan right now. Nothing like making Christmas decorations while Jim-from-the-Office saves America.


Once you have gone all the way around, give your wreath a little shake and add some support pins/glue if some of the leaves are not staying put.
Next, let’s make our bow. Cut the bow pieces out using your Cricut in the same way you cut the leaves, except you only need one, not 120!
Take the longest bow piece and add a dot of hot glue in the center.

Then fold the ends to the center and press to adhere (be careful of the hot glue!).

Then place another dot of hot glue in the center of the tail piece.

Flip the bow piece over and adhere to the tail piece.

Wrap the final small piece around the bow and secure in the back with hot glue.


Then add your bow and your baubles (in my case white felt balls) to your wreath using hot glue.


You can add a ribbon for hanging if you prefer. I hang mine on a nail, pressing it into the foam, instead of a ribbon—it’s up to you!

If you have any questions or need help troubleshooting cutting your felt, leave me a comment!


Comments & Reviews
Judy Kim says
Thank you for this detailed guide on creating a felt wreath with Cricut! I recently made a similar project for my sister’s birthday, and it brought such joy. Your tips will definitely enhance my next crafting experience! run 3
football says
Witness the fusion of athletic elegance and strategic intellect, where every movement becomes a brushstroke in the canvas of Football Bros.
scrandle says
Step into the arena of Scrandle play online, where words become your chosen weapons in a battle of wits for ultimate linguistic dominance.
scrandle says
Step into the arena of Scrandle, where words become your chosen weapons in a battle of wits for ultimate linguistic dominance.
watchingdigital101 says
Great tutorial. Using Explore and wondering if I should set pressure to max for thick felt? Thanks for help. myblockbreaker
writingstellar33 says
Just finished this wreath and the colors are lovely. The felt bow is perfect for the festive holiday look. ragdoll archers
Tom says
It looks just great! io games
Iris Itzel says
I’ve cut felt with Cricut Explore before, and you indeed have to adjust the That’s Not My Neighbor pressure quite carefully. What you said about using wool-blend felt is very practical. Anyone new to DIY felt wreaths will save time on trial and error.