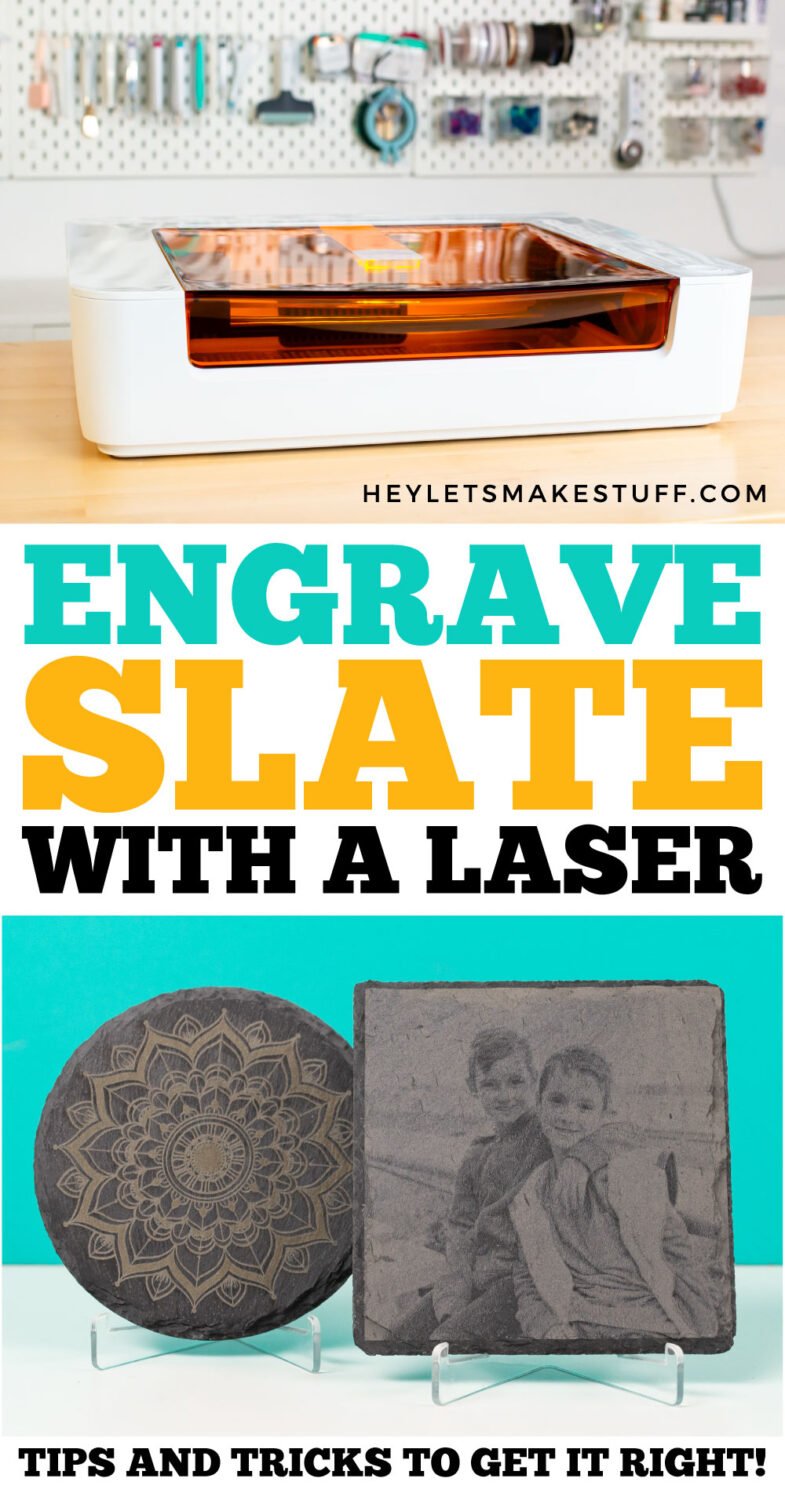
Your laser can work with so many more materials than just wood and acrylic! Learn all my tips and tricks to engrave slate with a laser and get a free set of engraving files for your laser!
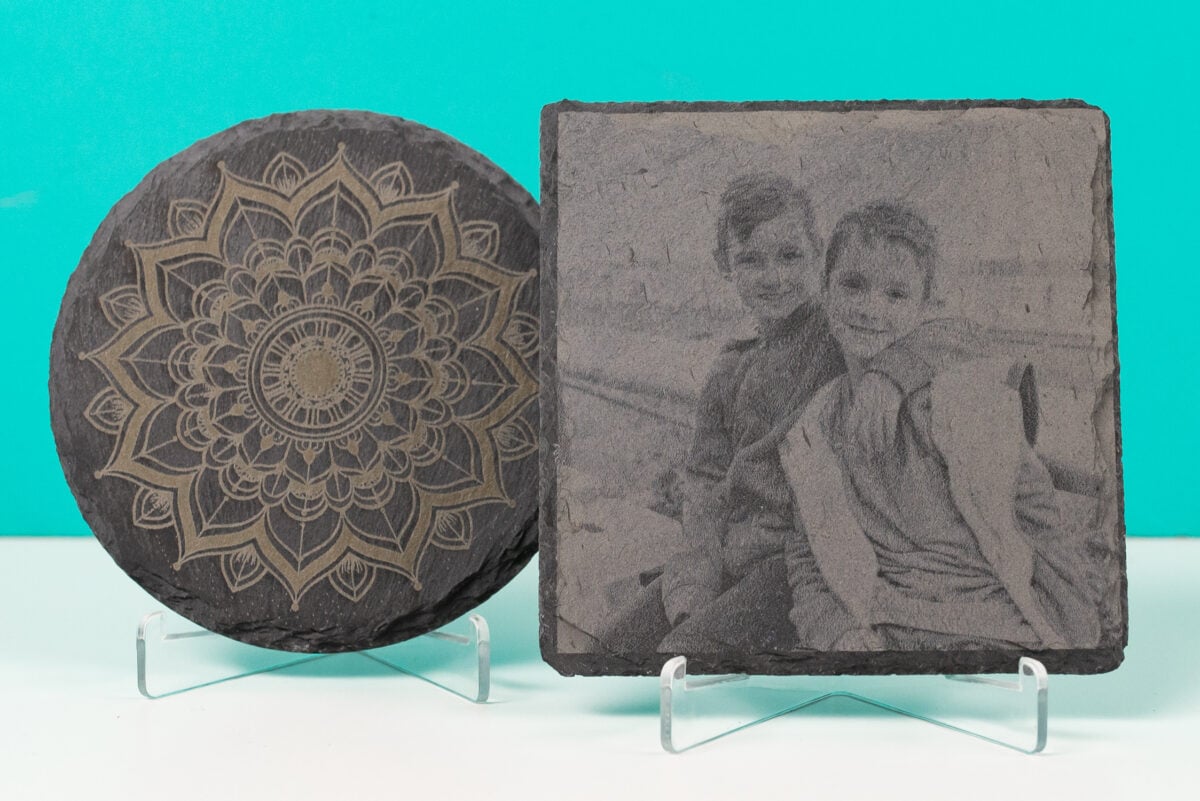
When I’m teaching about using a laser, I most often talk about two types of materials—wood and acrylic. But today we’re going to learn how to engrave slate with laser! You can make all sorts of cute custom coasters, photos, and cheese boards using this method and they make great products to sell as well.
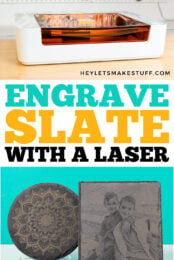
For this project, I am using my Glowforge Spark™. Glowforge Spark is a diode laser, which means that it’s smaller and less powerful than a larger CO2 laser like the Glowforge Pro™ or Glowforge Plus™. But it also means that it’s significantly less expensive for the everyday crafter and it allows you to get started in the laser crafting world without breaking the bank. Check out my Beginner’s Guide to Glowforge Spark to learn more about this Craft Laser™!
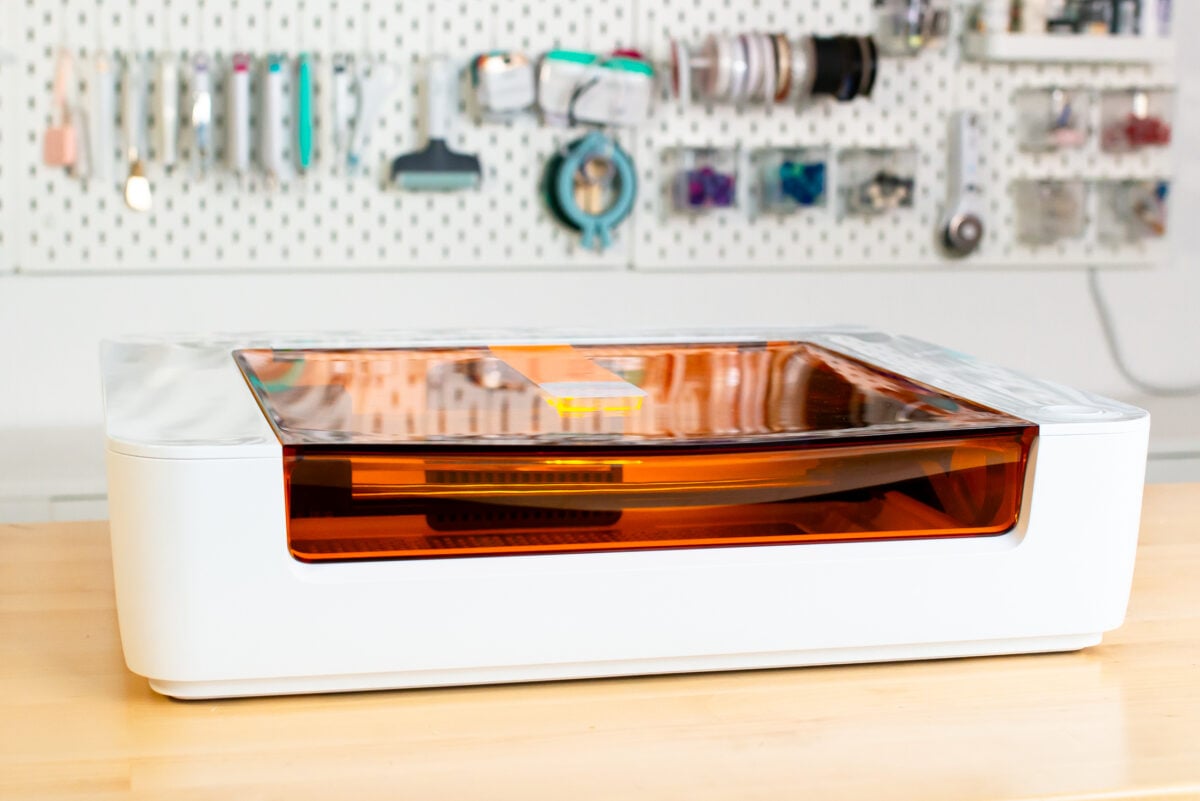
Note that it is impossible to cut slate with a laser, even a more powerful CO2 laser. Your best option for cutting slate is…a tile saw!
Engraving slate may seem like an advanced tutorial, but it’s actually super easy! I’m going to show you two different projects today. How to engrave a design and then how to engrave a photo (which requires a simple extra step).
Watch the Video
Want to see how I engrave slate in action? Hit the play button below! Or keep reading for a written tutorial.
Supplies
- Laser machine (I am using my Glowforge Spark)
- Round slate coasters
- Square slate coasters
- Acrylic easel stands (for display)
Get the Free File
Want access to this free file? Join my FREE craft library! All you need is the password to get in, which you can get by filling out the form below. The file number is: L12.
Instructions for Engraving a Design
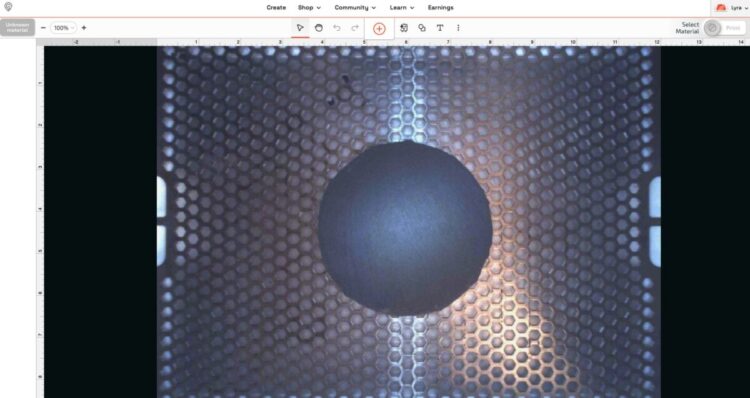
Place the slate in the center of the bed of your laser. Make it as straight as possible if you’re using a square or rectangle. Your Glowforge will take a photo of the bed of your laser with the slate, which you’ll be able to see in the Glowforge App.
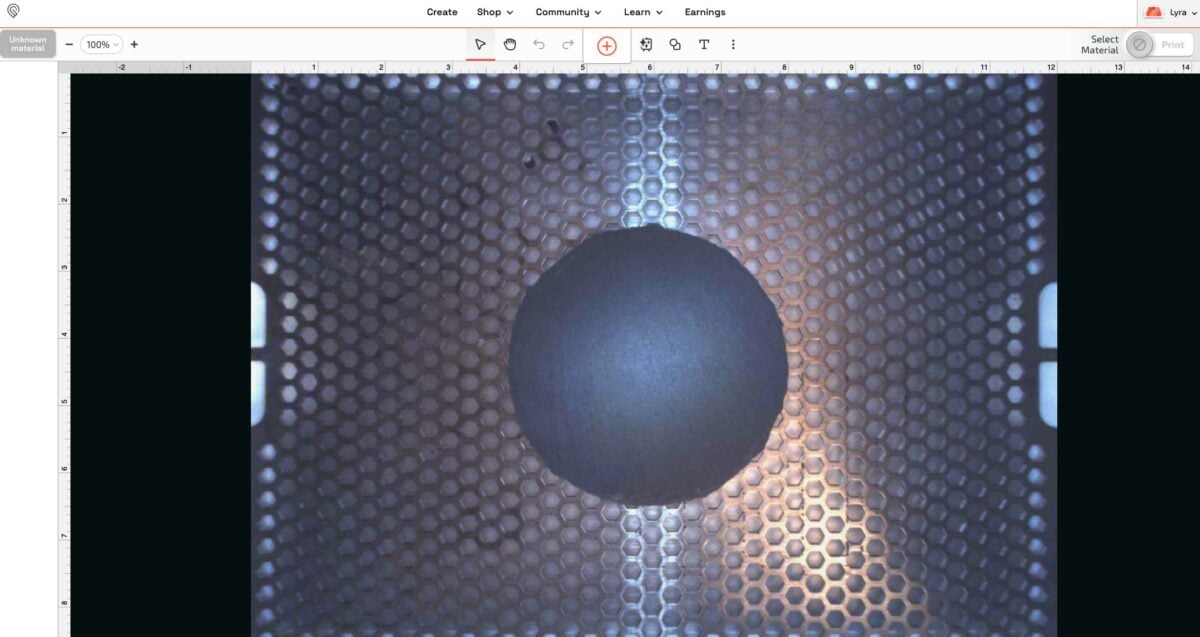
Because this material is thick, we want to set our focus. This will help our engraving to look crisp and not blurry. Go to the three dots at the top of the Glowforge App and click Set Focus.
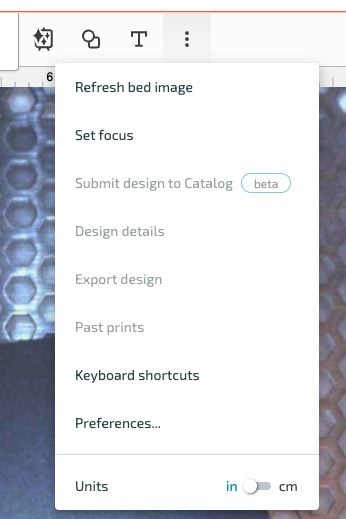
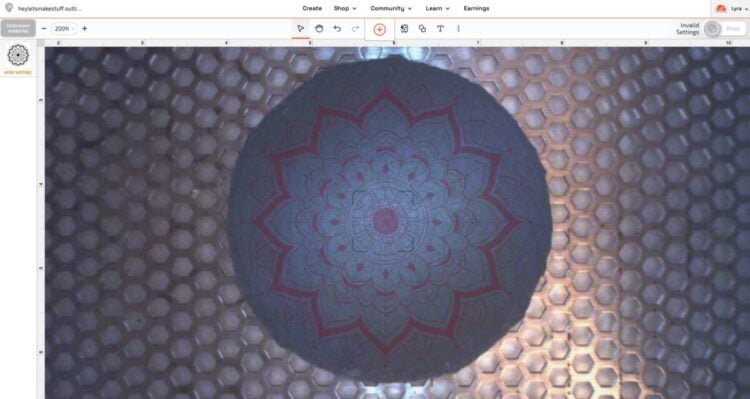
Your Glowforge will make some noise as it sets the focus. Then you’re ready to add your image. Upload the image you want to use and resize it on top of your slate. For these designs, I liked keeping the design itself inside the boundaries of the rough edges of the slate.
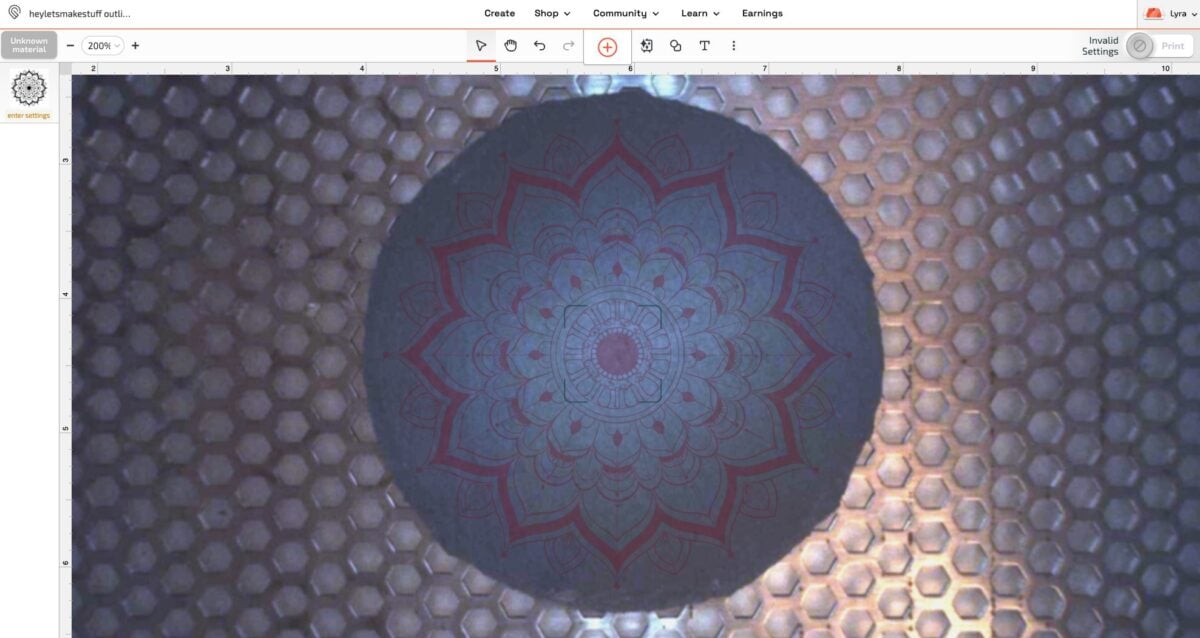
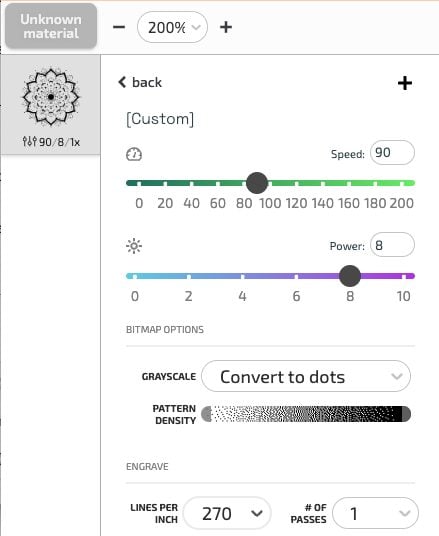
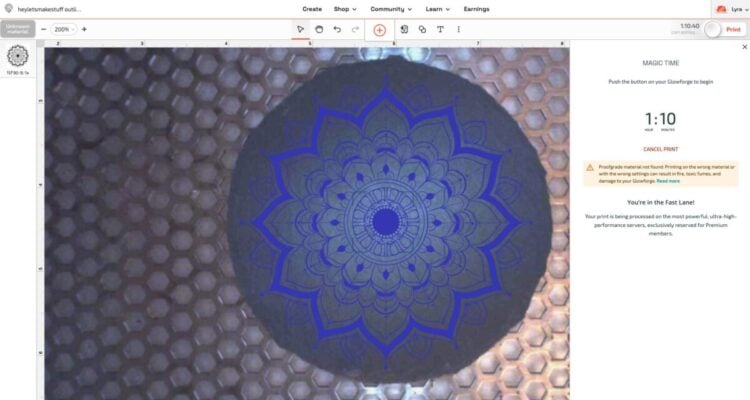
Then we’ll need to set a manual setting for slate because it’s not a Glowforge Proofgrade material. For these mandala designs, I found Speed: 90, Power 8, Pass 1 to work really well. I set my Lines Per Inch to 270. You may need to do some tests to see what works best for your laser and image.
That’s it! Click Print and your image will be processed. This has an engrave time of an hour and ten minutes. This is one of the tradeoffs between a larger CO2 laser (like the Glowforge Pro) and a smaller diode Craft Laser. A Craft Laser is much slower than a larger CO2 machine.
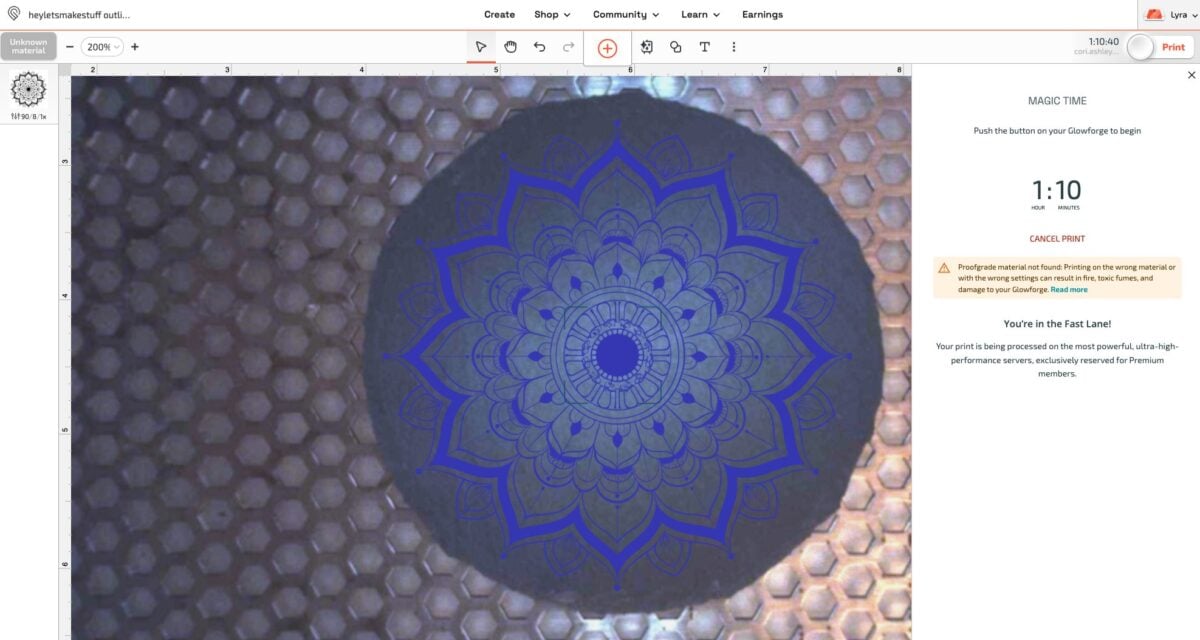
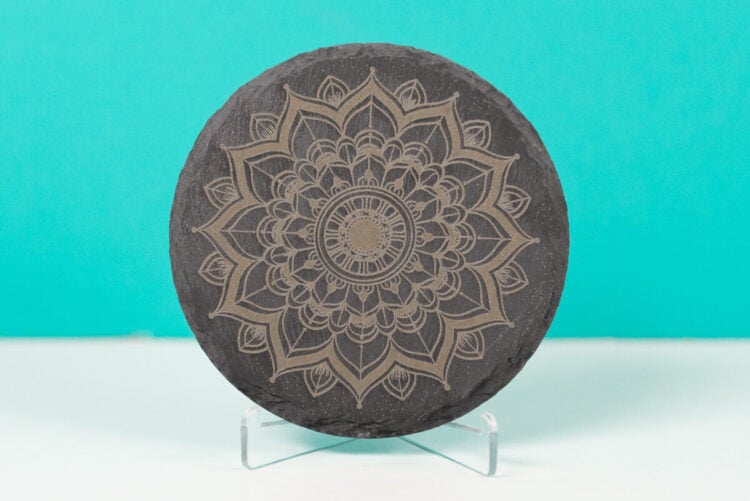
Press the blinking button and your Glowforge will engrave your slate!
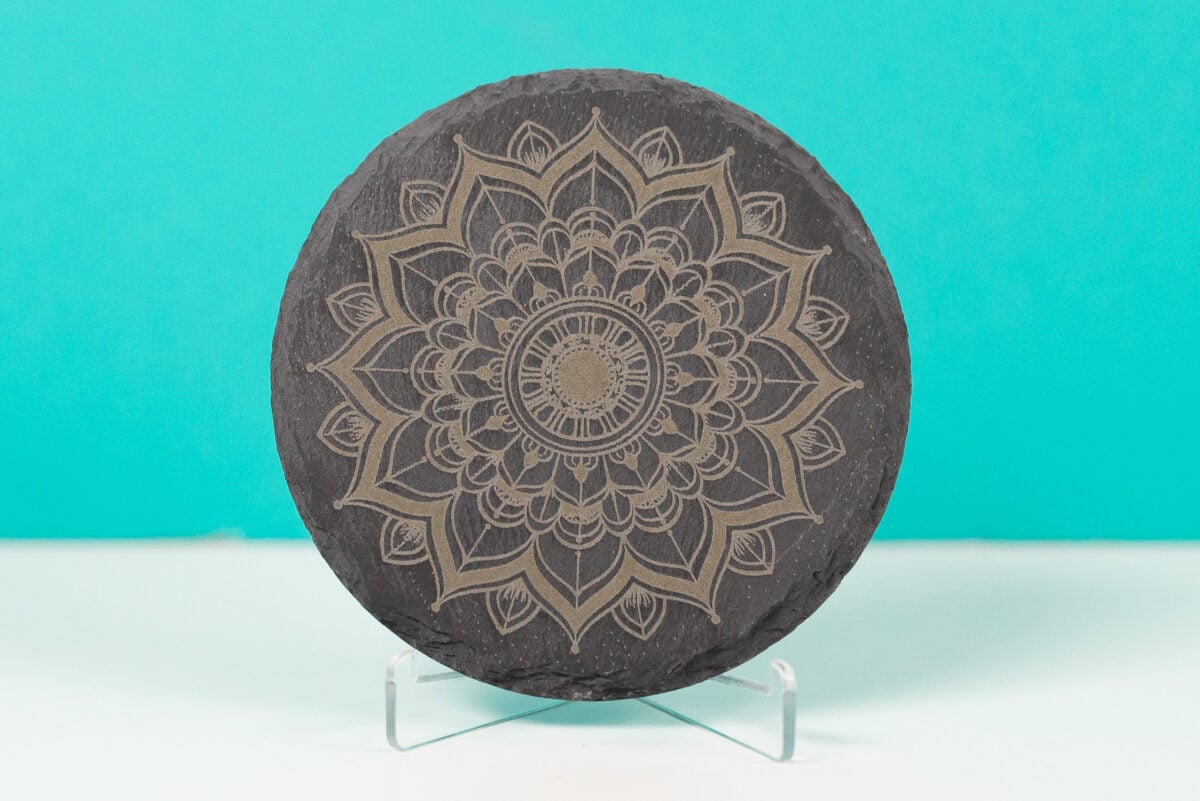
Gorgeous!
Instructions for Engraving a Photo
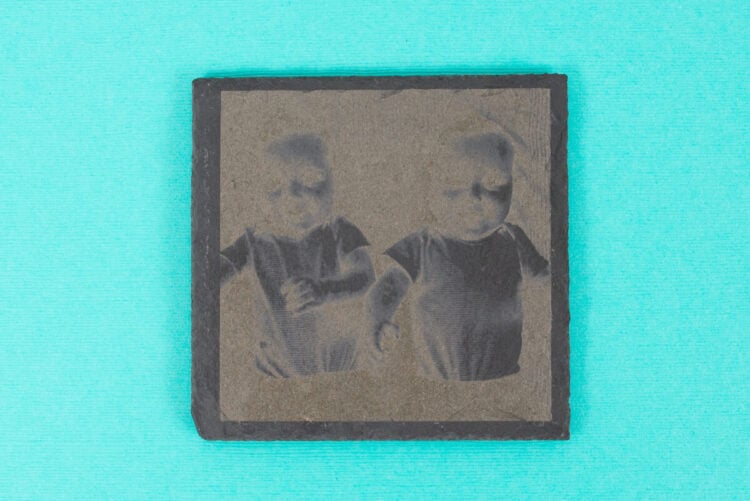
Engraving a photo is basically the same as engraving a design with one extra step—you need to invert the photo first. Because the color inside the slate is lighter than the top layer of the slate, you’ll end up with what looks like an inverted image if you just engrave a regular image. You can see that here with this image of my boys.
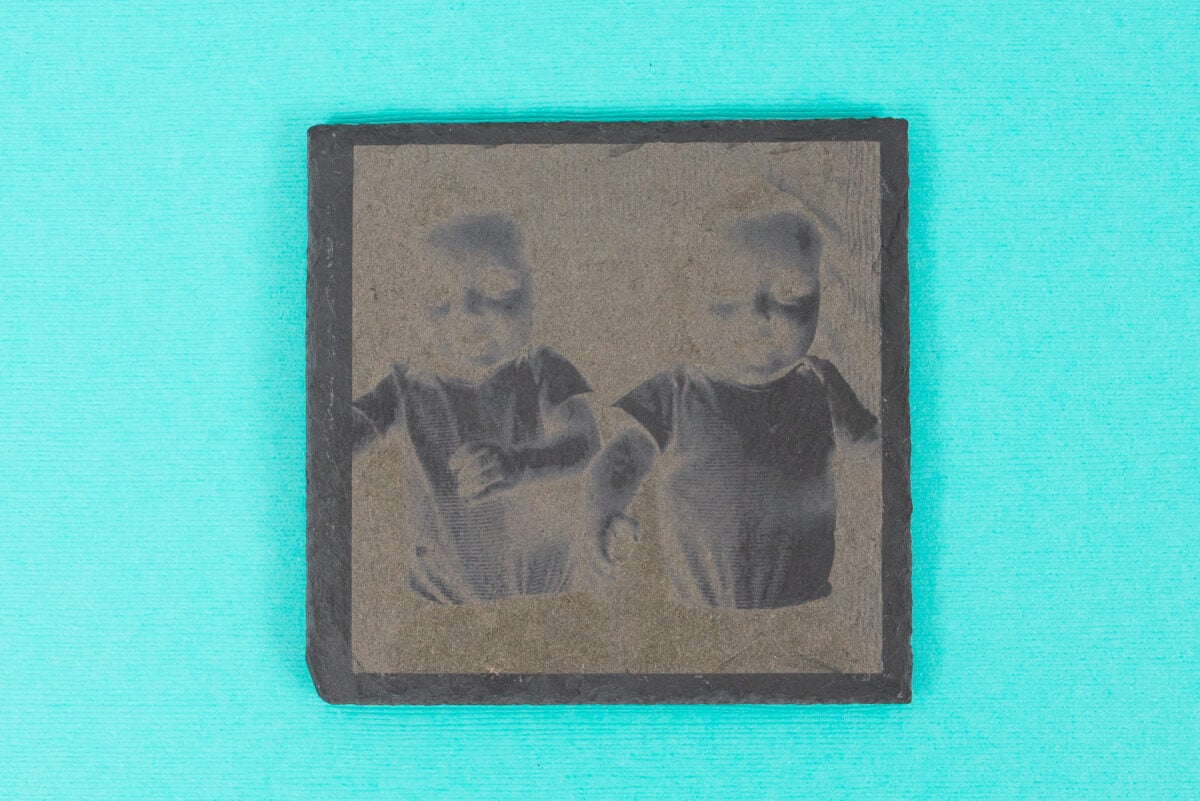
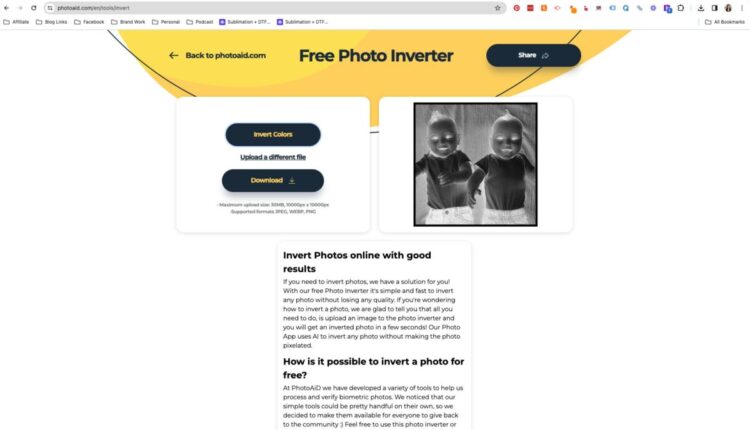
Not exactly what we want! To invert a photo, you can use a site like Free Photo Inverter. Just upload your photo, click invert, and download your inverted photo. You’ll see that it actually looks similar to the photo above!
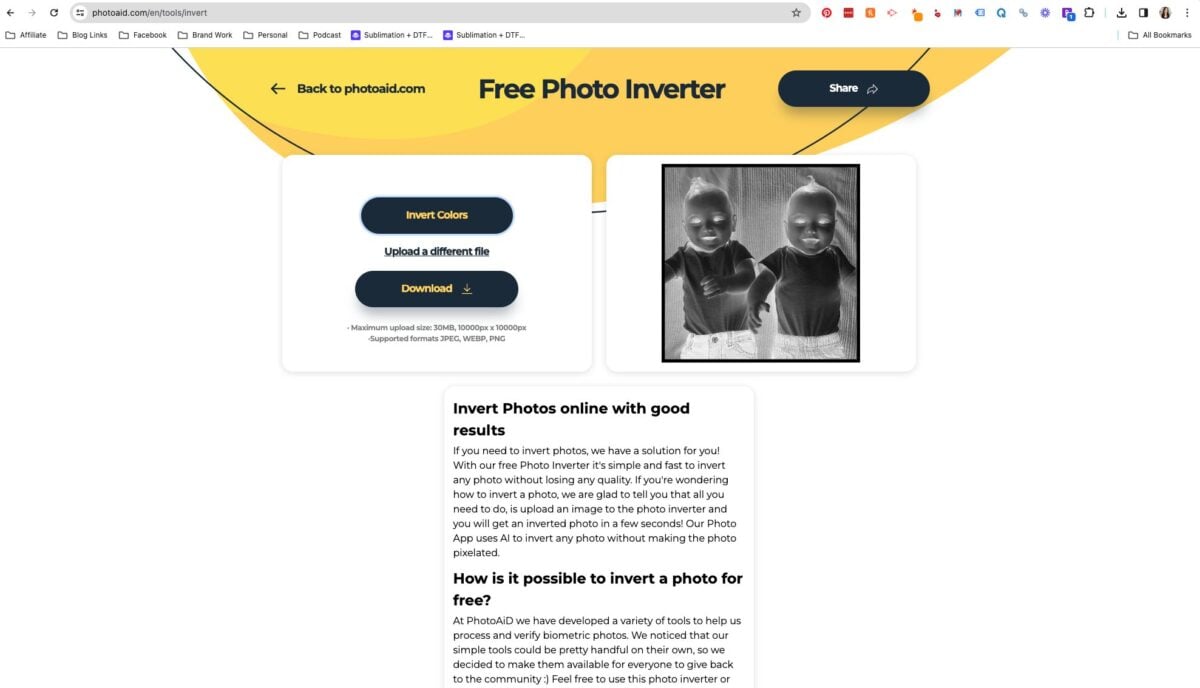
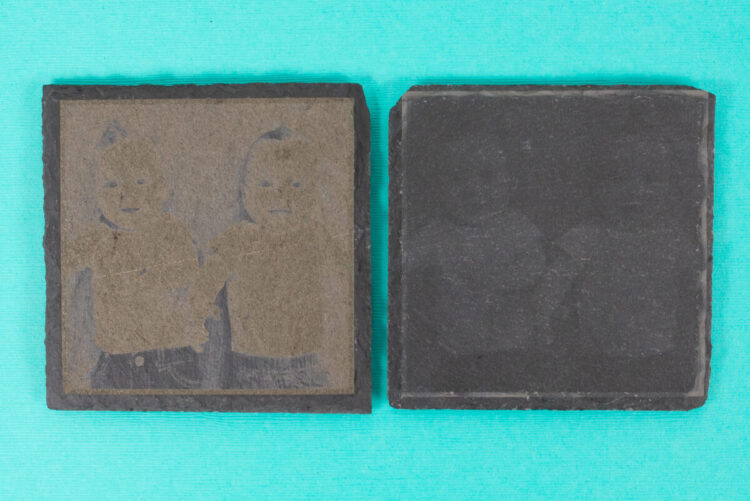
Then you’ll upload the inverted photo to the Glowforge App and proceed as we did above. I did some more testing with the image of my boys as babies and never found a setting that I really liked. I think this is because there are too many medium grays in my image. You can’t tell, but they are wearing yellow onesies, they have peachy skin, and the blanket they are on is light blue. All medium grays when converted to grayscale.
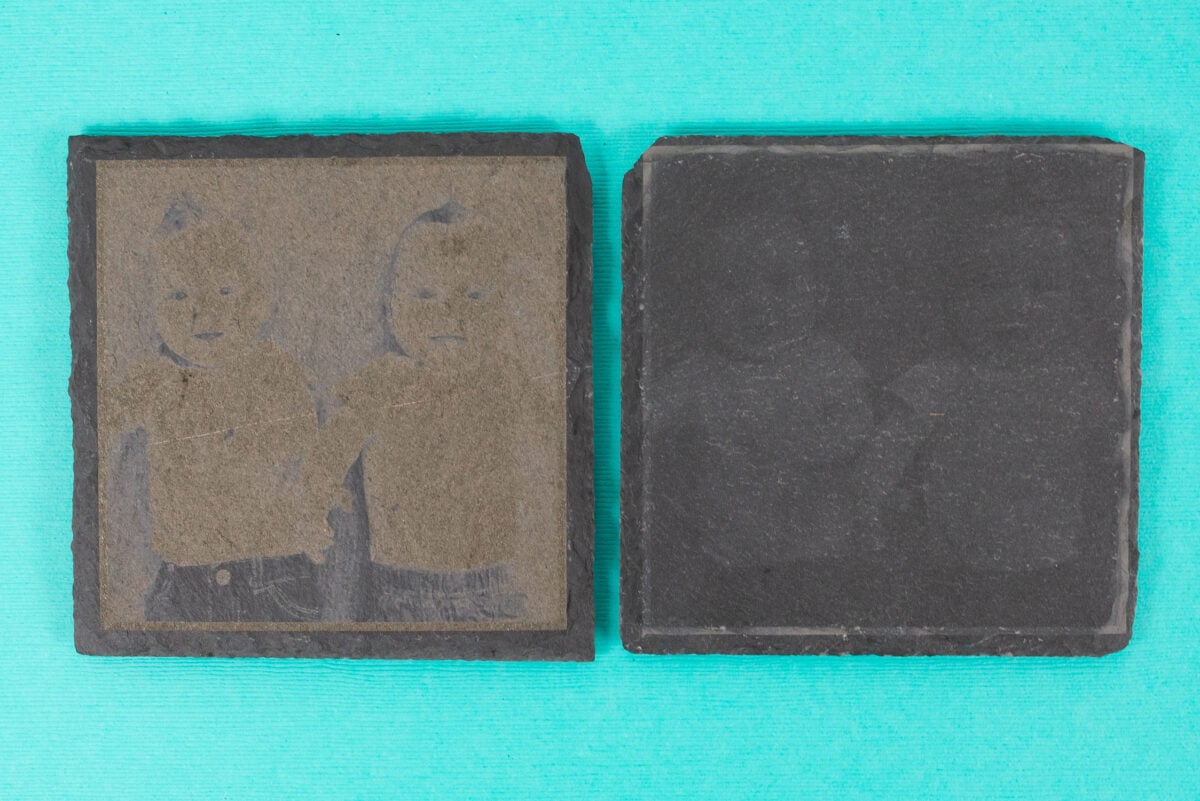
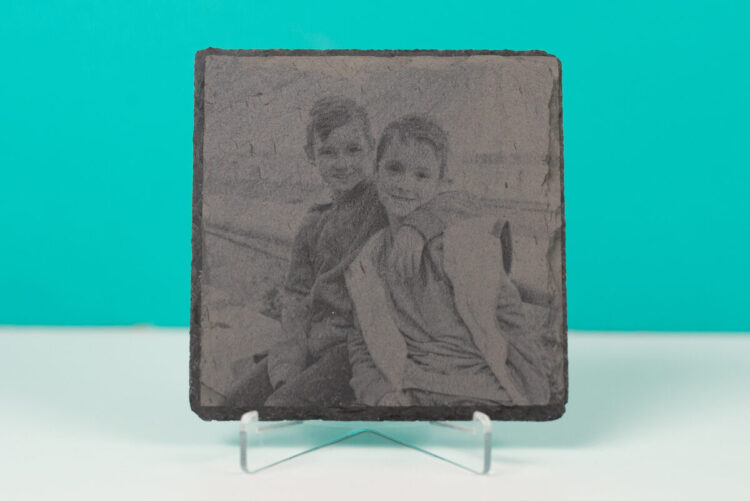
So I tried a different photo with more contrast, this one of my boys this year (they’re eight now!). This photo has a lot more contrast. I used the settings Speed: 90, Power 8, Pass 1 with my lines per inch set to 405. And I got a much better result!
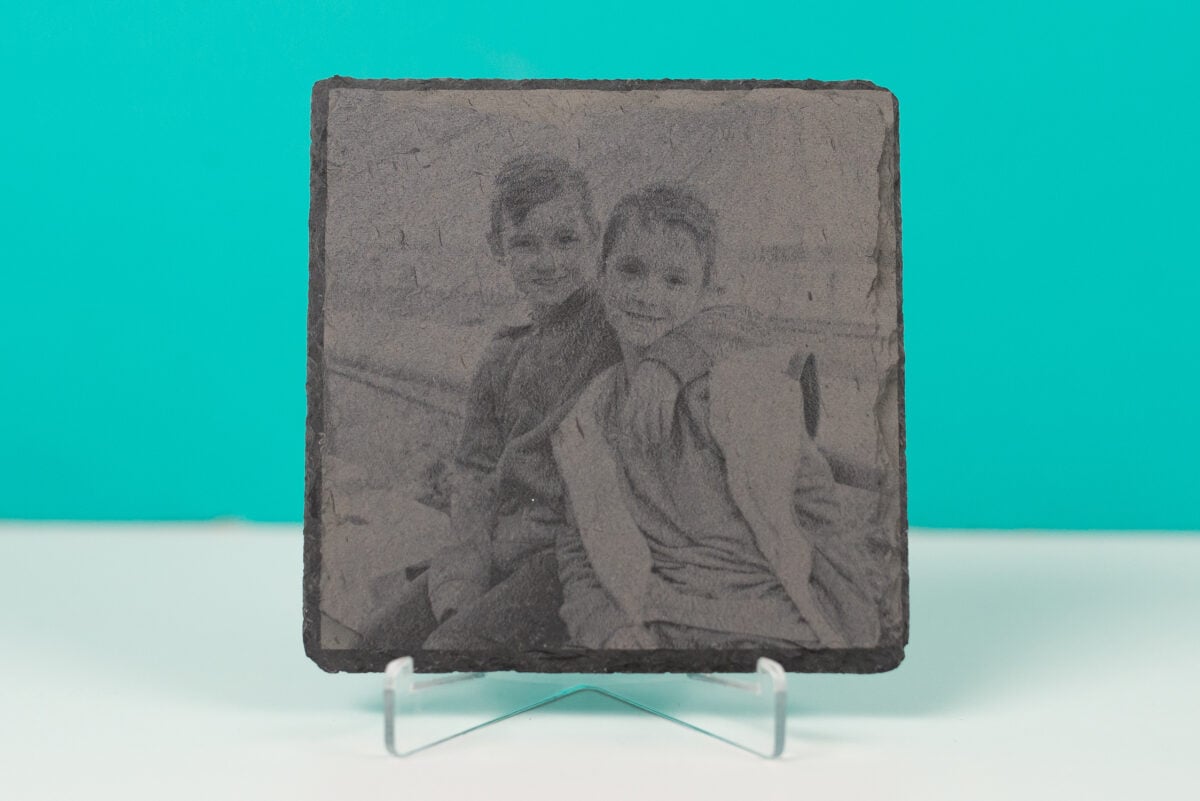
Like with most crafts, you may need to do some testing to get the best results. Luckily, these slate coasters aren’t expensive so you have some room to play around and see what settings are best for your photo!
I hope you enjoyed this tutorial showing how to engrave slate with a laser! If you have any questions or need help troubleshooting, just leave me a comment below!
ENGRAVING SLATE WITH A LASER
Equipment
- Laser Machine (Glowforge Spark)
- Acrylic easel stands (for display)
Instructions
- For this project, the Glowforge Spark™ is being used. Glowforge Spark is a diode laser, which means that it's smaller and less powerful than a larger CO2 laser like the Glowforge Pro™ or Glowforge Plus™. But it also means that it's significantly less expensive for the everyday crafter and it allows you to get started in the laser crafting world without breaking the bank. Check out this Beginner’s Guide to Glowforge Spark to learn more about this Craft Laser™!Note that it is impossible to cut slate with a laser, even a more powerful CO2 laser. Your best option for cutting slate is…a tile saw!These instructions will show you two different projects. First, how to engrave a design and then how to engrave a photo (which requires a simple extra step).

- Instructions for Engraving a DesignPlace the slate in the center of the bed of your laser. Make it as straight as possible if you're using a square or rectangle. Your Glowforge will take a photo of the bed of your laser with the slate, which you'll be able to see in the Glowforge App.

- Because this material is thick, you will want to set the focus. This will help the engraving to look crisp and not blurry. Go to the three dots at the top of the Glowforge App and click Set Focus.

- The Glowforge will make some noise as it sets the focus. Then you're ready to add your image. Upload the image you want to use and resize it on top of your slate. For these designs, the design was kept inside the boundaries of the rough edges of the slate.

- Next, you will need to set a manual setting for slate because it's not a Glowforge Proofgrade material. For these mandala designs, Speed: 90, Power 8, Pass 1 work really well and the Lines Per Inch to was set to 270. You may need to do some tests to see what works best for your laser and image.

- That's it! Click Print and your image will be processed. This has an engrave time of an hour and ten minutes. This is one of the tradeoffs between a larger CO2 laser (like the Glowforge Pro) and a smaller diode Craft Laser. A Craft Laser is much slower than a larger CO2 machine.

- Press the blinking button and your Glowforge will engrave your slate! Gorgeous!

- Instructions for Engraving a PhotoEngraving a photo is basically the same as engraving a design with one extra step—you need to invert the photo first. Because the color inside the slate is lighter than the top layer of the slate, you'll end up with what looks like an inverted image if you just engrave a regular image.

- Not exactly what we want! To invert a photo, you can use a site like Free Photo Inverter. Just upload your photo, click invert, and download your inverted photo. You'll see that it actually looks similar to the photo above!

- Next, upload the inverted photo to the Glowforge App and proceed as you did in the steps above. More testing with the image of these two boys as babies and a setting was never found that looked good and this is because there are too many medium grays in the image. You can't tell, but they are wearing yellow onesies, they have peachy skin, and the blanket they are on is light blue. All medium grays when converted to grayscale.

- A different photo was used with more contrast. The settings used were Speed: 90, Power 8, Pass 1 with the lines per inch set to 405. This is a much better result!Like with most crafts, you may need to do some testing to get the best results. Luckily, these slate coasters aren't expensive so you have some room to play around and see what settings are best for your photo!



Leave A Reply!