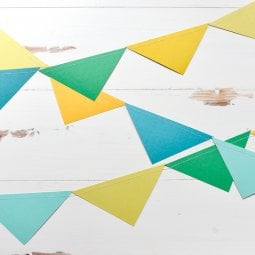
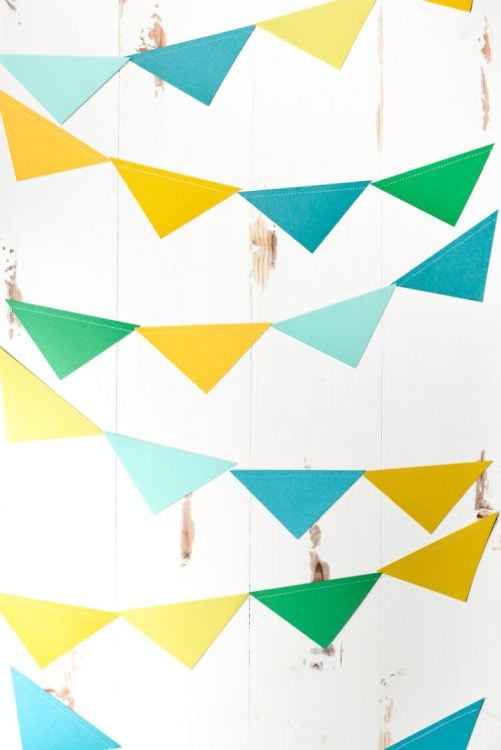
These are the easiest paper pennants to make for any party! Sew the pennants together with your sewing machine to create a banner that’s perfect for your next birthday party, baby shower, or as nursery decorations.
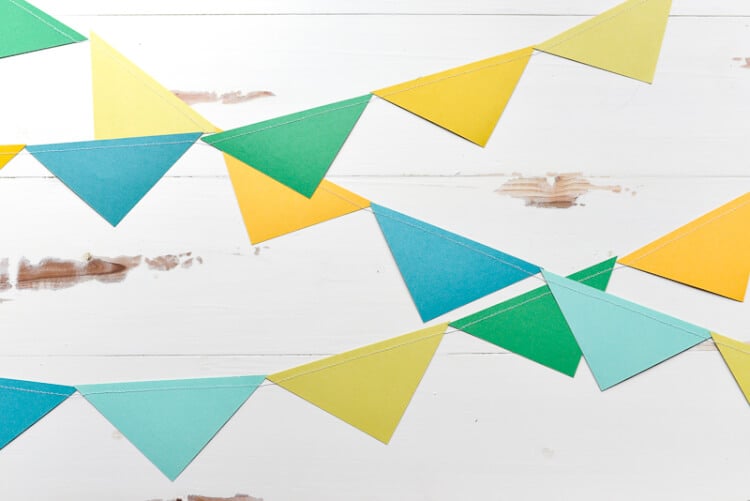
Buying pennants to decorate for a party can get expensive. If you have a stash of scrapbooking paper and a sewing machine, you can create custom paper pennants that are inexpensive, easy, and don’t look like they came from a party supply shop.
You may be thinking — sewing paper? Yes you can! I do it all the time and it’s a great way to quickly connect these pennants together.
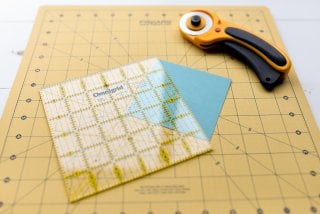
Most pennant flags are taller than they are wide, but I found a great little stack of 4″ x 4″ textured scrapbooking paper (which I can no longer find online), so I made cute wide pennants out of right triangles. If you have 12″ x 12″ scrapbooking paper or card stock, you could cut it on both diagonals to make four big flags per piece of paper, or cut them in half again to make eight, and in half again to make sixteen.
Paper Pennants Supplies
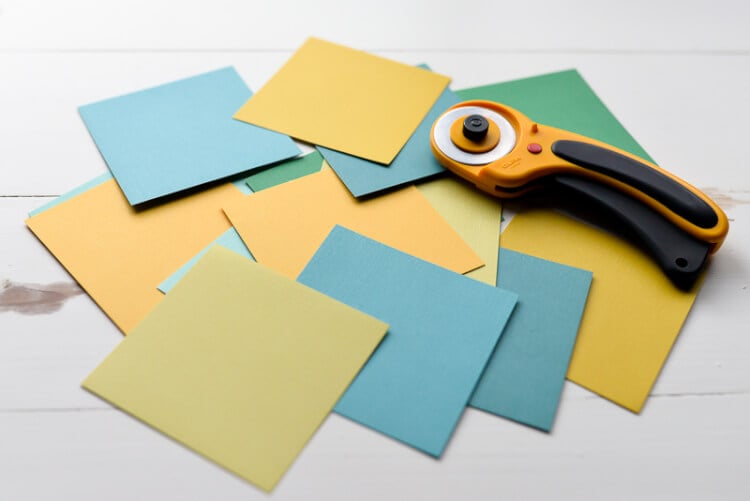
- Card stock, cut into squares
- Rotary Cutter
- Ruler
- Coordinating thread
Paper Pennants Instructions
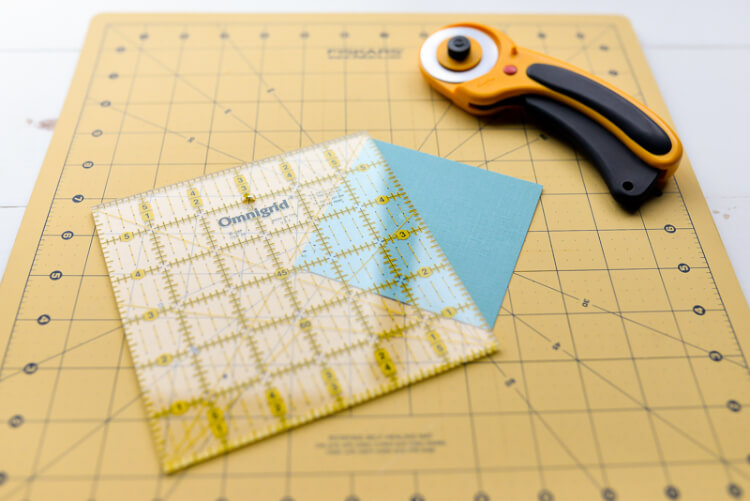
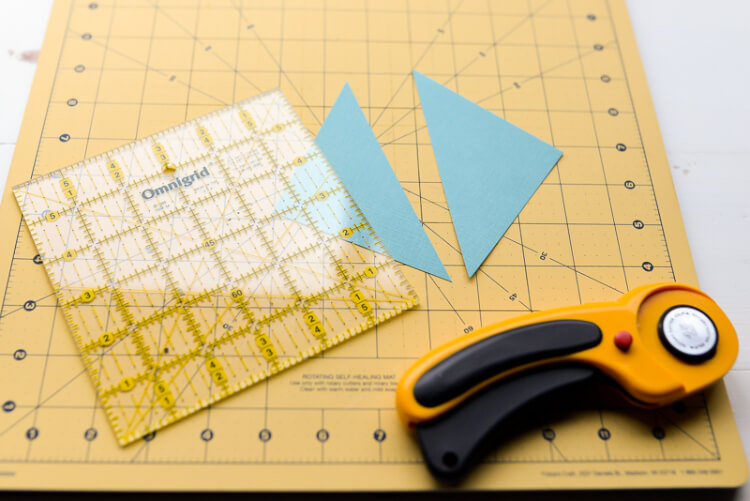
Slice each square in half along the diagonal, using a ruler and rotary blade, making two right triangles. You could also draw a line and cut with scissors, but I find the rotary cutter method a lot faster.
I have a rotary blade dedicated to cutting paper — I just set it aside for whenever I want to cut paper, since paper dulls the blade faster than fabric
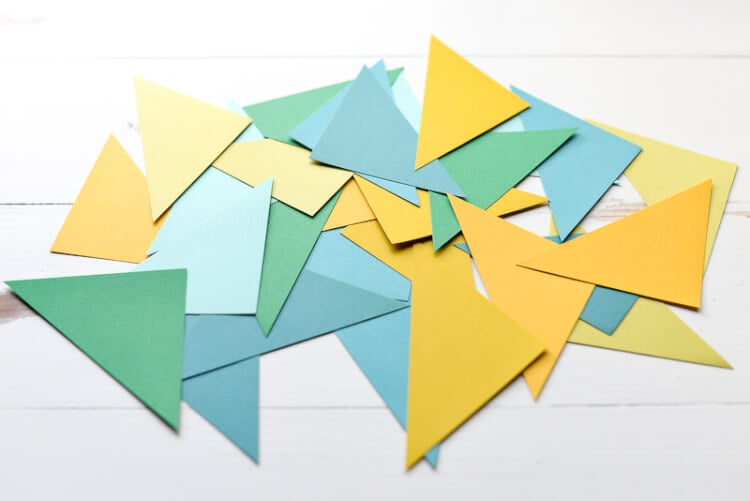
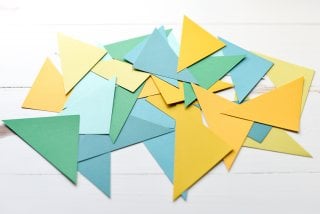
Lay out your flags in the order you’d like. The length is up to you and the number of flags you have. I didn’t put my flags in perfect alternating order, but mixed it up a bit. I didn’t want it to look too perfect, but that’s up to you. Stack them in a pile, from the first flag at the top to the last flag at the bottom.
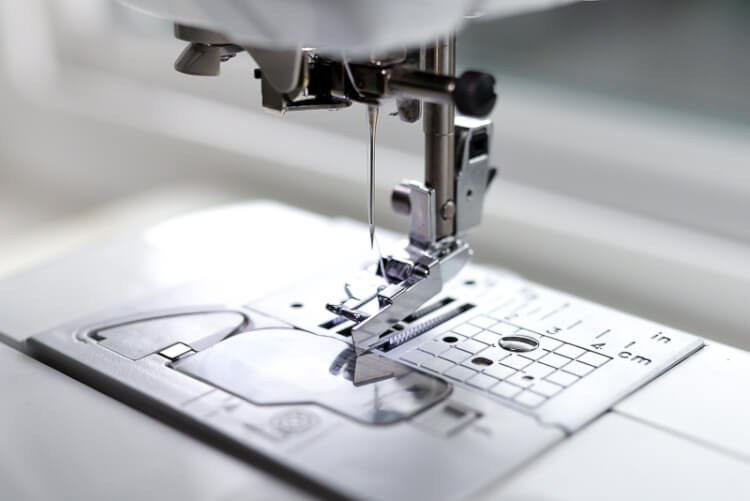
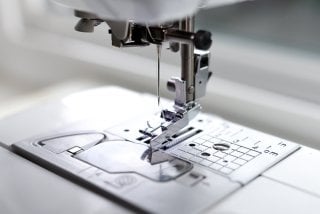
Set your machine to a wider stitch — basically the length you might use to baste. I suggest using a 1/4″ foot while sewing these flags — the guide made it easy to get the flags to go through the machine straight.
I also turned on the “needle down” feature on my machine; you’ll see why in a second. Make sure you have enough thread on your spool and in the bobbin so you don’t run out mid-banner.
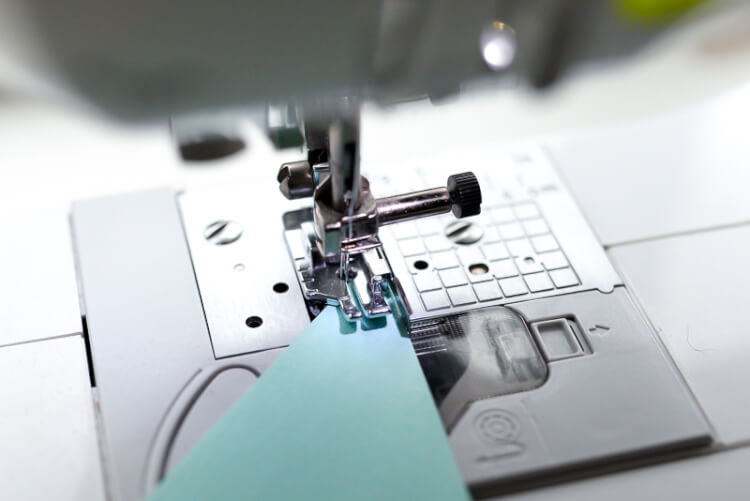
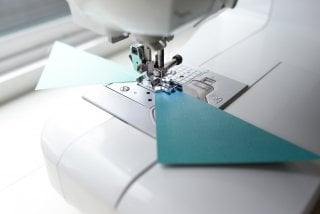
Pull the ends of the thread out from your machine, so there is about a foot of loose thread at the end to use for hanging. Line up the long edge of the right triangle (the hypotenuse, for those of you who paid attention in math class) with the flag under the foot and you’ll see that the edge of the 1/4″ foot and the down needle create this perfect guide for the flag (I hope this picture accurately captures what I mean).
If you don’t have a “needle down” feature on your machine or a quarter-inch foot, no problem. Just stick the paper under the needle like you would a piece of fabric. Then sew along the edge, keeping the edge of the paper touching the guide of your foot.
When I reached the end of a the flag, I stopped sewing, and the needle was down, and I put in the next paper and just kept sewing!

Continue this process until you’ve sewed all the way through all of your pennants! Make sure when you reach the end to leave an extra foot of thread at the end for hanging.

A cute, easy decoration for any party! Use scrapbooking scissors to give the short edges of the triangles cute scallops or pinking, or to use letter stickers to spell out a message for a special occasion.

EASY SEWN PAPER PENNANTS
Supplies
- Card stock cut into squares
- Coordinating thread
Instructions
- Slice each square in half along the diagonal, using a ruler and rotary blade, making two right triangles. You could also draw a line and cut with scissors, but I find the rotary cutter method a lot faster.

- Lay out your flags in the order you'd like. The length is up to you and the number of flags you have. Stack them in a pile, from the first flag at the top to the last flag at the bottom.Set your machine to a wider stitch — basically the length you might use to baste. Suggest using a 1/4" foot while sewing these flags — the guide made it easy to get the flags to go through the machine straight.Also, turn on the "needle down" feature on your machine; you'll see why in a second. Make sure you have enough thread on your spool and in the bobbin so you don't run out mid-banner.
- Pull the ends of the thread out from your machine, so there is about a foot of loose thread at the end to use for hanging. Line up the long edge of the right triangle (the hypotenuse, for those of you who paid attention in math class) with the flag under the foot and you'll see that the edge of the 1/4" foot and the down needle create this perfect guide for the flag. If you don't have a "needle down" feature on your machine or a quarter-inch foot, no problem. Just stick the paper under the needle like you would a piece of fabric. Then sew along the edge, keeping the edge of the paper touching the guide of your foot.
- When you reach the end of a the flag, stop sewing, with the needle down, and put in the next paper and just keep sewing!
- Continue this process until you've sewn all the way through all of your pennants! Make sure when you reach the end to leave an extra foot of thread at the end for hanging.A cute, easy decoration for any party! Use scrapbooking scissors to give the short edges of the triangles cute scallops or pinking, or to use letter stickers to spell out a message for a special occasion.


Comments & Reviews
AI Saree says
This DIY guide for making paper pennants is creative and practical, perfect for adding a personal touch to any celebration. The sewing technique is a clever twist! For more unique ideas, check out AI Saree, where innovation meets tradition.