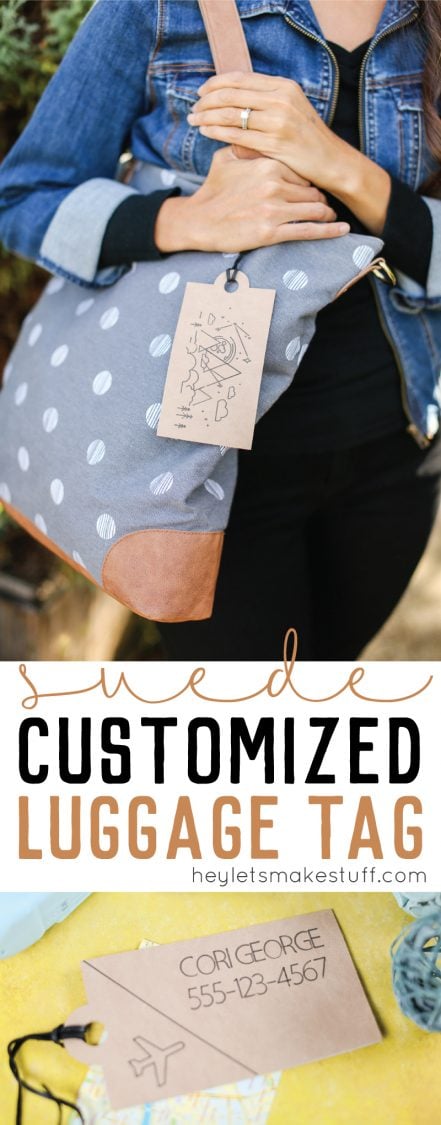
Use your Cricut to make this customized suede luggage tag. Not only will the Cricut cut it for you, but it will also write whatever text you want!
I’ve had a big trip on my calendar for months now — Turks and Caicos in the Caribbean, with my husband at the end of October for Beaches Social Media on the Sand. Unfortunately, Hurricanes Irma and Maria ripped a path of destruction through the islands of the Caribbean. Thankfully, everyone staying at Beaches and all their staff made it safely through the storms.
The clean-up, however, is intense — the resort itself is closed until the middle of December, and our conference is postponed indefinitely. While I’m definitely disappointed not to be heading out there next month, I am really just thankful that everyone there is okay. I can’t wait until they get the resort cleaned up and we can head back there! If you’d like to donate, the Sandals Foundation is putting 100% of donations to hurricane clean-up and rebuilding efforts. I’ve seen firsthand how this amazing organization gives back to the islands, so definitely donate if you can.
Just because I’m not heading there this next month doesn’t mean I’m not still planning for a big trip! I headed over to the Cricut Design Space to find a luggage tag that I could put on my bag (because is there anything more stressful than filling out one of the paper ones at the airline counter while the line of people glare at you? Nope.). I usually pack in a carry-on, but for blogging trips I find that I usually need to check a bag.
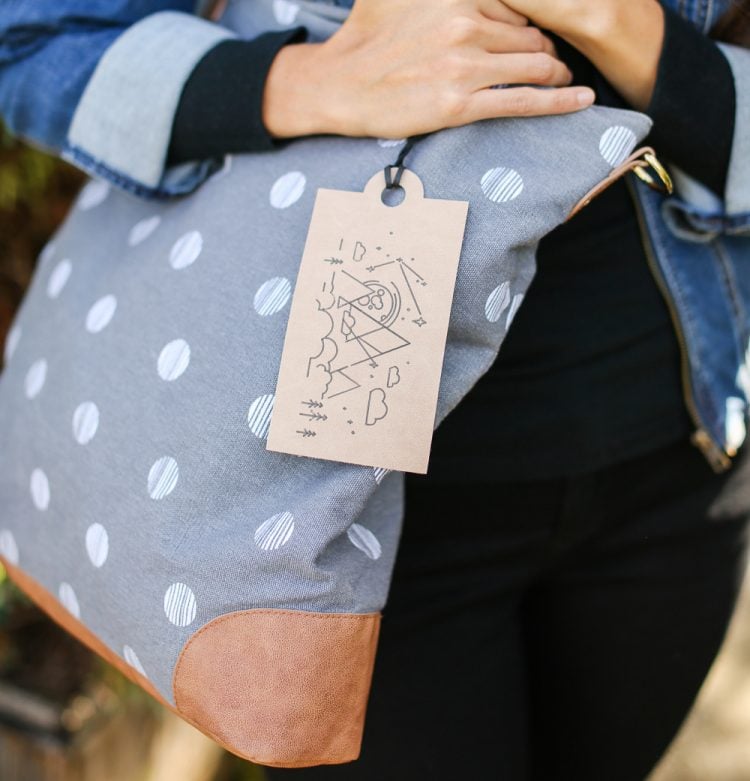
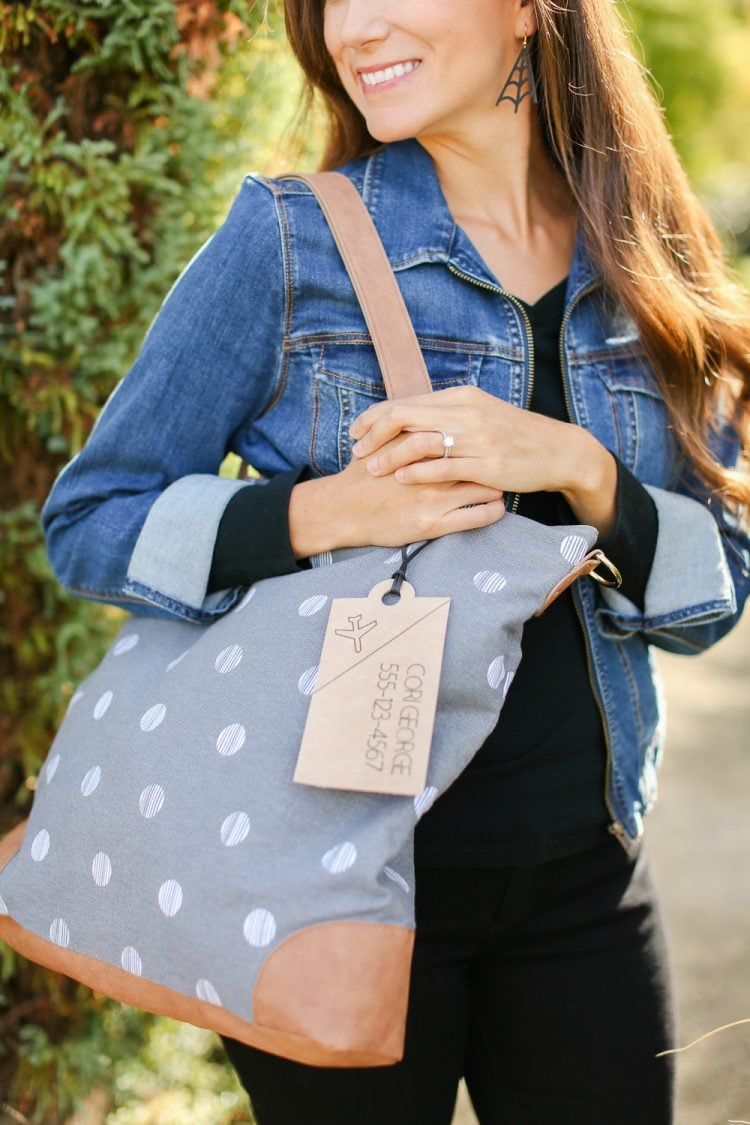
This luggage tag is awesome because you can customize it for you using the Cricut pen tool! And it’s super cute to boot, and doesn’t look like all the other luggage tags out there, making your bag easy to find. I originally made this tag on Cricut’s faux leather, but the ink never dried! So I tried it on suede, and not only does it not smear, it’s so stylish! And a big thank you to my gorgeous friend Natasha, who modeled for me.

Cricut Suede Luggage Tag Supplies
- Cricut Faux Suede or other heavy material of your choice
- Cricut Pen
- Spray Adhesive
- Leather cord
- Cricut Explore Air 2, Cricut Explore Air 3 or Cricut Maker
- Strong Grip Cutting Mat
Cricut Suede Luggage Tag Instructions
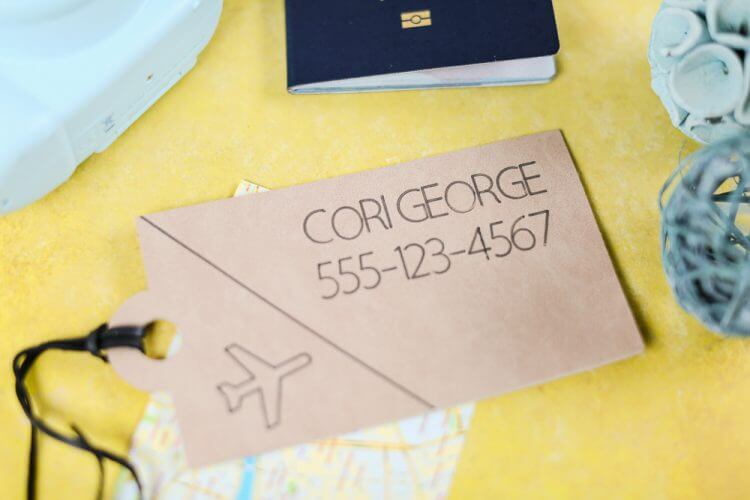
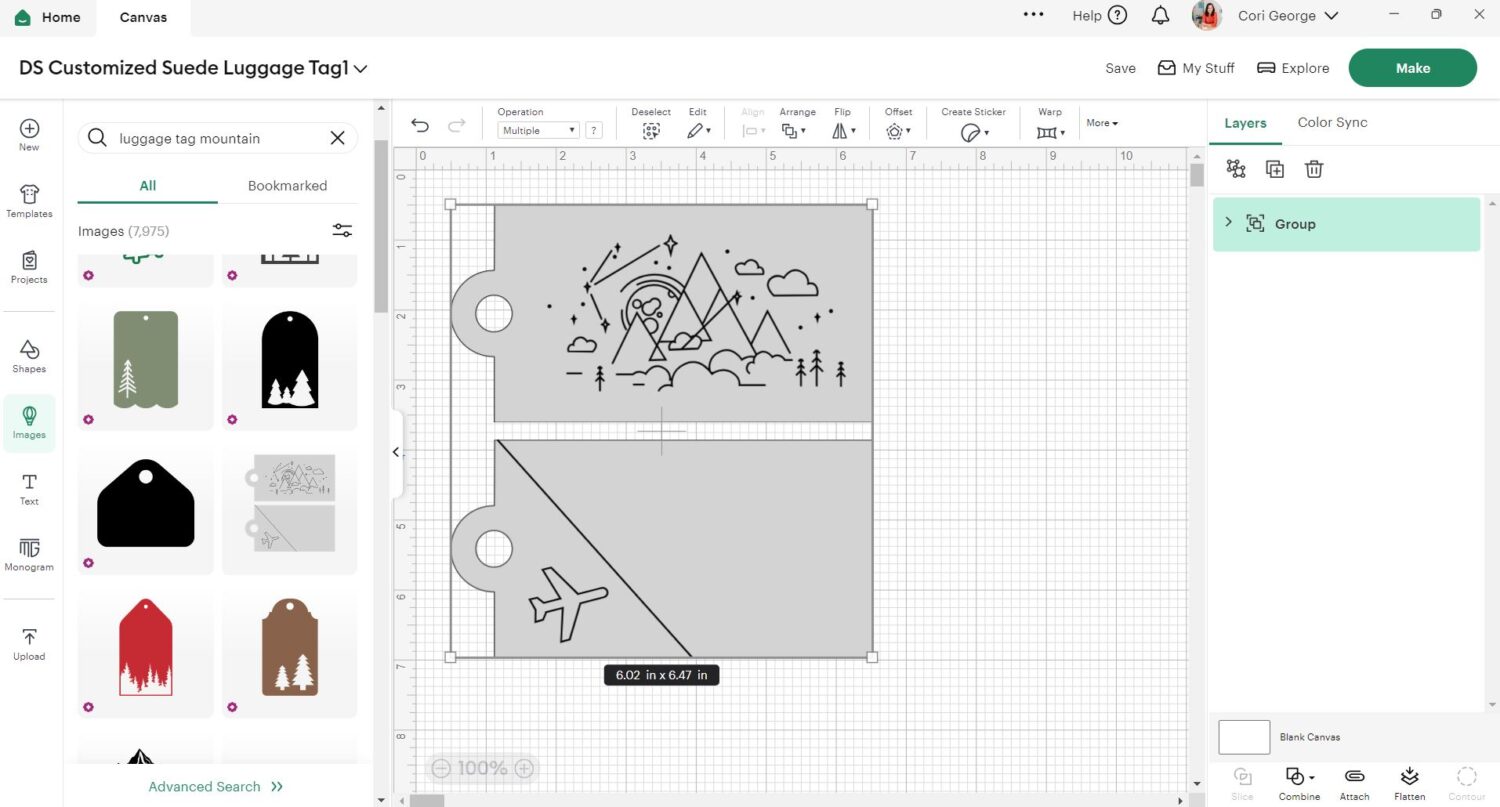
This project is technically a Make It Now project in the Cricut Design Space (you can find it here), but if you go directly there you can’t customize it with your name and contact information. So instead, click the Images tab in the left sidebar and search for “luggage tag mountain.”
Scroll down until you find this luggage tag and insert it into your canvas. You’ll see that there’s space to add your own text above the airplane on the back of the tag.
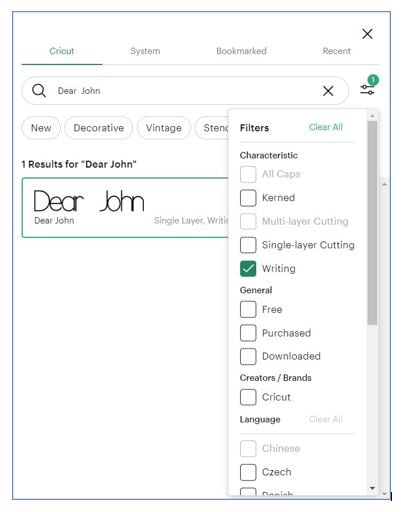
Using the text tool, type your contact information. (Of course I used fake contact information on this version — I like you all, but I don’t need you calling me at all hours — ha!). Change the font by using the dropdown menu on the right side. You can sort by “writing” style to find the fonts that work with the pen tool. I ended up with Dear John, which matched the midcentury modern styling of this luggage tag.
Once you have your name placed, select everything on your canvas and click “Attach” in the lower right-hand corner– this is to ensure your contact information writes in the correct place on your luggage tag.
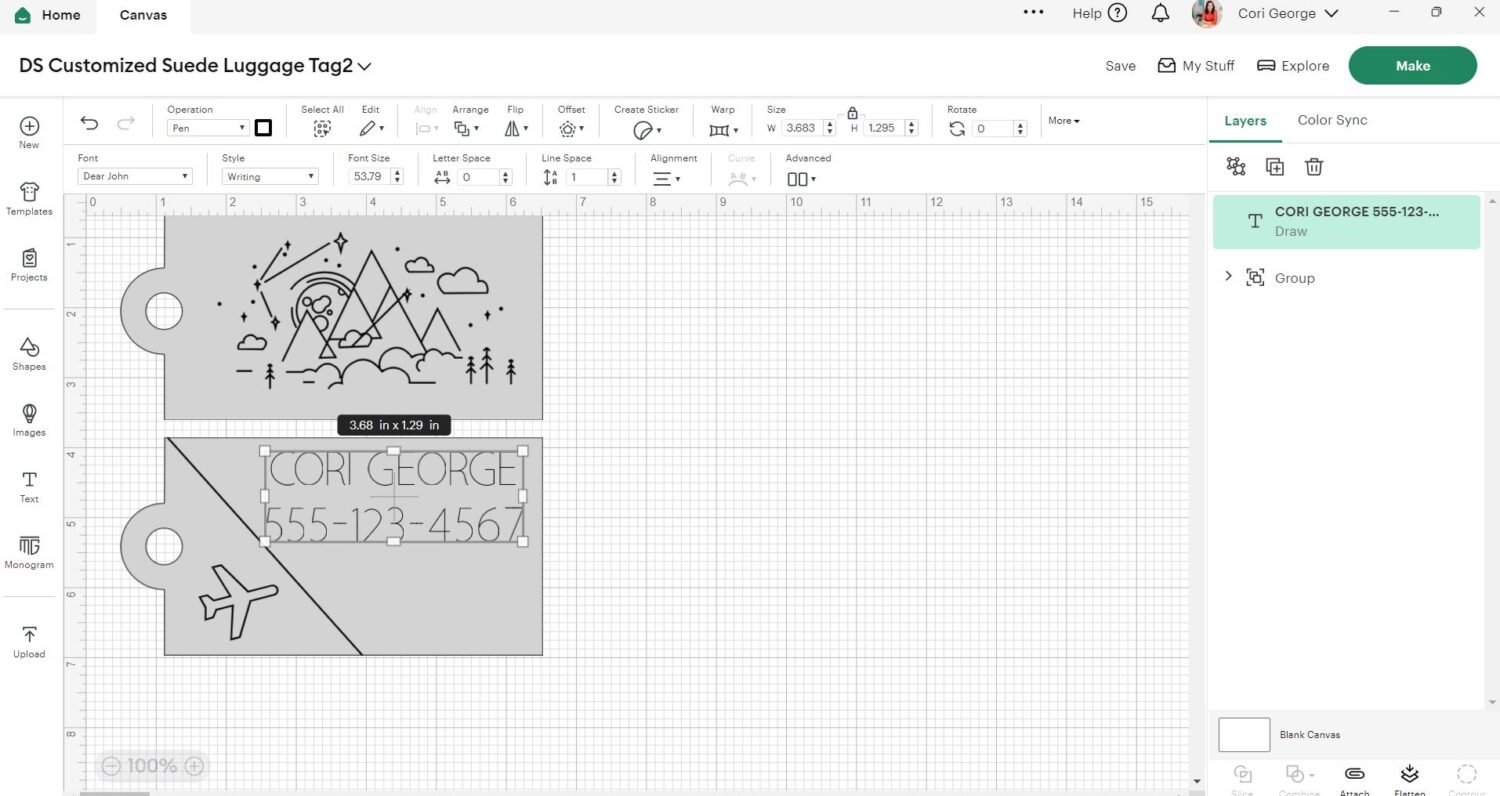
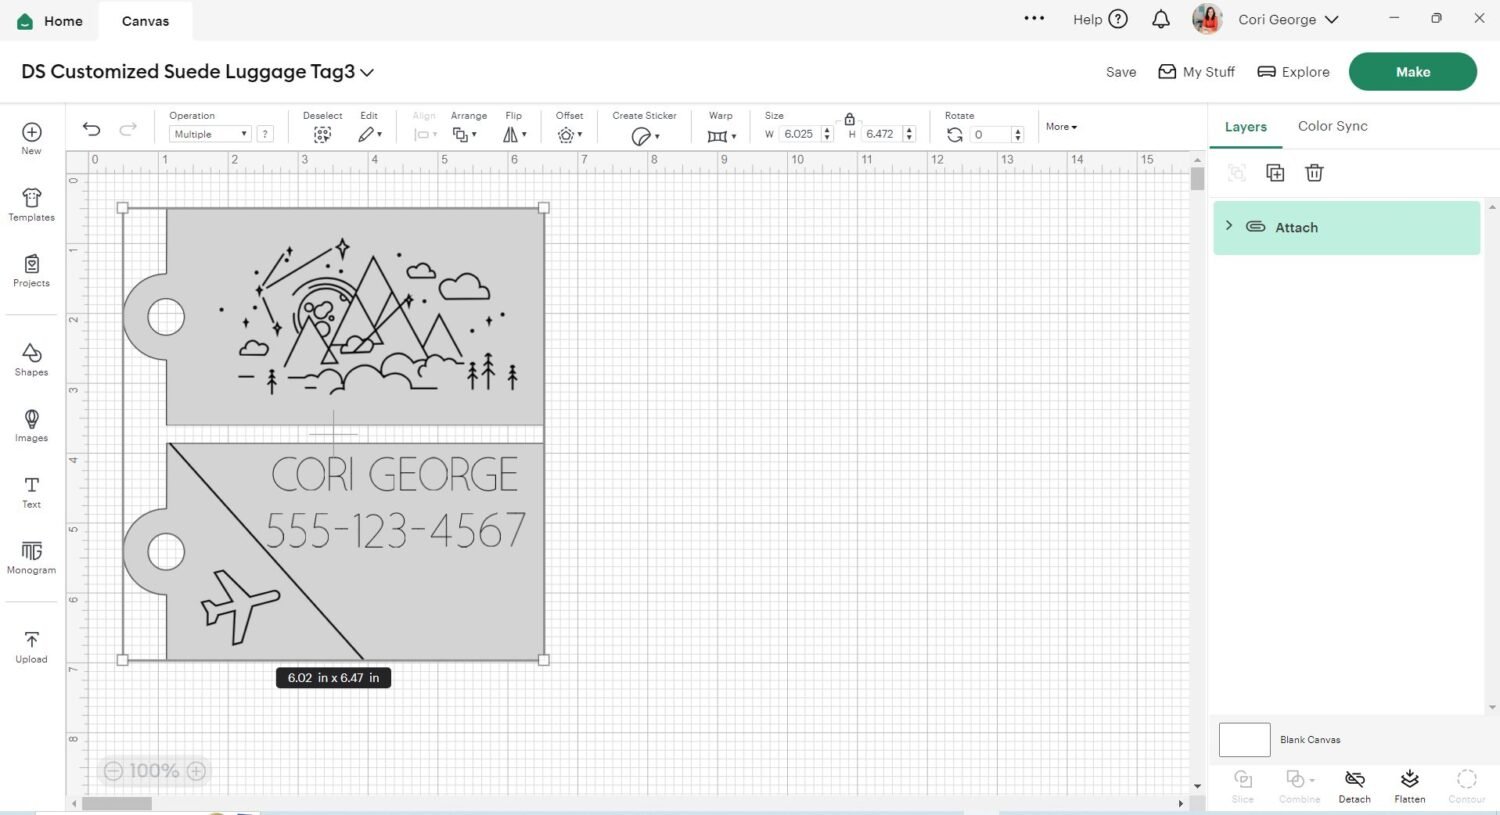
Hit Make It and follow the on-screen prompts to write and cut your luggage tag! Use spray adhesive to glue the two pieces together, and tie to your bag with a leather cord or other ribbon or cording! Such an easy project that will help you keep track of your bags when you travel.

CUSTOMIZED SUEDE LUGGAGE TAG
Equipment
- Cricut Maker or
Supplies
- Cricut Faux Suede or other heavy material of your choice
- Leather cord
Instructions
- This project is technically a Make It Now project in the Cricut Design Space (you can find it here), but if you go directly there you can't customize it with your name and contact information. So instead, click the Images tab in the left sidebar and search for "luggage tag."Scroll down until you find this luggage tag and insert it into your canvas. You'll see that there's space to add your own text above the airplane on the back of the tag.
- Using the text tool, type your contact information. Change the font by using the dropdown menu on the right side. You can sort by "writing" style to find the fonts that work with the pen tool. For this project, Dear John, was used which matched the midcentury modern styling of this luggage tag.
- Once you have your name placed, select everything on your canvas and click "attach" — this is ensure your contact information writes in the correct place on your luggage tag.
- Hit Make It and follow the on-screen prompts to write and cut your luggage tag! Use spray adhesive to glue the two pieces together, and tie to your bag with a leather cord or other ribbon on cording!




Leave A Reply!