Need a way for customers and clients to get in touch? Use a QR Code! Here’s how to laser etch a QR code to use on a sign at a craft fair or other business.
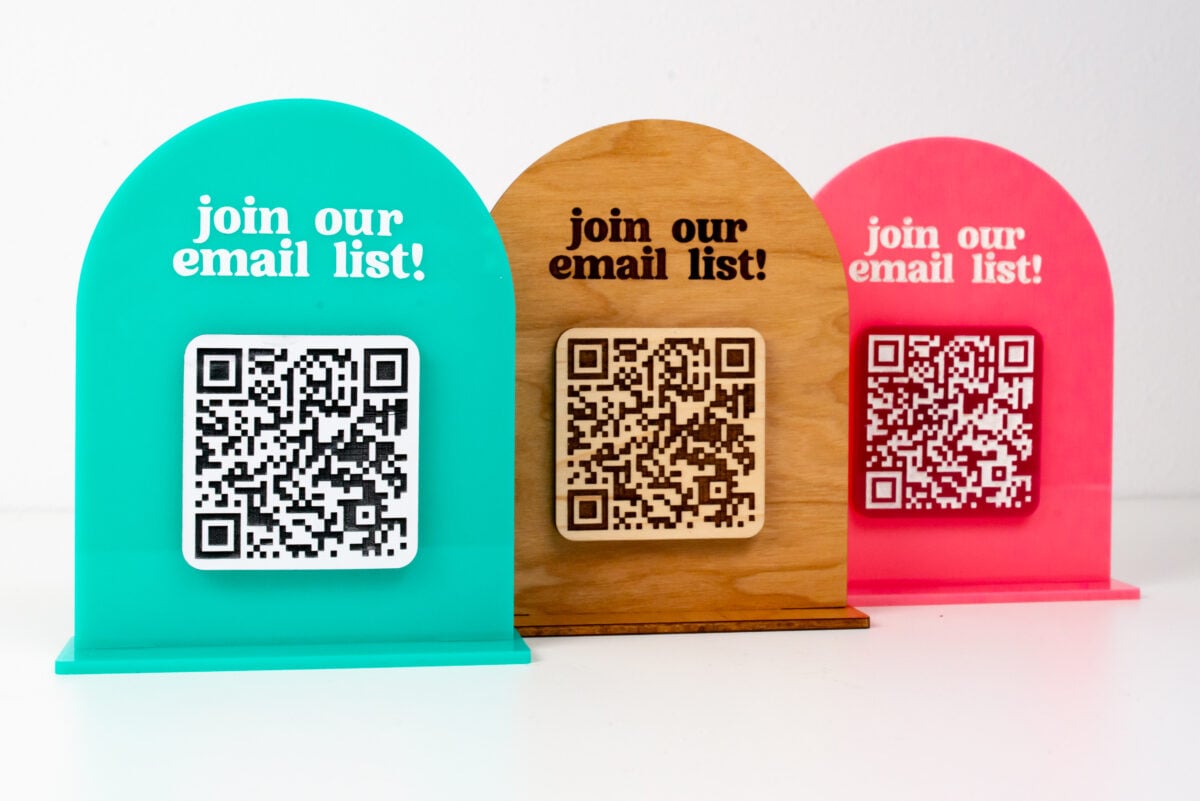
One of my favorite ways to easily get people my contact information is using a QR code. Instead of having a bunch of links on my business card, for example, I have a QR code that links to a bio page that I can update so my cards never go out of date.
QR codes are also amazing for small businesses. We’re always trying to turn our local customers into online customers and a QR code makes it easy.
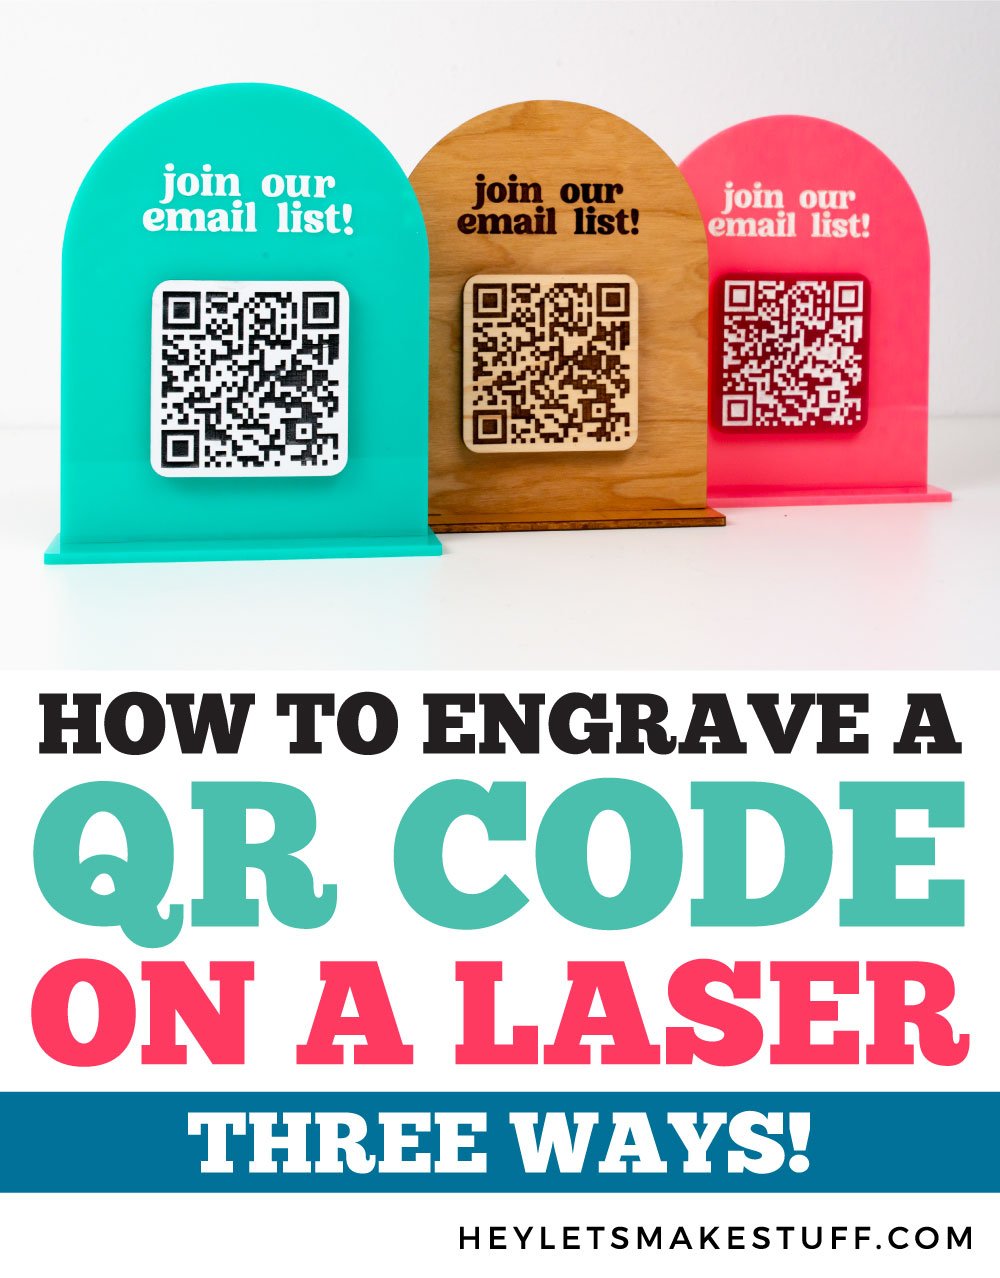
In today’s post, I’m going to show you three ways to laser etch a QR code. We’ll use wood, acrylic and paint, and a two-tone acrylic. These techniques should work no matter what laser you are using, though you will have to play around with the settings for your specific material and machine. Today I am pulling out the big guns and using my Glowforge Pro, but a less powerful diode laser should work as well.
When it comes to cutting acrylic on a diode, however, make sure you read my post How to Cut Acrylic with a Diode Laser so you’ll know what you can and can’t cut.
I also have a free sign file for you. You can engrave whatever you’d like at the top (Visit My Site! Join My Email List! Enter to Win!) and then put your QR code right below it. You could also use adhesive vinyl cut on your Cricut or Silhouette.
QR Code Best Practices
Before we actually make our QR code sign, let’s talk about a few best practices when using QR codes for your small business or organization.
- QR codes are meant to be physical so they can be scanned with a phone. Meaning that they don’t do well on a digital medium. I see them occasionally on websites, but if you’re scrolling a website on your phone, how are you supposed to take a photo using your phone? Just use a link in that case.
- Make sure there is contrast in your QR code so that it is easily readable by phones, especially older phones.
- Include a clear call to action, whether it’s “Join our email list!” or “Shop the sale!” People want to know why they are using on a QR code.
- Ensure your QR code is large enough to scan. Generally you don’t want anything smaller than 1″ x 1″, but for a laser-cut QR code I think 2″ x 2″ is a better size.
- Make sure you test your QR code! You don’t want to make one only to have it not work properly.
- If your audience may be unfamiliar with a QR code, you may want to include some instructions below the code that say something like “Open your camera app and point it at the QR code.”
Now let’s dive in and learn how to laser etch a QR code!
Watch the Video
Want to see how to make a QR code in a video tutorial? Just hit play below! Or keep reading for a written tutorial.
Get the Free File
Want access to this free file? Join my FREE craft library! All you need is the password to get in, which you can get by filling out the form below. The file number is: L15.
Supplies Needed
- Laser machine
- Wood sheet (a lighter wood like maple works best) OR
- Acrylic sheet AND
- Coordinating craft paint and brush OR
- Two-tone acrylic sheet
- Masking
- Standing Sign SVG (optional, see above)
Making a QR Code SVG
There are a ton of sites for making free QR codes, but I specifically wanted to find a site that would let me export an SVG file. There is a lot of detail in a QR code and I wanted to make sure the laser had a nice crisp file to work with. I ended up using QR Code Monkey, but there are other options as well.
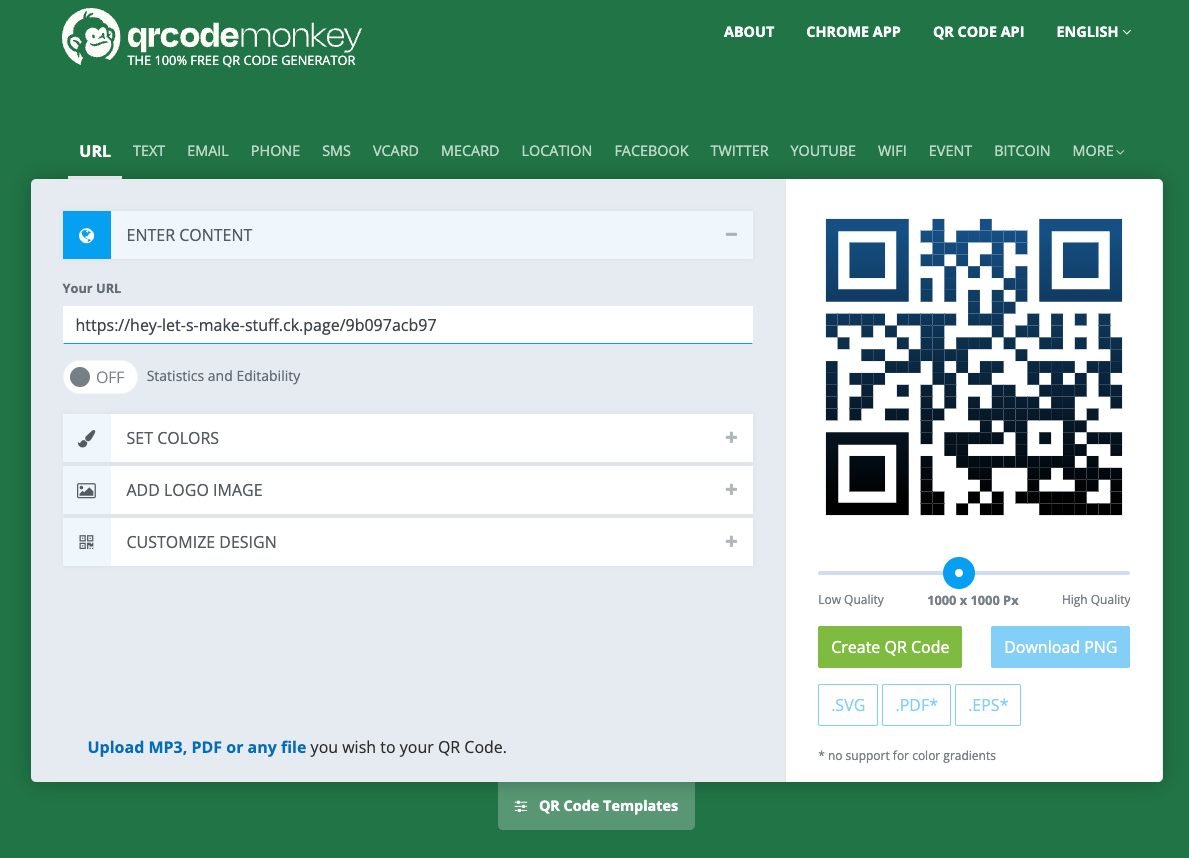
All you need to do is add your website link! For this one, I am linking to a “sign up for my email list” link I have on my blog. I added it under ENTER CONTENT and Your URL:
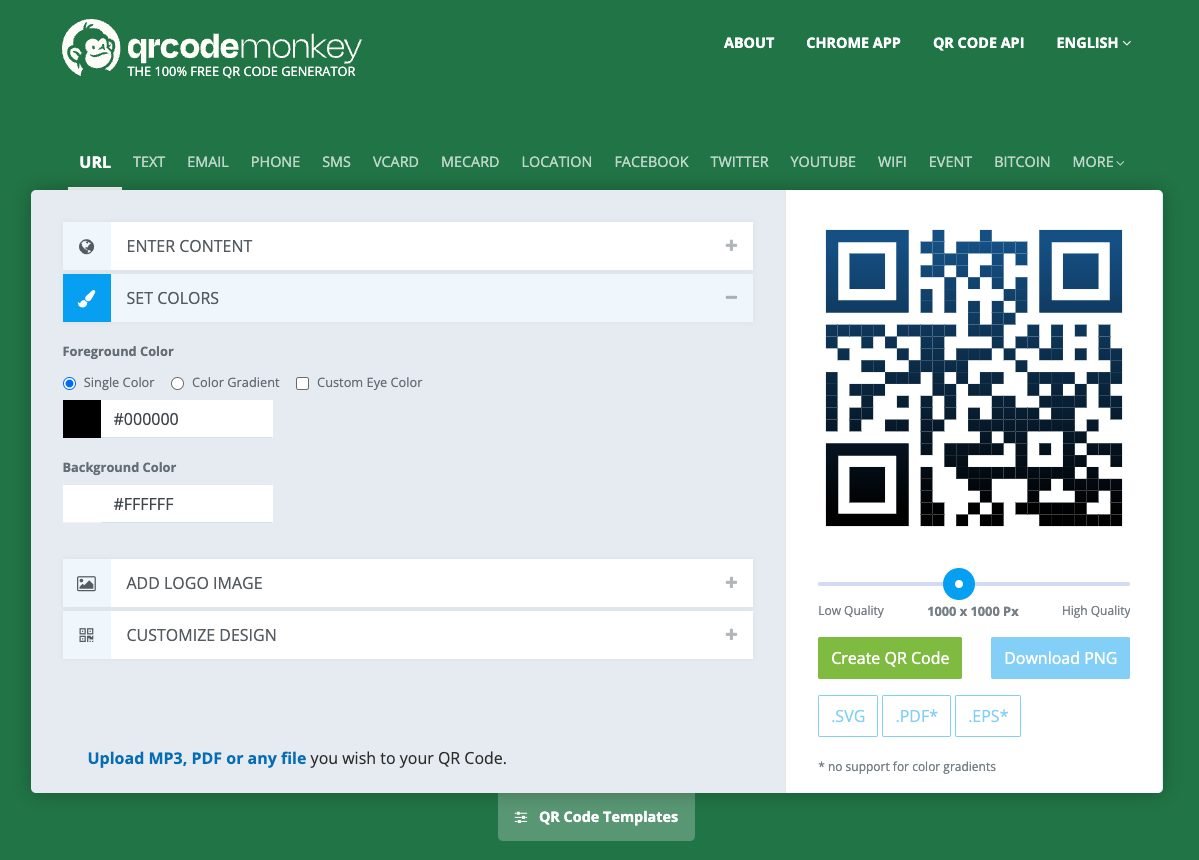
Under SET COLORS make it a single color (black works best—the color code is #000000).
Then click on the green “Create QR Code” button on the right and it will create your personalized QR code above it.
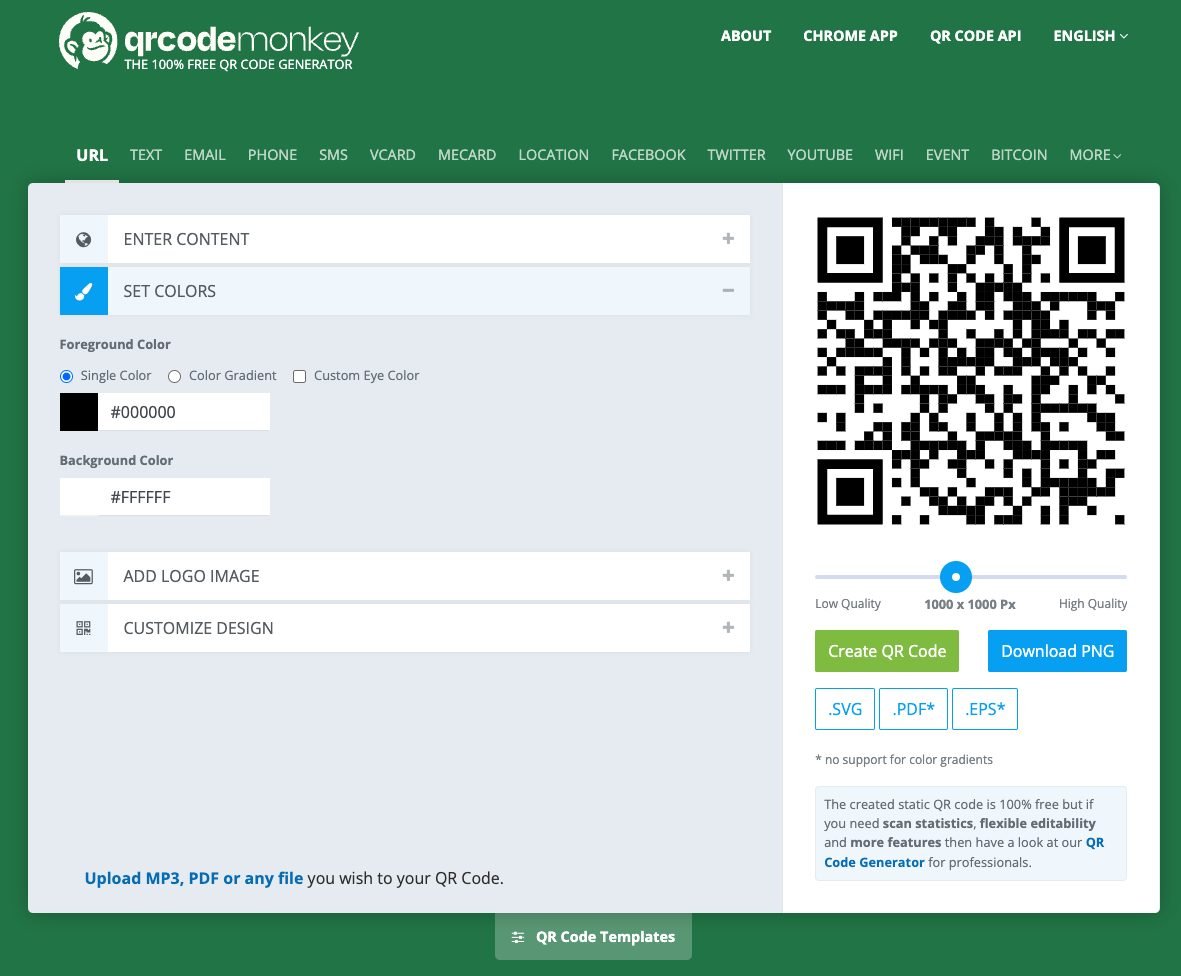
Download the SVG version and save somewhere on your computer where you can find it.
Masking Your Material
For all three materials, I highly recommend masking. I have specific notes on each material below, but masking did produce a better, cleaner QR code in all of my tests. You can read more in my post Laser Masking for Cleaner Laser Projects.
Engrave and Cut the File on Your Laser
For this project, I’m using my Glowforge Pro so I’ll be using the Glowforge App software. But the overall idea is the same no matter what software you are using.
Note: I am cutting the sign separate from my QR code, but you could also have your QR code directly etch into your sign if you prefer. I like the ability to swap it out if necessary, so that’s why I keep them separate. For this tutorial, I am just going to focus on cutting the QR code.
The setup for the QR code is the same no matter what type of process you are using here. Let’s do the wood one as an example. I’m using a scrap of masked medium maple hardwood that you can see here in the Glowforge App.
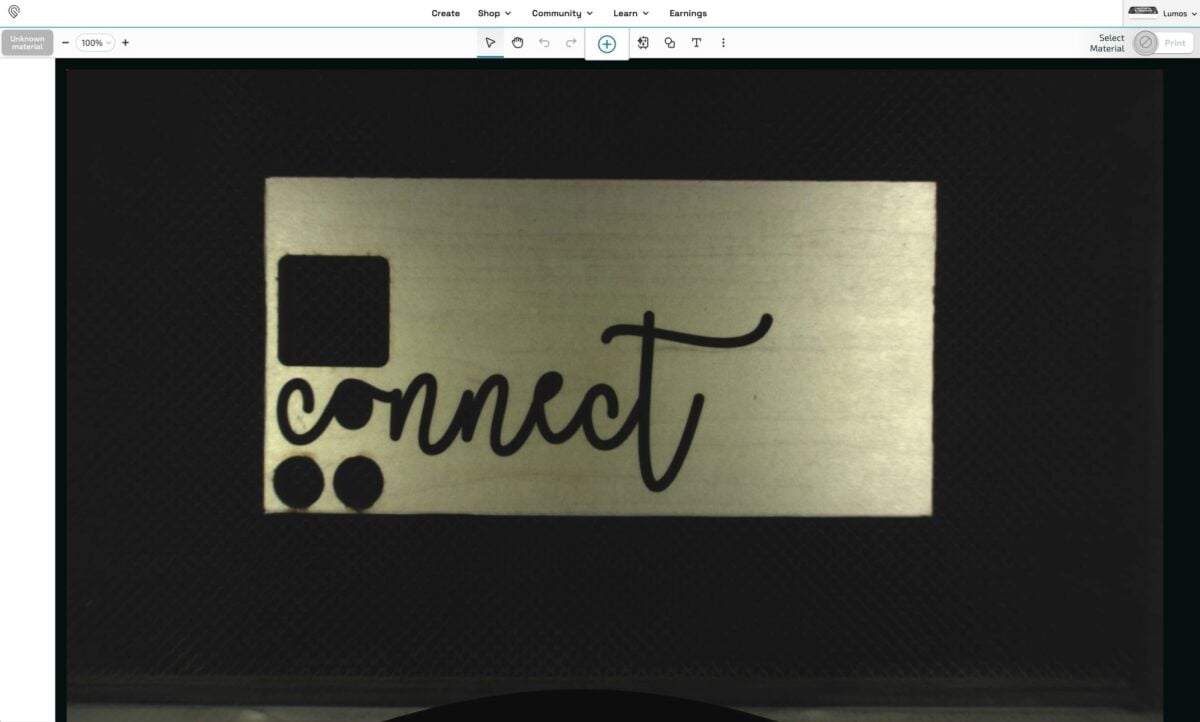
Upload your SVG QR code to a new document. It will come in very large.
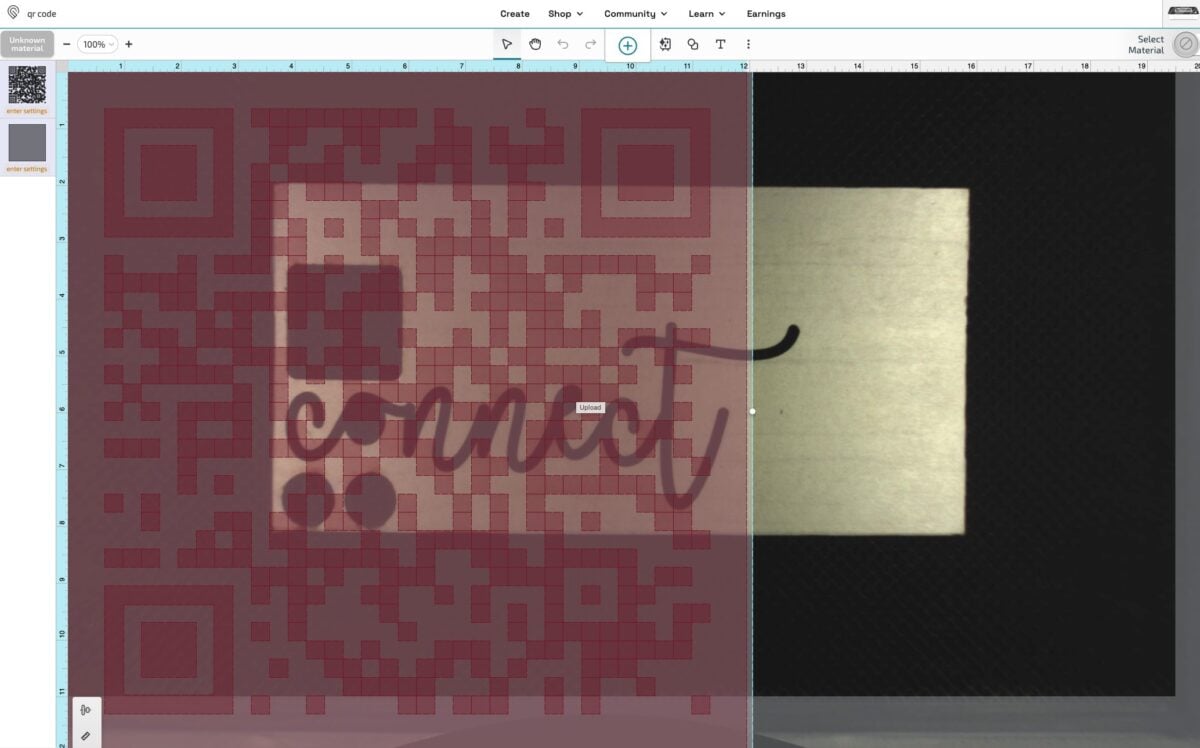
Resize the QR code. I generally think that 2″ wide is a good size for most signs, but if you are making something different you can go larger. I wouldn’t go too much smaller—for that I would probably use a printed QR code.
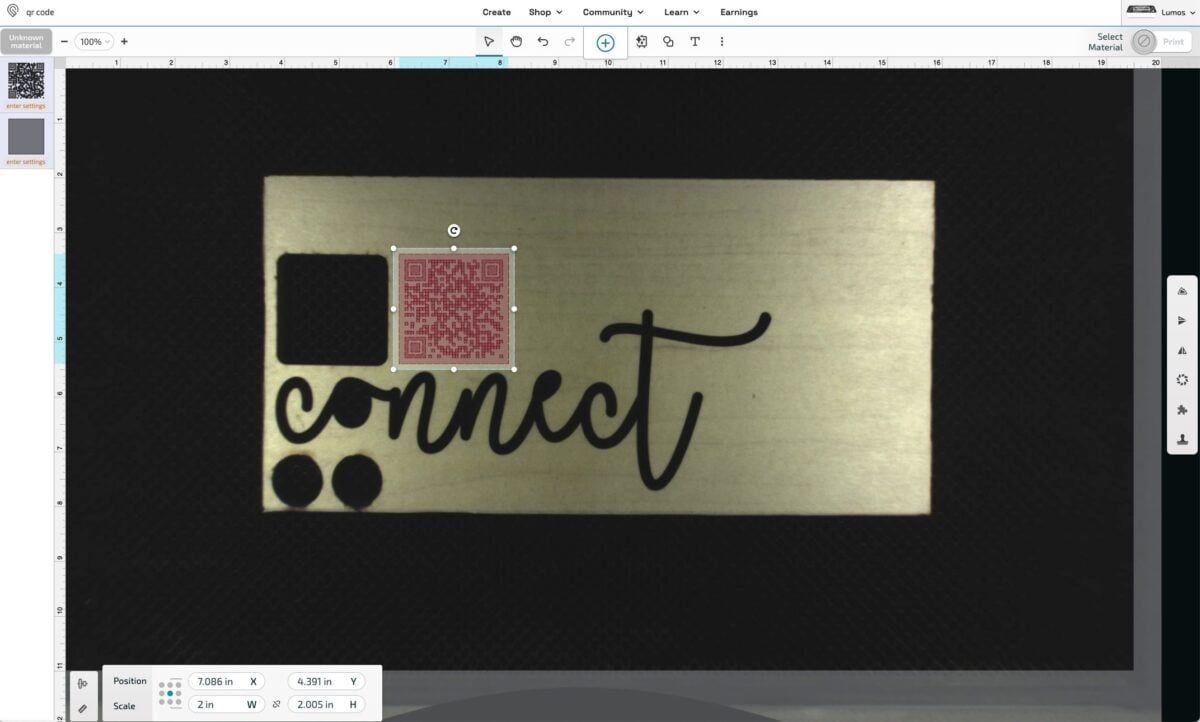
From here, you can cut as is, but I prefer a rounded corner to my QR code. I have the Premium Glowforge account, so I have access to using shapes in my design. If you don’t, you can cut it as is or you can import a 2″ square with rounded corners from another design program.
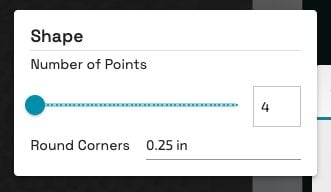
Create a square. In the settings on the right, change the corners to have a .25″ rounded corner.
Then layer that square directly over the QR code. It should be the same size and should snap into place nicely.
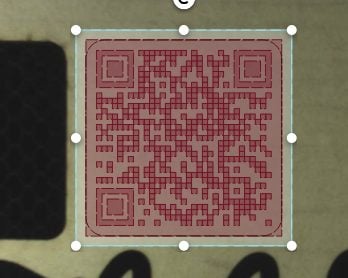
Now set your material. I am using that medium maple hardwood. I also went and ignored the square outer cut line that I imported with my QR code. That means that it will only cut the rounded corner.
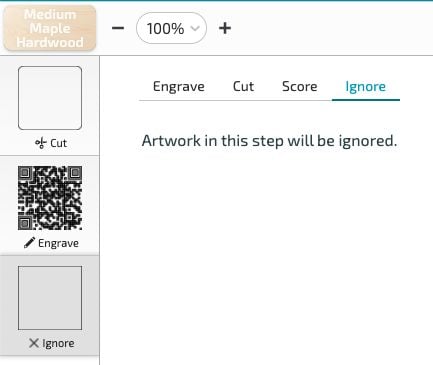
Click print to send to your Glowforge and engrave and cut!
Results
Let’s see how all of these QR codes turned out!
Wood QR Code
This one is the most simple! For your wood QR code, you’ll definitely want to mask your wood. I found that without the masking, I had way too much charring to even make the QR code legible.
Remove the masking using either Gorilla tape or a plastic razor blade. Gorilla tape worked really well for my Glowforge Proofgrade maple. I used a bit of museum putty to attack the QR code to the stand I made out of cherry. For this one, I engraved the words “join our email list” into the stand.
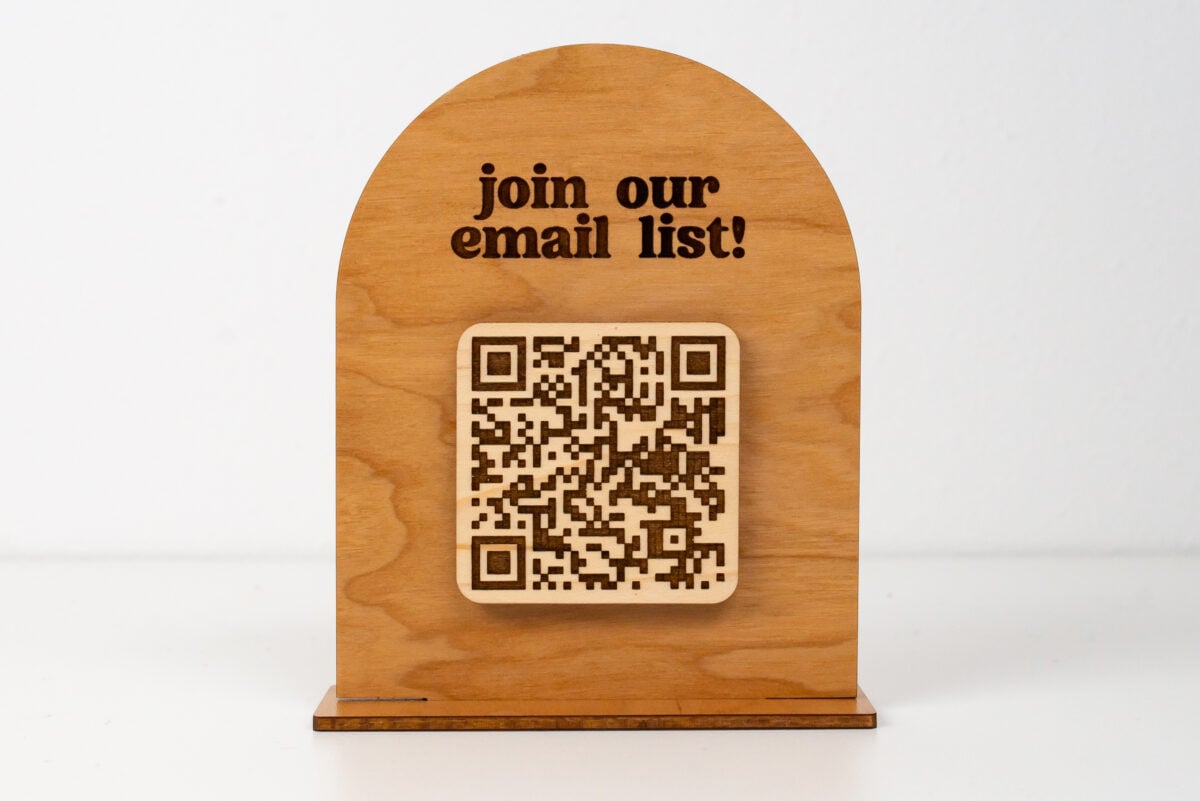
While this one is the easiest to make, it does have the most rustic feel of them all. Great for many applications, but personally I wanted something more modern, so I tried two different acrylic options next.
Painted Acrylic QR Code
This one you definitely need to mask before cutting, because the masking will act as a stencil for your paint. I like using regular acrylic craft paint or even chalk paint to dab all over the engraved QR code before removing the masking. I also engraved the words “join our email list” into a lighter pink acrylic stand and painted the words as well.
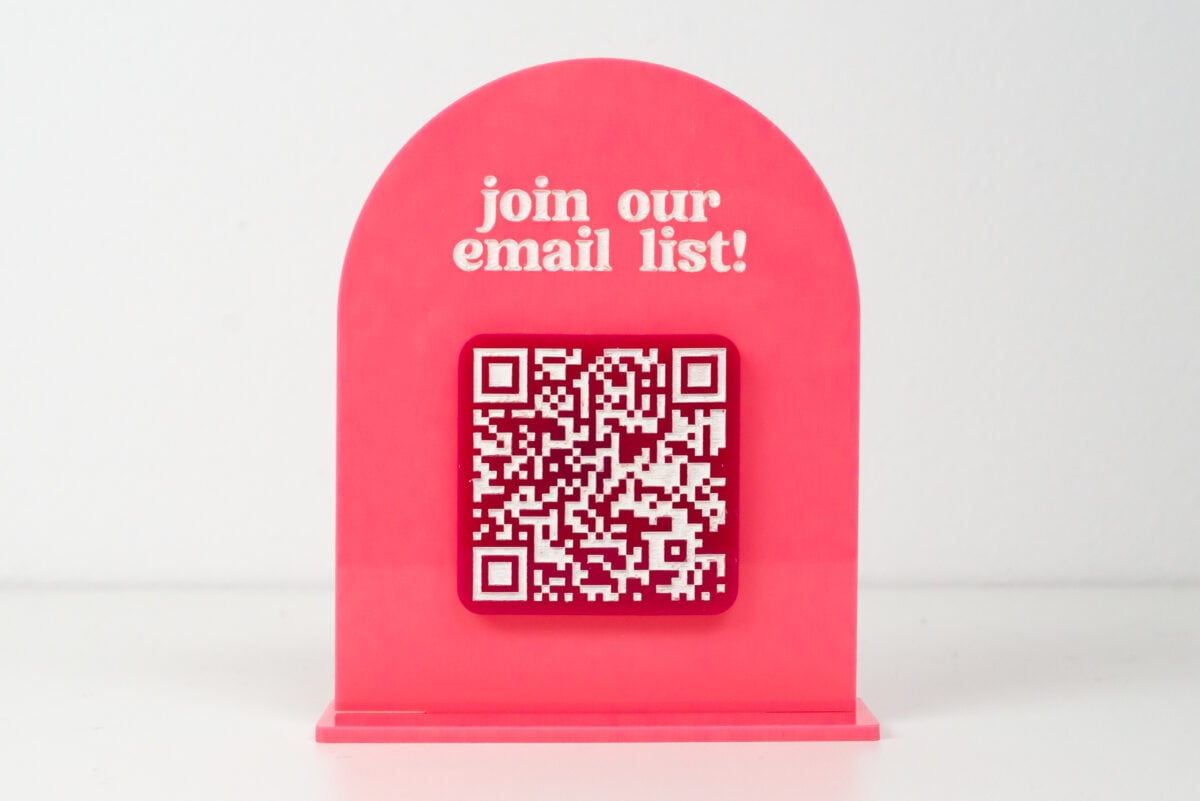
When removing the masking, you can try tape or the plastic razor blade. I found that the plastic razor worked better for me. But you do want to wait for the paint to dry or else you’ll be scraping little pieces of masking into the wet paint.
Overall, this looks great but it is a bit more labor-intensive. In addition to the painting itself, you need to clean up your paint supplies and if you weren’t tidy with your painting (or if you let your nine-year-old paint, like I did!!), you’ll need to scrap extra paint off the sides of your QR code. I do think it looks a little more handmade than the other two options. I can never get that paint as perfect as I’d like.
Two-Tone Acrylic QR Code
When I found this two-tone acrylic from Houston Acrylics, I was really excited to try it out specifically for this project. My acrylic has a white surface with a black core. So when it’s engraved, the laser removes the white part of the acrylic and you can see the black underneath.
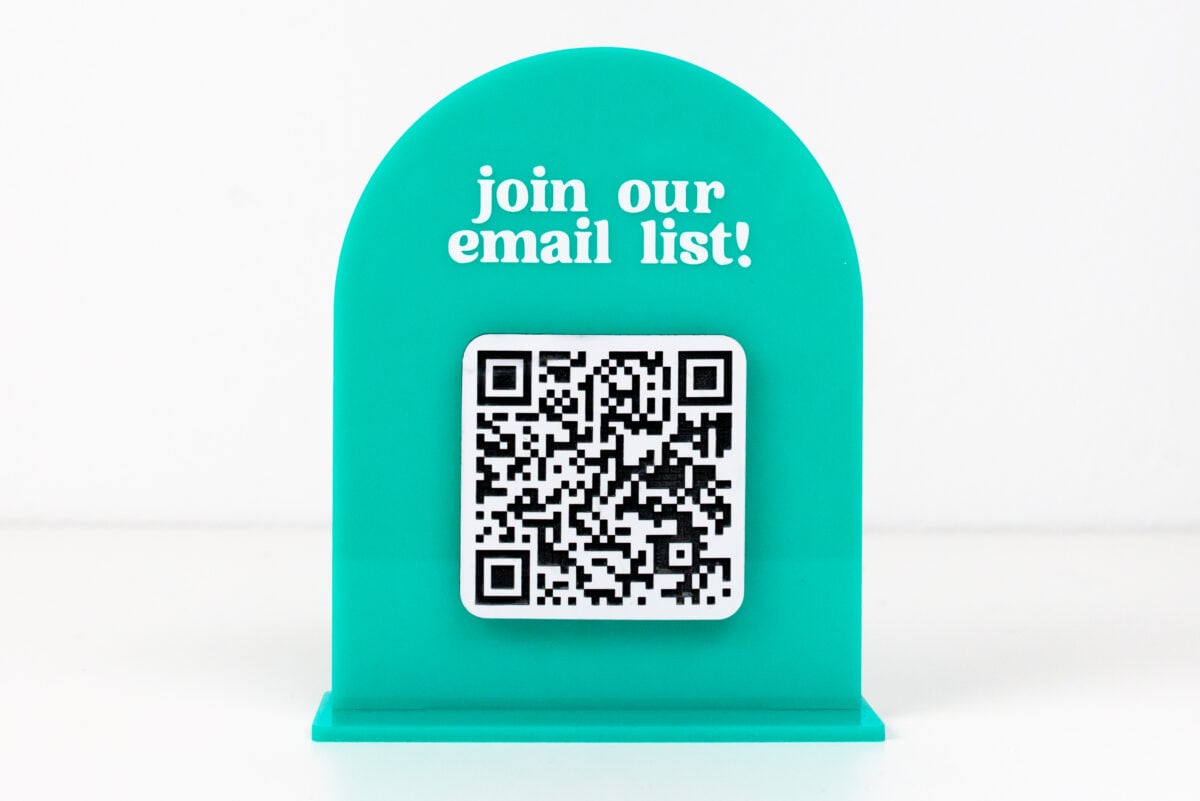
The masking removed better with the razor blade on this one, and then I actually cleaned it up even more with some dish soap and a scrubber. I found that there were just a few marks on the white that I wanted to tidy up.
For this one, I used my Cricut Joy Xtra to cut white vinyl and applied it with transfer tape instead of engraving in the stand. It looks nice and neat.
They make other colors as well, but you want to make sure to choose an acrylic that has a good contrast between the two colors so that the QR code is readable.
I hope you found this tutorial on how to laser etch qr codes helpful! Which is your favorite? Let me know in the comments!


Leave A Reply!