LAYERING HTV USING SLICE AND SET
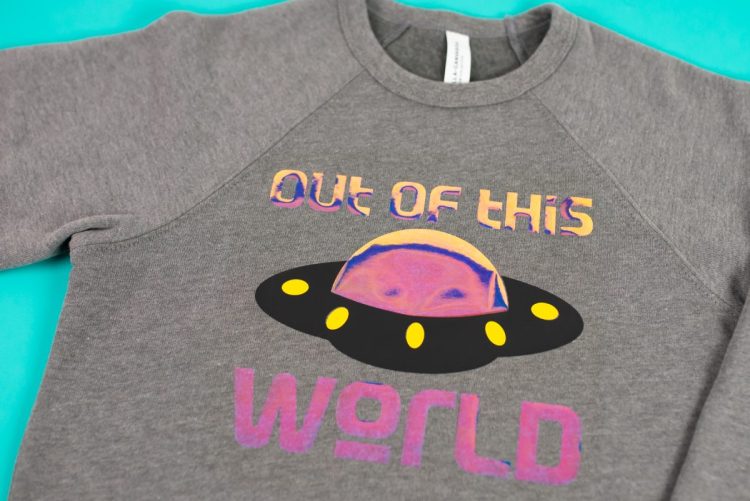
Have an HTV project with a lot of layers? Use Cricut Design Space to "slice and set" your image and give it a layered look without actually layering vinyl. Plus get this free Outer Space SVG to make a cute project of your own!
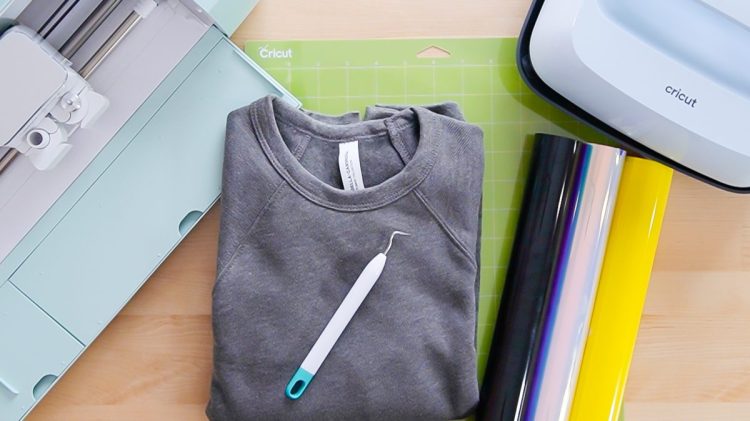
Equipment
Ingredients
Instructions
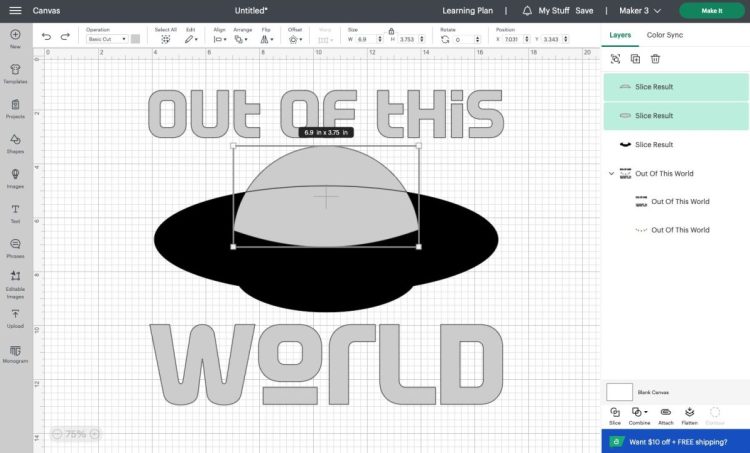
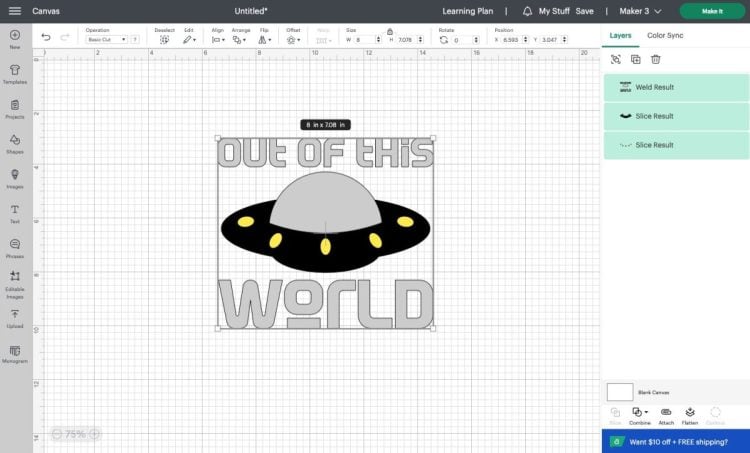
- For this project holographic heat transfer vinyl is being used for the dome of the UFO, which means you'll want to use the slice tool to avoid layering it on top of the black vinyl and running the risk of poor wear and tear later.First, upload the SVG into Cricut Design Space. You'll notice the dome layer, the UFO body, the lights, and the text are each a different color. If you select the whole design, you'll notice the slice tool is grayed out at the bottom of the Layers Panel on the right. You cannot select it because you can only slice two layers at a time.
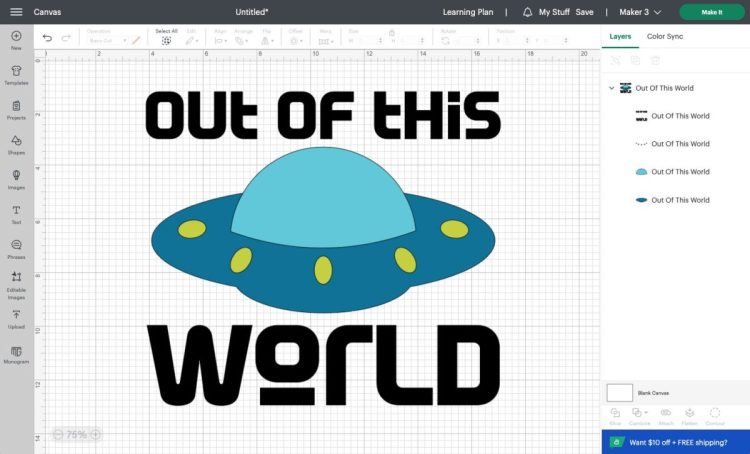
- The colors have been changed in Design Space to match more closely to what is being used in real life.

- To begin your slice, select just the dome layer and the UFO body layer. You can now use the slice tool!
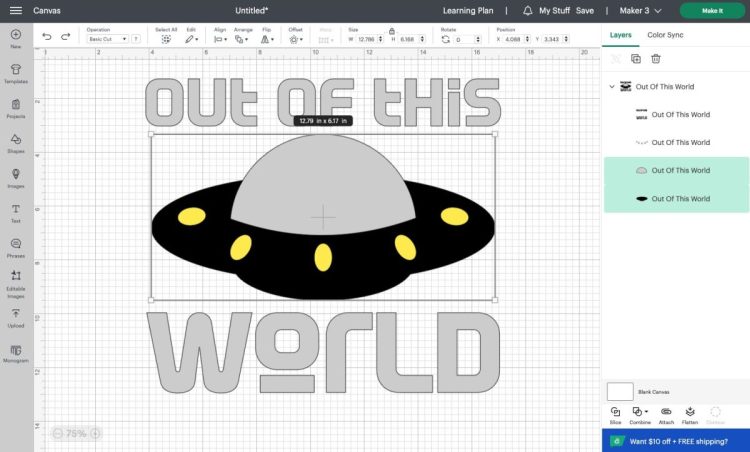
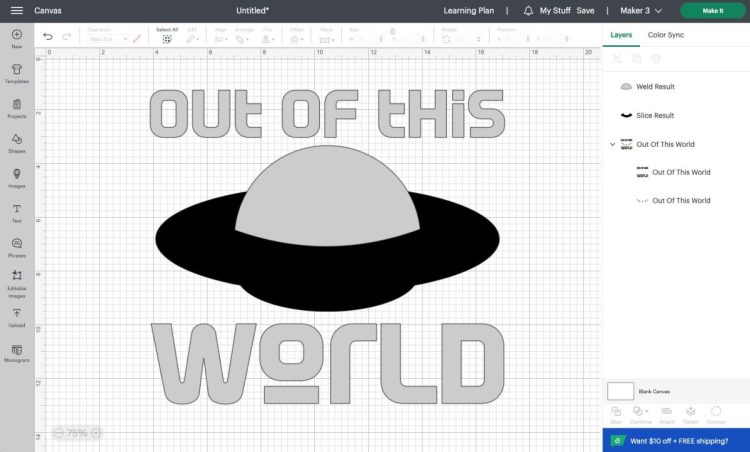
- Click Slice. You'll get four resulting layers: the original black UFO body layer which is now in two pieces, and then two silver dome layers. The dome was split into two because of the way this design was created. You will want to keep the dome as a single layer, which will be fixed shortly. Select and delete the overlapping part of the design. In this case, it's the black middle piece of the dome.
- Now, you'll combine the two halves of the dome back to one layer. Select both pieces and select Weld under the Combine tool.
- It is one layer again. You'll notice the lights moved underneath the black body layer. That's okay!
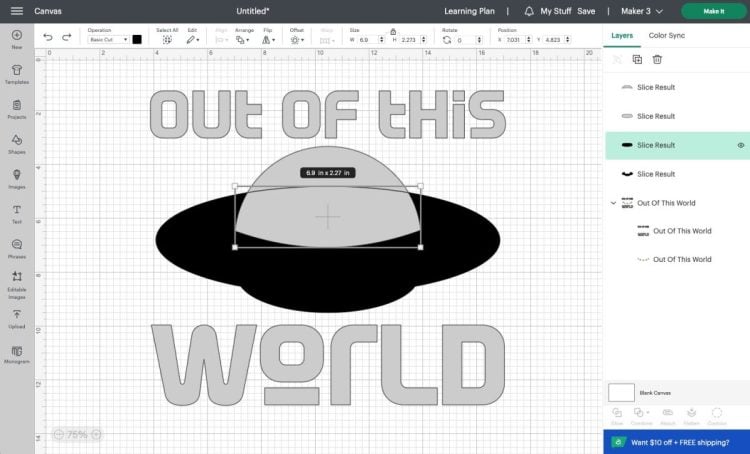
- Let's repeat the slice process for the remaining lights layer. Select the body layer and lights layer.
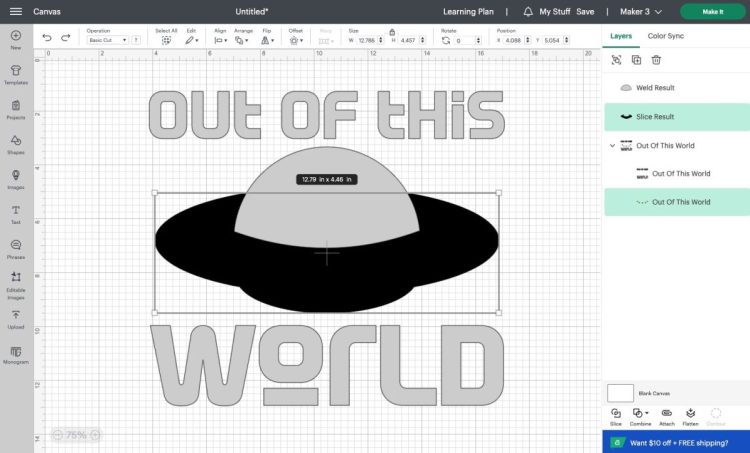
- Click Slice. You'll now see three more Slice Results: the black body layer with the lights cut out, the yellow lights, and a black lights layer.

- Delete the black lights layer. Once that layer is deleted, you'll see the original image with sliced layers. This will allow you to place the design together like a puzzle instead of layering layer on top of layer.
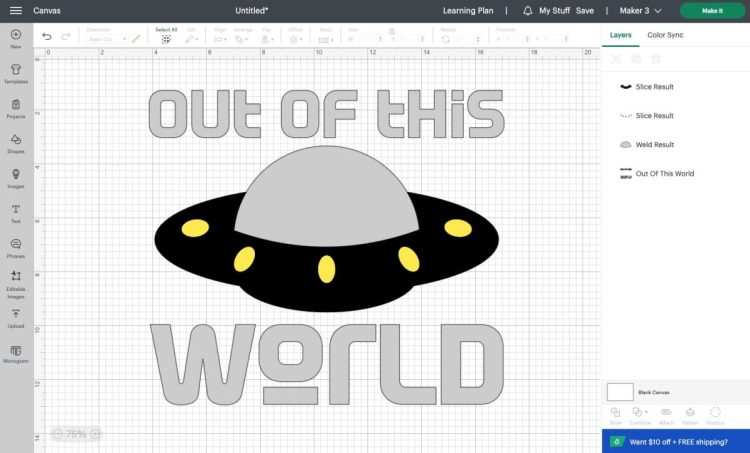
- If you have additional layers, continue to select the base layer and one more top layer until all layers are sliced.To make it easy weld the dome layer and the words, since you'll be cutting both out of the holographic vinyl.

- Finally, resize the image to fit your shirt! For this kid's medium fleece, an 8" width is being used for this image.
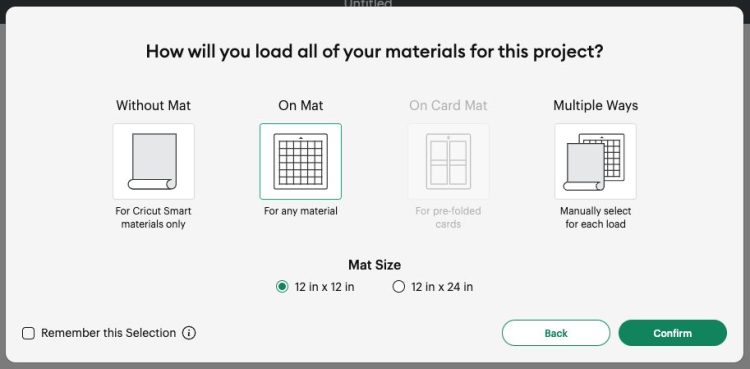
- Cutting Your File on Your CricutClick Make It in the upper right. You'll see a pop-up that asks how you want to load your material into your machine. For this project, use "On Mat."
- Then in the Prepare Screen, make sure to mirror all of your layers, so they will adhere the correct direction once cut.
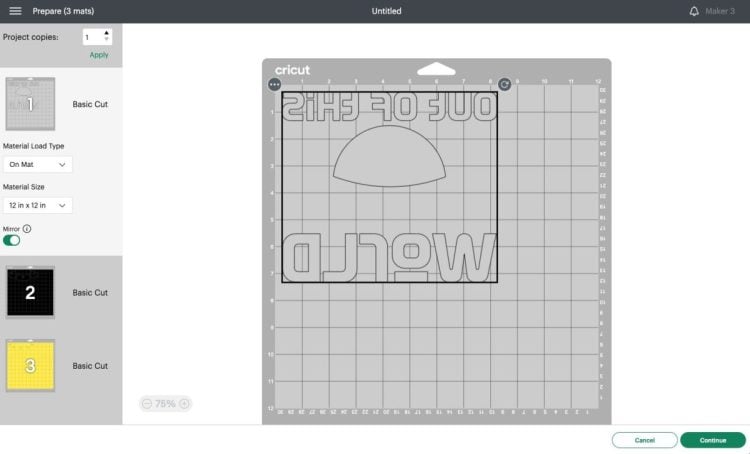
- Finally, in the Make Screen, choose your material. For this project, holographic iron on was chosen for the first layer and regular Everyday Iron On for the other two layers.

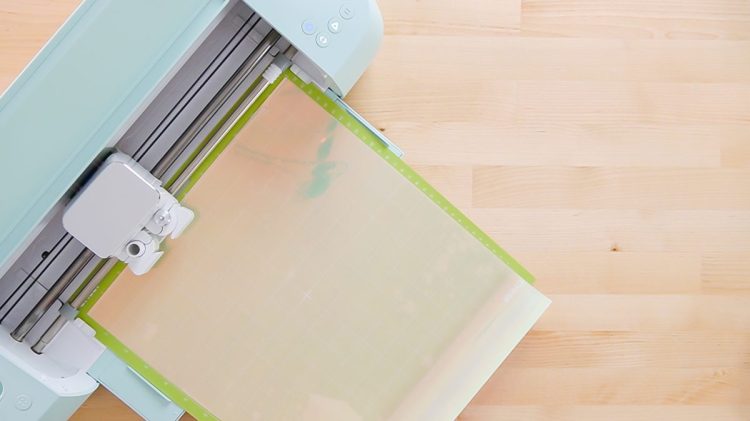
- Cut each of your layers using your Cricut!
- How to Use the Set Method to Layer Iron-On VinylNow that you have all three UFO layers sliced and ready to go, let's talk about how we're going to layer them.
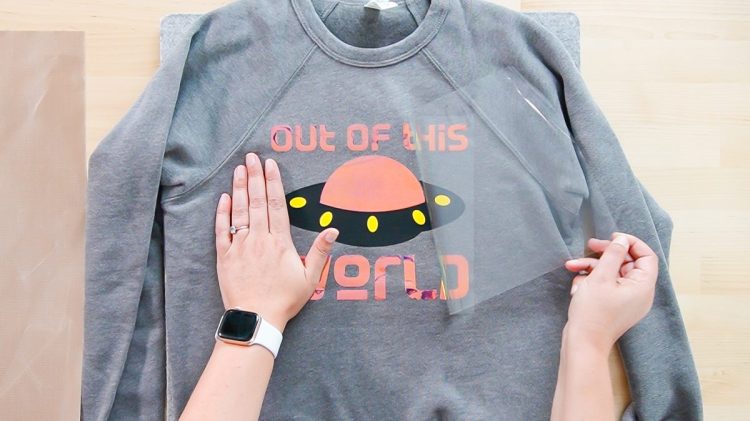
- To start, layer all of the layers just to make sure everything fits the way it is expected to. In this case, we have four layers total (one for the text).
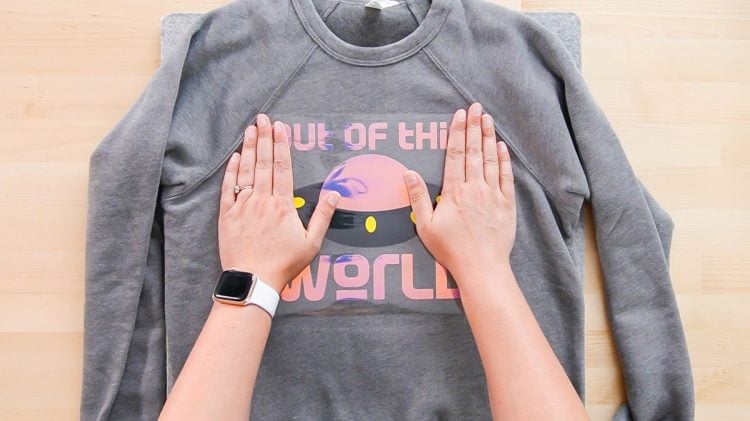
- When satisfied with the placement, peel back everything except for the bottom layer.
- In this case, start with the black UFO layer. This helps determine exactly where the rest of the design will go.
- Adhere the vinyl using your EasyPress (see the post for adhering iron-on vinyl here—it includes information for using your iron, EasyPress, or heat press). Use a piece of butcher paper or a teflon sheet when pressing multiple layers. This ensures that the EasyPress doesn't touch any vinyl that may already be on the shirt.Using the EasyPress or other heating method, adhere this bottom layer using the recommended temperature for regular iron on, which is 315°. Here do a shorter press — usually 15 seconds.
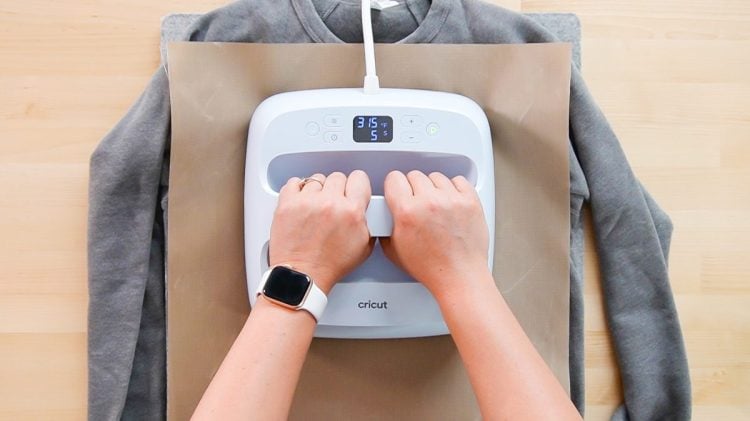
- Then carefully peel off the carrier sheet (remember to check whether your iron on is warm or cool peel). It won’t be as “set” as it would if you used a longer press. But this is okay—you will press three more times and it’ll be perfectly set at the end. If it doesn’t peel, however, give it another 10-15 seconds under the press.
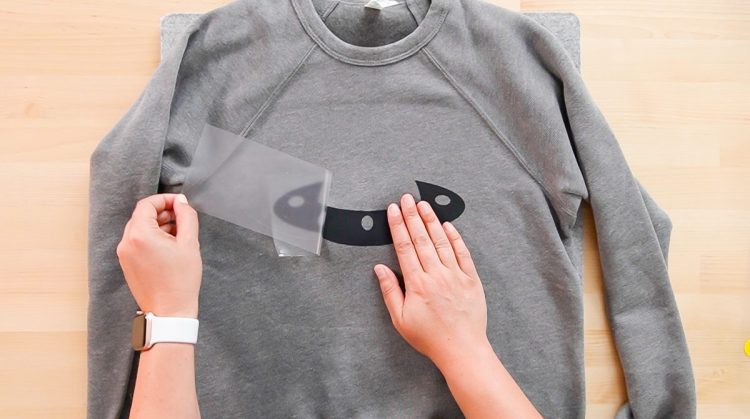
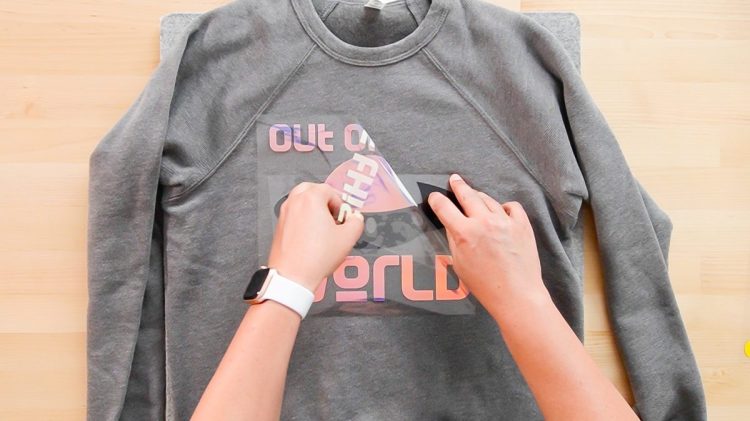
- Be sure you place a pressing cloth or teflon sheet over your design to protect the vinyl from your EasyPress heat plate. You don't want the pressed vinyl to bubble or warp without the carrier sheet. Peel off the carrier sheet.Place your second color where it fits within the design.
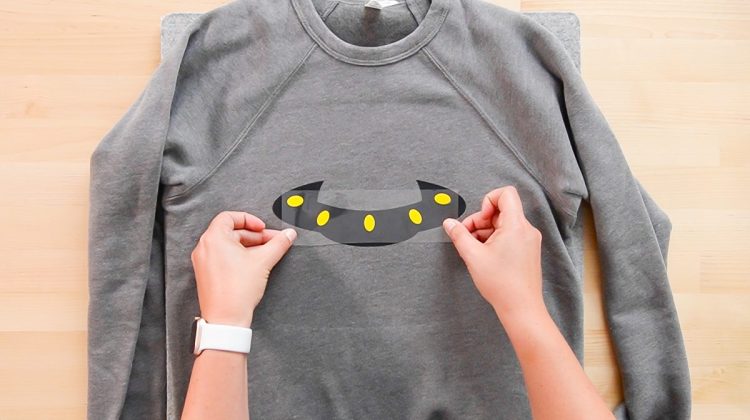
- For the yellow lights layer, place it into the black dome image and press. Make sure to cover the design with a protective sheet so the press doesn't stick to the previously pressed HTV.
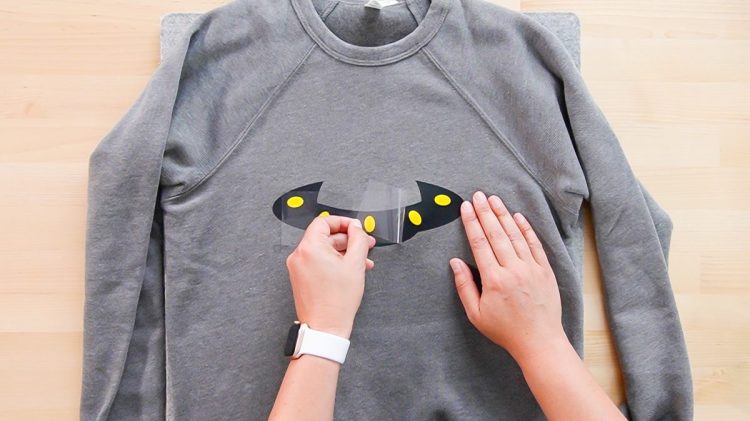
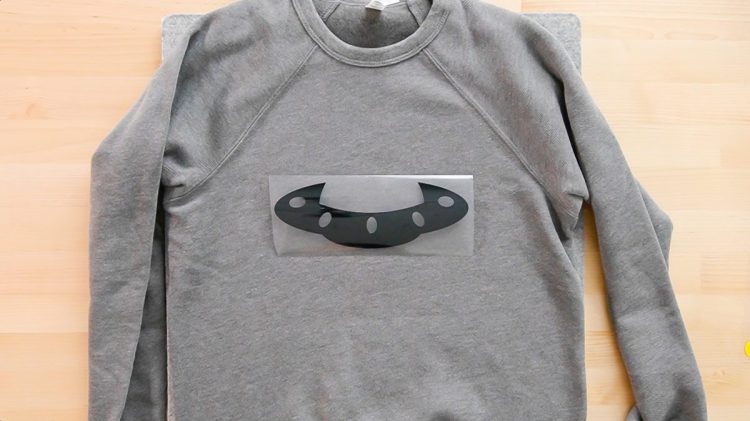
- Now, it's time for the final color. In this case, the silver holographic vinyl is being used. This specialty vinyl is the main reason for using slice for this particular design. Layering isn't recommended with specialty HTV products. The holographic vinyl would bubble. So, this is the reason for choosing to add the words and the dome last.
- For this layer, you're going to do a longer press--the full 30 seconds is recommended.
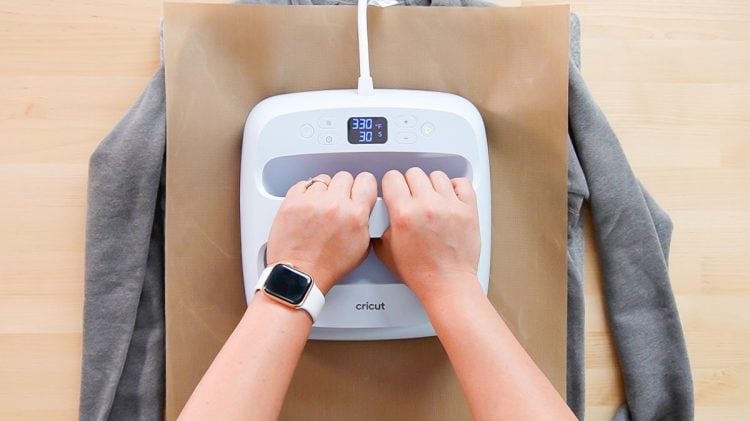
- Flip the project over and press from the back for another 15 seconds to get the iron on vinyl to really adhere to the shirt.
- Viola! You're done! I hope this helps you feel more confident when slicing and layering vinyl!