How to Cut More than One Color on a Cricut Mat
Save time and materials by cutting more than one color on a Cricut mat! Whether you're cutting cardstock, iron on, vinyl, or another material, you can use this trick to cut multiple colors at once with your Cricut.
Instructions
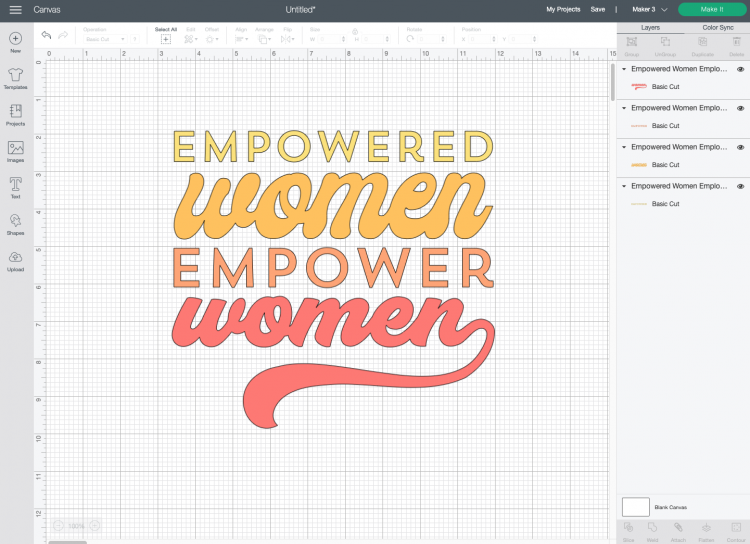
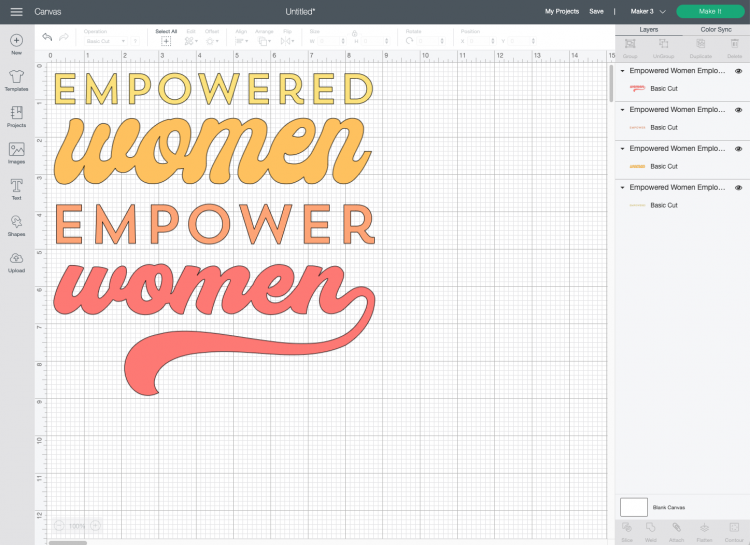
- Set Up the File in Cricut Design SpaceTo begin, we need to rework any multi-colored file a bit so that it will be easier to cut on a single mat. Here you will see a four-color image on the mat.
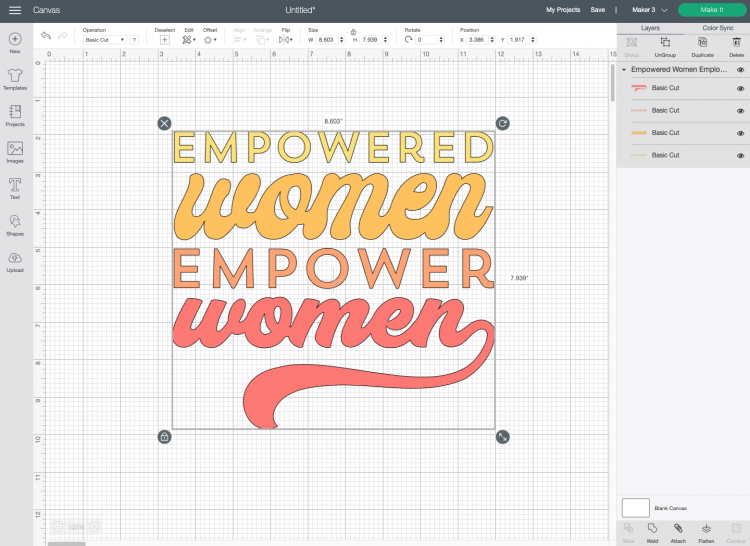
- If was to "Make It" as is, Cricut Design Space would split all four colors here onto four separate mats. That's totally cuttable as is, but that means we're preparing and waiting for four mats to cut.
- So instead, let's rework that image. Start by ungrouping the image (select the image and click UnGroup) so you can move each piece individually. You'll see they are now ungrouped in the Layers Panel on the right.
- Then create a "Fake Mat," which is basically a square that stands in for the cutting mat. This helps to visualize the cutting mat and how my pieces will be arranged. Click Shapes and insert a square onto your Canvas.
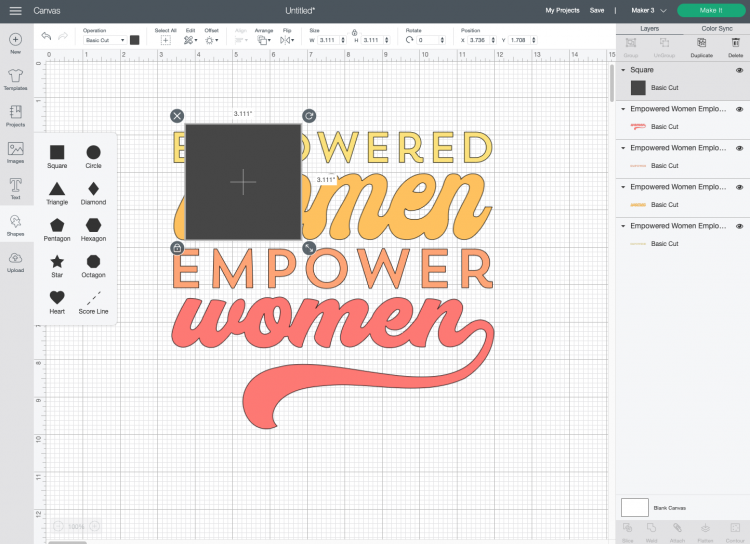
- Change the size of the square to be 12" x 12", and then move it to the top right of your Canvas. It's easiest to just change the Position inputs to be X = 0 and Y = 0 in the top edit bar. You can also use the Arrange > Send to Back tool so that it goes behind your image.
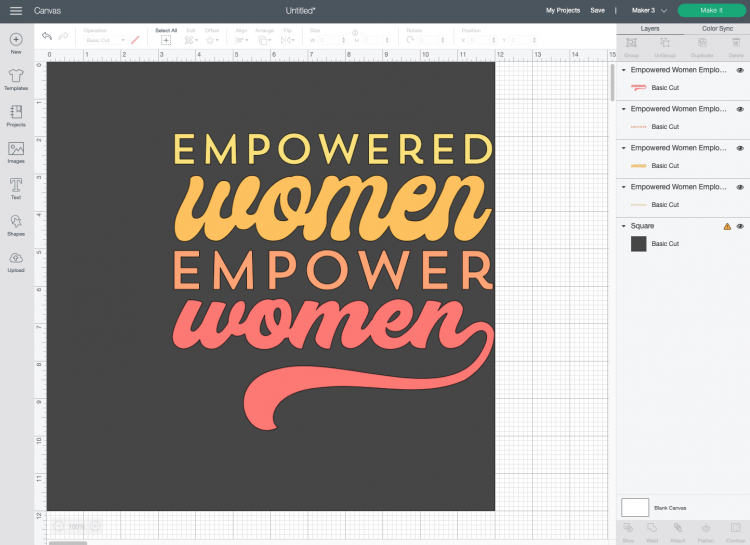
- Now you can move the pieces of your image to give them a bit more...breathing room. So instead of having each word so close together in this image, arrange them on the "mat" (the black square) with a bit more space in between each word.
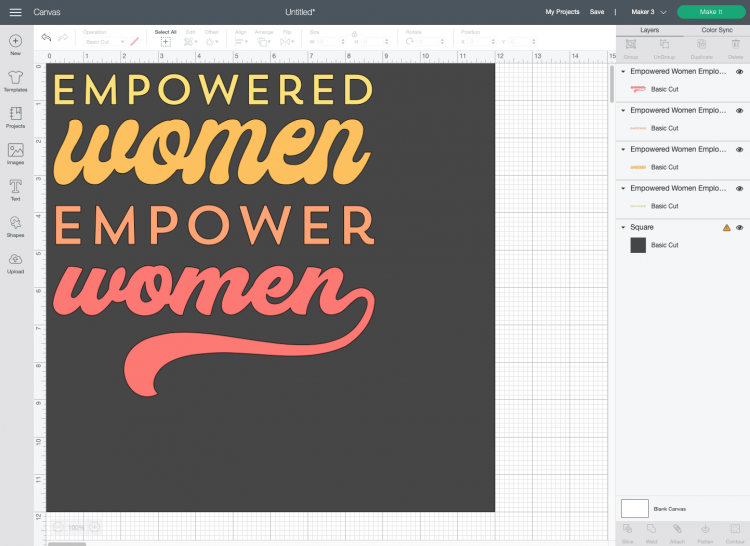
- Then delete the black square.
- Now select all four layers of your image and click Weld at the bottom of the Layers Panel. Everything will turn one color and you'll see it as a Weld Result in the Layers Panel.
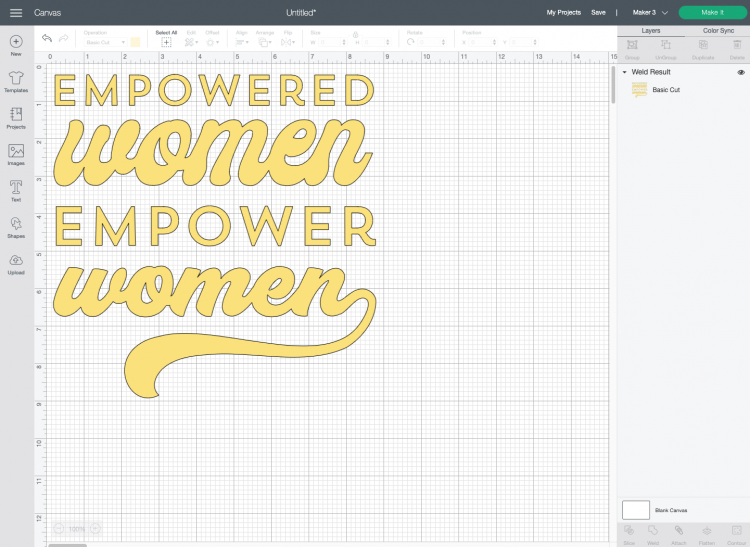
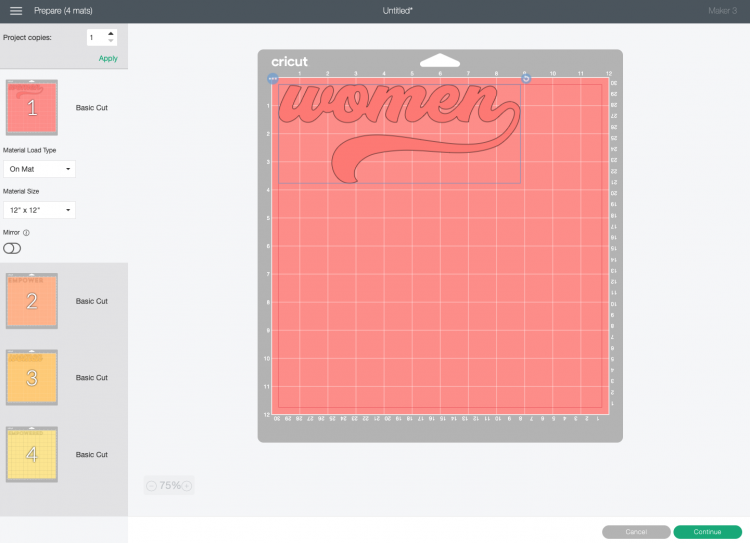
- Now we're ready to cut the image! Click Make It in the upper right and you'll see that you now have a single image on a single mat. BUT...we're still going to use four colors of vinyl, as you'll see in a moment.
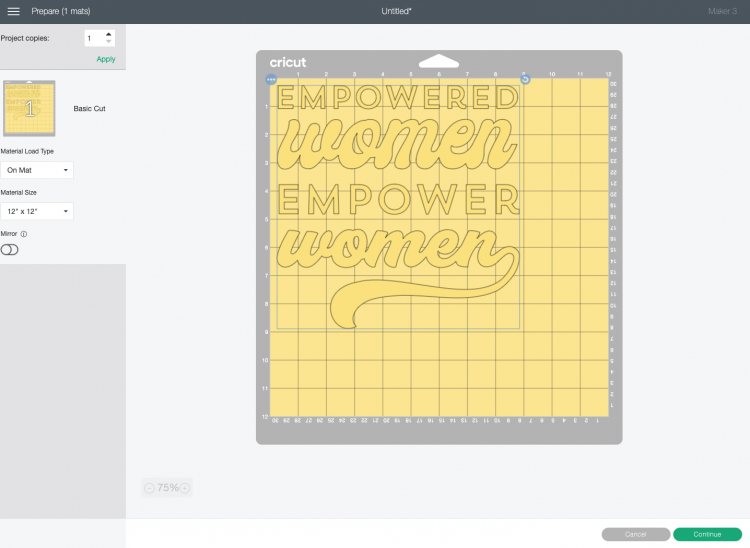
- Prepare Your Materials and MatNow let's cut strips of material (for this project adhesive vinyl is being used) for each element in the image. You can use the mat preview in the Prepare Screen to see just how big you need to cut each piece. You want to cut each piece of material as large as it can be without overlapping.
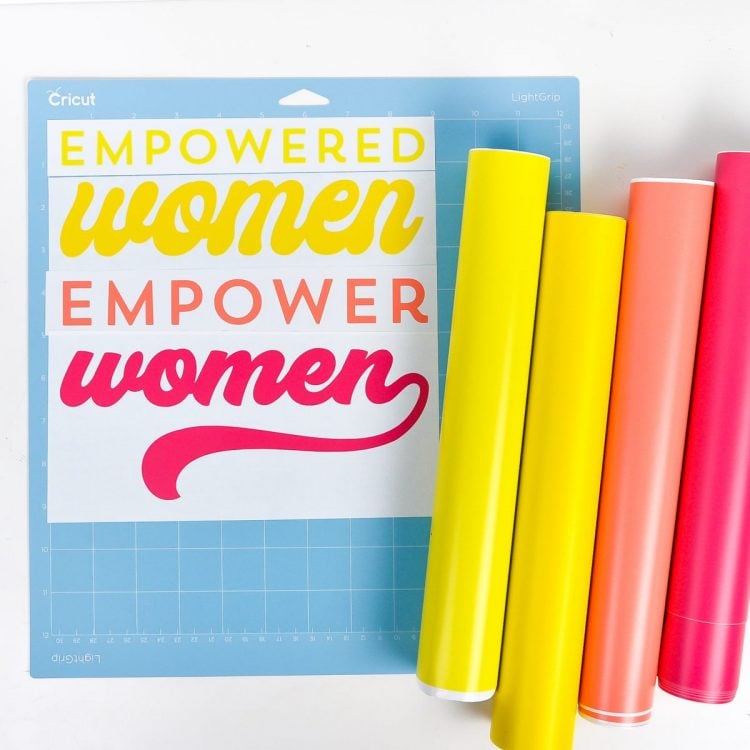
- For this project, adhesive vinyl on the roll is bein used, so using a rotary cutter and an acrylic ruler to make the cuts. If using scraps, a scissors is usually used.Empowered: 1.25" tall Women: 2" tallEmpower: 1.5" tallWomen: 4.5" tallIf you are uncomfortable with such small margins between the words, you can always space them out more when you're setting up your file.
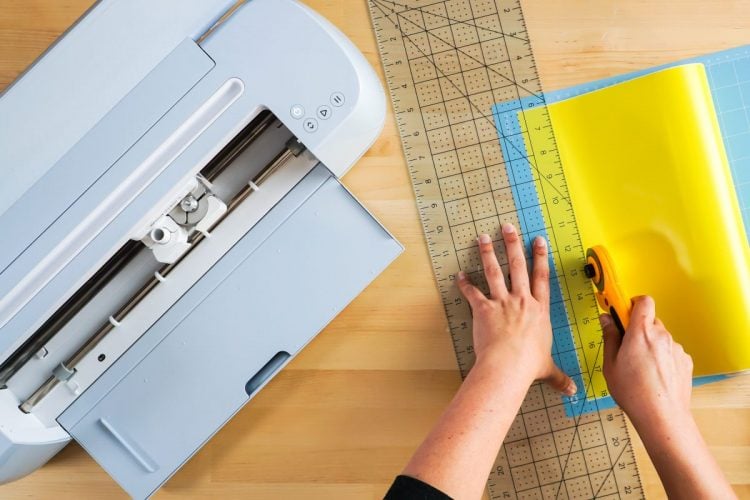
- Then place all four colors on a single Cricut mat, in the layout shown on the Prepare Screen. A brayer can help smooth everything down.
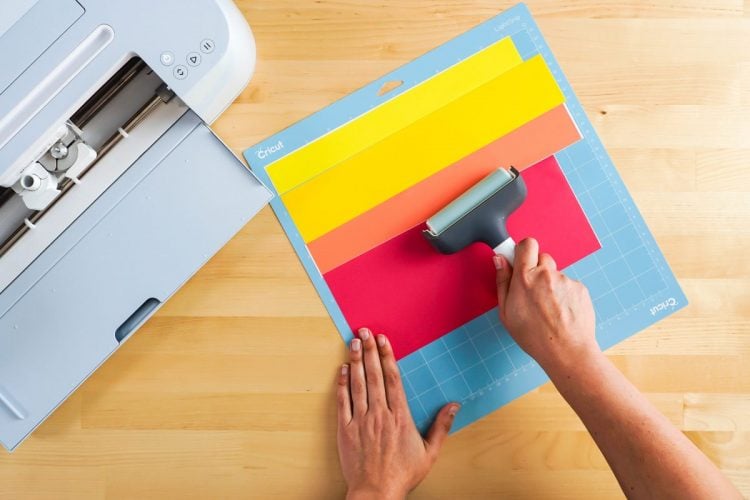
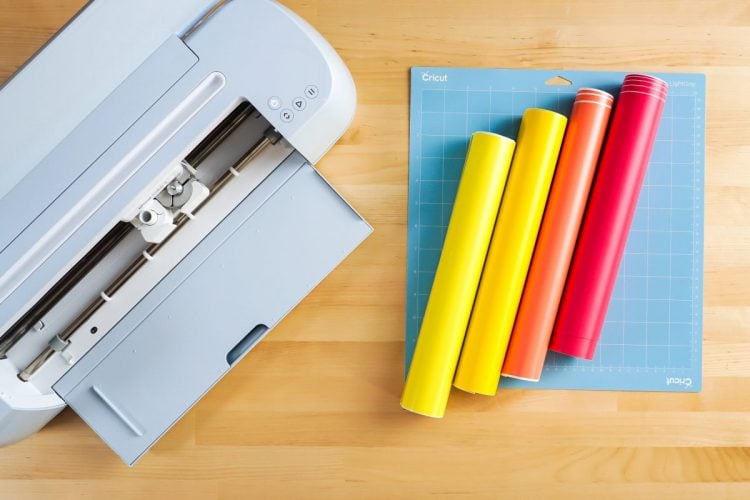
- Cut More than One Color on a Cricut MatThen click Continue in Cricut Design Space. Select your material type and insert your mat with the several material colors into your machine. Click the blinking button and your Cricut will cut the single image on all four materials!

- Once your images are cut, you can weed them directly on the mat or remove them and weed them individually (if using a material that needs to be weeded—you can also use this technique for materials that don't need to be weeded, like cardstock).
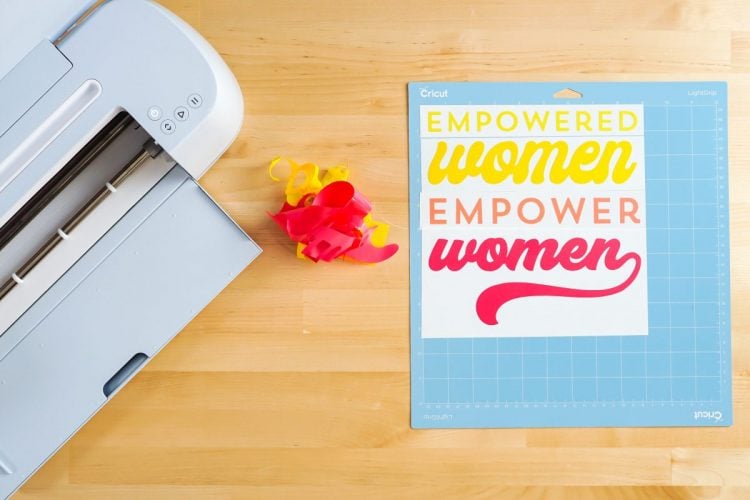
- And that's it! Depending on what material you used or what your project is, what you do next with these different images is up to you! And speaking of multiples, check this out: How to Cut with Multiple Cricut Machines at the Same Time!