
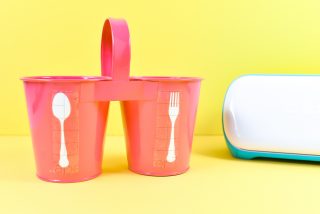
DIY Utensil Caddy
Keep your utensils organized at a picnic or other gathering with this DIY utensil caddy and your Cricut Joy or other Cricut machine! One color of vinyl, one cut, one type of application. A perfect beginner Cricut project.
Equipment
- Cricut Maker or
Ingredients
- White adhesive vinyl or other coordinating color
- Caddy
- Cricut Design Space File
Instructions
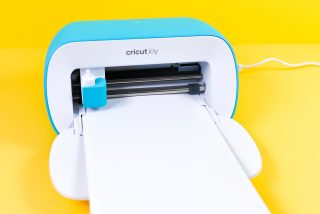
- Before you begin, make sure you have the correct machine selected in the upper right of Cricut Design Space. Cricut Joy is being used for this project, so Joy was selected.Start by opening the Cricut Design Space file. You'll see the spoon and fork image. You can search for other utensil images as well if you like a different style of utensils better.
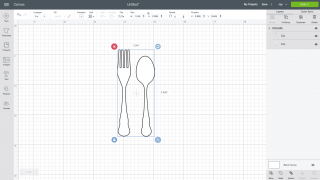
- From there, re-size your utensils to fit on your utensil caddy using the Size tool in the edit bar at the top. Mine ended up being 3" tall.

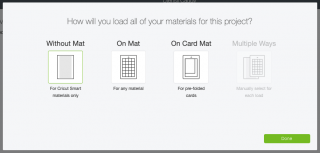
- Then hit Make It in the upper right! From there, you'll be taken to the Prepare screen.If you are cutting this on your Cricut Joy, you will see a pop-up screen that asks for your mat selection. You can cut regular vinyl on a mat, or you can use Smart Vinyl, which doesn't require a mat.
- If you are cutting this on Cricut Explore or Cricut Maker, you'll go straight to the Prepare screen.From here, you can rearrange and rotate your images to fit on your vinyl better. All you have to do is click on one of the images and use the little rotate icon to rotate the image. If you hold down the shift key it will rotate it at fixed intervals. Both the fork and they spoon were rotated 90° and moved to the very edge of the vinyl by clicking and dragging on each image.
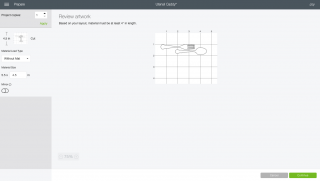
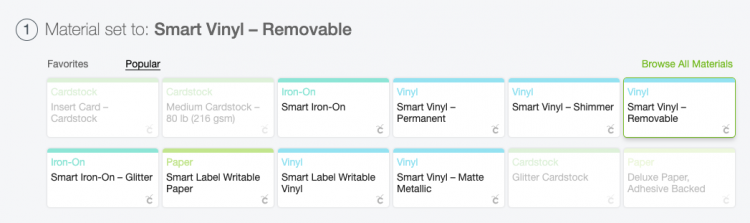
- Once you have your images where you want them on your material, click Continue to go to the Make screen.In the Make Screen, your Cricut machine will connect to your device. Then you will select your material. For this project, Removable Smart Vinyl was used, but make sure you select whichever material you are using.
- Once you select your material, you will be prompted to insert your blade into your machine if it's not there already.

- Insert your material or mat into your Cricut. The Joy will automatically feed the material/mat into the machine, but you will need to press the arrow button on Cricut Explore or Maker.
- Then either click Go in Cricut Design Space (Cricut Joy) or the blinking C (Explore or Maker). Your Cricut will quickly cut your material!Now it's time to put those newly cut decals on your caddy. First you will weed away the extra vinyl around your fork and spoon (sorry that it's difficult to see here—white on white doesn't photograph well!). Read Weeding Adhesive Vinyl for tips and tricks.
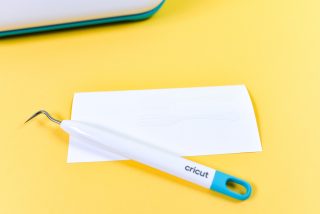
- If you have a steady hand these decals are large enough that you can probably peel and stick them on like stickers. But for most projects using transfer tape is preferred as it makes it easier to keep projects straight.Cut a piece of transfer tape slightly larger than your decals and peel off the backing paper. Then place it sticky-side down on top of your decals. Use a scraper to burnish the transfer tape to your decals.
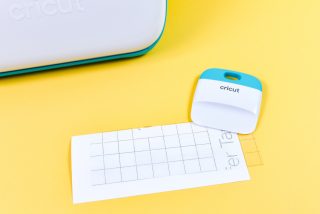
- Then peel the vinyl backing sheet off the transfer tape and the decals should stick to the transfer tape. Read Using Transfer Tape for tips if you find your vinyl is not sticking.
- Then cut the two pieces apart. Place the decals on your utensil caddy, making sure they are centered and straight. Press down on the vinyl to burnish it.
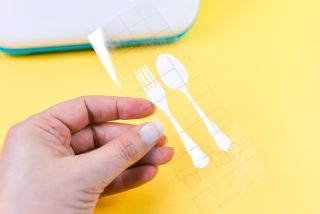
- Then peel back the transfer tape. The decals should stick to your caddy—and you're done!