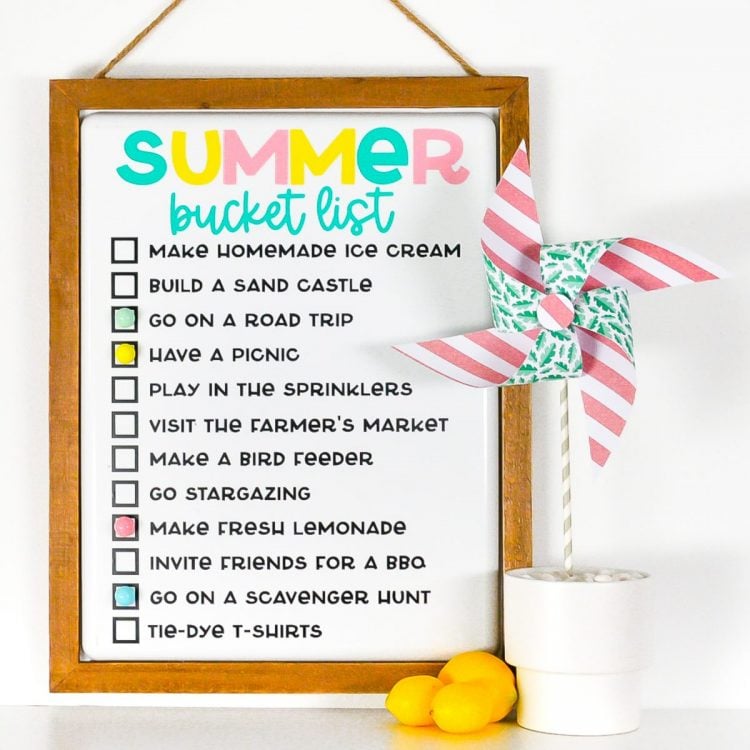
DIY BUCKET LIST SIGN
This fun bucket list can help you keep track of all of your must-dos through the year! Make the DIY bucket list sign with your Cricut and removable vinyl, and swap out each season with new ideas!
Equipment
- Cricut Maker or
- Maker 3 or
- Blue LightGrip Mat use with the Adhesive Vinyl
Ingredients
- Smart Vinyl (see material note below) or
- Adhesive vinyl
- Dry erase board (see note)
- Magnets or
- dry erase markers
- Bucket List SVG File
Instructions
- Material Note: You can cut this on your Cricut Maker 3 or Explore 3 using Permanent Smart Vinyl. I'm actually using both on this project—Smart Vinyl for the black, but regular adhesive vinyl for different colors used in the header.Whiteboard Note: This file is designed to be used on a 12" x 18" white board, but can be reworked for other sizes as well, like this cute 9" x 12" hanging whiteboard.Upload the Bucket List File to Cricut Design SpaceThere are two versions for you in the file—one regular version, and one with weeding boxes. Weeding boxes basically make it a lot easier to weed large or complex projects. They are built into this file, but if you want to make your own, check out How to Make Weeding Vinyl Easier with a Weeding Box.For this project, we are using the weeding box version. Upload it to Cricut Design Space (see Uploading SVG Files to Cricut Design Space if you need help).

- If you want to add your own bucket list items, hide the weeding box layer, and Contour out the items you don't want (Using Contour in Cricut Design Space). Then add your own using the font Poolside. Then, select all of your bucket list items and click Weld at the bottom of the Layers Panel so they cut together.To get the weeding boxes to attach and cut properly, select the image and click Ungroup at the top of the Layers Panel.
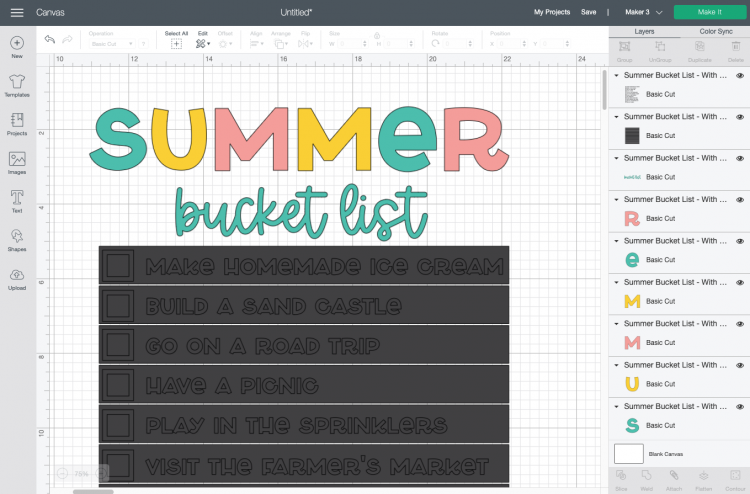
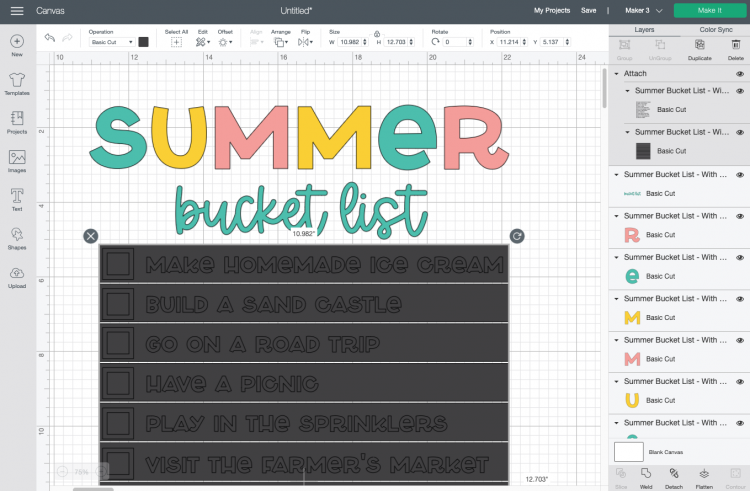
- Now select just the black bucket list text and the weeding box layers and click Attach at the bottom of the Layers Panel. You'll see those two layers nested under an Attach heading in the Layers Panel.

- If needed, resize your bucket list to fit on your board. That's it! You're ready to make your bucket list. Click Make It in the upper right.
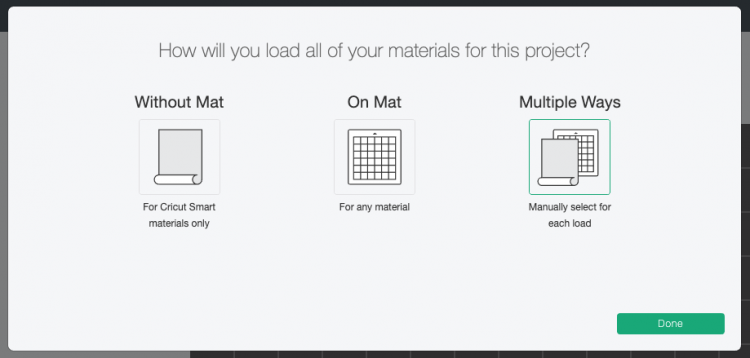
- Cut Your Vinyl for Your Bucket ListIf you have a Cricut Maker 3 or Cricut Explore 3, you'll see a Mat Selection window. Multiple Ways was chosen for this project because Smart Vinyl is being used for the black layer and regular adhesive vinyl for the header at the top. You can choose On Mat if you're cutting using a mat. If you do not have one of these newer machines, you won't see this screen.
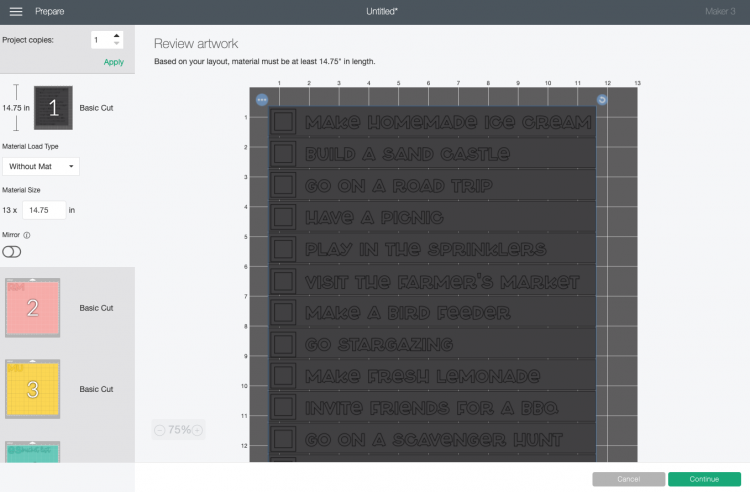
- On the next Prepare Screen, you'll see all of your images laid out on their respective mats (or just on the material if using Smart Vinyl). The weeding boxes should be on the same material/mat. If they are not, go back to the Canvas and try attaching again.
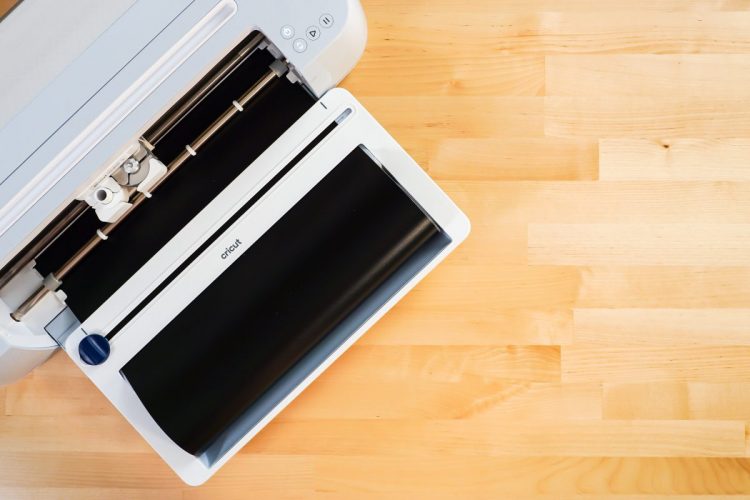
- On the Make Screen, you'll set your material to Smart Vinyl or permanent vinyl. Make sure you have your fine point blade in your machine and place your vinyl colored side up. Insert your mat or material and your Cricut will cut your project! I used Cricut Smart Vinyl and my Cricut Roll Holder for the black layer. Learn more in my post How to Use the Cricut Roll Holder. This is only available for the Cricut Maker 3 and Cricut Explore 3 machines.
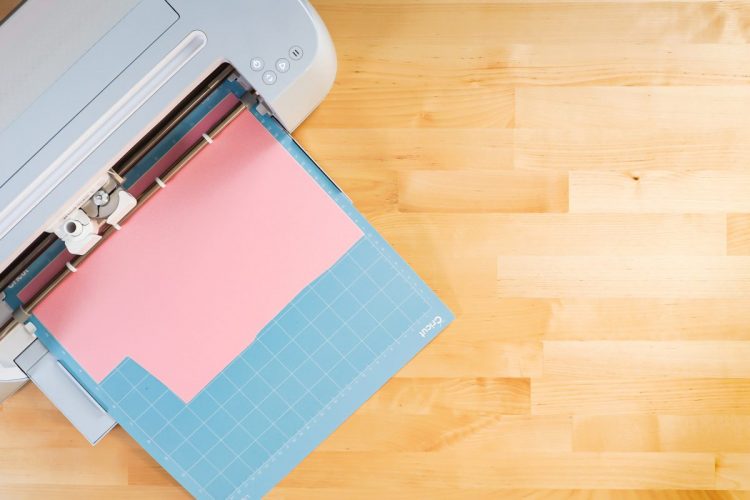
- For the other layers, I simply cut on a mat like any other project.
- Weed Your Bucket List DecalNext we're going to "weed" the negative space from around each image. You'll see how the weeding boxes make weeding this large piece easier. Weed the edge first.
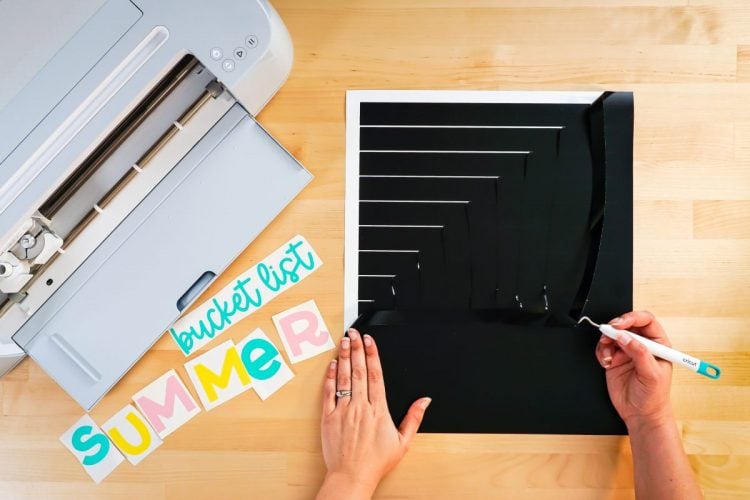
- Then you can weed each individual list item. This is so much easier than trying to remove that negative material all in one go.

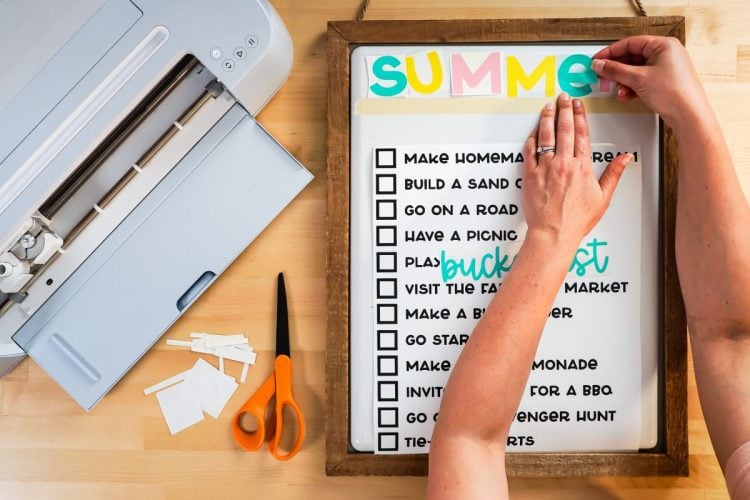
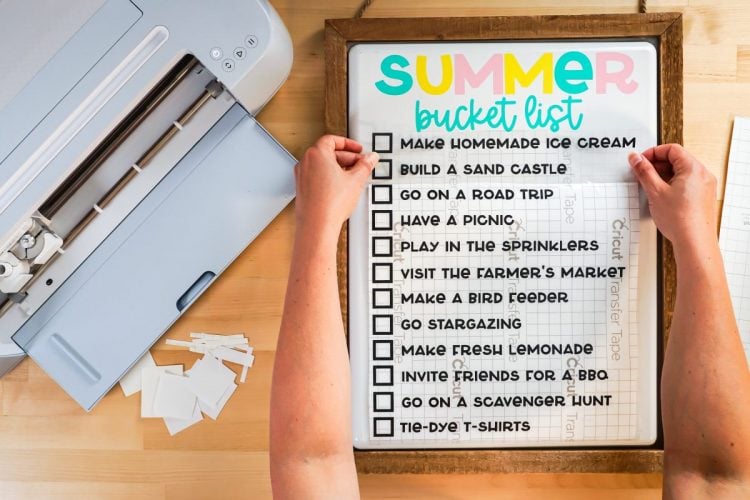
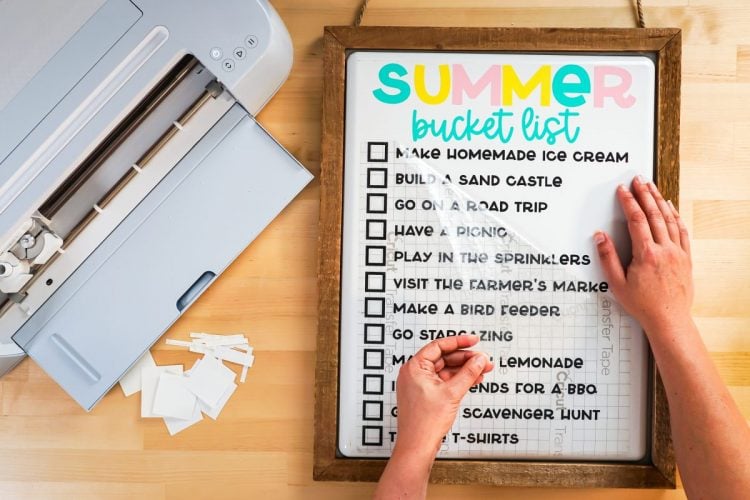
- Adhere Your Bucket List to Your White BoardStart by placing all of your pieces on your white board to see how it's all going to fit. Trim as close as you can to the edge to make it easier to lay out.
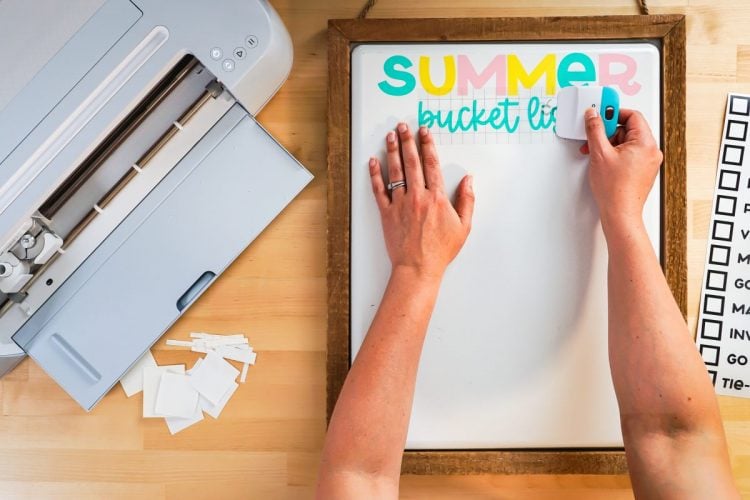
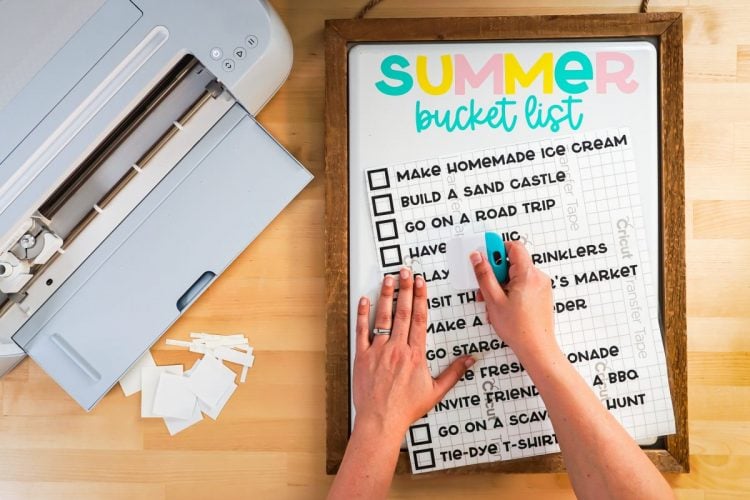
- Start at the top. For the word SUMMER, those were placed by hand instead of using transfer tape—it's easy with simple shapes like big letters! Use a piece of masking tape to help make sure my letters are straight.
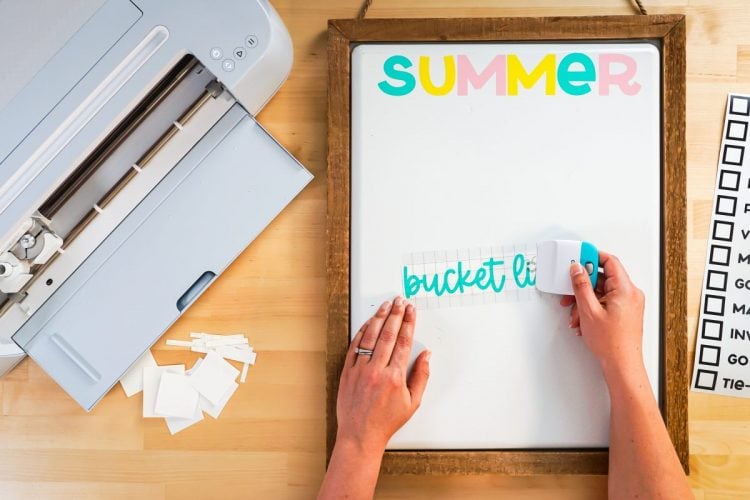
- For the words "bucket list," transfer tape was used. You can see an in-depth tutorial about Using Transfer Tape if you need it (plus troubleshooting tips if you’re struggling!). Start by cutting a piece of transfer tape the same size as the words. Peel off the backing on the transfer and place the sticky side down on the decal.
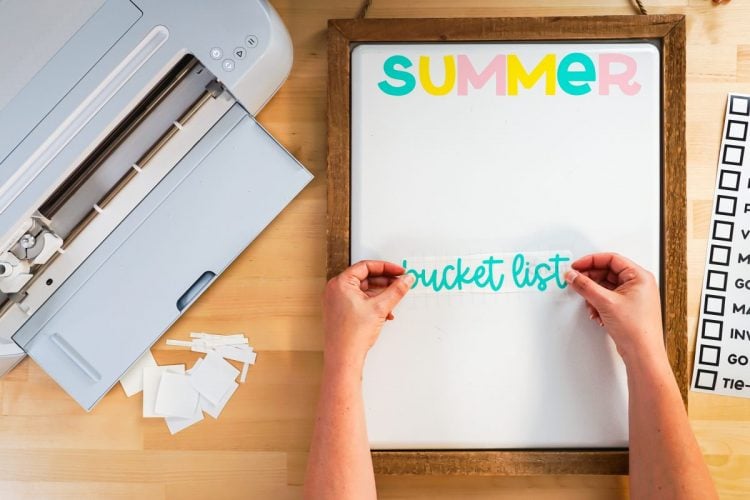
- Use a scraper to burnish the transfer tape onto the decal.
- Then flip it over and peel back the carrier sheet from the decal. The vinyl should stick to the transfer tape.
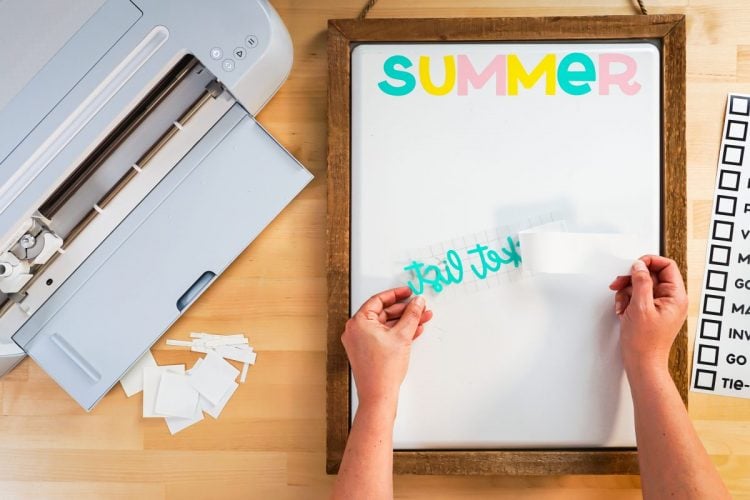
- Then place it on your white board and burnish again with the scraper. Peel back the transfer tape and the decal should stick to your white board.
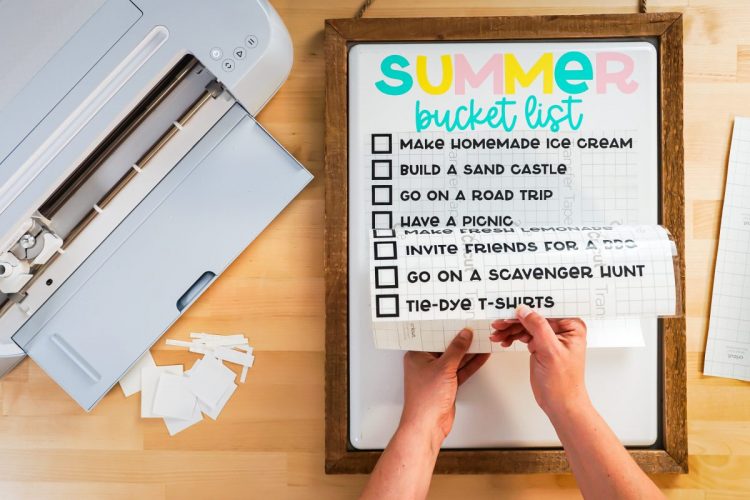
- For the larger black decal, we're going to work in sections. Start by cutting a piece of transfer tape the same size as your decal. Then curve it in half and place it on your decal, so the middle of the transfer tape hits first, then work your way to each edge.
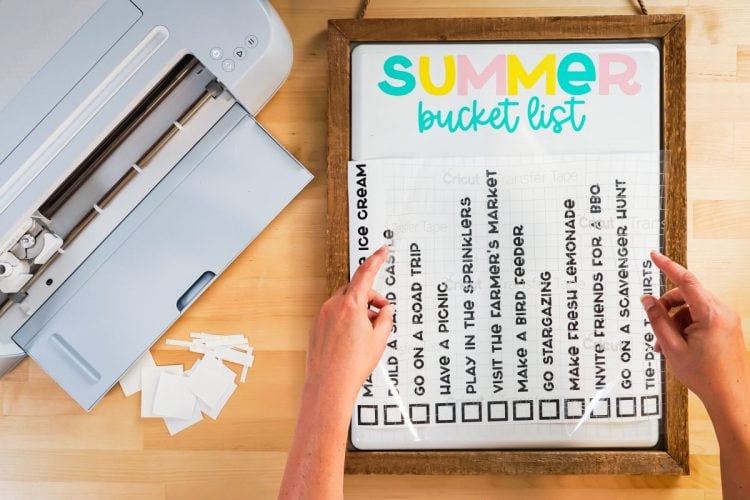
- Then use the scraper to burnish the transfer tape to the decal.
- Instead of peeling back the entire carrier sheet, peel it back from the top two lines of the decal and use scissors to cut off that backing. Then you can place the decal on your white board without worrying about the entire thing sticking in one go.
- Then peel the carrier sheet off the back of the vinyl as you press the vinyl to the white board. Go slowly so you don't miss any of the letters.
- Once you have your decal on your white board, use the scraper to burnish the vinyl to the white board.
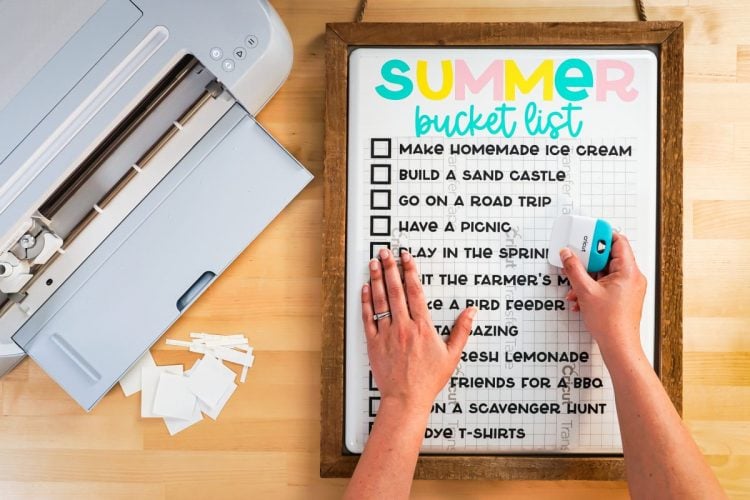
- Then peel back the transfer tape and your decal should stick! I like using non-porous bases like white boards—vinyl tends to stick really well and make things easy!
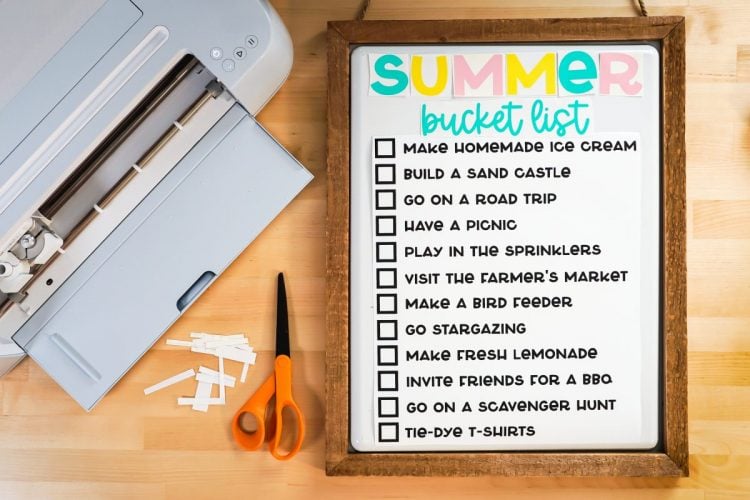
- Then use magnets or a white board marker to check off things as you do them!