
USING SISER EasySubli WITH A SAWGRASS PRINTER
Sublimate on cotton or dark fabrics with Siser EasySubli! This material is designed to work with EasySubli Inks in a Sawgrass Printer. Here's a detailed tutorial on how to use it.
Equipment
Ingredients
- Shirt - this project is using one from
- BELLA+CANVAS Shirt
- Siser EasySubli transfer sheet
- Siser EasySubli mask or
- KTM mask
- Butcher paper
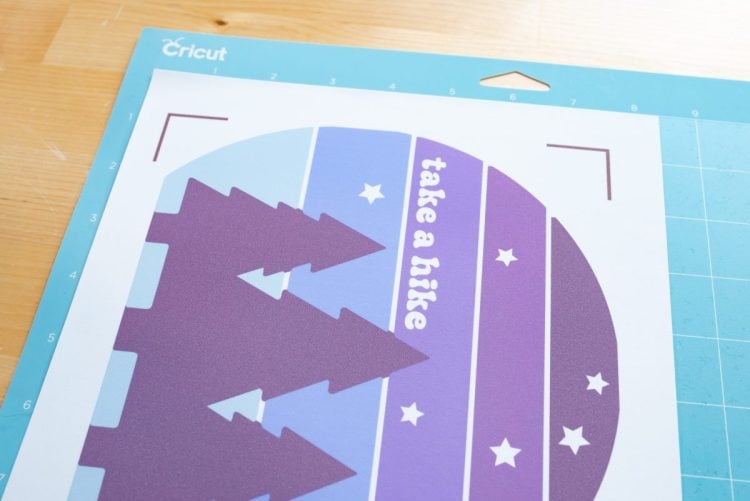
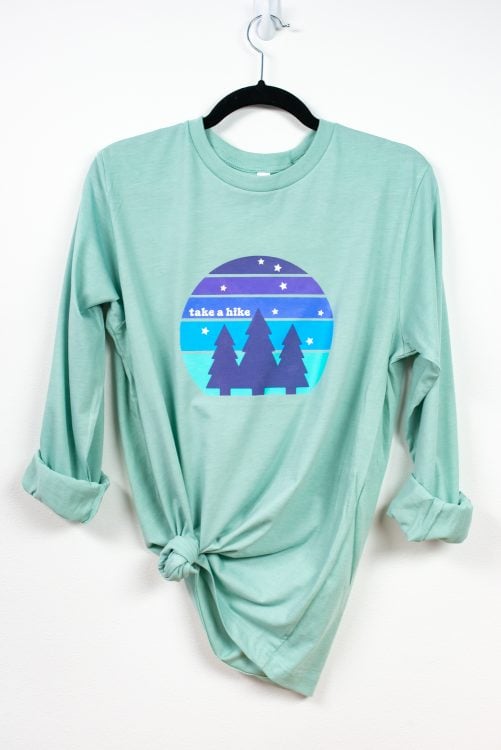
- Free Take a Hike File #S13
Instructions
- NOTE: These instructions are specifically for Sawgrass printers with EasySubli inks. No Cutting Machine—Print Your ImageIf you are using a simple image and are not planning on using a cutting machine to cut around the edge, you can upload your file to Sawgrass Creative Studio or Sawgrass Print Manager. Then resize to fit your garment. You want to make sure the Mirror is turned OFF. This is one of the few instances where you do not want to reverse your image for a heat transfer project. Then print your project.Then skip to the Cure Your Image section below.
- Cutting Machine—Set Up Your FileIf you are using a cutting machine, upload your image to your cutting machine software. For this project the PNG version of the file was used from the download above. And because this project is cutting with a Cricut, you need to upload the image to Cricut Design Space. Choose Complex in the first Image Type screen.
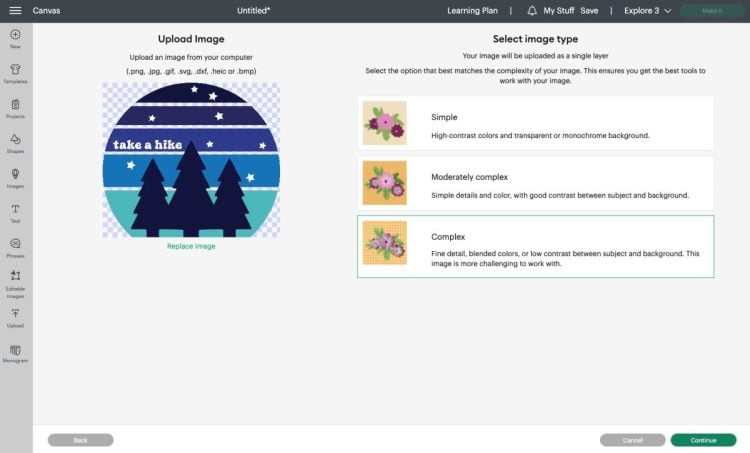
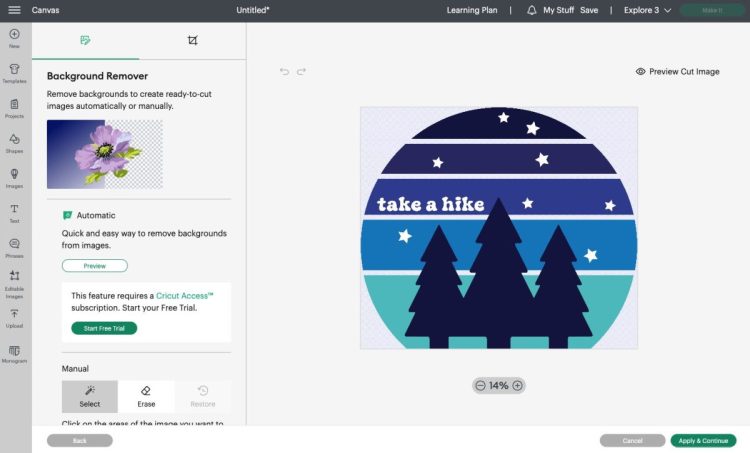
- Then in the next screen, remove the background. If you've uploaded a PNG, most likely the background will already be transparent. But if you do have a background on your image, you can remove it using these tools.
- Click Apply & Continue and in the next screen, choose Print then Cut as your upload type.

- Once the image is on the Canvas, rotate it and then max out the print then cut size, making the height 6.82" to take advantage of the largest print then cut size. (Depending on your version of Cricut Design Space, you may be limited to 6.75" until a recent update rolls out to everyone.) If you are using another cutting machine, you may have a bigger cutting area.
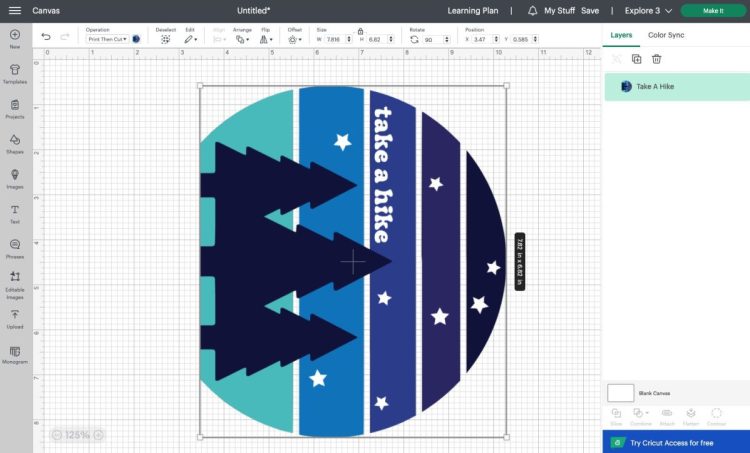
- Once you have your image ready to go, click Make It. You'll see your project on a piece of paper on a Cricut mat. Unlike other heat transfer projects you want to make sure mirror is OFF. This is one of the few instances where you don't want to mirror an iron on project.
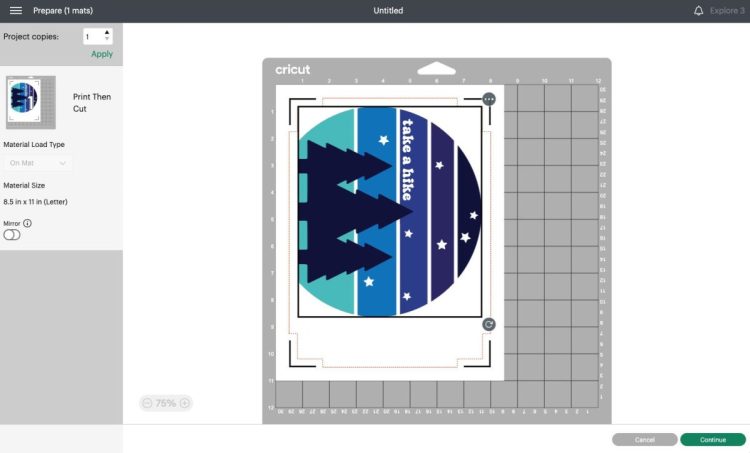
- Print Your ImagePlace your EasySubli in your Sawgrass printer with the shiny side UP. The image will print on the back rough side.Click Continue and Design Space will prompt you to print your project. For projects cut with a cutting machine, it is suggested leaving the bleed ON. This will ensure there is no white space around the edge of your image if your cut is slightly off. Also check the "Use System Dialog Box" because this will allow you to use Sawgrass Print Manager with your file.
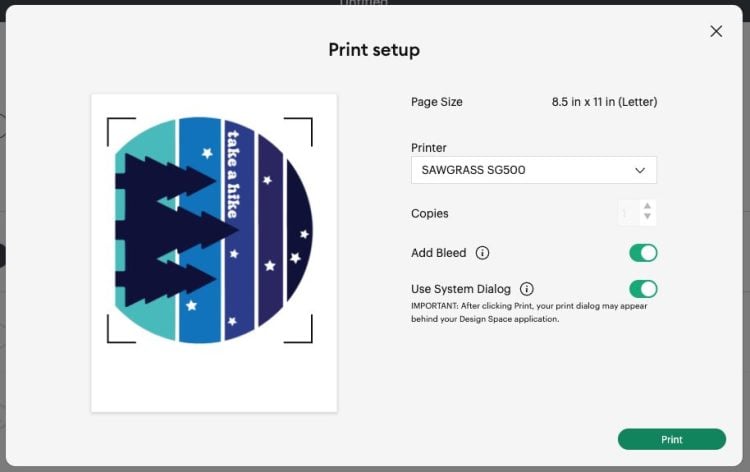
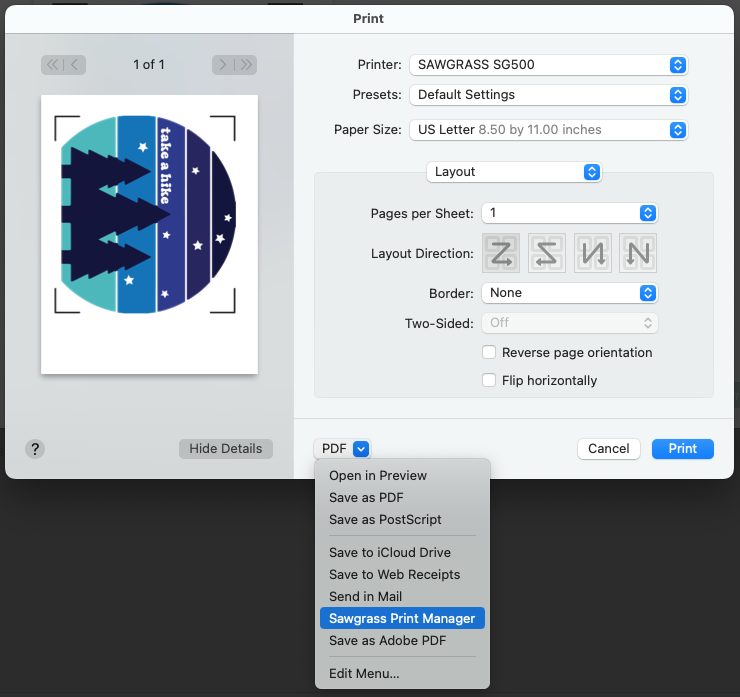
- The System Dialog Box will most likely open BEHIND your Design Space screen, so you may need to move Design Space to see it. From here, instead of selecting a printer and hitting print, go down to the bottom and select Sawgrass Print Manager. (Note: if you are on a PC, you may select Sawgrass Print Manager where you select the printer instead.)
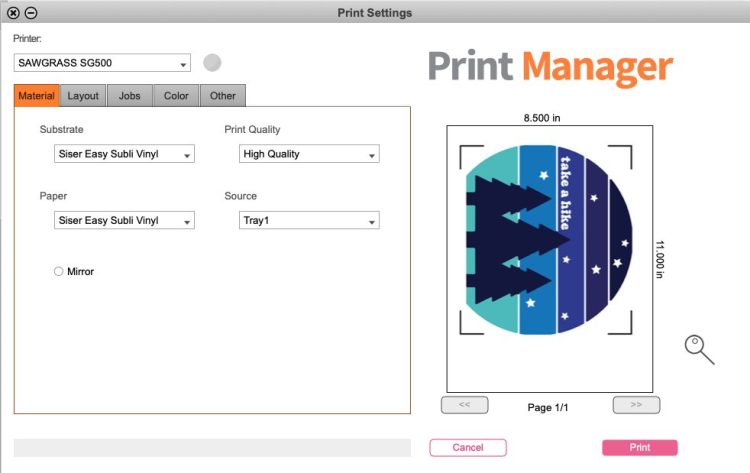
- This will open up the Sawgrass Print Manager. From here, change some of the settings. Change both the Substrate and the Paper to Siser EasySubli Vinyl. Then make sure mirror is OFF.
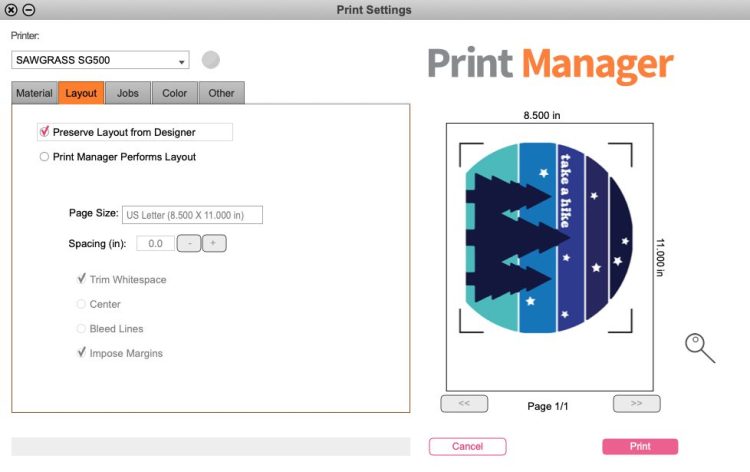
- In the Layout Tab, make sure that "Preserve Layout from Designer" is checked.Then click Print! Your Sawgrass printer will print both your image and the registration marks on the EasySubli material.Remember, sublimation colors will look washed out when printed—you'll get the brightest colors when you press! If you're having issues with the color of your Sawgrass prints, reach out to their customer service folks for help.
- Cure Your ImageAlthough EasySubli inks are designed to dry on EasySubli, you do need to make sure the ink is dry before you press. You can leave the printed sheet to dry on its own overnight, or you can place under a heat press set to 315° for 30 seconds or so to dry the ink. Do NOT close the press—just hover the press over the top to evaporate any moisture still left in the ink.Double check that it's dry (if not, hover again), and you're ready to cut your image.
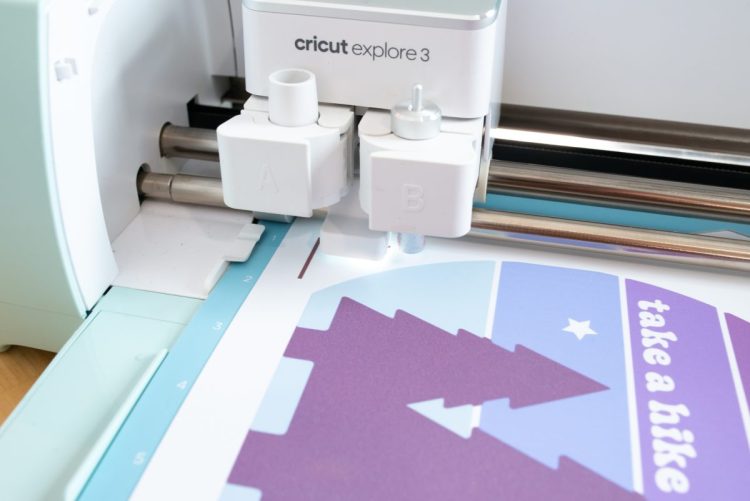
- Cut Your ImageNext you'll place your dry image on a Cricut cutting mat, in the upper left corner, with the image facing up and the shiny side on the mat.
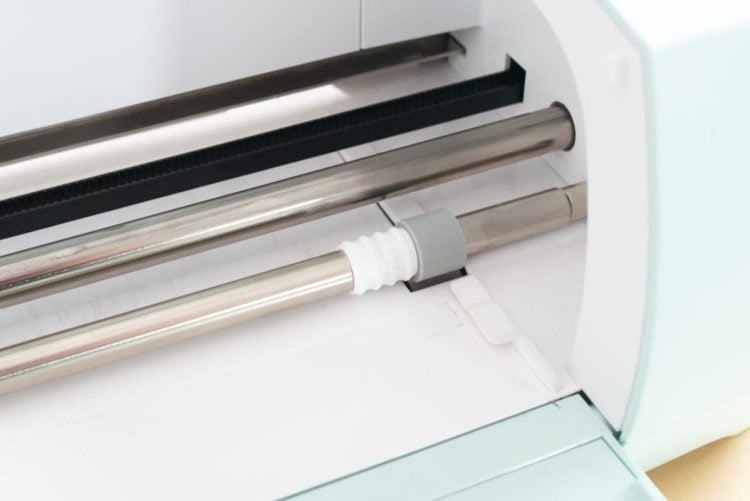
- Move the white star wheels on your machine's rollers to the right so they don't imprint your material.
- In Cricut Design Space, set your material to Everyday Iron-On, but ignore the warning about the mirror being turned on.
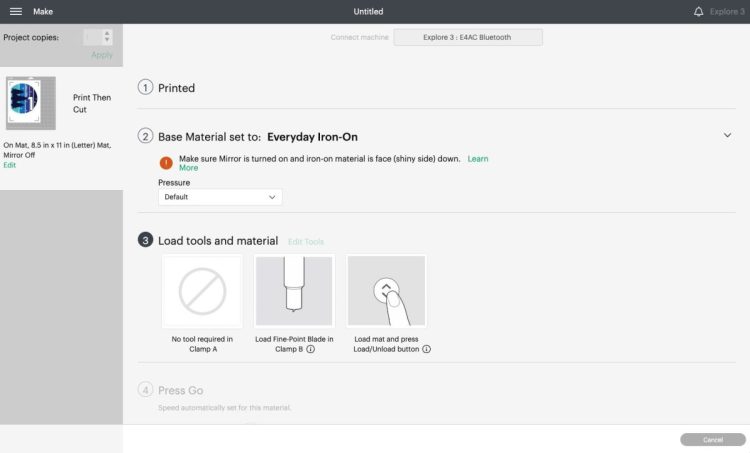
- Insert your mat your machine, following the prompts in Cricut Design Space. Your machine will read the registration marks and cut around the edges and any cutouts.If you are having an issue with your cut, make sure you are using a new mat and a new blade. Mat and blade condition can make a big difference in clean cuts.
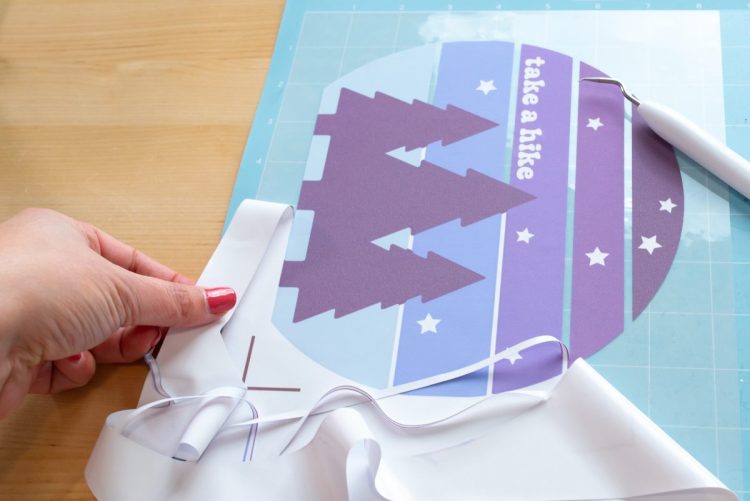
- Weed Your ImageNow it's time to remove any part of the material that is not your image. This includes the area around your image and any cutouts. Use a weeding hook to carefully pull up unwanted material, like you would any other heat transfer vinyl product.
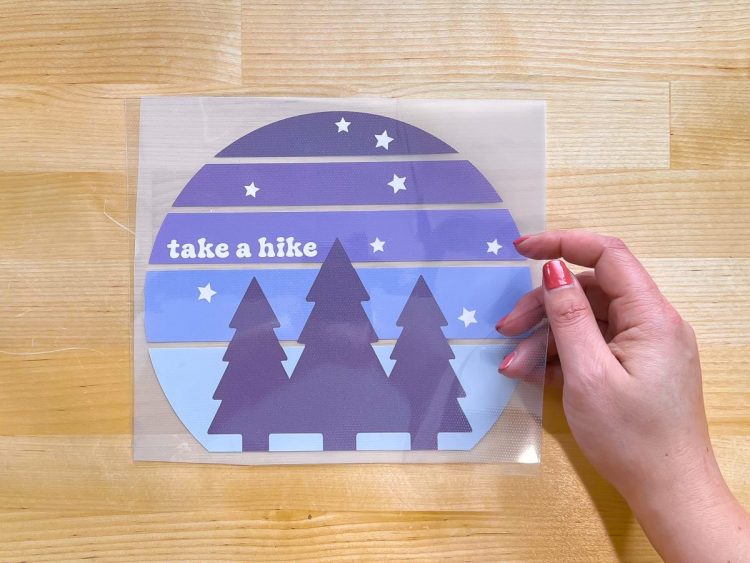
- Mask Your Image to Transfer ItLike I mentioned before, if you have a simple design, you can just pick it up off the carrier sheet and put it on your garment. But if you have a more complex design, use a mask. The KTM mask works so much better for me than the Siser mask, but you can try either (or another HTV mask if you have one!).Cut a piece of masking slightly larger than your image. Peel back the protective sheet on the masking and place it sticky-side down on the image.
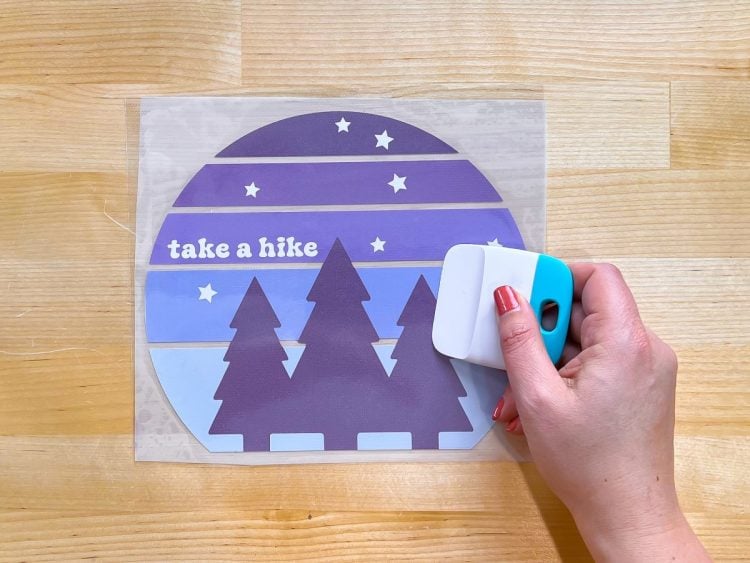
- Use a scraper or squeegee to burnish the mask onto the transfer from both the front and the back.
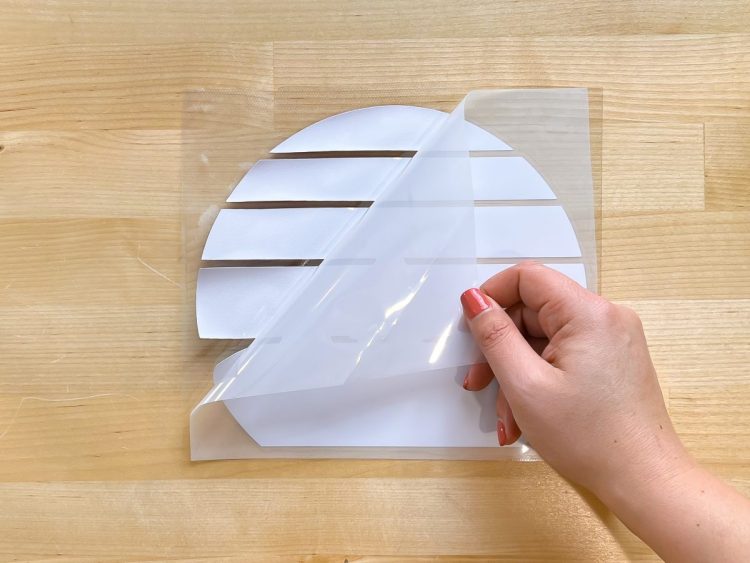
- Then peel back the carrier sheet (the one at the back of your image), leaving the image on the mask. Not gonna lie, this can be really difficult. The EasySubli just does not like to stick to the mask. So go slowly, using your hands to keep the material down on the mask. You can see in this photo how the edges like to pop up and not stick.If parts fall off, that's okay, you can easily just put them back into place. This is the biggest reason to keep your images fairly simple —too many small pieces can be difficult with this material.
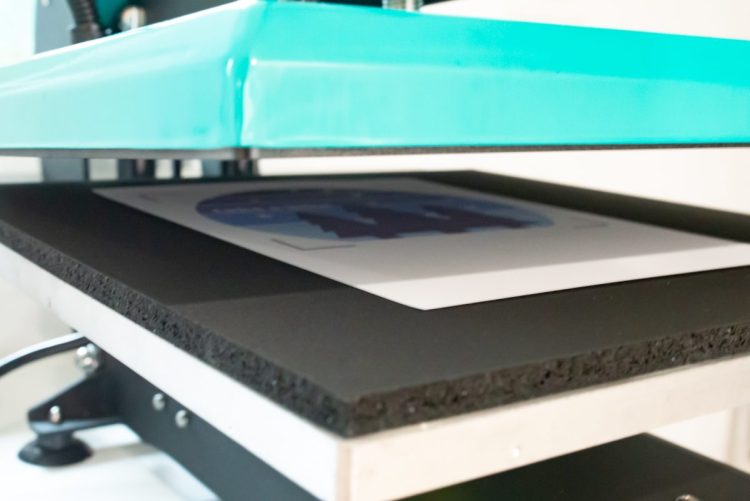
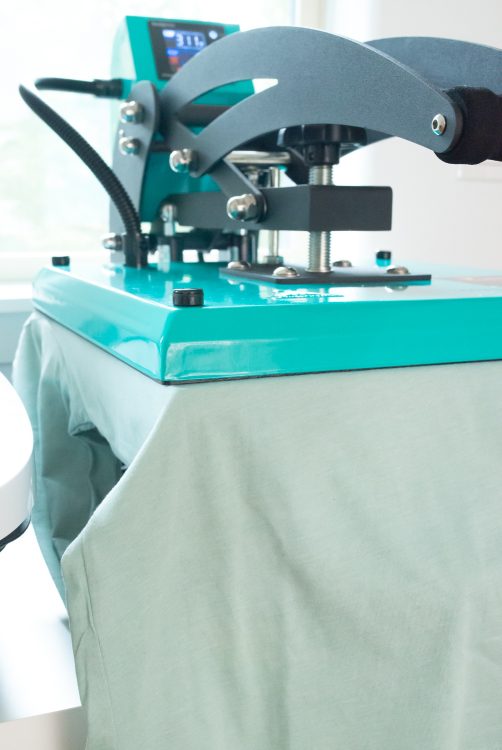
- Preheat Your GarmentPlace your garment int your heat press. Press your garment at 311° for 4-5 seconds to help flatten it and remove any moisture.
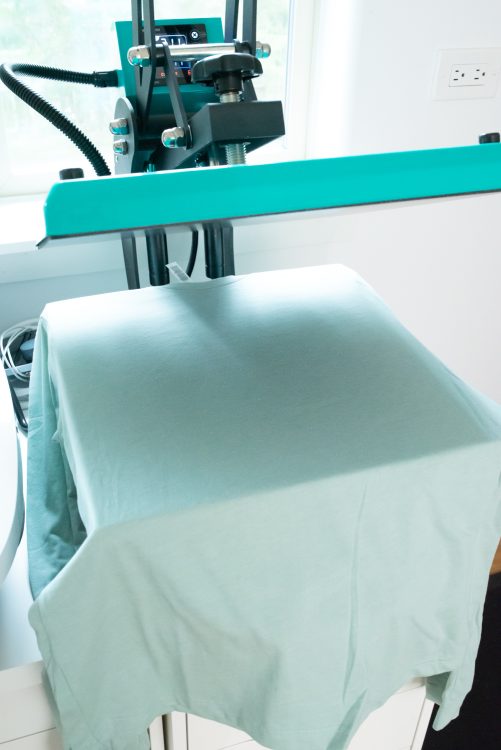
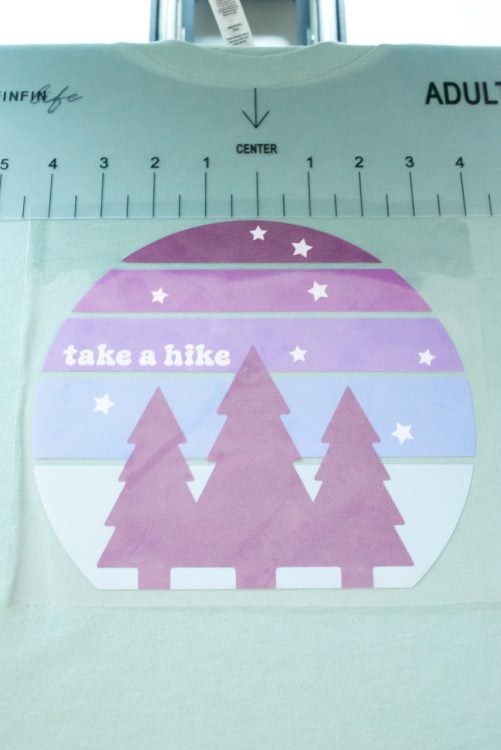
- Apply Your EasySubli TransferPlace your transfer with the mask up on your pre-heated garment. Using a t-shirt guide helps with placement.
- Place a piece of butcher paper over your entire image (use more than one piece if necessary).
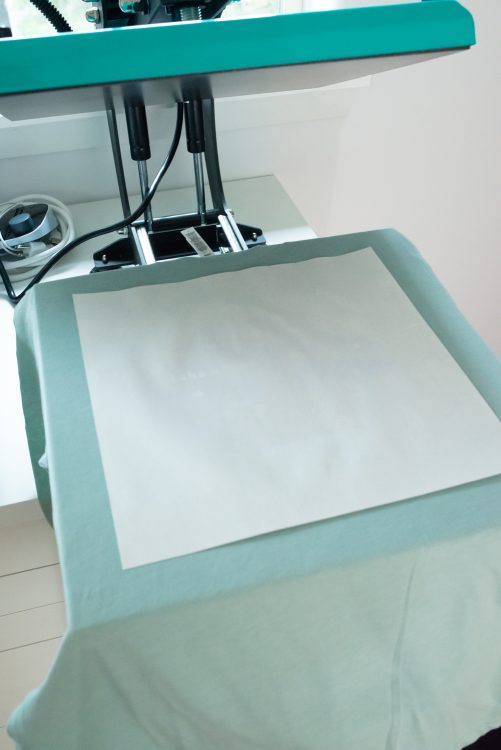
- Apply EasySubli with a heat press at 311º for 15 seconds using medium pressure.
- Peel off the mask while the image is still warm, revealing your final project! If you are finding pieces are still lifting, you can press for an additional 5 seconds. Flip your garment over and press for 10 seconds from the back.You can also use an EasyPress set to 325° for 30 seconds on one side and then an additional 30 seconds from the back.
- Caring For Siser EasySubli GarmentsBecause this type of sublimation isn't sublimating directly into the shirt fibers, there is a point where you'll start to see cracking or peeling. Making sure your project is preheated and pressed correctly, and then cared for properly, can help extend the life of your garment. Wait 24 hours before washing your garment inside out. Prefer line drying, but you can also tumble dry low.