TISSUE PAPER JELLYFISH
These tissue paper jellyfish are perfect for a mermaid birthday, under the sea party, or any other beachy event you might have! Whip them up this afternoon with a few simple supplies!
Equipment
- Rotary cutter optional
- Acrylic Ruler optional
- Self-healing cutting mat optional
Ingredients
Instructions
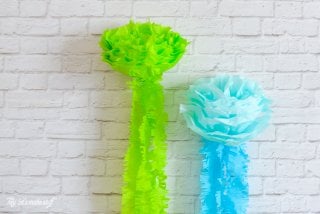
- Start with two sheets of tissue paper, opened and flattened on a table. Don't worry about creases -- they'll disappear as you make your...jellyfish top, which called the "bell" and the bottom is the "oral arms." For this project we are just going to use top and bottom.
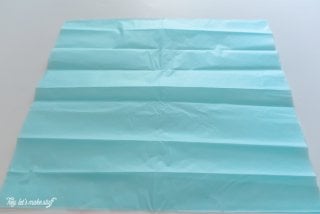
- Fold your tissue paper in half.
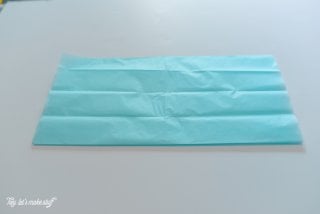
- And in half again. You should have a square.
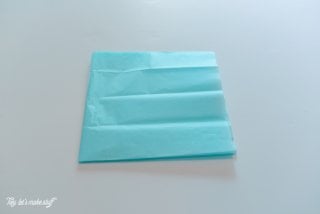
- If you don't have a square, fold into a triangle and trim of any excess. Then unfold your triangle so you have a square again.Then take a look at your stack of paper. Two of the edges have folds. Using scissors or a rotary cutter and ruler, trim off the folded edges. Basically, you want to have eight even-ish squares of paper with no folds along the edges.
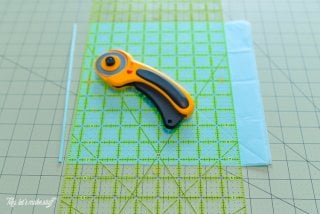
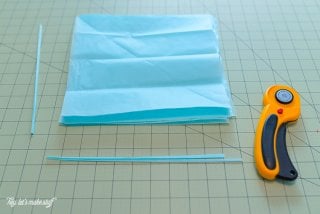
- Accordion-fold your squares. You should end up with six or seven folds.
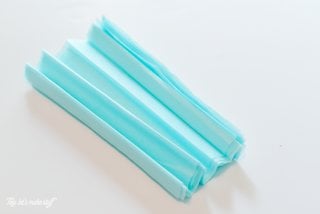
- Staple in the middle.

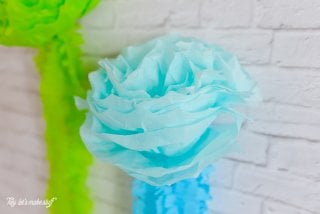
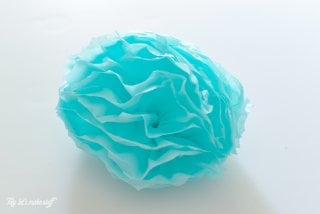
- Trim the edge using an inward scallop. We decided this most looks like a jellyfish, though you have options.
- Then fluff your jellyfish top. Start pulling the pieces of tissue paper upward, being careful not to rip them. Pulling them up from closer to the center helps prevent ripping, exactly the opposite of what this photo shows.

- Fluff one side
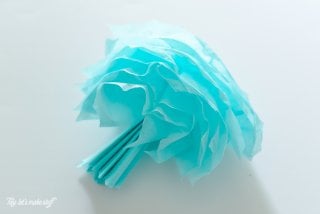
- And then the other. Then you're ready to work on the bottom!
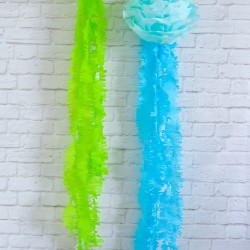
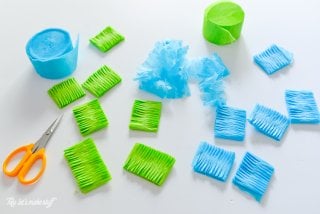
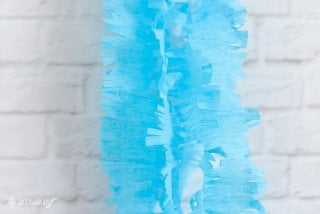
- Cut a few lengths of crepe paper. You can make them any length you want. We went long, because they are going to hang from the ceiling.
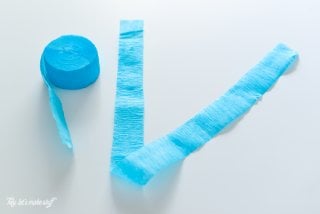
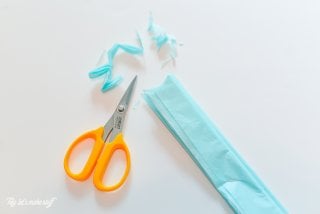
- Fold your crepe paper into a flat roll, about 3" long
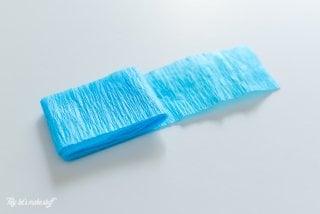
- Cut fringe onto both sides of your roll, making sure not to cut all the way across.

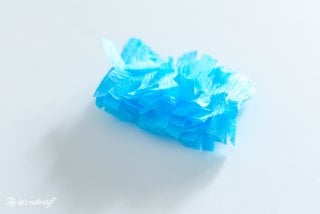
- Then, before unrolling, fluff the fringe.
- Then unroll, and fluff more, if desired.
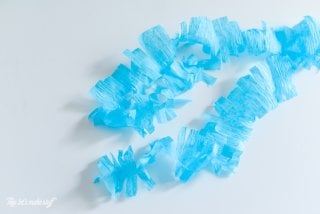
- Do this lots. We used seven crepe paper strands for each jellyfish.
- Using craft glue, attach the crepe paper to the bottom of the jellyfish. We hung them using white thread, but piercing a threaded needle through the center of the jellyfish top and tying a knot.Tada!
- Tada!