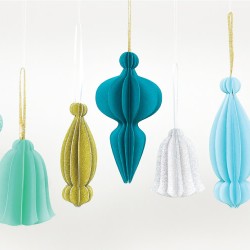
Retro Cut Paper Ornaments
These cut paper ornaments are made with an array of cute papers and cut on the Cricut Maker or other electronic cutting machine! Get the free SVG cut files and learn how to assemble these beautiful 3D paper ornaments.
Equipment
- Cricut Maker or
Ingredients
Instructions
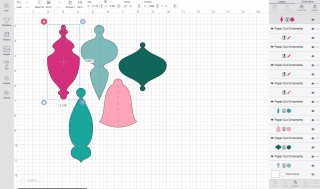
- These are instructions to craft your ornaments using a Cricut machine. You may need to modify this project for other machines.Start by downloading the files above and uploading them to the Cricut Design Space. You'll see five ornaments, each with a line down the center. In the right-hand panel, change each of those lines from a cut line to a score line.

- Then "ungroup" all of your files so there are ten separate pieces (five ornaments, five score lines). Then use the "attach" button in the bottom left to attach each score line to each ornament. This way, your score line will score in the correct place for your ornaments. You can also re-size your ornaments if you'd like. For this project, one set was cut at the size in which it imports, and one at about 66% of that.
- Once all your ornaments are attached to your score lines, hit "Make It" in the upper right. You'll want to change the quantity to at least 10, but if you are making them at a larger size, you might want to use more pieces. Make sure to insert your scoring stylus into your Cricut so that it scores the line down the center of each piece.Once your pieces are cut, fold them in half. The "inside" of your fold will be the part that shows on your ornament, so make sure that's the "pretty" side.

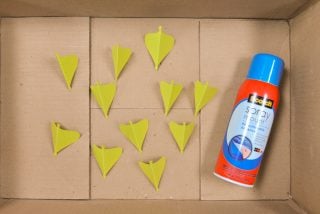
- Put the pieces, face down, in a cardboard box and used some spray adhesive on the backs.
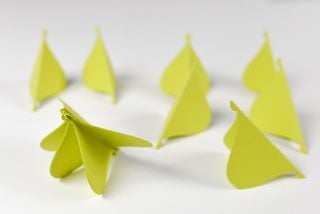
- Then just line up each of your pieces and glue the backs together -- you'll immediately start to see the shape of your ornament form.
- Before gluing your final two pieces, use a little quick-dry tacky glue to hang a piece of ribbon. Then glue the final two pieces together to finish the ornament.
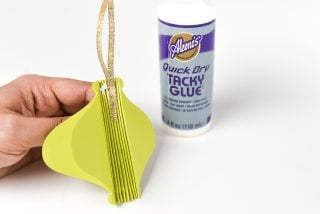
- Make sure the glue dries completely before hanging!

Notes
Paper Ornaments: Best Paper
For these retro-style paper ornaments, I tried a bunch of different paper and cardstock and came up with a couple qualities that I think make for the best ornaments.-
- Light cardstock: The light cardstock (that is, heavier than paper and lighter than thick cardstock) was the easiest to work with. Heavier cardstock tended to "force" itself apart while paper got a little ripply with the glue.
-
- Smooth: the smoother the back of the paper (the part that was glued together), the better the glue adhered.
-
- Colored core: I preferred cardstock that was dyed all the way through, so the edges of my paper were the same color as the rest of the ornament. Those with a white or coordinating core made it a little easier to see where my gluing wasn't perfect (see the glitter ornaments vs. the solid ornaments).
-
- Glitter: I love love how the glitter paper looked but it was harder to fold, even with the score. Still, it was worth it -- gorgeous!