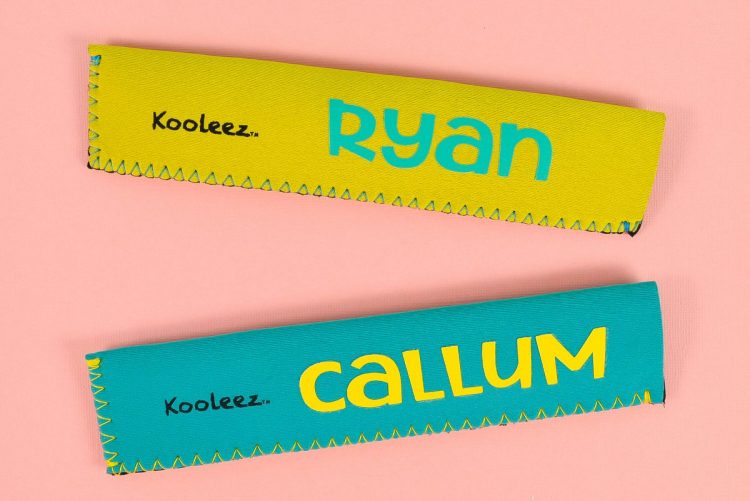
Personalized Ice Pop Holders
Keep little hands from freezing with these personalized ice pop holders! Use your Cricut to easily embellish pre-made ice pop holders—this craft can be done in less than 15 minutes!
Equipment
- Cricut Maker or
- Maker 3 or
- Explore 3 or
- Blue LightGrip Mat if using Iron On Vinyl
- EasyPress or
Ingredients
- Smart Iron On (see material note below) or
- Iron on
- Ice pop holders
- Ice Pop SVG
Instructions
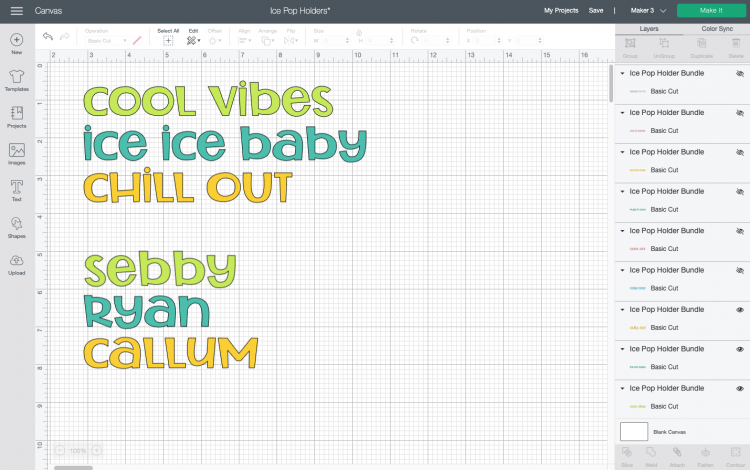
- Material Note: if you are using a Cricut Maker 3, Cricut Explore 3, or Cricut Joy, you can use Smart Iron for this project. Because a brighter array of colors were desired for this project, that don't come in Smart Iron On, regular iron vinyl was opted for this and a mat used for this project.Upload the Ice Pop File to Cricut Design SpaceUpload the SVG file to Cricut Design Space (see Uploading SVG Files to Cricut Design Space if you need help). You'll see that there are ten funny sayings for your ice pop holder. Ungroup and choose the ones you'd like to use and hide the rest using the "eye" tool in the Layers Panel.You can also re-color the artwork to match your iron on, if you prefer.
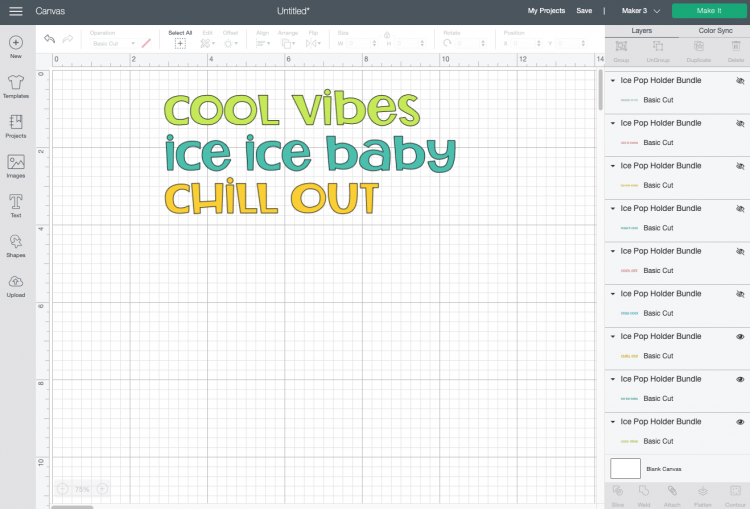
- Measure your ice pop holder for the maximum length you can use for your decal. The holders used for this project were about 8.5" long, so longest decal was made to measure 7.5".Now let's add a name! You can use any font you'd like! Type out all of your names in your font, and recolor and resize if necessary. The font Rocket Science was used for this project.
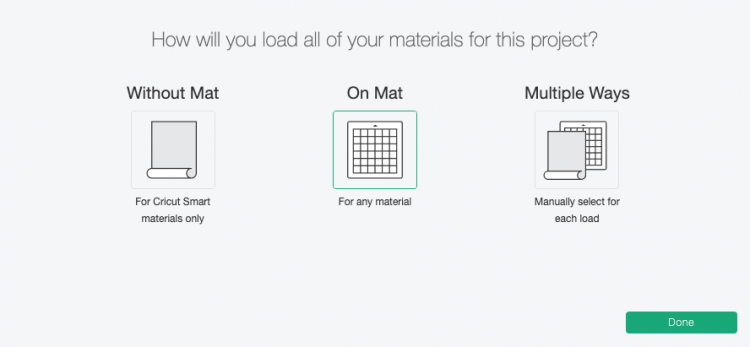
- On the next Prepare Screen, you'll see all of your words laid out on their respective mats. Make sure you click the mirror slider on each layer—if you don't mirror these words, they'll be backward when you cut them!

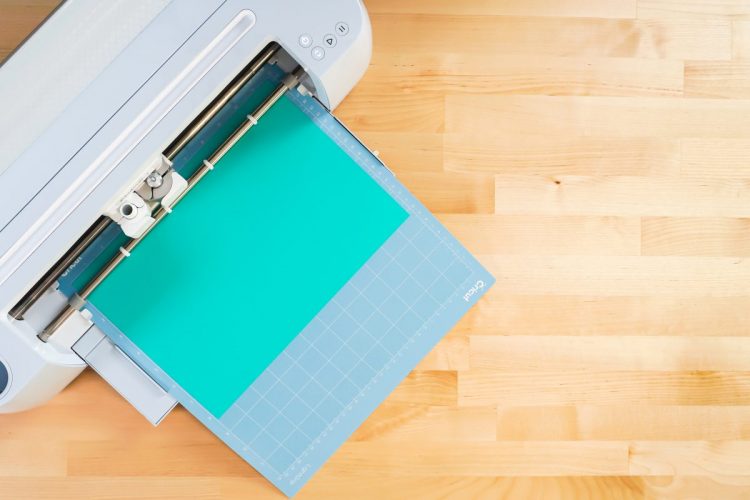
- Cut Your Iron On for Your Ice Pop HoldersIf you have a Cricut Maker 3 or Cricut Explore 3, you'll see a Mat Selection window. You can choose Smart Vinyl (matless) or on a mat if you're not using Smart Vinyl. If you have an older machine, you will not see this window.
- On the Make Screen, you'll set your material to iron on (or Smart Iron On if that's what you're using). Make sure you have your fine point blade in your machine and place your iron on with the shiny side down. Insert your mat (or Smart Iron On), and your Cricut will cut your project!
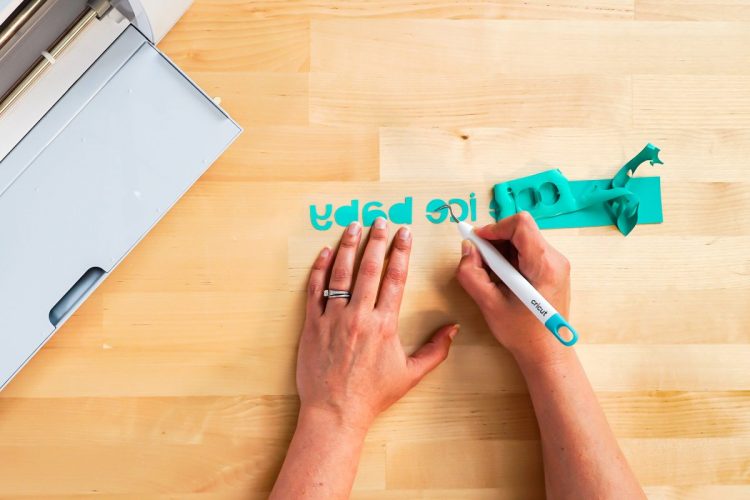
- Weed Your Iron OnNext we're going to "weed" the negative space from around our image. I have an extensive post about Weeding Iron On Vinyl, which you'll want to read—tons of tips and tricks to making it easier.
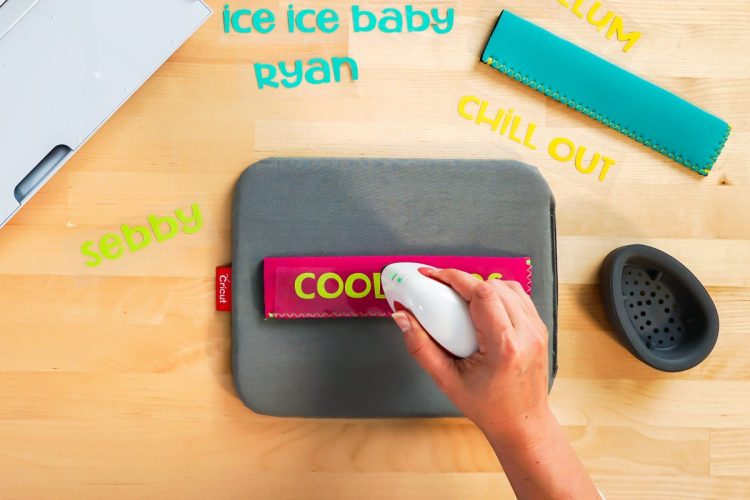
- Adhere Your Iron OnUsing iron on with neoprene is similar to most other iron on projects. Learn more about Using Iron On Vinyl if you're struggling. Place your decal on your ice pop holder, and use your EasyPress Mini or iron to adhere the iron on to the ice pop holders.
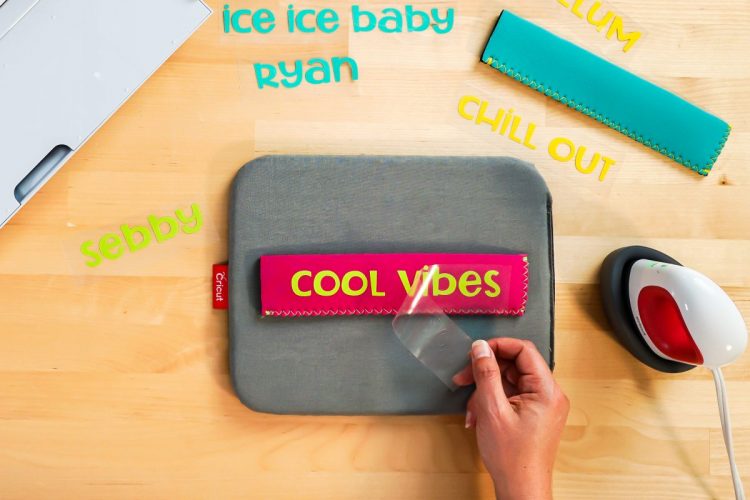
- Once it's cooled a bit, peel back the carrier sheet. Then repeat with the name on the other side.
- You're done!