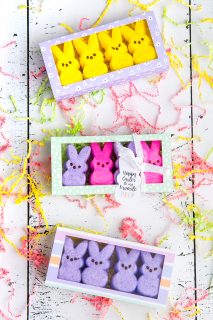
PEEPS EASTER TREAT BOX
Give your Easter Peeps a nice little home with this Easter treat box made with your Cricut Explore or Cricut Maker! Get the free SVG for this fun Cricut Easter craft, perfect for Easter baskets and spring-themed gifts.
Equipment
- Scoring Stylus (Explore or Maker) or
- Scoring Wheel (Maker Only)
Ingredients
- 1 sheet 12" x 12" cardstock or
- 2 sheets 8.5" x 11" cardstock
- 1 sheet acetate (a Cricut mat protector sheet also works well!)
- 1 sheet white cardstock
- Ribbon or twine
- Free Peeps Easter Treat Box #C279
Instructions
- Setting up the File in Design SpaceUpload the file to Cricut Design Space (see How to Upload SVG Files to Cricut Design Space for detailed information). You'll see four pieces—the box tray (top left), the box sleeve (top right), the acetate panel (bottom left, and the Peep bunny tag (bottom right).
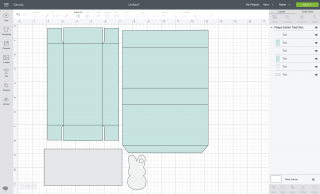
- All of the parts of the project will be grouped together, so select the image and click "Ungroup" at the top of the Layers Panel on the right. You can now work separately on each of the pieces.
- First we're going to work with the tag for the box. Select the Peep tag and use the Text Tool in the Design Panel on the left to write your text. You can use the Zoom tool in the lower left if needed. See these posts All About Cricut Design Space Fonts and Working with Script Fonts in Cricut Design Space for help manipulating your fonts.
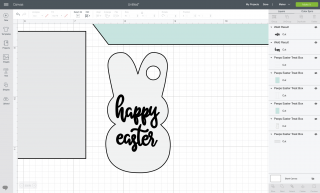
- Once you have your text, select the text and the tag and click Flatten at the bottom of the Layers Panel on the left. This will create a Print then Cut Layer.

- You can also skip this step and cut as normal if you'd like to hand-write your sentiment on the tag after it's been cut.
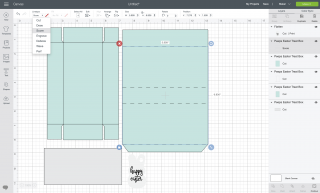
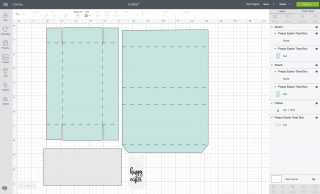
- Okay, now let's get work on the box!Find the layers that contain the score lines for the tray and the sleeve. Under Linetype in the Edit menu at the top, change these cut lines to score lines.

- Once you have the score lines changed, select a set of score lines and the corresponding box piece and click Attach in the lower left. This attaches the score line to that box layer so it will score and cut properly. You'll note that the two layers are now nested under Attach headings in the Layers Panel.You're now ready to print, score, and cut your project! Click Make It in the upper right.
- Cutting the Easter Peeps Treat BoxIn the Prepare screen, you'll see three mats. If you are using 8.5" x 11" cardstock, change the material size for the box mat before continuing.
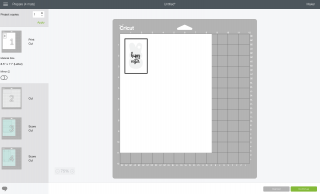
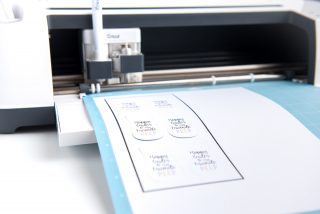
- Then click continue! In the Make screen, you'll be prompted to print your bunny tag layer (it looks a bit different in the photo below because making a bunch of these boxes at once!). Cricut Design Space will place a registration mark around the image so it can cut accurately.Once printed, place your printed image on the mat and insert into your Cricut, select cardstock as your material, and your machine will cut around the edge of the tag!
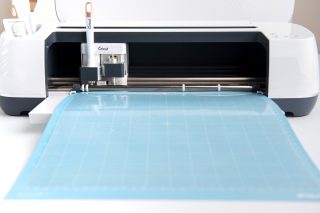
- Next up is the acetate layer. This is the window for the box. Place your acetate on your cutting mat and change your material to acetate. It is suggested to change your setting to More Pressure so that it cuts all the way through.
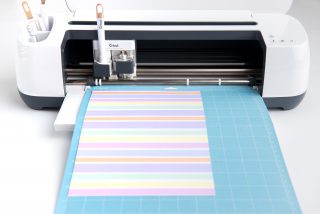
- Finally, you'll score and cut the box layers. Insert your Scoring Stylus or Scoring Wheel into your machine and place your cardstock on the mat.Then your Cricut will first score and then cut your box pieces.
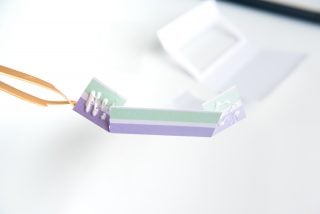
- Assembling the Peeps Easter Treat BoxFold on all of the scored lines for the box tray and box sleeve.
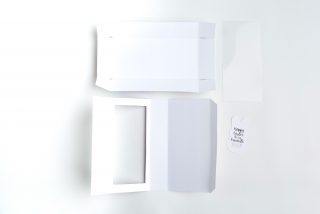
- For the treat box tray, glue the two square tabs to the end tabs to create the walls of the box. Repeat on the other side. This will create the tray that will hold your Peeps.
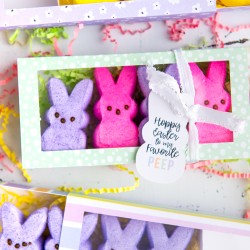
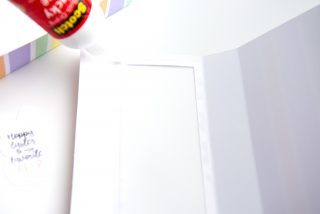
- To create the window in your treat box sleeve, glue the acetate rectangle onto the inside of the sleeve panel. Allow the window to fully dry before assembling the sleeve. Most quick-dry tacky glue is non-toxic and water based, but if you prefer to use a different food-safe glue, please do.
- Glue the tab of the sleeve to the opposite side to create the sleeve.

- Add your peeps into the treat housing box and slide it inside of the sleeve using the window as a guide to reveal the peeps. Add a ribbon or twine around the width of the box to secure the tray in place and attach the Peep tag! It's ready to gift!