HOW TO MAKE WATERPROOF STICKERS WITH A CRICUT
Decorate your water bottle or laptop with cute custom stickers! Here's how to make waterproof stickers with a Cricut, including my favorite materials and tips and tricks to get Print then Cut right!
Equipment
- Cricut scraper and a piece of cotton or felt
Instructions
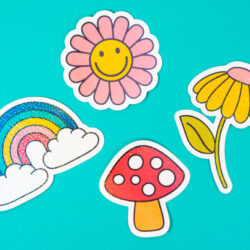
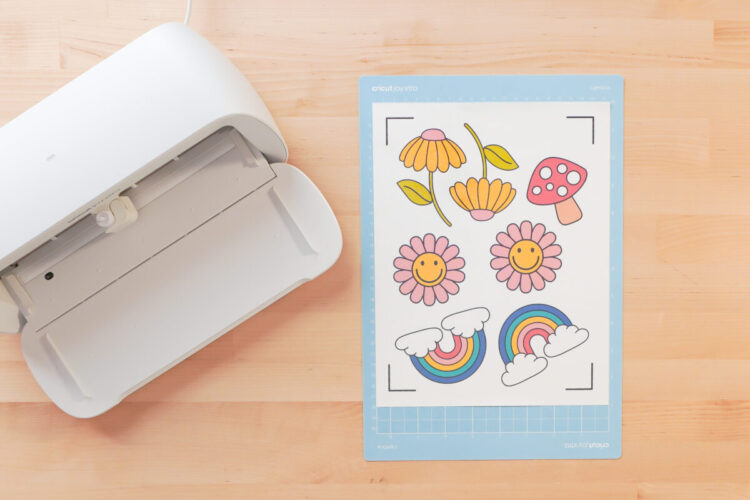
- The Cricut Printable Waterproof Sticker Set comes in a few varieties. For the purpose of this tutorial the holographic white is being used. The varieties are: White - Transparent - Holographic White - Holographic Transparent
- Setting up the File in Cricut Design SpaceSet up the file in Cricut Design Space. In this tutorial all four PNG files were changed in size to be closer to 3".
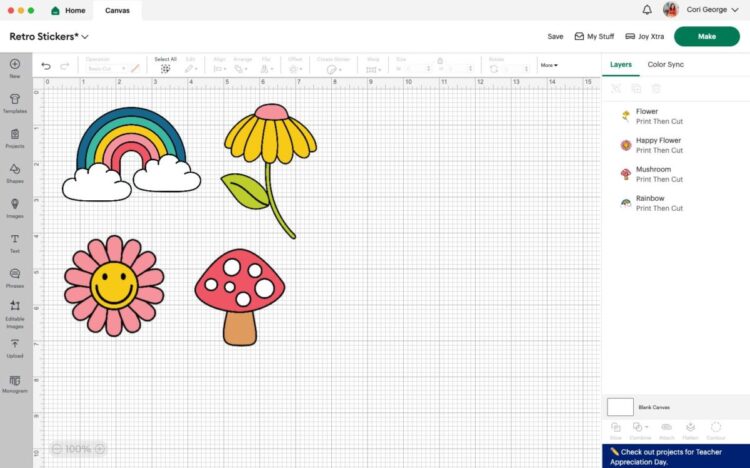
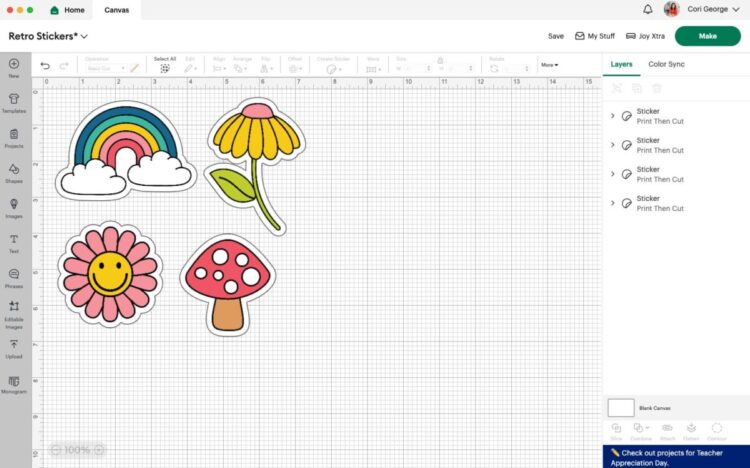
- To easily turn these into stickers, use the Create Sticker tool! Find out more in this post Using the Cricut Create Sticker Tool in Cricut Design Space. For this project the Die Cut option with a standard border was used, but there are other options to explore here!
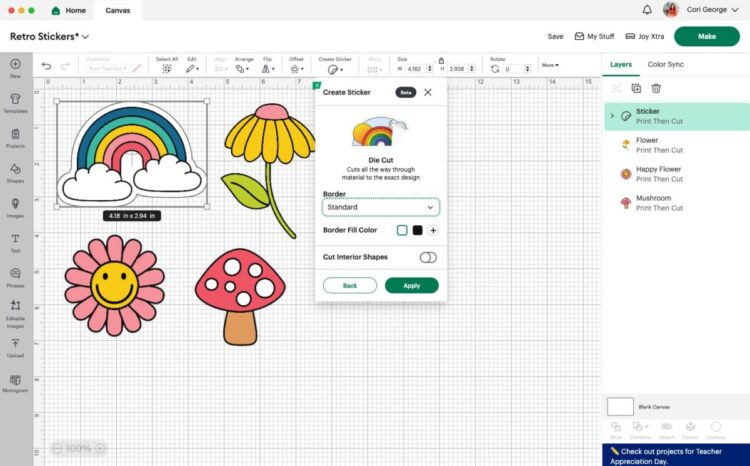
- The same option was used for all four of these stickers.
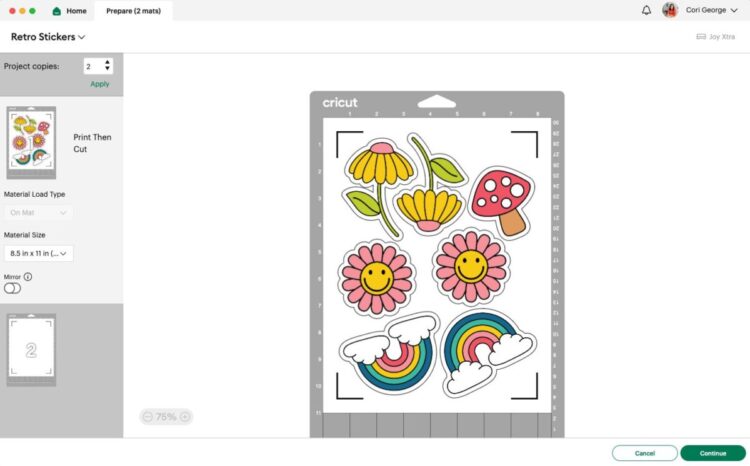
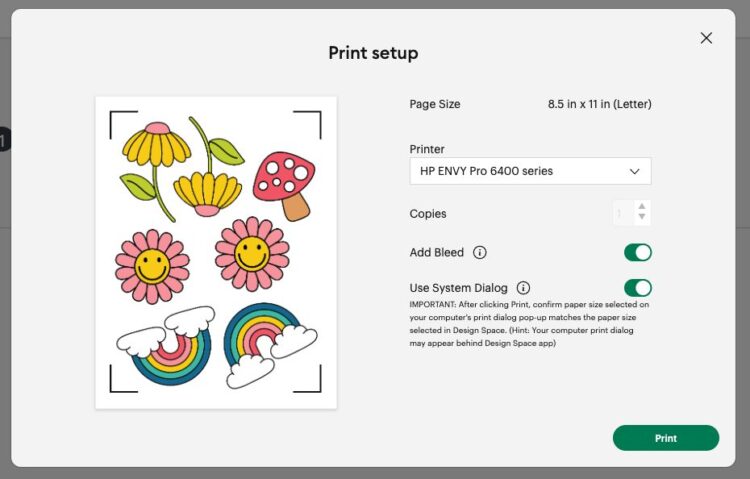
- Click on Make it! On the Prepare screen, you'll see that Design Space has used two sheets for these stickers. But you can save space!
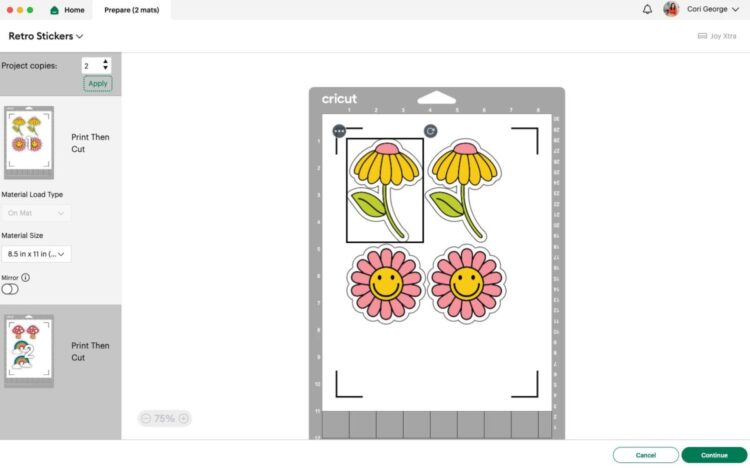
- Use the move and rotate tools (you can learn more in this post How to Fit More on a Cricut Mat and Save Material!). One of the mushrooms ended up being hidden because it couldn't fit and only a single sheet of stickers was used for this project.
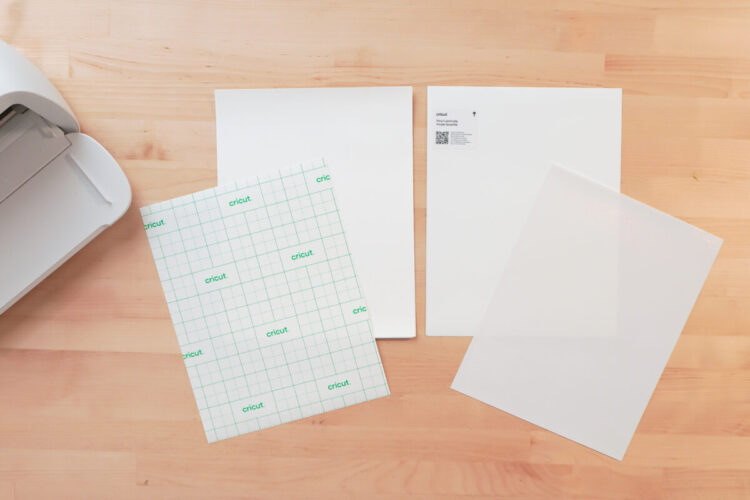
- Printing Your StickersBefore printing, take a look at the two parts of the Cricut Printable Waterproof Sticker Set. There are two different sheets. The one on the left is the printable vinyl and has the green Cricut grid on the back. The other one is the vinyl sheet that makes the stickers waterproof.
- Then click Continue and you'll be prompted to print your image. Insert a sheet of the printable vinyl (with the green background) into your printer. Keep the Bleed checked and the Use System Dialog checked.
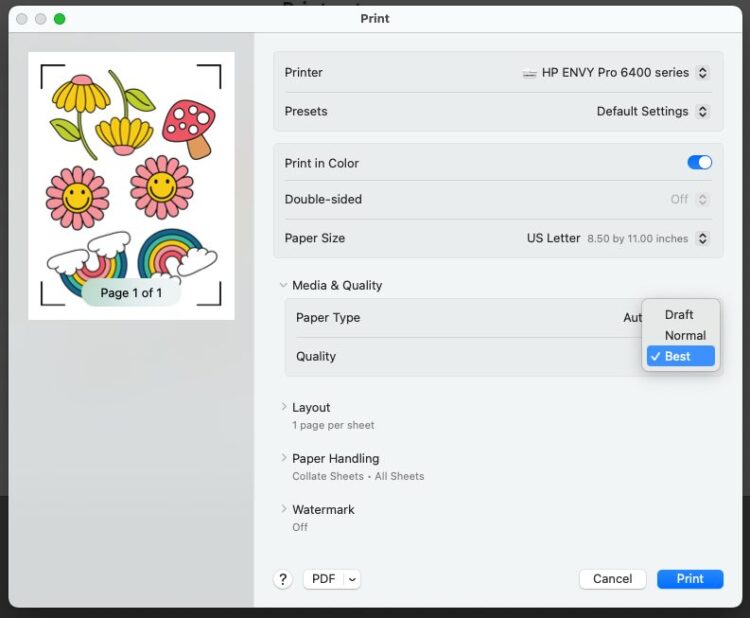
- This will open up the System Dialog Box. On a Mac, change the Quality to Best. If you have a PC, change the quality to high in your printer settings.Then click Print and your image will print on the printable vinyl!
- How to Apply the Waterproof VinylNow you need to apply the vinyl on top of the printed sheet—this is what will make the stickers waterproof.At the top of the waterproof vinyl, there is a strip. Peel off the strip.
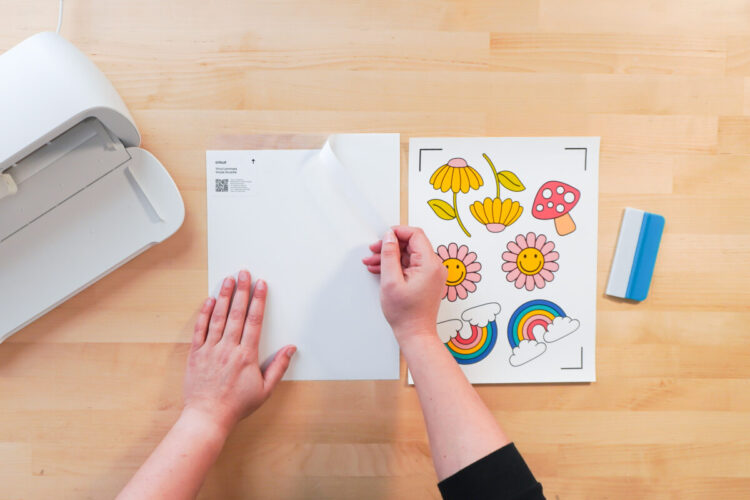
- The area where you removed the strip will be sticky. Carefully line it up with the edge of your printed sheet. Press down to adhere.
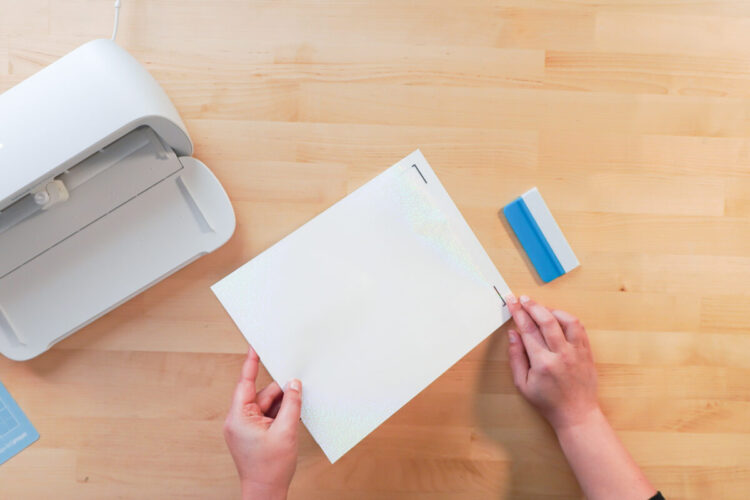
- Then flip the vinyl up and start to peel the backing away from the rest of the sheet. As you do this, use the squeegee to press the vinyl into the printed sheet.
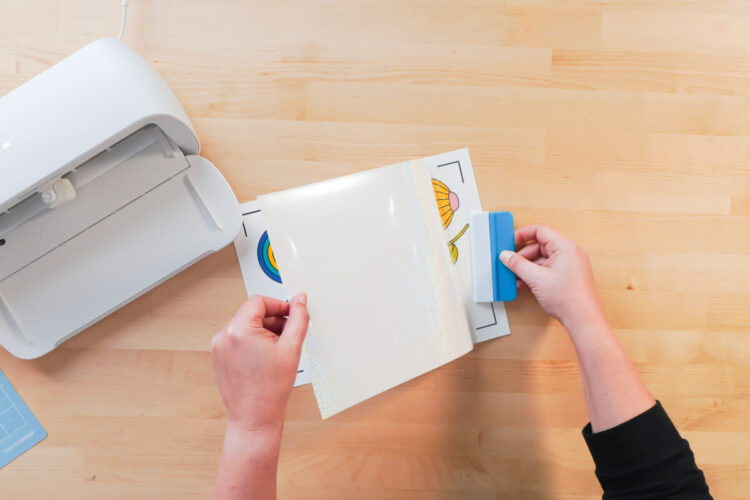
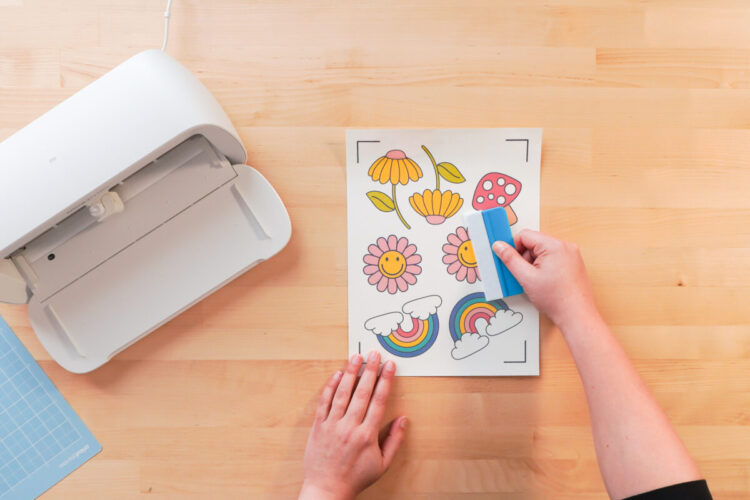
- Then use the squeegee to fully press the waterproof vinyl onto the printed sheet.
- Cut the Stickers on the CricutNow cut the stickers!Back in Cricut Design Space, choose your material. All of the Printable Waterproof Sticker Set options mentioned at the beginning of this post are available as options.
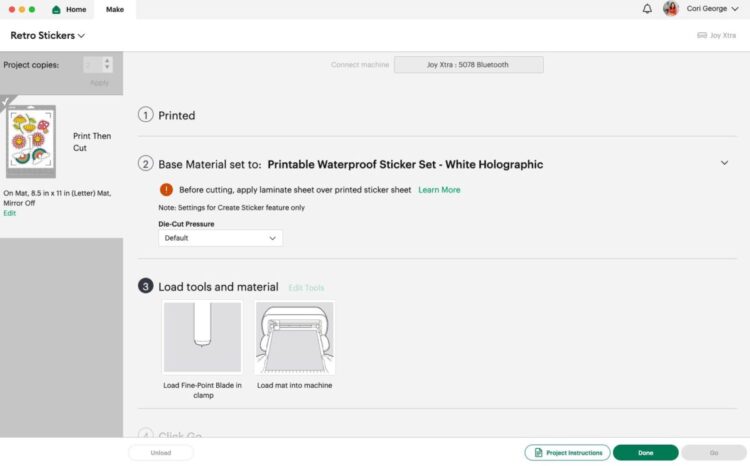
- Place your printed sheet on a Cricut cutting mat.
- Insert your mat into the machine and your Cricut will cut your project!
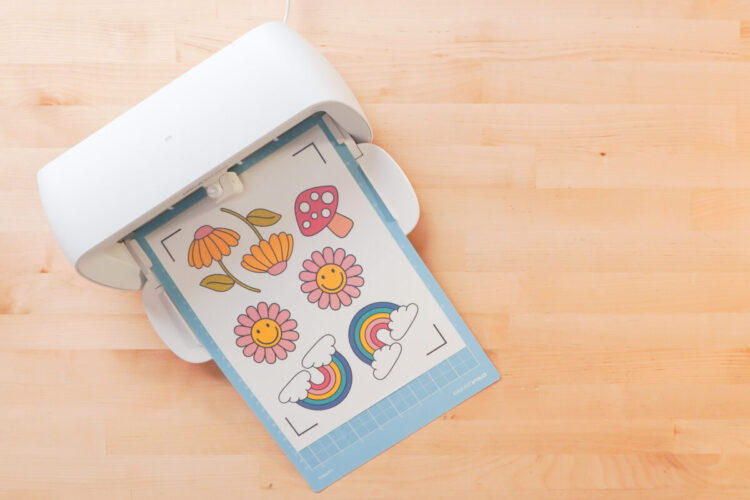
- In this project, because die cut stickers was chosen in Design Space, the stickers cut all the way through the backing material. If you choose kiss cut stickers, then your stickers will just cut through the top layer, leaving the backing material in tact.
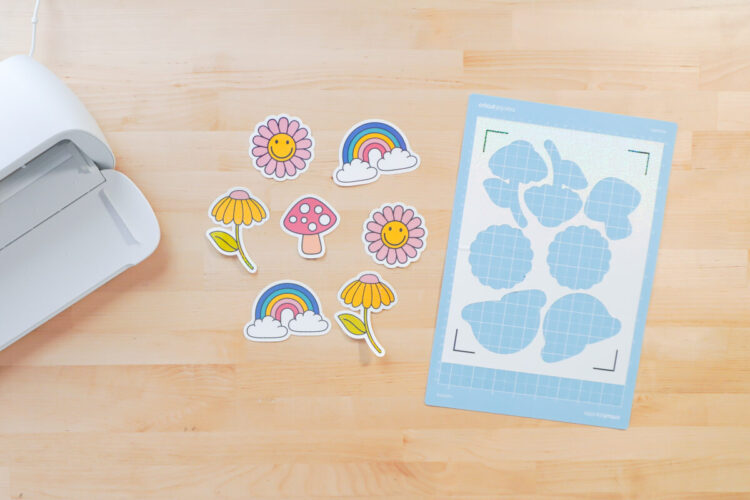
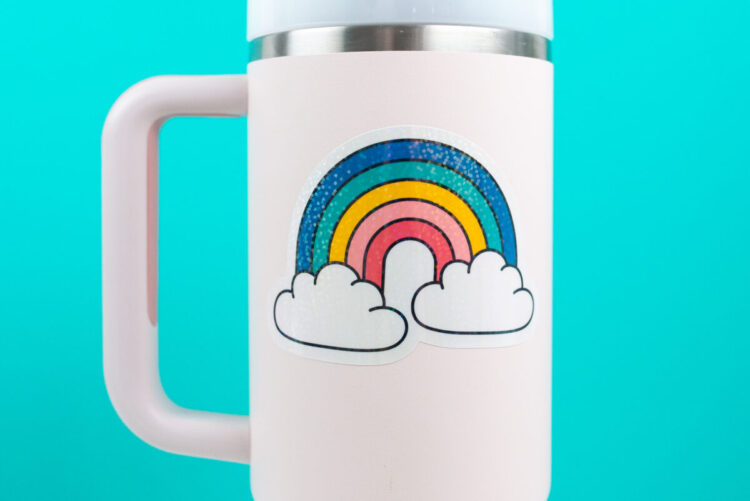
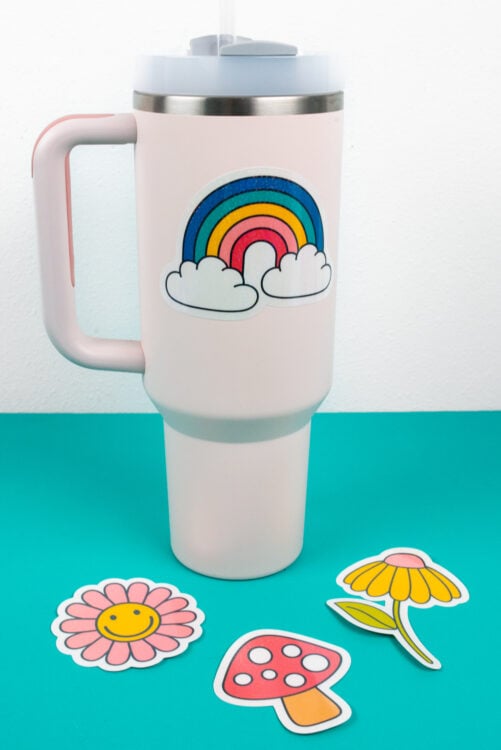
- Love the holographic look of these stickers! They shimmer and shine in a way that's difficult to capture in a photograph. They really are so fun!If you are struggling with your cutouts being accurate, make sure you calibrate your Print then Cut!