HOW TO APPLY VINYL TO AN ORNAMENT
Making custom ornaments with your Cricut is easy, but how do you apply vinyl to an ornament without wrinkling? Here are my best tips and tricks for making the perfect DIY ornament.
Ingredients
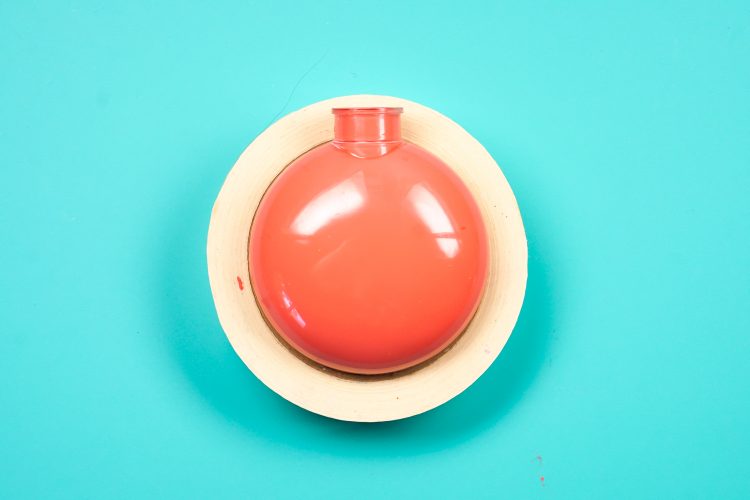
- flat disk ornament or
- flat globe ornaments either plastic or glass
- glitter vinyl or
- regular adhesive vinyl
- two design space files: #MDD512B9 and #MF762560 or design of your choice
Instructions
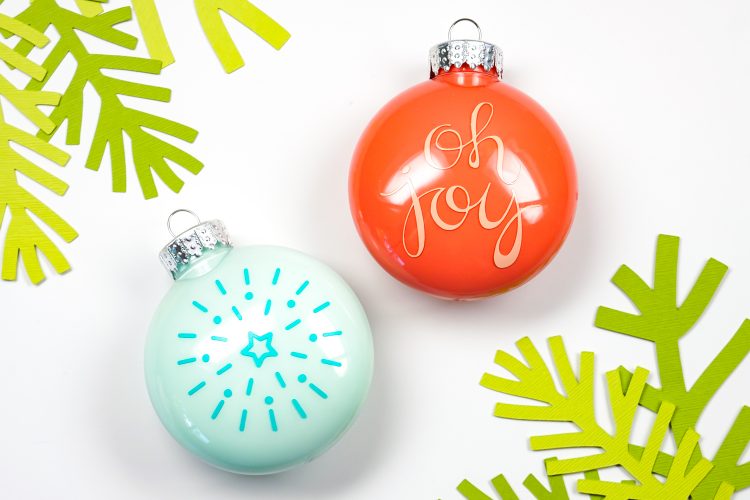
- Choose the Right OrnamentUse a little craft paint to color your ornament (seethe How to Paint the Inside of an Ornament tutorial), but you can also use crinkle paper, wedding invitations or baby announcements, photos, faux snow, glitter, and more.
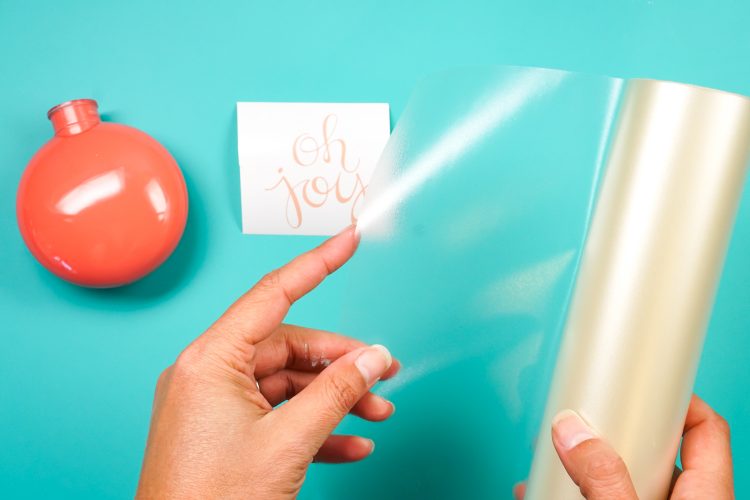
- Choose the Right DesignPicking the right design for your ornament can make or break your project. "Open-ended" designs are preferred, meaning there aren't a lot of loops (like the letter "O"). Circles are just hard to place on a round object, because...science or math, or something. Small loops are fine, but big loops are harder. The font Tingler is a favorite—there are no loops (it's for stencils, but works great in this case too).For this project two design space files were used: #MDD512B9 and #MF762560.
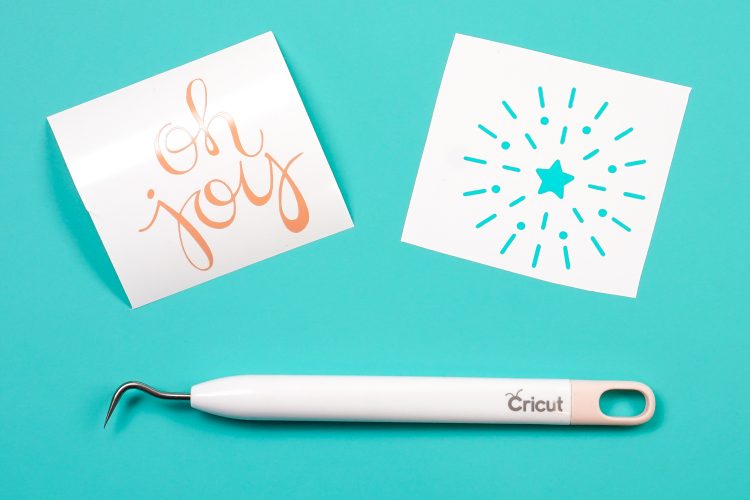
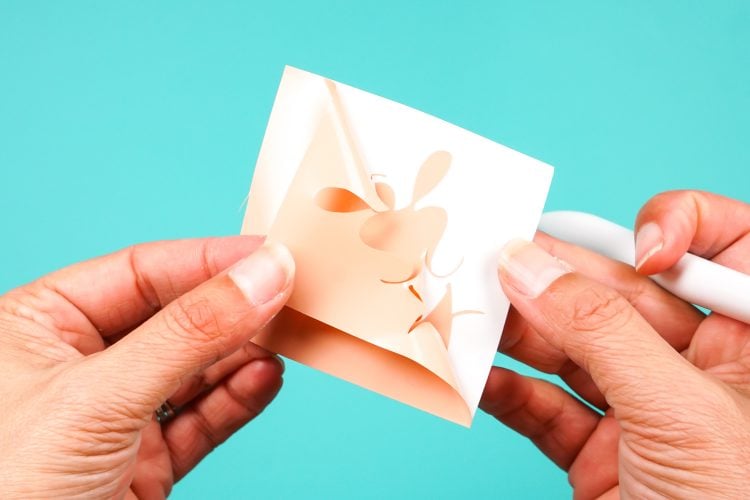
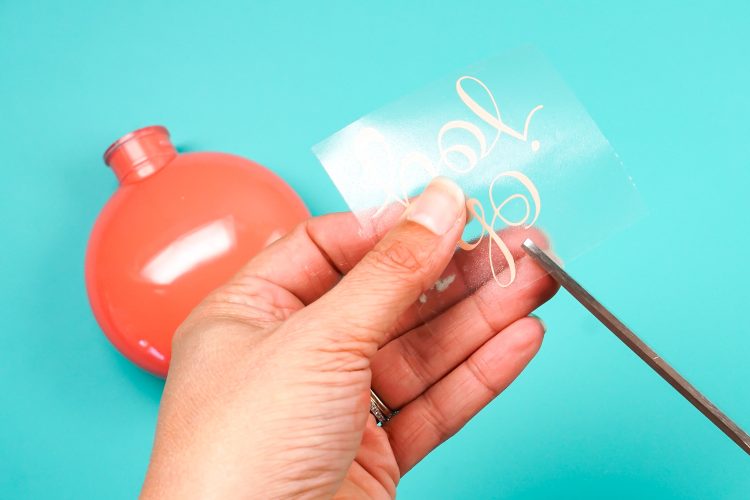
- Choose the Right VinylChoose either glitter or regular vinyl and cut your designs with your Cricut machine.Once cut use your weeding tool and remove the negative parts of the design.
- Secure Your OrnamentThe last thing you need is your round ornament rolling around your table as you're trying to apply your vinyl. Use this go-to method of using a tape roll—just set the ornament in the roll and it will be more stable when you're applying your vinyl. This is more important on a full sphere than a disk, but if you find it helpful, go for it!
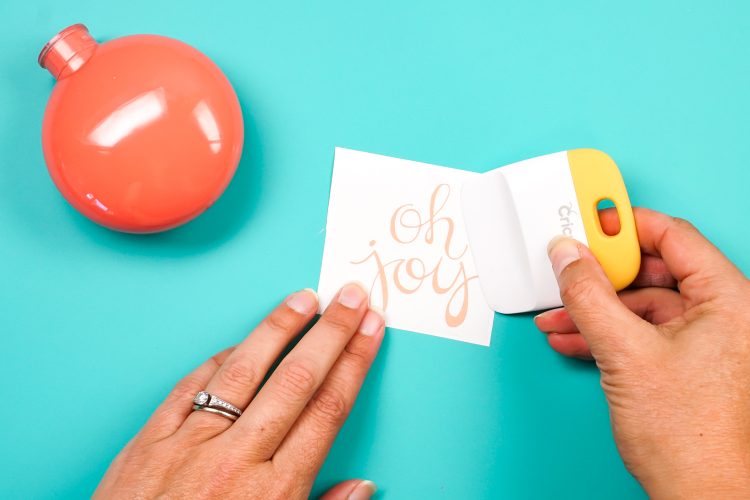
- Use Transfer TapeUse transfer tape to move your vinyl from the backing sheet to the ornament.
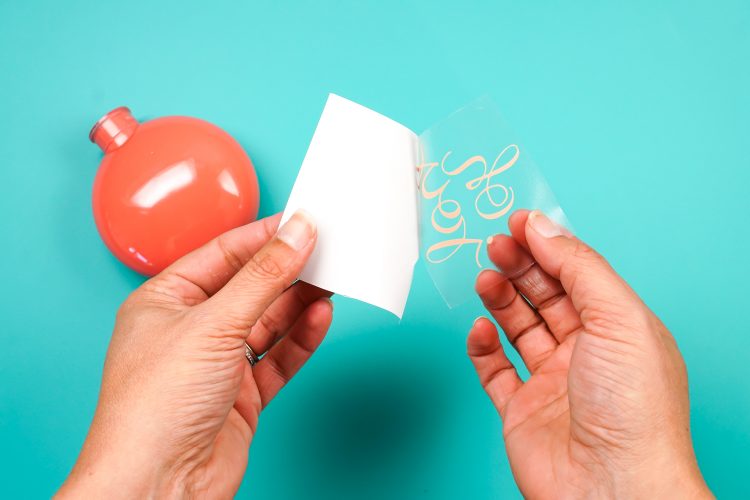
- Clip Your Transfer TapeBecause you're working with a curve and transfer tape and your design are flat, cut slits around the edges of your transfer tape. This allows you to work with the curve of the ornament better.
- Apply Vinyl From the Center OutStart in the center of design and work toward the edges. Starting from one side is a recipe for disaster. You can also use the Hinge Method, if you prefer.
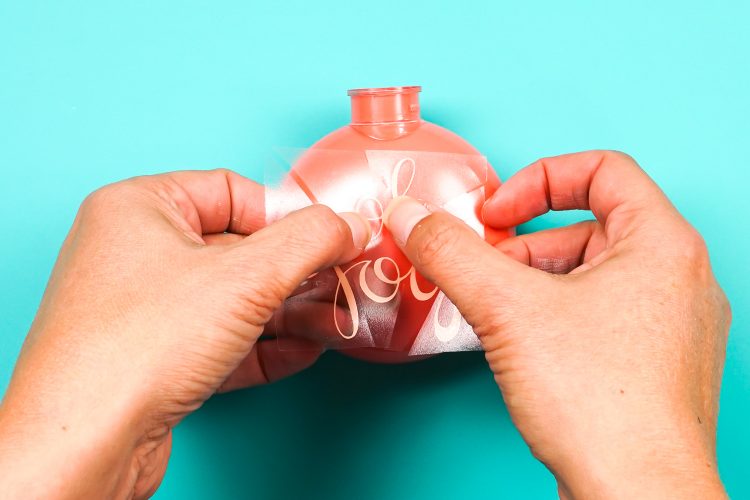
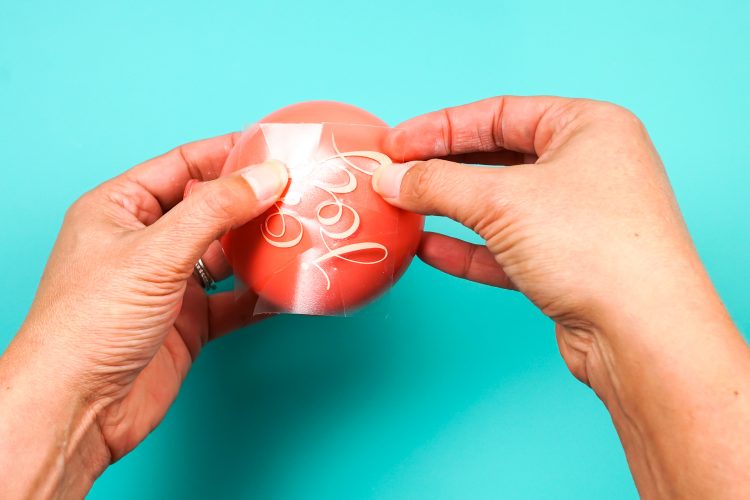
- Don't Burnish Until You're HappyTry to keep from pressing the vinyl really hard until you're happy. Vinyl likes to stick to ornaments—Waiting until you're happy to really press everything down allows you to adjust if needed. Once you're happy, press down the vinyl and peel back the transfer tape!
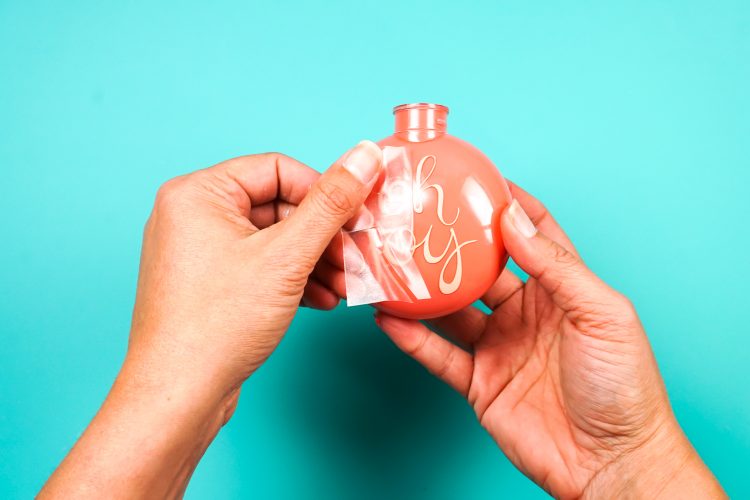
- Fixing Bubbles and BumpsRepeat: Bubbles. Will. Happen. Working with a flat material on a curved surface is difficult and most projects will find you with places your vinyl didn't adhere perfectly. Here are a few ways to fix bubbles and bumps.The Splice MethodIf you have a thin strip of vinyl that has a bump, you can use a craft knife to actually cut the vinyl, allowing the two ends of the strip to overlap a bit. The Lift MethodThis is the preferred method for most bumps. Use your weeding tool or tweezers to carefully work under the vinyl, lifting it up so you can re-apply it properly.The Pin MethodIf you have bubbles (vs. bumps), you can use a pin to prick a little hole in the bubble. Over time (not right away), the bubble will settle.The Aw-Who-Cares MethodIf your bubbles aren't terrible, you can always just leave them. Sometimes they'll work their way out on their own. Sometimes they won't. But aw, who cares?