Go Fly a Kite Quilt-As-You-Go Tutorial
This Go Fly a Kite QAYG quilt block is perfect for a spring quilt! Includes the instructions to make this adorable quilt block.
Equipment
Ingredients
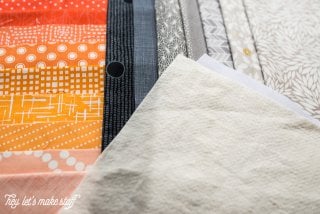
- 13" x 13" backing piece of fabric
- 13" x 13" piece of batting
- various colors of fabric.
Instructions
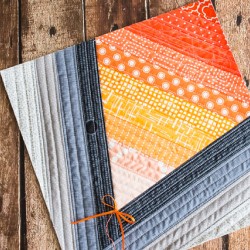
- In this block, there are three layers to your quilt sandwich, which you will quilt as you go (thus the name!). Your final block will be 12.5" x 12.5".
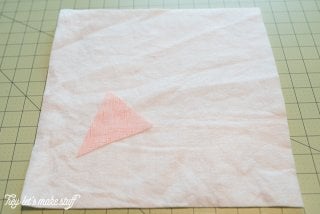
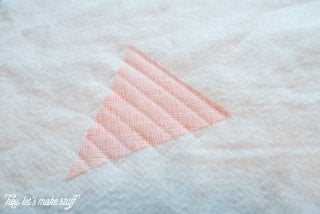
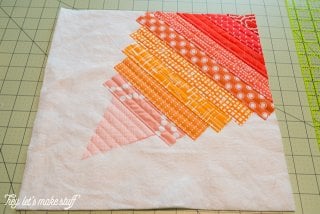
- This block is more of a technique than an actual pattern, so you can make the strips of fabric any size you'd like, and you could make this block as large or small as you want.For this project, start with a triangle. The triangle is a little taller than it is wide, this really helped to get the kite shape. Place it so the bottom corner of the triangle is pointing at the bottom left corner of the quilt block.
- Quilt the triangle directly to the fabric, right-side up. I do this by quilting across, turning my fabric, quilting four stitches up, turning my fabric, quilting back across, etc., in a sort of squared zig-zag pattern. It makes it easier than cutting thread after each pass.
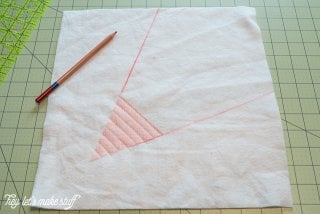
- To make sure the orange fabric covered the entire "kite" area, draw two lines emanating out of the triangle at the bottom. As you quilt on the strips, make sure they are wide enough to cover this area.
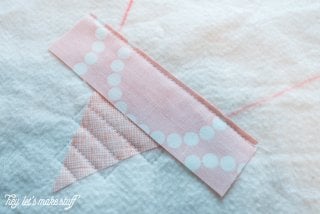
- All of the remaining strips are cut to 1.5" wide. To place the next strip of fabric, lay it face down on top of the first piece, the edges lining up. Then stitch with a small seam (1/8").
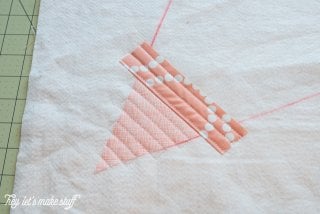
- Flip that piece up and press. Then quilt that piece to the batting and backing fabric in the same manner you did for the triangle.
- Continue with this method until you have placed all of your orange strips. Trim the edges so your block is square.
- Next you're going to start placing your black-and-white gradient. You'll notice not all of the fabrics in my original selection were used. It is used as a guide to figure out what looks best as the quilt block progresses.
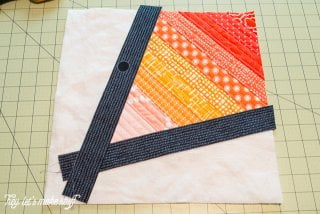
- Sew these pieces face down like you did with your other strips, then press open and quilt to the backing fabric. You want to make sure to cover all of your orange fabric raw edges when you do this.
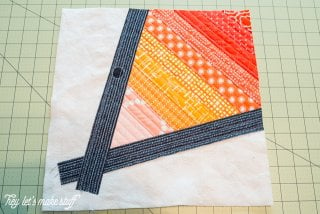
- Continue adding your gray pieces until you reach the end of your block. Square it up and trim it down to 12.5" x 12.5" and you're almost done!
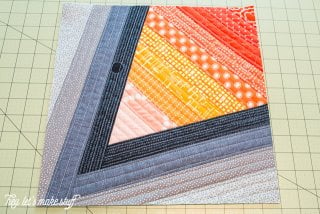
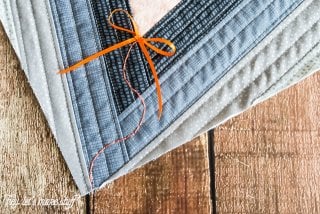
- You could leave this block as is, or you could try a little hand-stitching to make a kite string. Add a bow (sewn on) and it's ready to fly!If you want to know how to connect these blocks (the back is ugly, so you definitely need to add another backing fabric), there are tutorials all over the internet about combining these types of blocks. I haven't used any of them myself (I usually turn my QAYG blocks into pillows or bags), so I can't recommend any tutorials personally.