
GHOST LUMINARIAS
Whether you call them luminarias or luminaries, these ghosts are a quick and easy Halloween decoration! Make these cute ghost luminarias using your Cricut and black iron on!
Equipment
- Cricut Maker or
Ingredients
Instructions
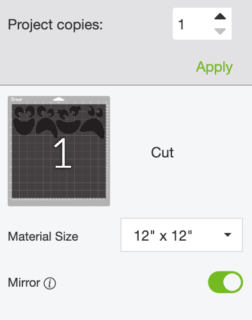
- Start by uploading the ghost SVG to Cricut Design Space. Need help uploading your file? This post will help!You may need to resize your file based on the size of your paper bags. Use the icon in the bottom left corner to resize your project.Now you're ready to cut your file! Hit Make It in the upper right.

- In the Prepare Screen, click the "mirror" option. This isn't quite as important with these ghosts (if their faces are backward, it doesn't really matter), but it's good to be in the habit of mirroring all of your iron on projects.Then cut your project in black iron on vinyl. Need help cutting iron on vinyl? I've got a post for that!
- While your ghost faces are cutting, turn on your EasyPress and set it to 305° and 30 seconds. This allows it to heat up while you complete the next step.Grab your weeding tool and weed off the excess iron on vinyl (everything that's not ghost face). These are big pieces, so weeding should be pretty easy. Check out these weeding tips and tricks if you're having trouble.
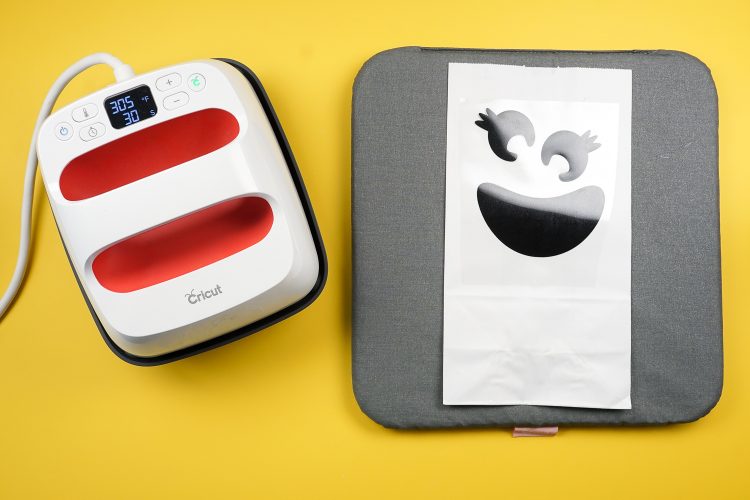
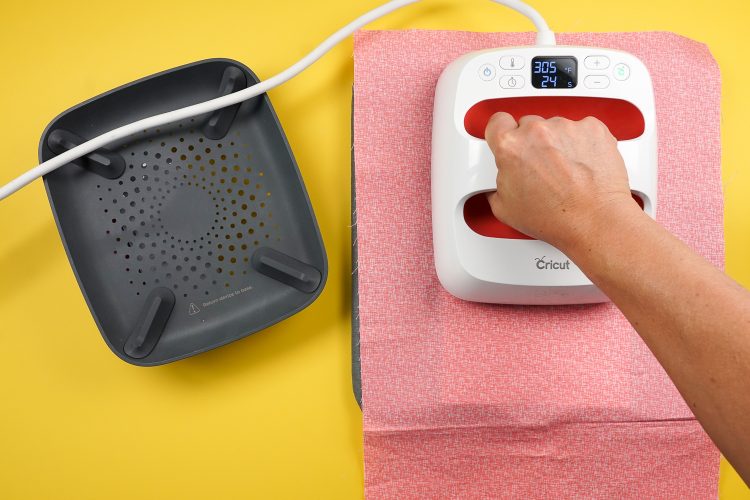
- Then place a white paper bag on your EasyPress mat, and then lay down the iron on vinyl on top. Use a pressing cloth (a piece of quilting cotton or a teflon sheet) so the hot EasyPress plate isn't directly on paper. Then press for 30 seconds.
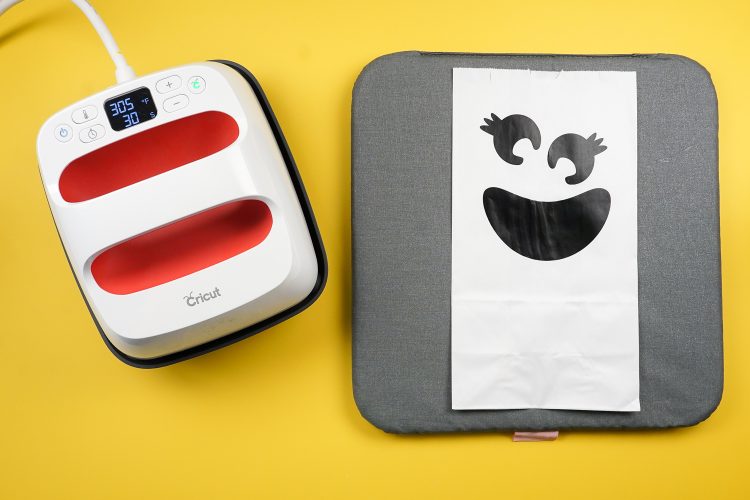
- Once you've pressed, allow to cool for 30 seconds and peel back the liner piece. Repeat with the other bags!
- When you're ready to use your luminarias, place a cup of sand in the bottom of each and nest a flameless tea light in the sand. You're done!