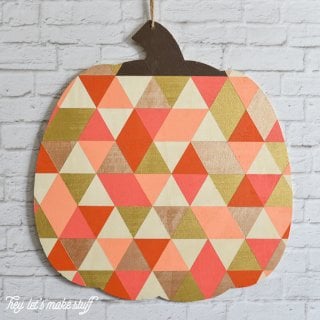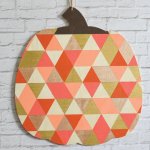
GEOMETRIC WOOD PUMPKIN
This geometric pumpkin was so fun to make! See how to create this paint treatment on whatever you might want to paint.
Equipment
- ruler with 60° line (like a quilting ruler)
- Pencil
Ingredients
Instructions
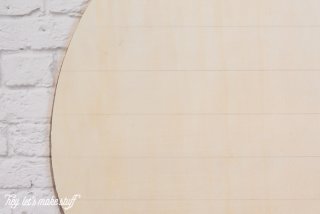
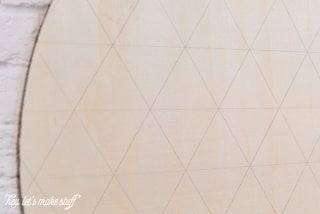
- Using a pencil, draw horizontal lines across your pumpkin (or whatever you're triangle-ing). For this project, the lines are 2" apart.
- Using the ruler, put the line marked "60°" on one of the lines you already drew. You'll see that the right side of the ruler (or left side, depending on how you lay the ruler down) creates another edge of the triangle. Draw one line using the ruler, and then draw parallel lines that are also 2" apart.
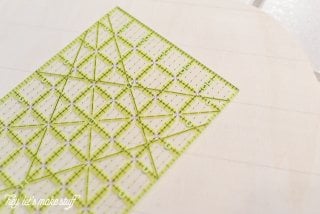
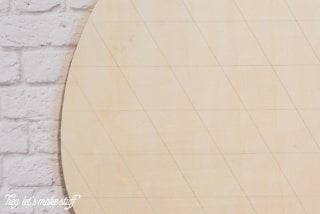
- Turn the ruler, and finish making your triangles.
- To create the geometric look, tape off a bunch of the triangles with Frog Tape, making sure to press down the edges well. For this project, two triangles were kept right next to each other so it would look even more random.
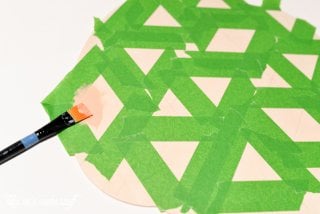
- Do two coats and let it dry.
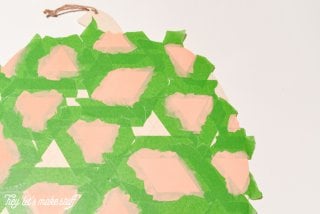
- Then peel off the tape -- this is what it looked like.

- Then tape of another bunch of triangles and paint them the next color. Two coats, let it dry, peel the tape off. And repeat, until you have all the triangles painted! For this project some of the triangles were kept with the raw wood of the pumpkin. You could paint every triangle if you prefer.