
DIY HAND WARMERS
Warm their hearts by warming their hands! These DIY hand warmers are made using your Cricut Maker and iron on. The perfect stocking stuffers for the whole family.
Equipment
- Fine Point Bade
- LightGrip Mat
- FabricGrip Mat
- Brayer optional
- Funnel
Ingredients
- One 6"x12" piece of fabric (per hand warmer)
- Coordinating thread
- Cricut Everyday Iron On
- Design Space File
Instructions
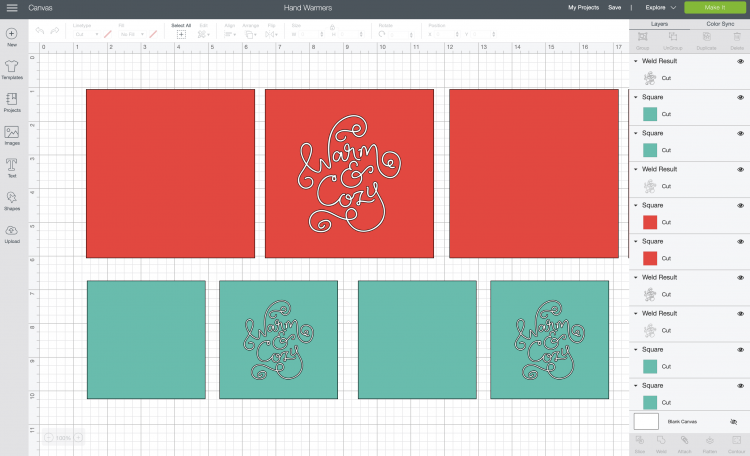
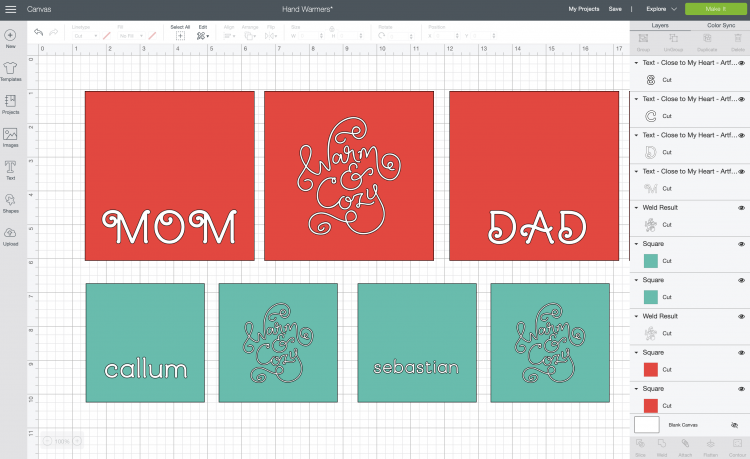
- The seam allowance for this project is 1/4".Note about fabric: when making hand warmers, you'll want to choose a fabric that retains heat. The best options for heat retention are fleece and flannel. Cricut Maker can cut both!Open and Customize the Hand Warmers in Cricut Design SpaceStart by opening the Cricut Design Space file I've created for you. You'll see there are two sizes of hand warmers—5" for adults and 3.5" for kids. You can resize these if you'd like.
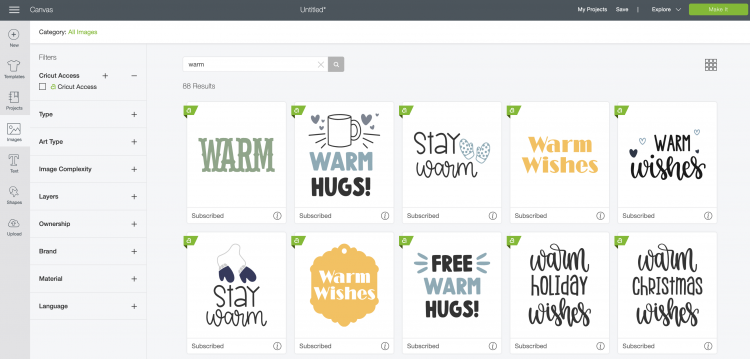
- If you'd like to choose a different design for your hand warmers, click Images on the left and search for "warm"—a bunch of cute designs come up in the results!
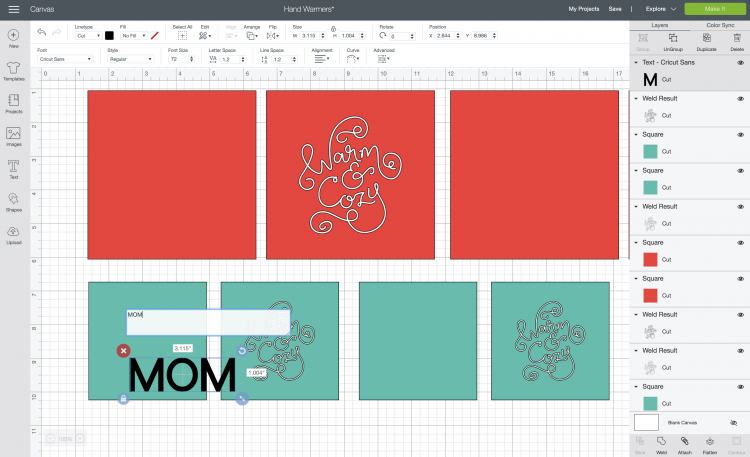
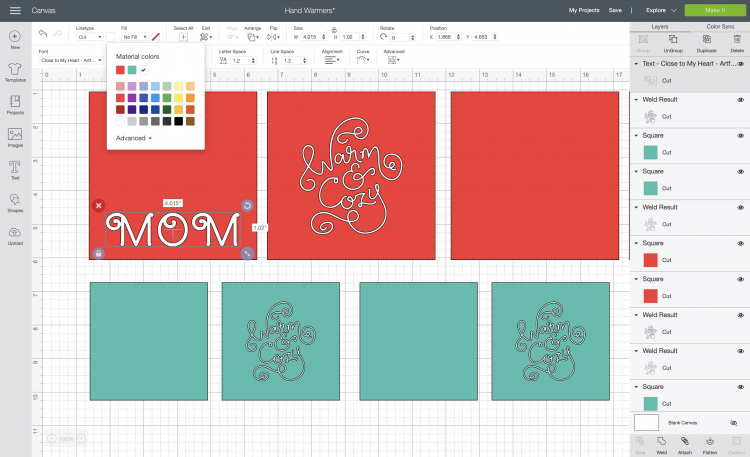
- Next, you can personalize your hand warmers. For this project, the names for our family were typed in using the font Close to My Heart - Artfully Sent. The names were then resized and colored white. When you're sizing the names, make sure you take into account the 1/4" seam allowance.
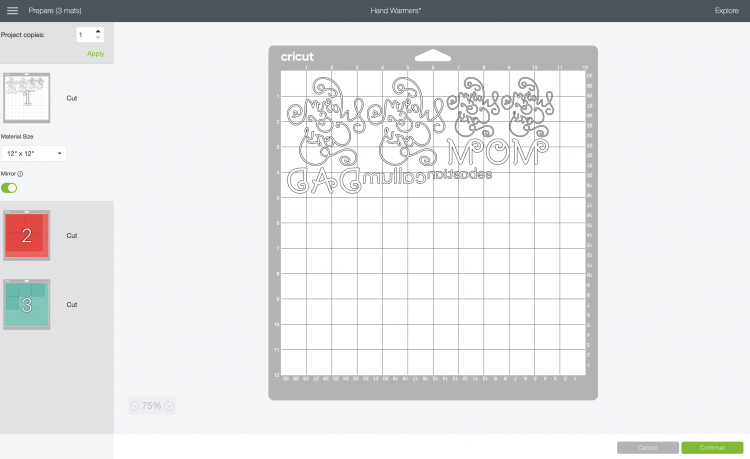
- Once you have everything ready to cut, hit Make It in the upper right. Click Make It in the upper right and you'll be taken to the Prepare Screen.Now you'll want to click the "mirror" slider for the white iron on layer. This will ensure that our decals face the correct direction when ironed onto the hand warmers.Then click Continue!
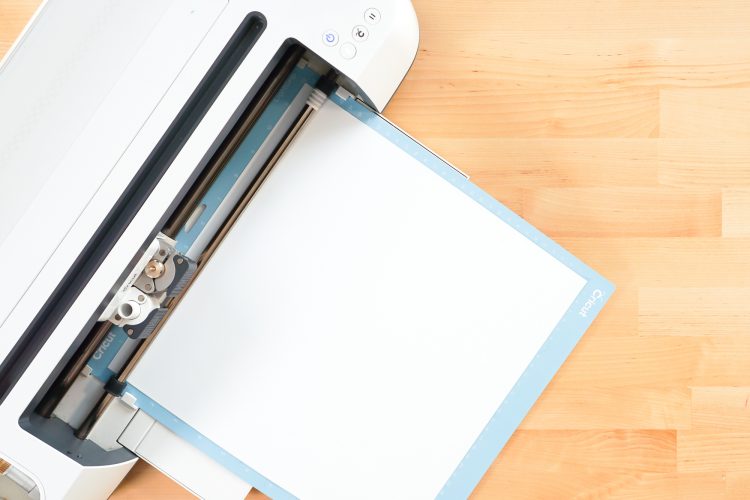
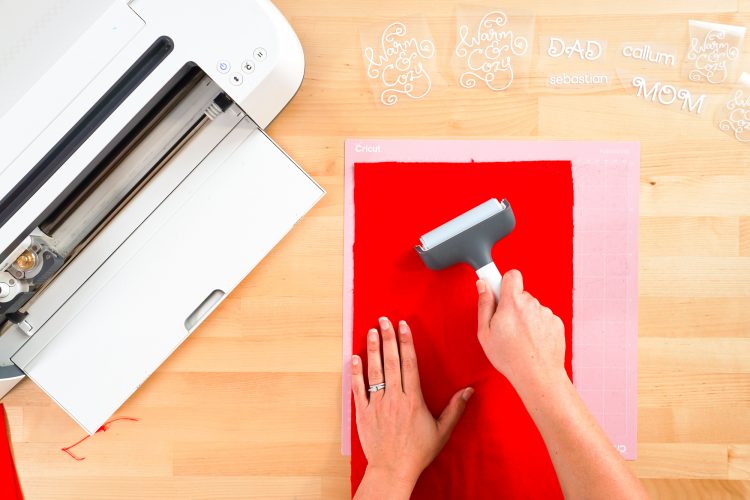
- Cut Your Iron On and FabricOn the Make Screen, you'll set your material. Depending on which layer pops up first, you'll either:Put your iron on shiny side down on the LightGrip cutting mat, set your material to iron on, and insert the Fine Point Blade.Put your fabric right-side down on the FabricGrip cutting mat (using the brayer to smooth it down if needed, set your material to the fabric you are using, and insert the Rotary Blade.Make sure that you change the blade and material between cuts!
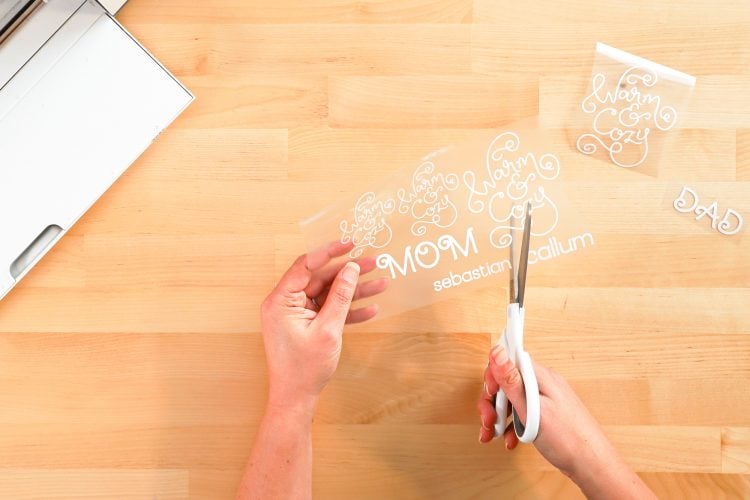
- Weed Your Iron On VinylNext we're going to "weed" the negative space from around our iron on images. There is an extensive post about Weeding Iron On Vinyl, which you'll want to read—tons of tips and tricks to making it easier.
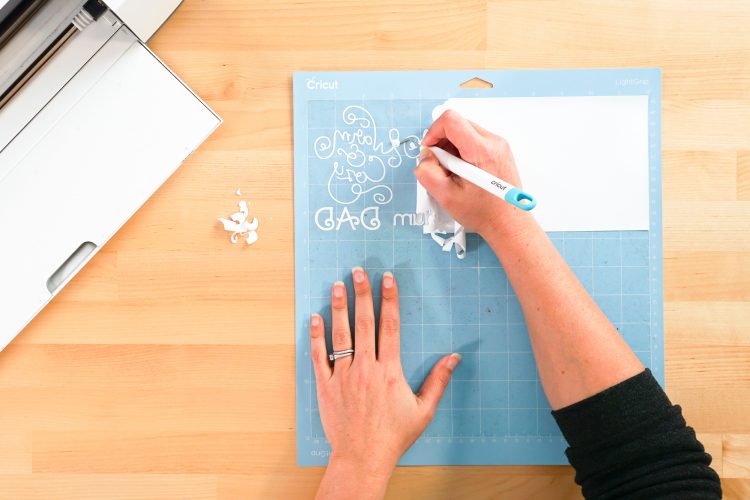
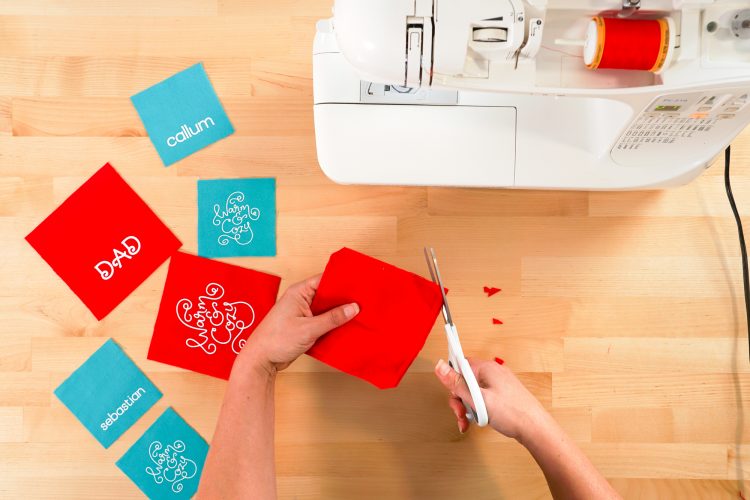
- You'll also want to use a pair of scissors to separate the individual iron on decals.
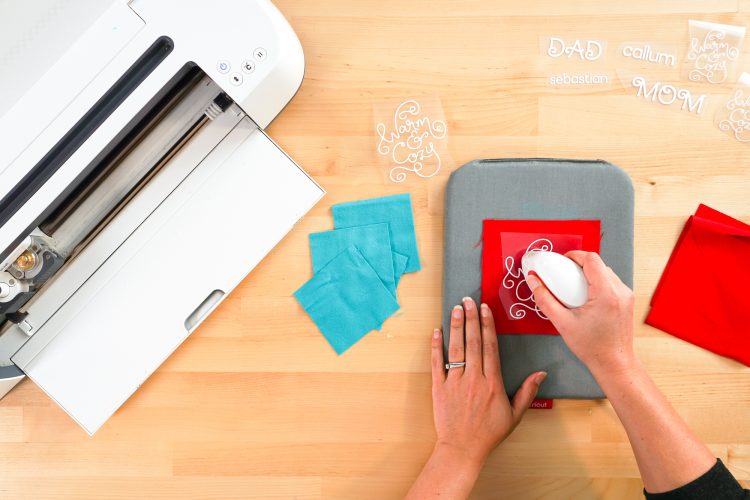
- Adhere Your Iron On VinylIt's easier to adhere the iron on vinyl before you sew your project. Place your image down on your piece of fabric, and use your EasyPress or EasyPress Mini to adhere the iron on to the fabric. Make sure you remember there is a 1/4" seam allowance.
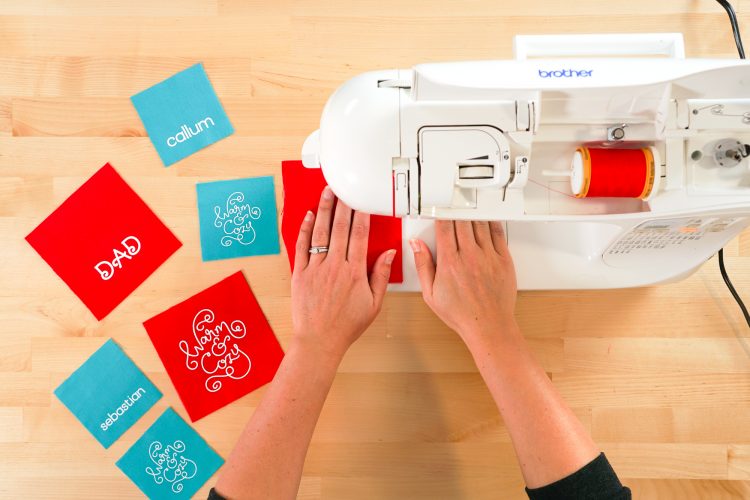
- Sew Your Hand WarmersTime to break out the sewing machine! Place your two pieces of fabric right sides together, sewing around all all four edges, leaving a gap of about 1.5" on one side for turning and filling your hand warmer.
- Clip the corners.
- Turn your hand warmer right side out and press (the Cricut EasyPress Mini works so well for this!). You may want to cover the hand warmer with a piece of cotton fabric to protect the iron on vinyl.

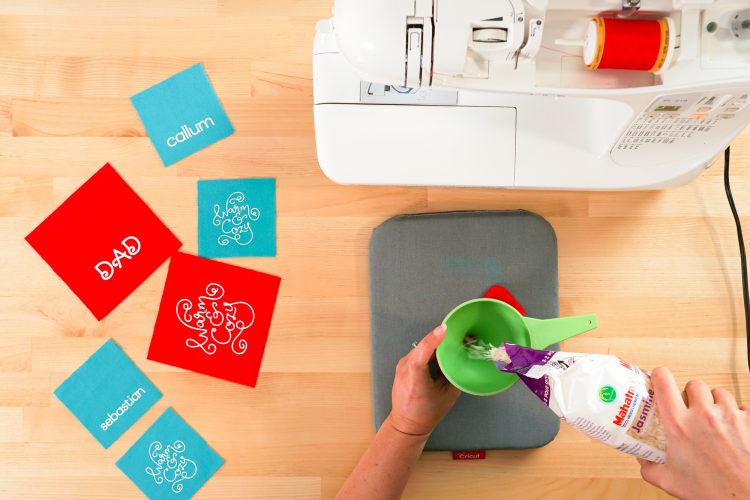
- Using a funnel, fill the hand warmer with rice.
- Then tuck the edges in and pin the hole closed.
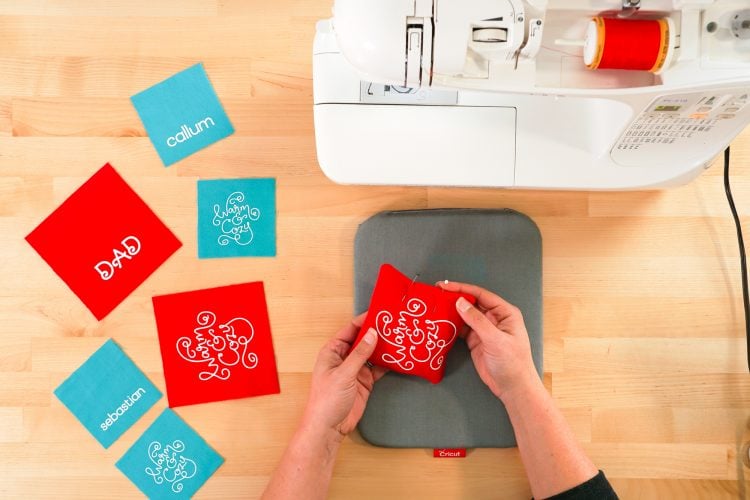
- Sew a 1/8" seam to close the hole.60 seconds in the microwave gets these hand warmers up to the perfect temperature for cold hands! Tuck in a coat pocket for a walk, or use to warm up after being outside in the cold. We've heated them up dozens of times and that iron on vinyl is still perfectly adhered! Really impressed.These DIY hand warmers also make a perfect stocking stuffer. Make one for each member of your family and show that Santa cares about warm hearts AND warm hands!
