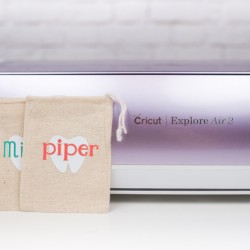
CUSTOMIZABLE TOOTH FAIRY POUCH
Make sure the tooth fairy can find your little one's tooth by making this sweet customizable tooth fairy pouch using your Cricut Explore and Cricut EasyPress!
Equipment
- Cricut Maker or
Ingredients
- small burlap or canvas pouch
Instructions
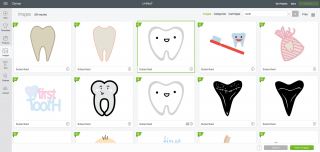
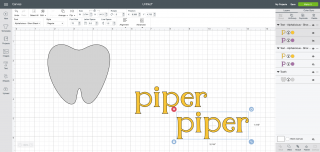
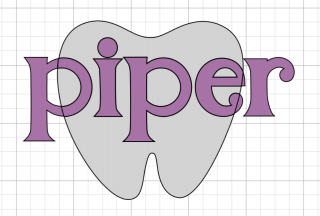
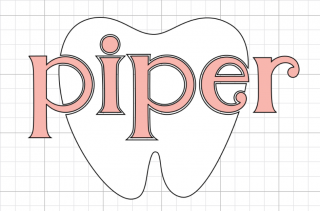
- Start by opening a blank Canvas in Design Space. Go to Images in the left Design Panel and search for "tooth." You can can also search for the file we're using by typing in #M22992CA. It's the center tooth in this screenshot:
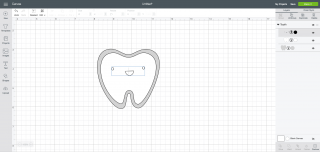
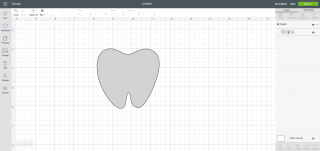
- Then, in the Layers Panel, click on the face and white tooth layers and delete them, leaving you with the gray piece. We will cut the tooth in white iron-on vinyl, but using the gray layer makes it easier to see what we're doing.
- Then, using the text tool in the Design Panel, type the child's name.

- Then we want to change this to a Cricut font that has an outline. To do this, go to the font dropdown menu and on the right side, click "Filter" and select "Multi-Layer."
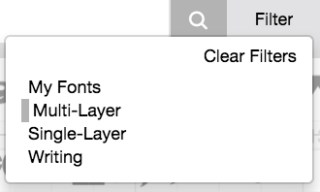
- This will narrow your choices down to just fonts that have more than one layer. Then choose one you like! I chose Alphalicious Short Stack for Piper and Cherry Limeade for Miles. Change the letter spacing if you feel the letters are too far apart. Then copy and paste a second copy of the name.
- In the Layers Panel, make visible the outline layer by clicking the "eye" icon.
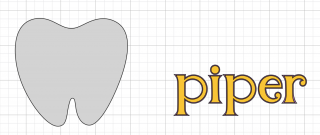
- And then delete the main font layer, leaving the outline only.
- Then select both the name and the tooth and click "Slice" at the bottom of the Layers Panel. It will slice tooth and the name.
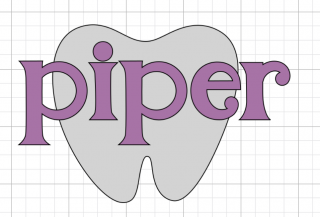
- Delete the purple letters (there will be two -- the part of the letters outside the tooth and the part of the letters within the tooth.
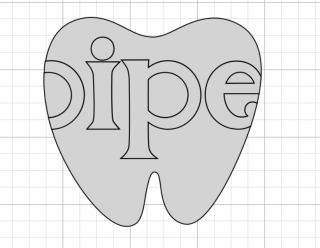
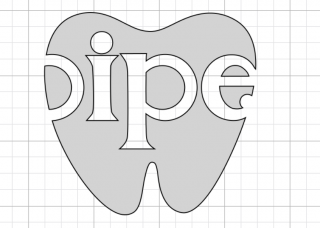
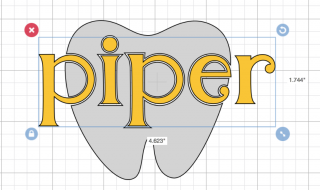
- Then delete the gray letters, leaving you with an outline of the letters.Then move the other name you copied earlier on top of the tooth to make sure it all fits together. Change the colors of the tooth and name, if you'd like, to visualize what your final project will look like. Voila! You're ready to cut!
- Cut out your two pieces of iron-on vinyl and weed out the negative space.
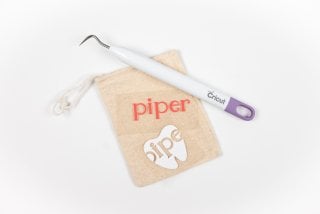
- Then, use your Cricut EasyPress or iron to adhere the tooth, and then the name, to a small pouch
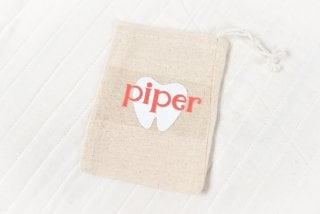

- Once you have your two pieces adhered, you're done!
