3D PUMPKIN
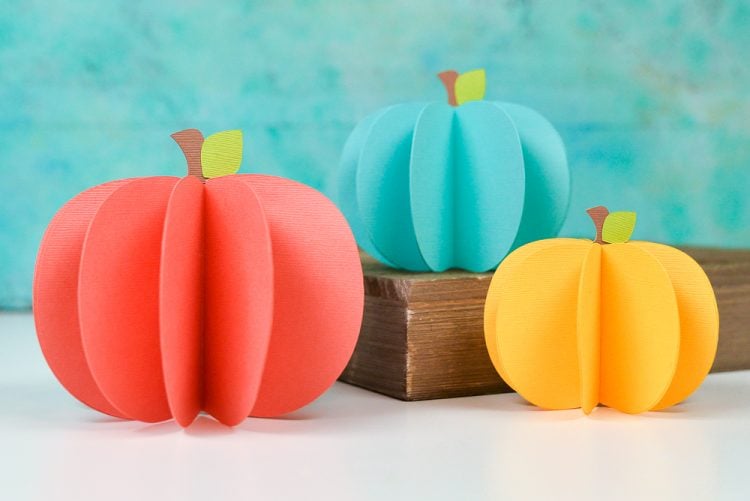
This 3D pumpkins SVG is perfect for both Halloween and fall decorating! Make these paper pumpkins using your Cricut and this free pumpkin SVG file!
Equipment
- Cricut Maker or
Ingredients
- Light cardstock in a variety of colors
- Free 3D Paper Pumpkin File #C141
Instructions
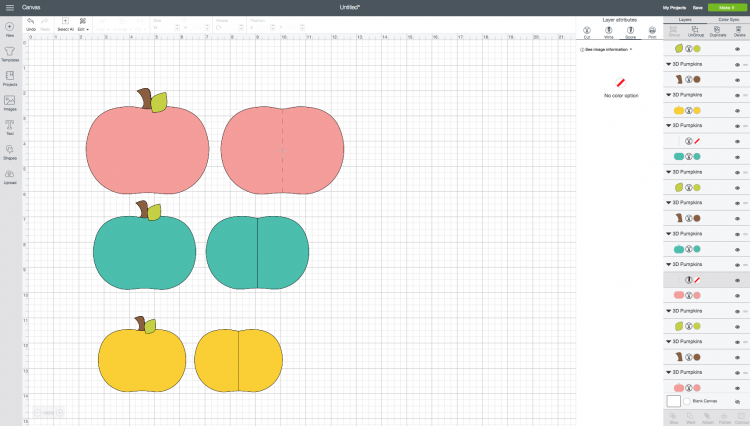
- Download the free pumpkin SVG above and open Cricut Design Space. You'll notice that there is the main pumpkin piece and the folded pumpkin piece. Because Cricut Design Space doesn't allow a score line to be created outside of the software, you'll need to change the three cut lines (the line running down the center of each folded pumpkin piece) to a score line by clicking on the line and changing it to "Score" in the Layers Attribute panel.
- Once you have the line changed to a score line, select that line and the pumpkin piece it's on top of and click "Attach" in the bottom of the Layers Panel on the right side. This will ensure that the Cricut scores that particular piece of paper in the right spot.
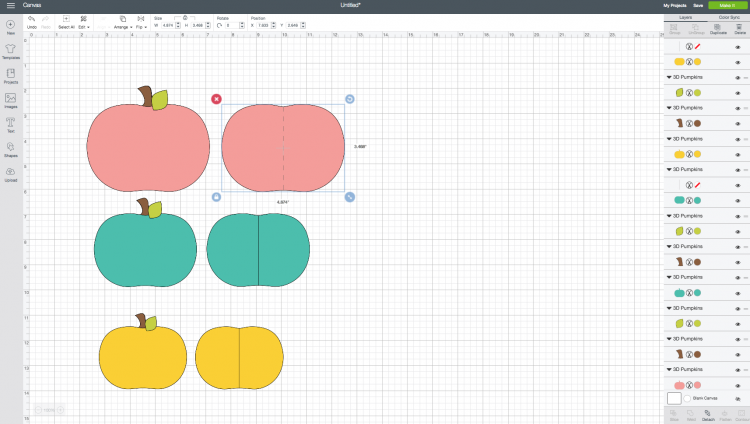
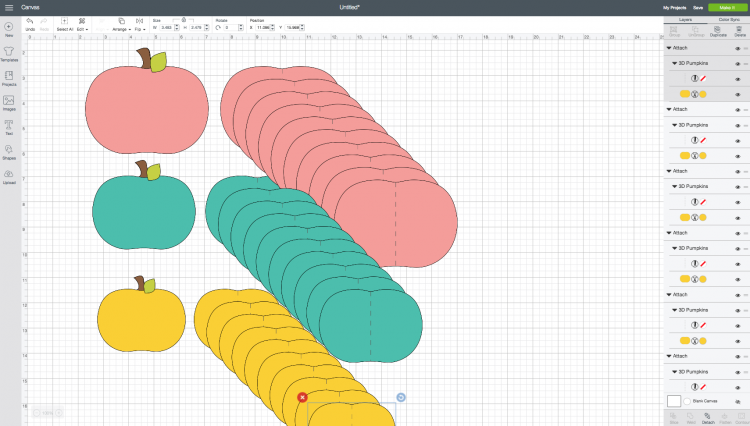
- Then duplicate that pumpkin piece so you have ten total folded pieces.
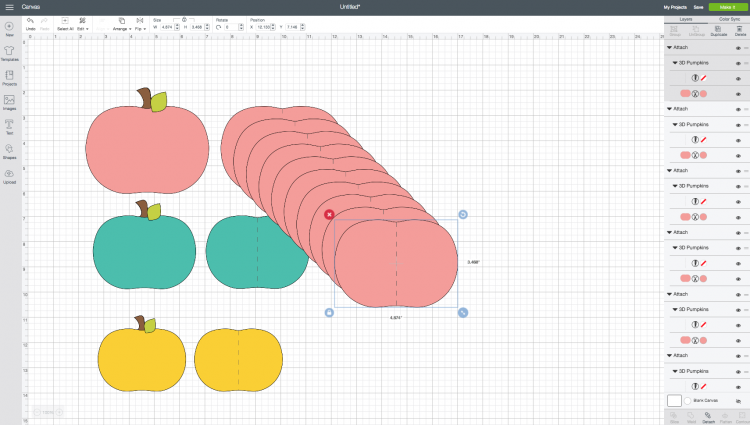
- Then do the same with the other two smaller pumpkins.
- Once you have everything cut out, fold the 10 pieces for each pumpkin along the score line. Then assemble these in the same manner as these 3D paper ornaments. I like to start by adding the stem to the main piece, and then the leaf at the end. Five pieces go on the front and back of the main pumpkin piece.
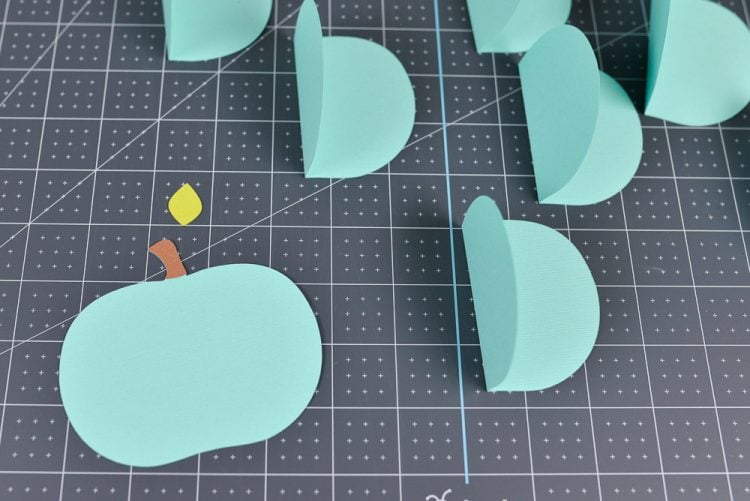
- Make sure to let the glue dry before adding each new folded piece! If not, the pressure from the folds will start to separate each layer.

- Once you have all of your folded pieces glued, add your leaf and you're done with this adorable pumpkin decor!