USING SLICE IN CRICUT DESIGN SPACE
Slice in Cricut Design Space allows you to make cutouts of different images! Here's everything you need to know about the slice tool, as well as samples to show the results of different ways of slicing different images and shapes.
Ingredients
- Design Space quatrefoil shape (#M7E72057) and an
- image of the word "Home" (#M262A3523).
Instructions
- IMPORTANT UPDATE: Cricut Design Space is adding tools in addition to Slice! Check out my post The Cricut Combine Tools: Weld, Unite, Subtract, Intersect, Exclude!Rules and Guidelines for Using SliceThere a few things to know about using the Slice tool, so double check you understand these rules:Only Works on Two Layers: Slice works on ONLY two layers. It does not work on a single layer or on three or more layers, and Slice will be grayed out if anything but two layers are selected.Unexpected Results: When you slice, you'll end up with more layers than you probably expect. Just delete any layers you do not need.Imagine a Cookie Cutter: Sometimes it's helpful to imagine the Slice process as a cookie cutter. You have your two layers and then the slice tool is like a cookie cutter cutting through the two layers. All of the resulting layers are what you would end up with if you'd used a cookie cutter.Ungroup Can Help: If you're finding that you have your images selected to Slice, but the Slice button is grayed out, you may have the wrong number of images selcted. Use the Ungroup tool at the top of the Layers panel to ungroup any images.Shapes Must Overlap: If you don't have overlapping shapes, nothing will happen when you Slice.No Un-slicing: Slicing is permanent. You can sometimes undo your Slice (particularly if you haven't saved your file yet), but you can't un-slice an image after it's been sliced.Hidden Layers: In the past, when you sliced an image, it would delete any hidden layers. But with newer updates, it seems that this bug has been fixed.
- How to Select Images to SliceIf you're unfamiliar with selecting images in Design Space, you have a few options. In the Canvas screen:Click your mouse near the items you want to select and then drag your mouse over the two items. Hold down the shift key on your keyboard and click each item you want to select.Hold down the shift key on your keyboard and click each layer that you want to select in the Layers panel.
- Using Slice to Cut Out a Shape of a Larger ShapeThe first example where you might use slice is cutting a shape out of another shape. This is the most common scenario where Slice is used. For this project we are using a quatrefoil shape (#M7E72057) and an image of the word "Home" (#M262A3523). Start by layering the two images on top of one another.
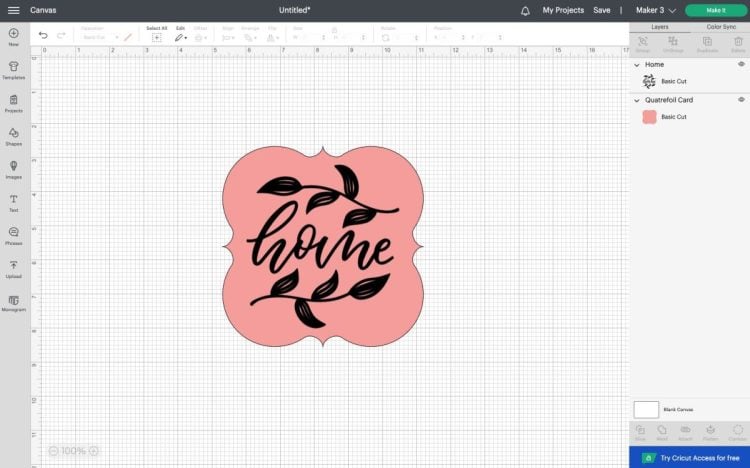
- Select both and click Slice. Your result will be labeled Slice Result in the Layers Panel on the right.

- Slicing creates more shapes that you might expect. In this instance, it creates three sliced images: the "Home" image, the cut out tag, and the leftover from the cutout tag.
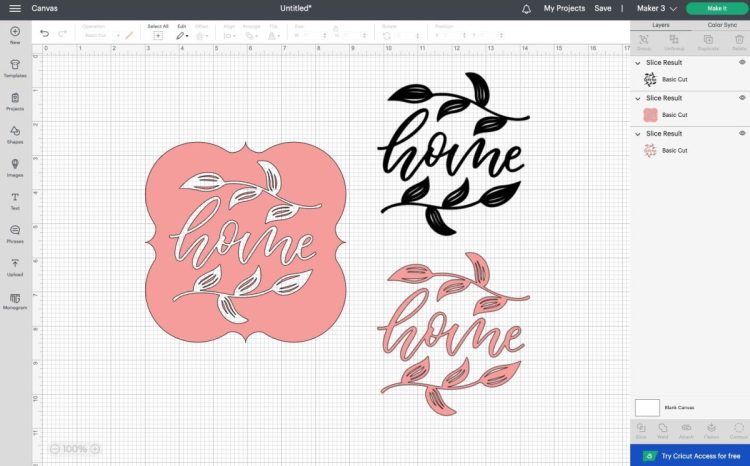
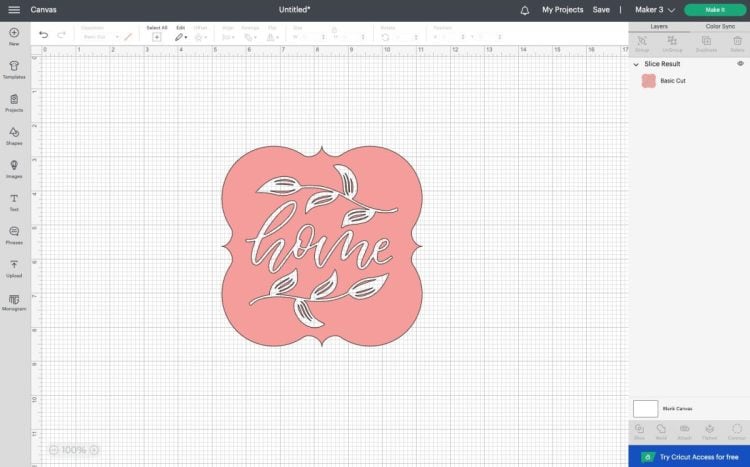
- This is probably more new images that you expected to end up with, but you can easily delete the extra pieces and keep the cutout tag.
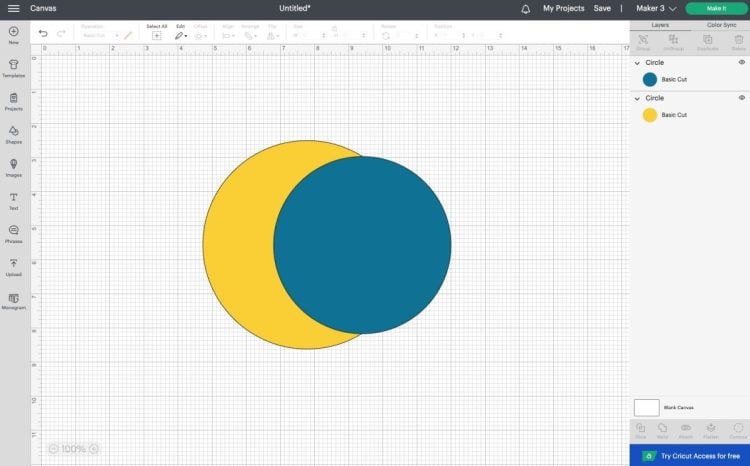
- Creating Shapes with the Slice ToolYou can use the Slice tool for is creating shapes that are not available in the left-hand Shapes menu. This is similar to how we made the snowman using the Weld tool.Let's make a crescent moon shape. Using the Shapes toolbar, insert two circles and make one slightly smaller than the other. Then overlap them—you can see that crescent taking shape on the left.
- Then select both circles and tap Slice. You'll end up with this when you break apart each individual layer:
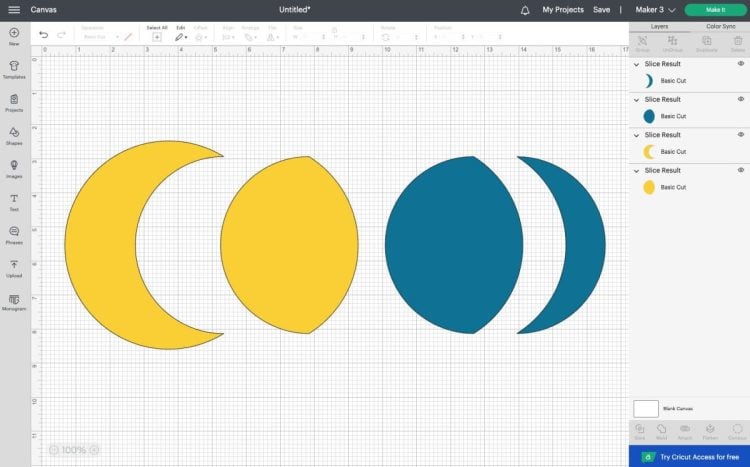
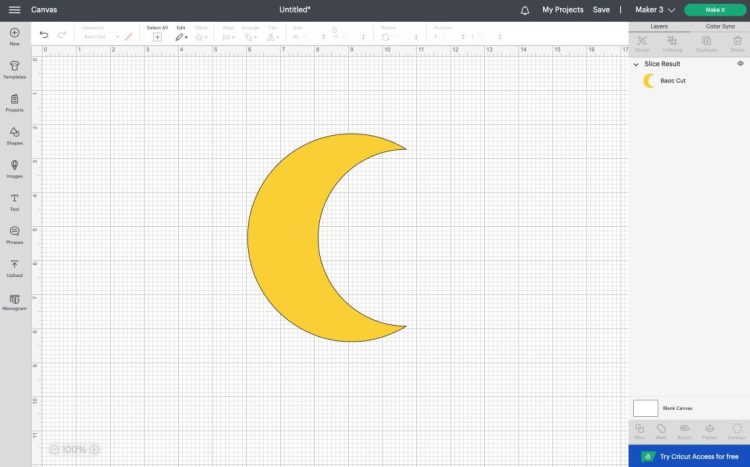
- That is even more image layers than the first example! Four new cut paths. The crescent that we wanted to make, plus two middle pieces, and the leftover on the right. Delete those extra pieces and keep your crescent. Easy, but definitely a bit confusing if you're new to the Slice tool!
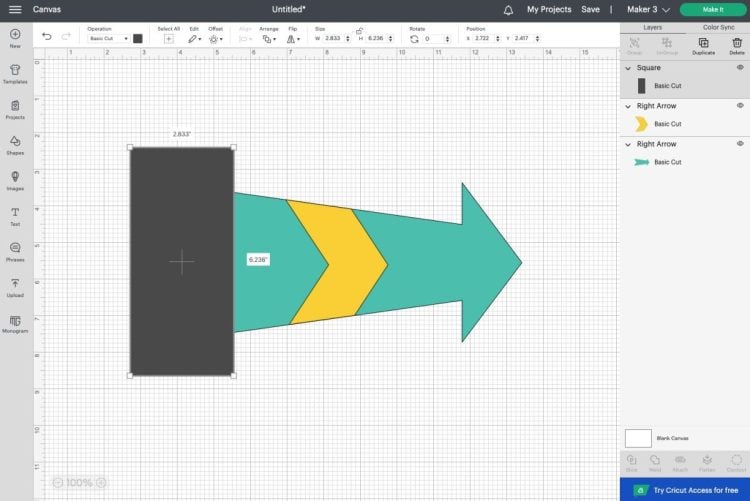
- Trimming Shapes using SliceSometimes you will want to cut off a certain part of a shape. For instance, maybe you don't want the tails on this arrow (#MFB1CE):
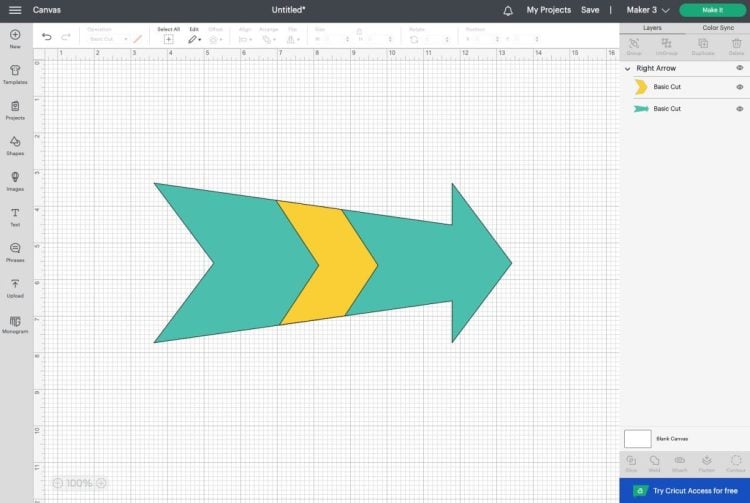
- Ungroup the arrow so that you can slice just the tails off.
- Then create a square using the Shapes menu on the left. Unlock the square by clicking the tiny lock above the size tool in the top Edit Toolbar, and then make a rectangle to cover the end of the arrow.
- Select the rectangle and the arrow and click Slice. You'll notice that the sliced images are brought to the "top" of the layers panel, which means the yellow piece of the arrow is behind the others.
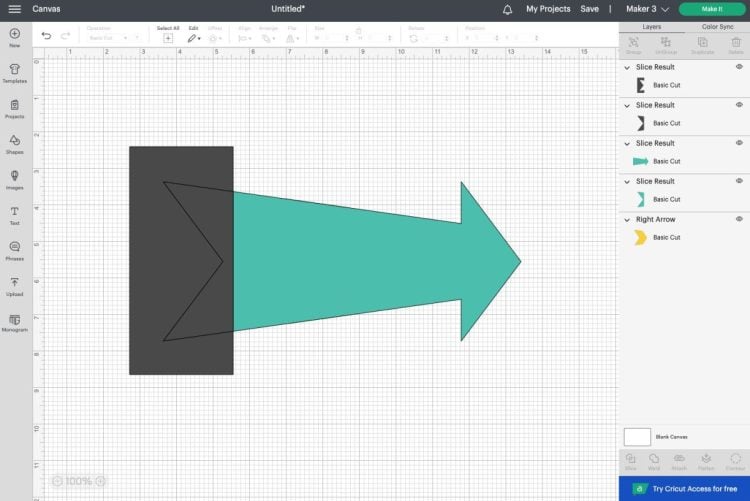
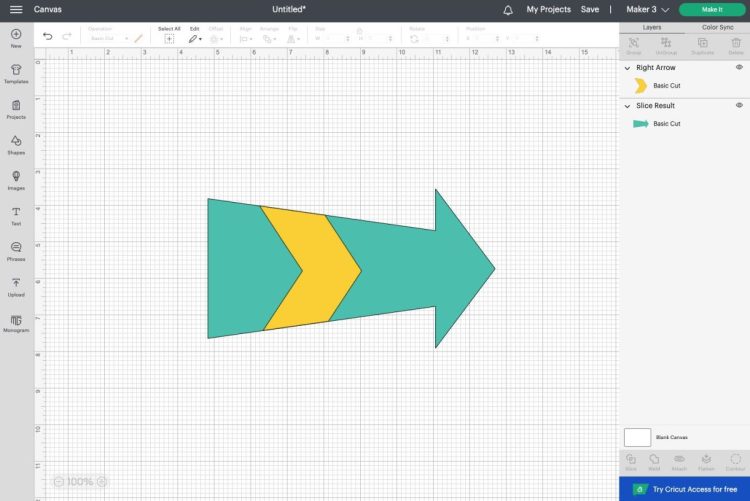
- Delete all of the extra pieces of the arrow you don't need, and then drag and drop the yellow piece of the arrow to the top of the Layers Panel. Now you have the same arrow without the tails.
- Can You "Unslice" an Image?There is no way to un-slice your images. You can immediate undo, but if you save your file or close and reopen it, you won't be able to undo and your image will be permanently sliced.
- Frequently Asked Questions about Slice in Cricut Design SpaceWhy is Slice Grayed Out in Cricut Design Space?Slice only works with two images. Most likely, you either have one or three or more images selected. Why are there So Many Layers when I Slice in Cricut Design Space?The Slice function creates layers whenever images overlap. So it's possible to have three, four, or even five different layers after you Slice.Can I Slice Text in Cricut Design Space?Yes, though you want to make sure your font doesn't have any hidden layers.