USE CRICUT DESIGN SPACE FOR SUBLIMATION CRAFTS
Cricut Design Space is a familiar program for many crafters, and it's a good place to begin if you're just getting started with sublimation but are familiar with a Cricut. Here's how to use Cricut Design Space for sublimation crafts, including how to get the best color!
Instructions
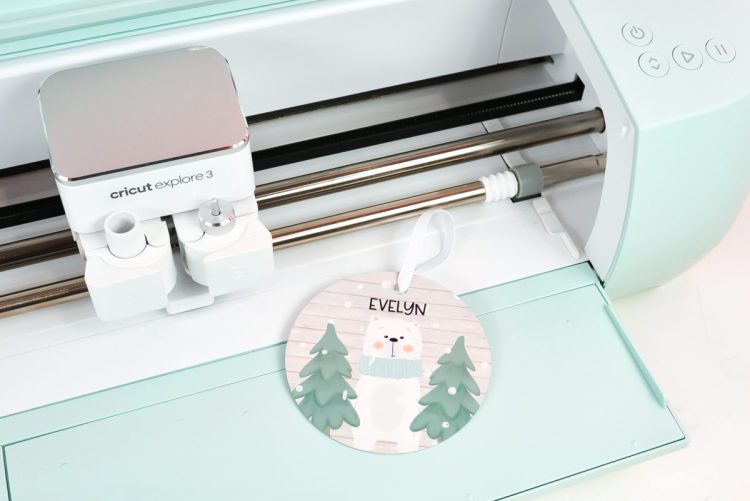
- Uploading and Modifying a Sublimation Image in Design SpaceFor these Instructions, a polar bear ornament design is being used from DesignBundles.net (a great resource for sublimation files!). Click Upload in Cricut Design Space to upload the PNG. In the Select Image Type screen, choose Complex.
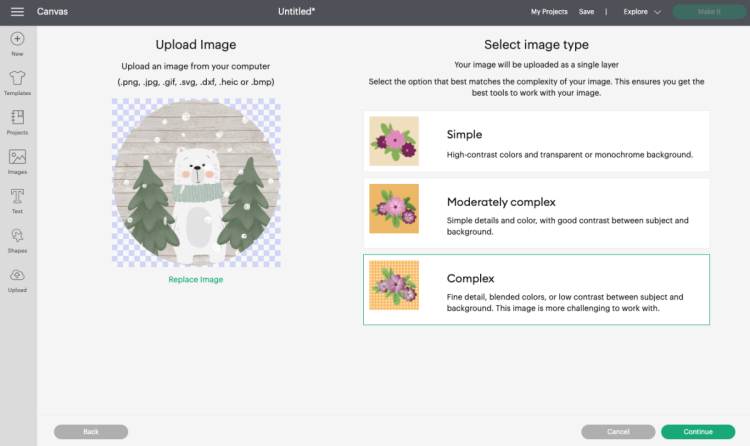
- Click continue. In the Background Remover screen, you'll see that the image has a transparent background (represented with the checkered squares). Most PNGs should have this transparent background, but if not, you can click to remove the background. Click Apply & Continue.

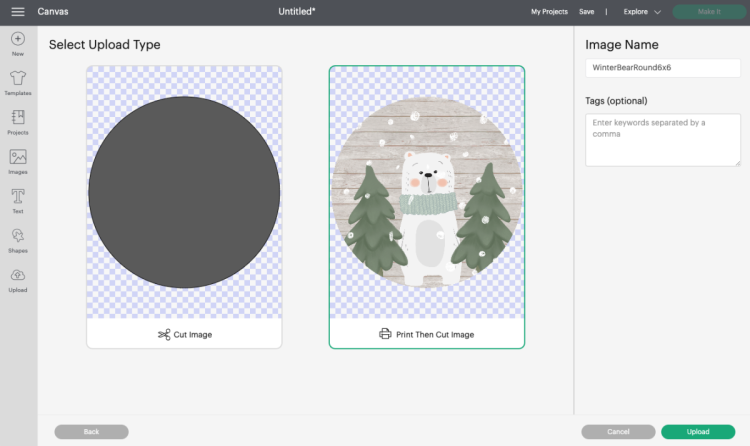
- In the Select Upload Type screen, choose Print then cut and click Upload.
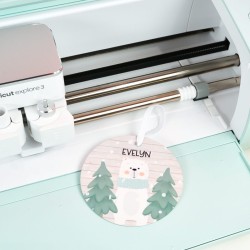
- Then select your image and bring it onto your canvas. Resize to fit your ornament. These metal ornaments are 3.5", so made the image 3.6" wide. It's nearly impossible to place a circle directly on a circle without ending up with a white edge, so cheat the size just a bit to make sure it covers the entire face of the ornament.
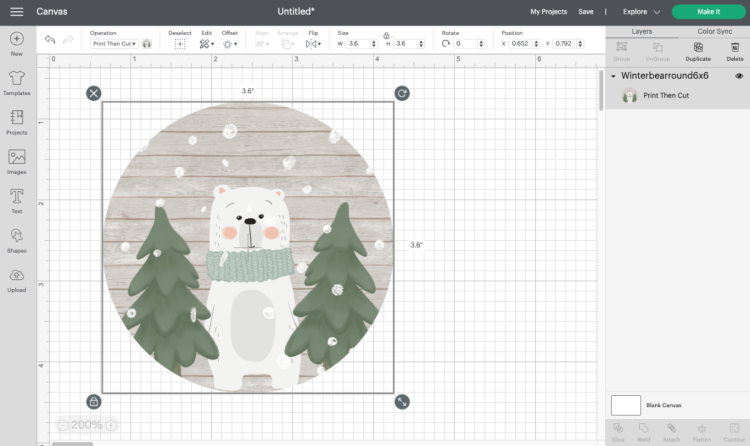
- If you'd like, you can add a name using the Text tool. Choose your font, resize, change the color, and place on your ornament, making sure to place the name low enough that it doesn't get cut off by the hole in the ornament.
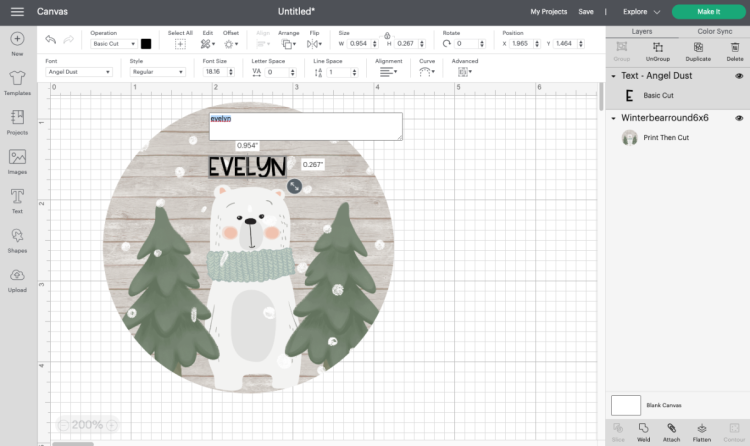
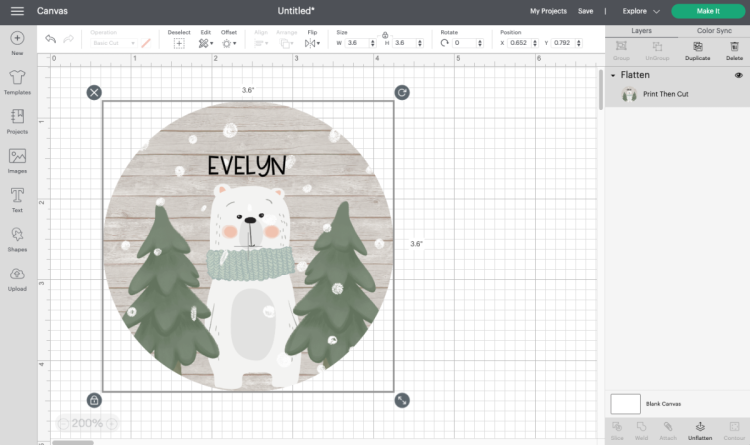
- Once you're happy, select both the name and the image and click Flatten to turn it into a single Print then Cut image. You'll see that it says Print in the Layers Panel.
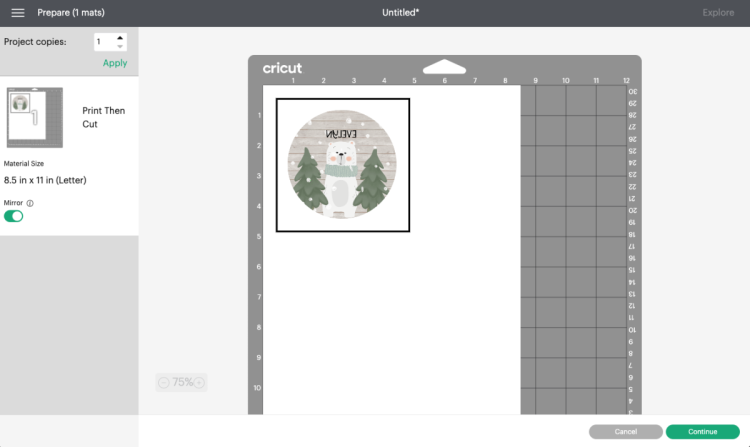
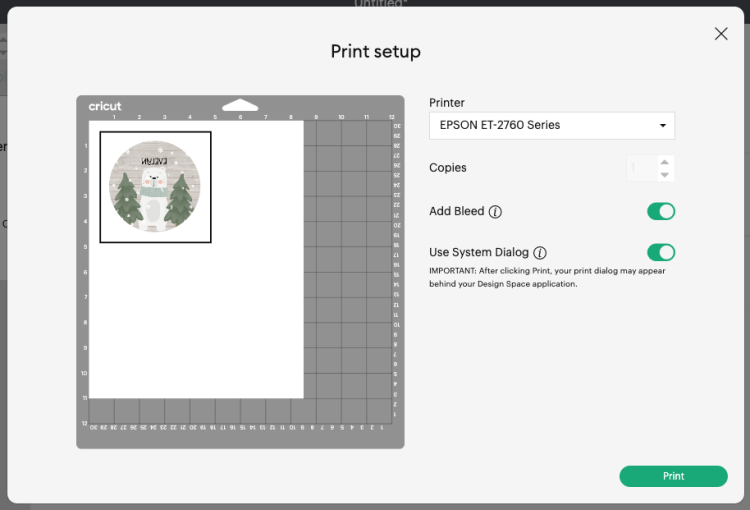
- You're ready to go! Click Make It in the upper right.In the Prepare screen, you'll see your image on a piece of white paper on a mat with a black box around it. Those black registration marks are used by your Cricut sensors to read exactly where to cut your image.Important: click Mirror to reverse your image. You must do this or your image will be backward when you go to put it on your ornament. Click Continue to go to the Make Screen.Before we finish making our ornament, we have to talk color!
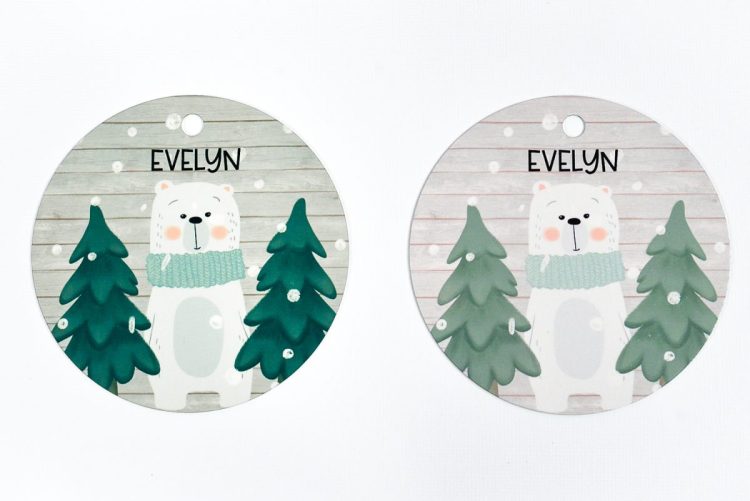
- To get a better understanding of color management in Design Space, please read the following sections in this post under:Cricut Print Then Cut Color ManagementColor Management vs. No Color Management in Design SpaceColor Management Caveats
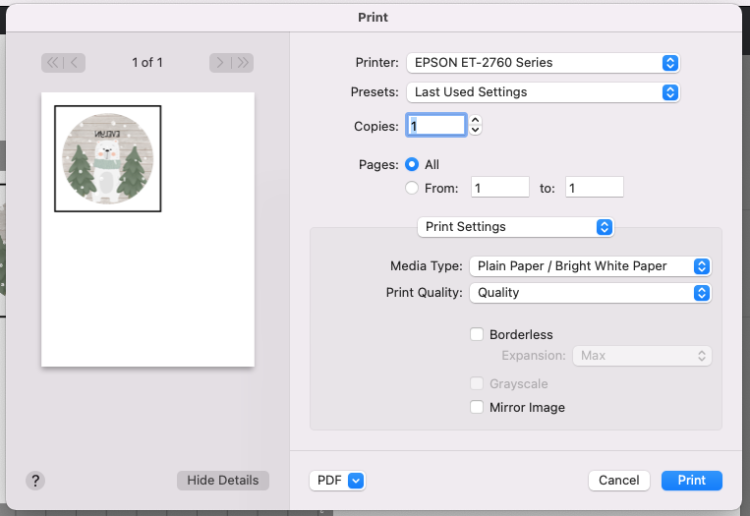
- Printing Your File with a Color Profile on a MacIn the Make Screen, Design Space will prompt you print your image. Click Send to Printer and this box will pop up. Keep Add Bleed selected, but also select Use System Dialog Box. Click Print.
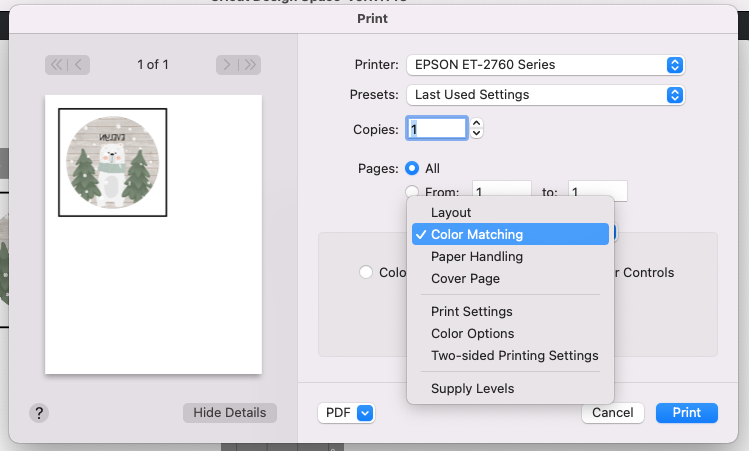
- That System Dialog box will most likely appear *behind* your Design Space window, so you'll have to drag the Design Space program over a bit to see that window. Here, you'll see a bunch of options. Select your sublimation printer. Toward the middle of this window, you'll see a dropdown. Click it and choose Color Matching.
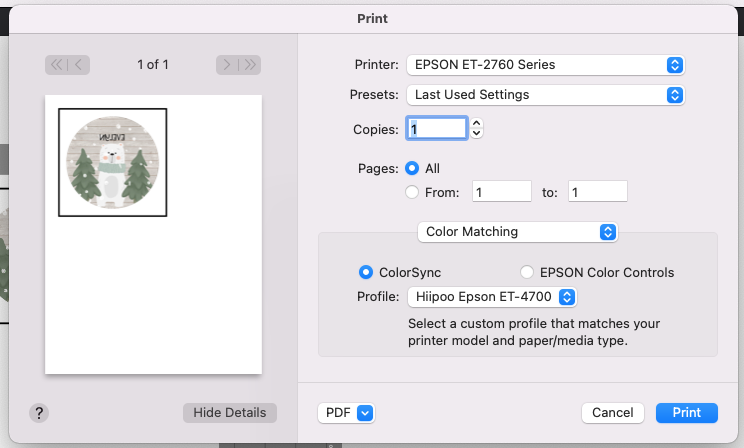
- From here, choose ColorSync. If you remember from installing your ICC profile, ColorSync is the Mac utility for color management. If you see the name of your ICC profile there, check it. If not, click Other Profiles and choose your profile from the list.Hooray! You now have color management.
- Before you hit print, use that same dropdown to select Print Settings.
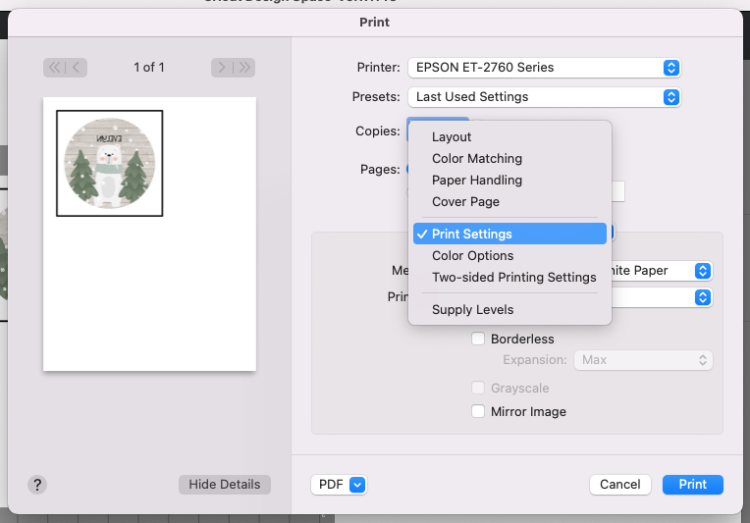
- From here, you can choose your print quality (I usually choose Quality). Do NOT select Mirror Image here. You already did that in Design Space and it will mess you up if you do it here.Make sure you have your sublimation paper in your printer and click Print!Once you have your image printed, place it in the upper left corner of a Cricut cutting mat, insert into your machine, and your Cricut will read the registration marks and cut around your image.
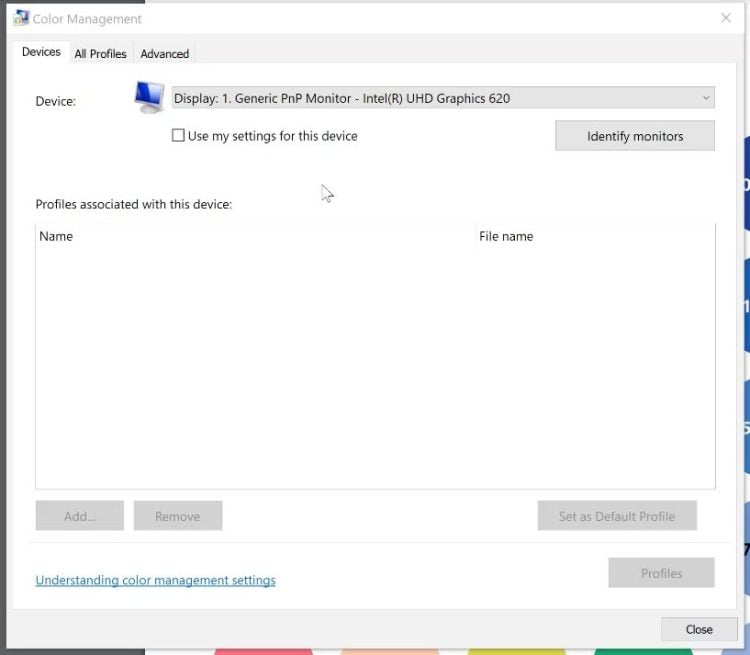
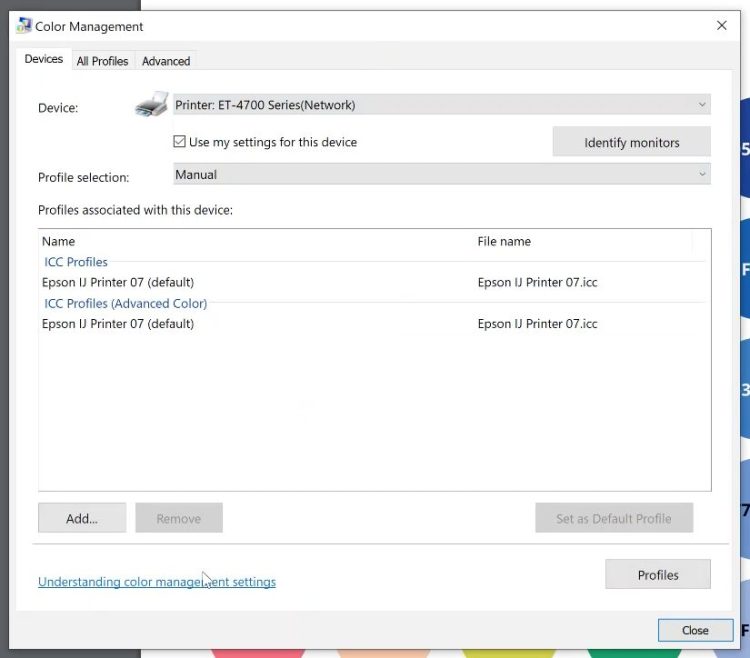
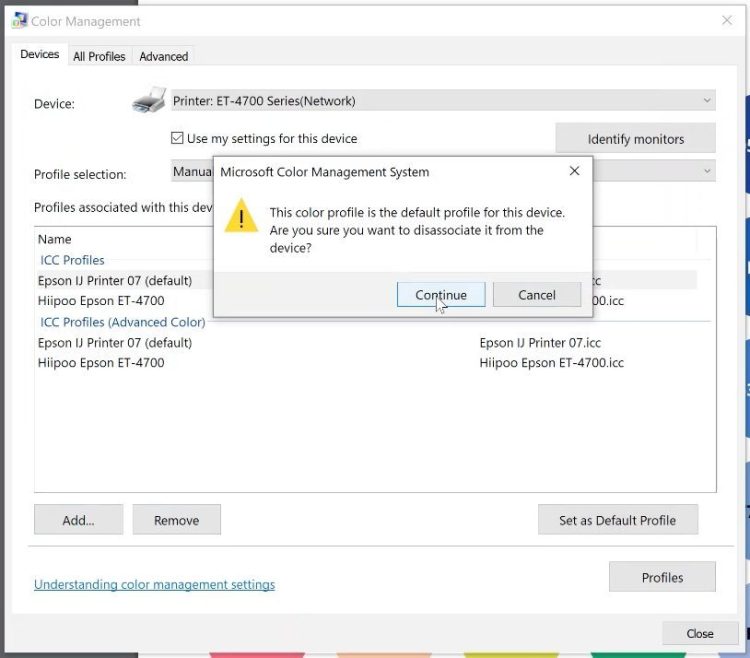
- Printing Your File with a Color Profile on a PCUnfortunately, there isn't a one-click method to color management on a PC while using Design Space.To select your ICC profile, you'll first need to head to your Start box and type 'Color Management'. This will bring up your Color Management window. Once there, select your printer from the Device dropdown box. For these instructions, a Epson ET4700 is being used.
- You'll see your printer will have the color profiles that it came with installed. You'll need to add the ICC profile you installed so you can use it with this printer.
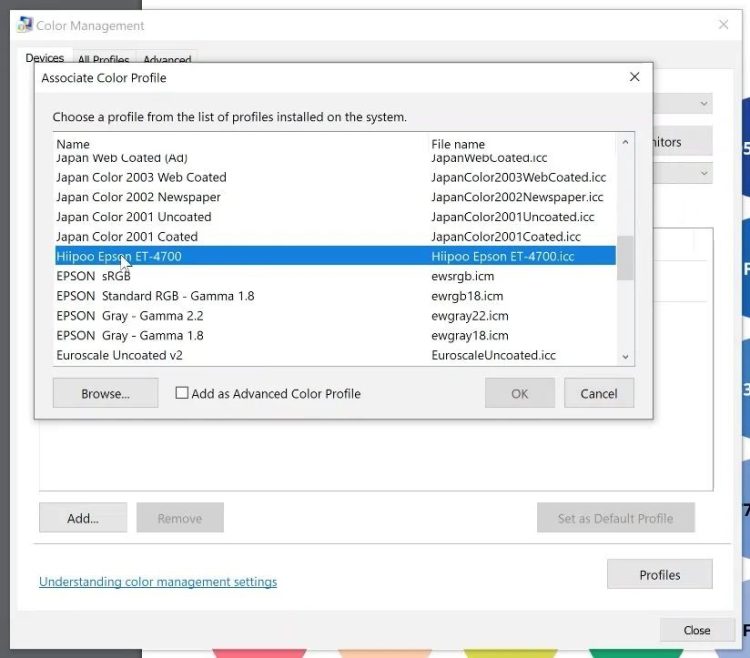
- Click Add and scroll down to the ICC profile you installed.
- Now you'll see both the original and the IC profile you installed and selected. You'll want to delete that original profile by highlighting it and selecting Remove. You'll get a warning about removing it. Click continue. Then click "Set as Default Profile" and click Close.
- In the Make Screen, Design Space will prompt you print your image. Click Send to Printer and this box will pop up. Keep Add Bleed selected, but also select Use System Dialog Box. Click Print.
- That System Dialog box will most likely appear *behind* your Design Space window, so you'll have to drag the Design Space program over a bit to see that window. Here, you'll see a bunch of options. Select your sublimation printer. Toward the right of this box, you'll see Preferences. Click it.

- From here, choose More Options.
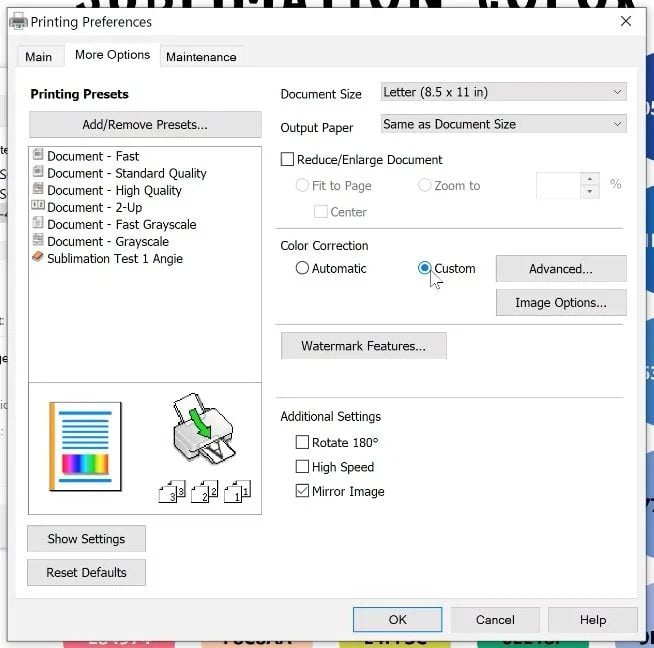
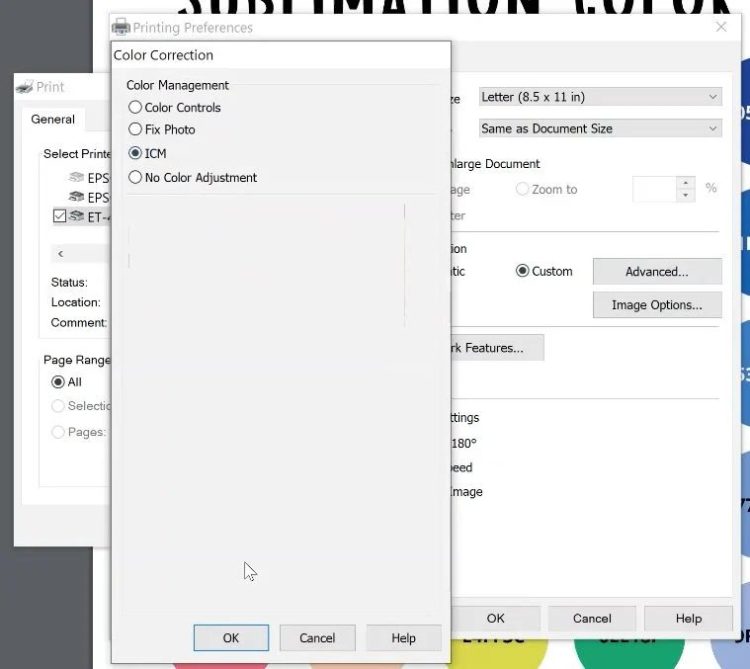
- If you remember from installing your ICC profile, you will want to select "Custom" under Color Correction. From there, a window will pop up. To use your ICC Color Profile, you want to select “ICM” and click “OK”.Hooray! You now have color management.
- Before you hit print, use that same pop up window to select Print Preferences. From here, you can choose your print quality (I usually choose "High").
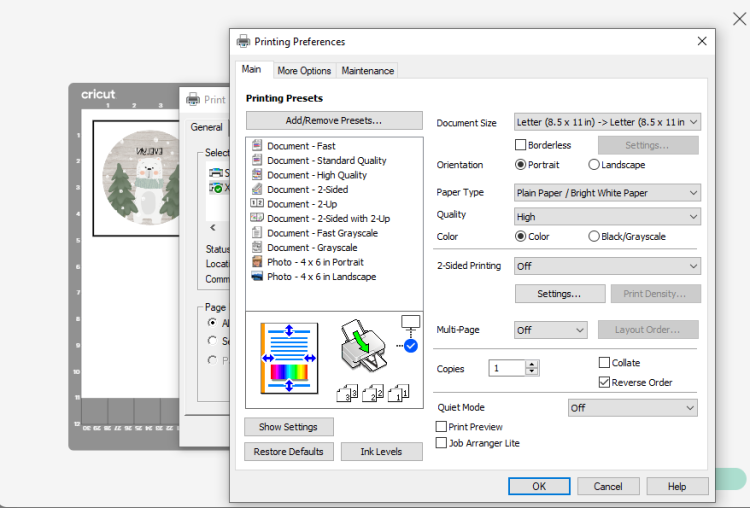
- Make sure you have your sublimation paper in your printer and click Print!Once you have your image printed, place it in the upper left corner of a Cricut cutting mat, insert into your machine, and your Cricut will read the registration marks and cut around your image.Once your image is printed, you'll transfer it to your blank using the manufacturer's time and temperature settings. Again, it is suggested to do a test print on a piece of polyester fabric to make sure everything looks good, then printing another to use on your actual blank!
Notes
Printing Your File with a Color Profile on a PC