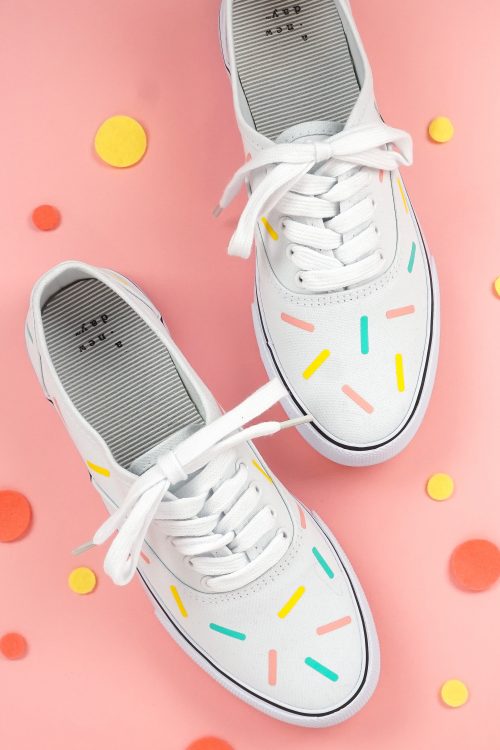
SPRINKLE IRON ON SHOES
The new Cricut EasyPress Mini makes it easy to make projects like these sprinkle iron on shoes! The small pressing plate and even heating work great on curved surfaces and over seams.
Equipment
- Cricut Maker or
Ingredients
- Canvas shoes
- Cricut Everyday Iron On in a range of colors
- Cricut Design Space file
Instructions
- Cut the sprinkles in various colors of Cricut Everyday Iron On. For this project the classic colors of pink, yellow, and blue are being used, but you could make the sprinkles whatever color you'd like! You can also make them bigger or smaller.When you're ready, click Make It in the upper left corner.
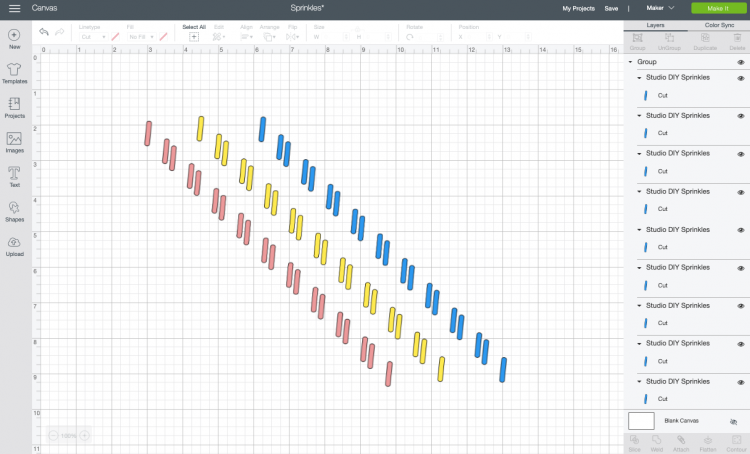
- In the Prepare Screen, click the "mirror" option for each layer. This isn't really important with these sprinkles, but it's good to be in the habit of mirroring all of your iron on projects.In the Make Screen, instead of choosing the "Everyday Iron On" material setting, choose "Cardstock." This will cut all the way through the iron on carrier sheet. This means you don't have to weed your project, and it's easier to place your sprinkles down on your shoes.
- Cut Your Iron OnPlace your iron on shiny-side down on your cutting mat and cut using your Cricut Explore or Maker.Once cut, lift up the excess iron on and you'll see you have a bunch of tiny sprinkles with tiny sprinkle-shaped carrier sheets on them.
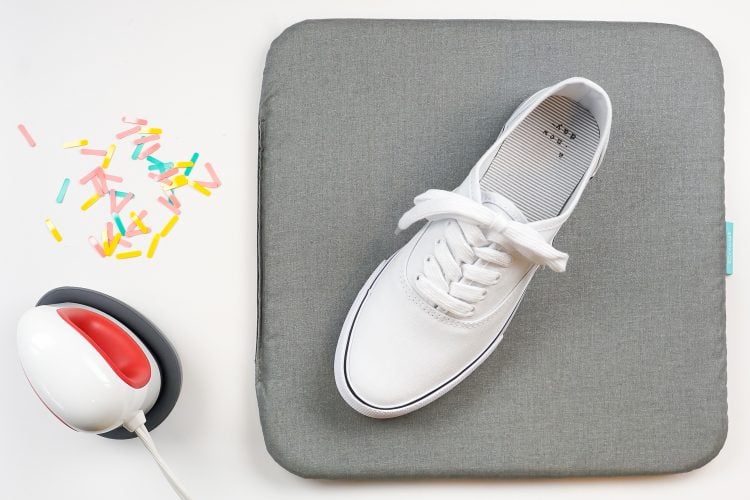
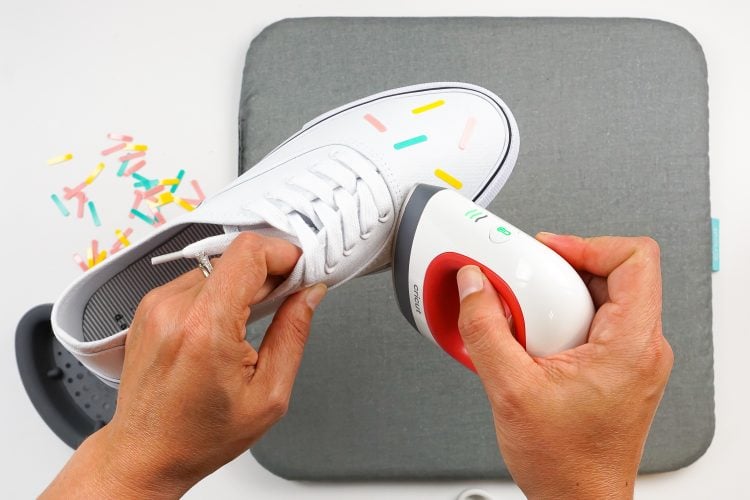
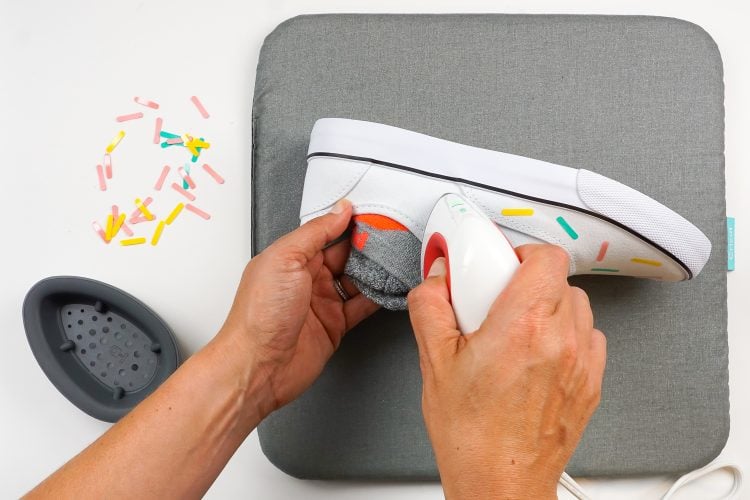
- Iron On Shoes with the EasyPress MiniSet the EasyPress Mini to medium and wait for it to come to temperature. Place a balled-up sock inside the shoe—this gives you the necessary resistance when pressing with the Mini.

- Place a sprinkle onto the shoe, shiny-side up, and press with the Mini for 20 seconds or until the sprinkle is adhered. Make sure you're pressing against the sock and not your fingers—the Mini can burn you through the canvas shoe. Make sure to avoid the rubber sole of the shoe.
- Do not remove the carrier sheet on the sprinkle. First, adhere all of the sprinkles. Keeping the carrier sheet over each sprinkle helps protect it from the heat place and means you don't need to worry about using a pressing cloth.
- Once you have all of the sprinkles adhered, remove all of the carrier sheets and you're done!