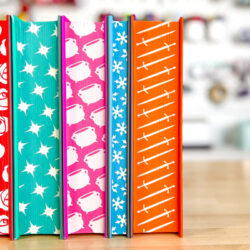
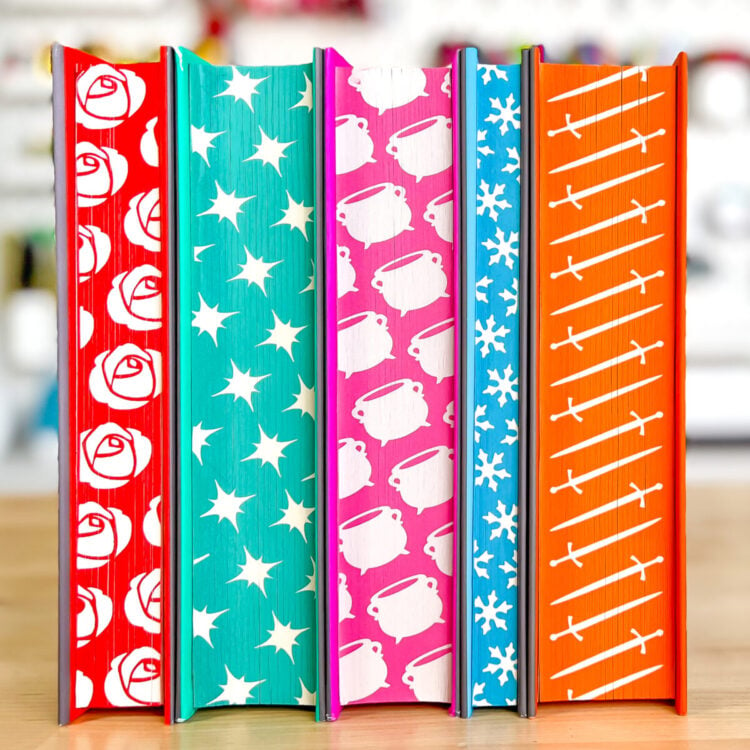
SPRAYING BOOK EDGES USING A STENCIL
Create a custom look for any books using spray paint and a stencil! These detailed instructions will walk you through all the tips and tricks to spray book edges perfectly so you can customize your bookshelf!
Equipment
- Cricut or other electronic cutting machine
Ingredients
- Removable adhesive vinyl*
- Green StandardGrip mat
- Weeding hook
- Transfer tape
- Scraper
- Montana Gold Spray Paint* Red: S3000 Shock Red - Teal: G6130 Malachite - Pink: - Blue: - Orange: CL2130 Shrimp Dark
- Clamps*
- Wooden blocks
- Brown paper wrapping*
- Scissors
- Painter's tape*
- Free ACOTAR Stencil SVG #C481
Instructions
- * Material Notes*Removable vinyl worked better for than permanent and it was much easier to remove.*Choose a satin or matte spray paint, not a glossy spray paint.*Used quick-release clamps but you can use c-clamps as well.*For the recycled paper you can use paper bags, but the brown paper wrapping that comes inside Amazon boxes worked really well and is more flexible than paper bags.*Can use regular masking tape but it actually pulls up at the inside of the covers, so recommend painter's tape as it works better.Prep a Book for Sprayed EdgesChoose hardback editions because they are sturdier and get the cleanest results. Some people do paperbacks as well, but the covers tend to ripple a bit.Select your spray paint colors. Recommend using a satin/matte spray paint versus a glossy one, as the ingredients in a gloss spray paint may cause the pages to stick more. Montana Gold spray paint a favorite and it's satin and it comes in a ton of colors so no matter what book you are spraying, there will be a color that works.
- Remove the book jacket so you have only the hardback book
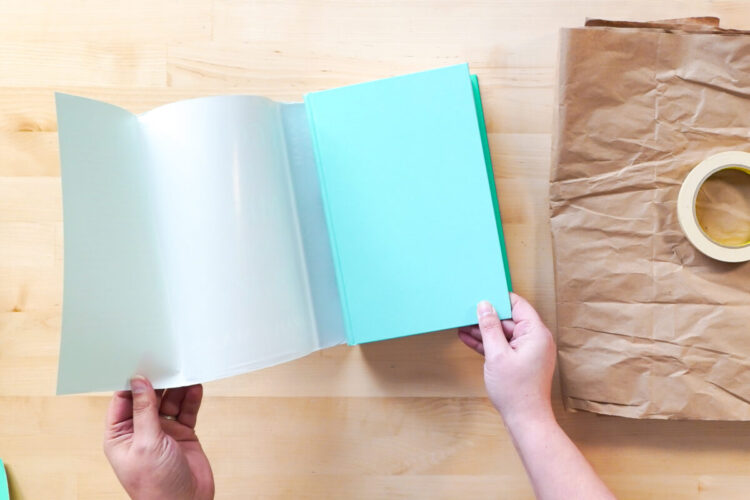
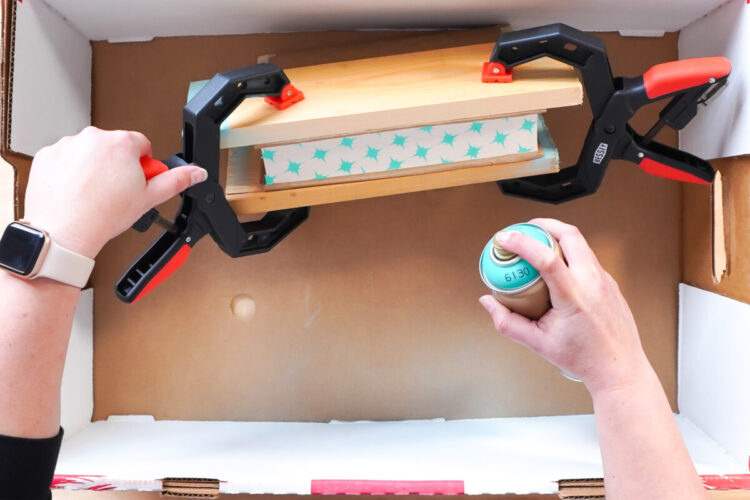
- Then use your recycled paper to cover the entire book. Be sure to cover and tape the front, back, and spine of the book very tightly. You don't want paint to seep into any crevices and get on your book! Recommend using recycled brown paper packing sheets and painter's tape in order to do this.
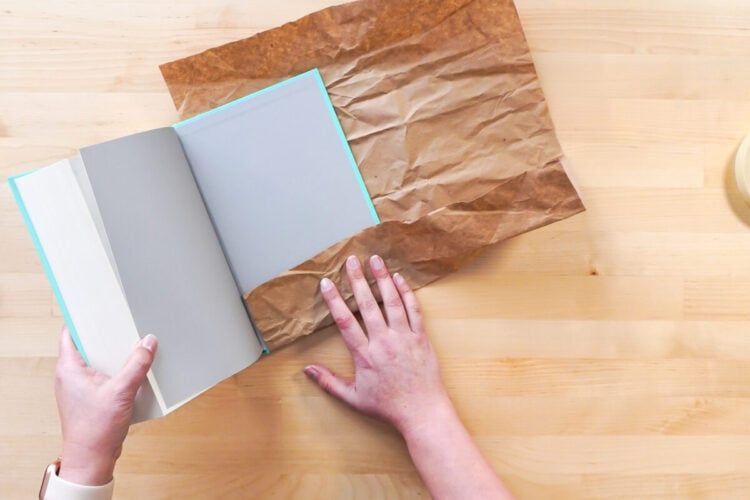
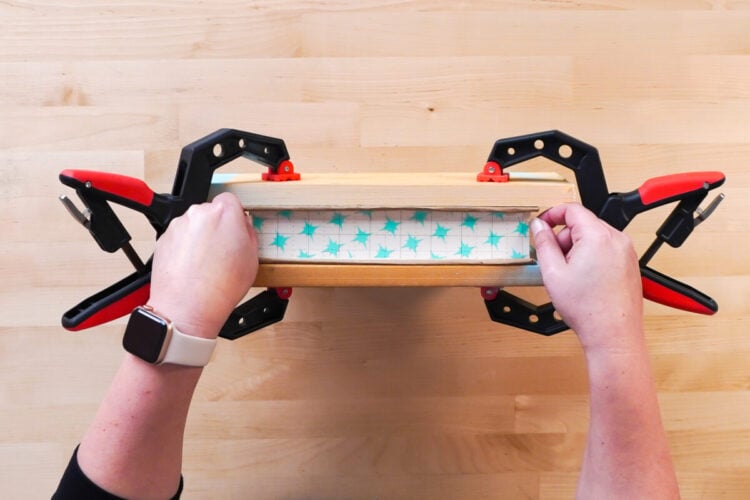
- Now, you'll need to create a book press. 4" ratcheting quick-release clamps and two pieces of scrap wood were used to do this. Wood is suggested rather than cardboard because it helps compress the entire book, plus it really protects your book from clamp marks. Other people use cardboard, but the clamping is more successful with wood.
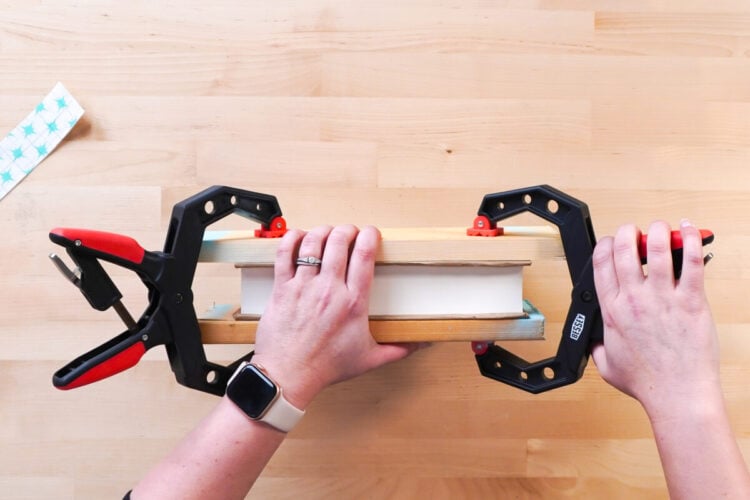
- You might want to wrap the clamps in plastic so they won't get any spray paint on them, but it was not done for this project. They get a bit of overspray but as long as you're not spraying a ton of paint into the ratcheting mechanism, you're fine without covering the clamps.Make sure to tighten your clamps as tight as you can get them. You want the book pressed together tightly and evenly so no paint leaks through the pages. Once your book is fully clamped together, measure the length and width of your book pages. If you decide to also do a book from the ACOTAR series that was used for this project and use the free SVG, the cut file is the correct size of that book series. If you are adding your own design, be sure it is the correct size. The free designs are slightly smaller than the length and width of the pages so nothing gets cut off in the painting process.
- How to Cut Your Vinyl StencilLet’s make the stencil you'll use for your book! Start by opening Cricut Design Space. For this project, the ACOTAR-themed file was used.To begin, create a new project in Cricut Design Space. Then click Upload in the Design Panel on the left.You’ll be taken to the upload screen where you can navigate to the file you want to upload. If you need more help with SVG files, see this post How to Upload an SVG to Cricut Design Space.Insert your file onto your canvas.
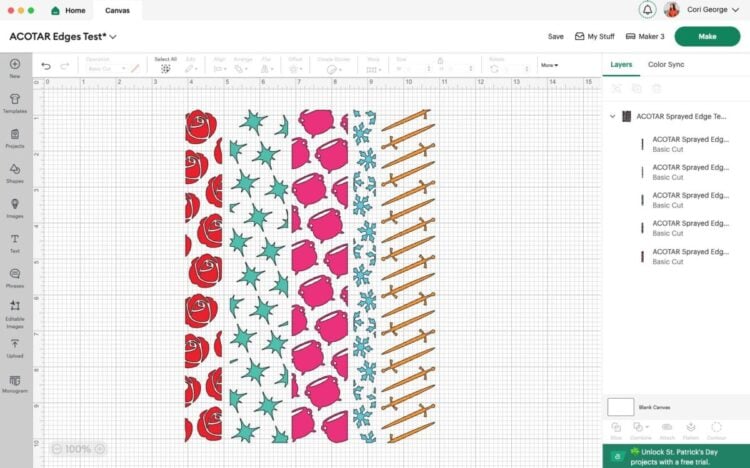
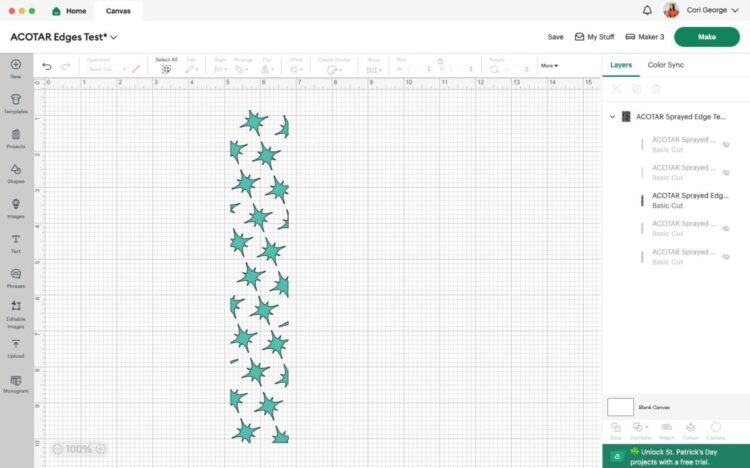
- Hide any stencils you are not using. If you're using the free file for your ACOTAR hardcover books, there is no need to resize.
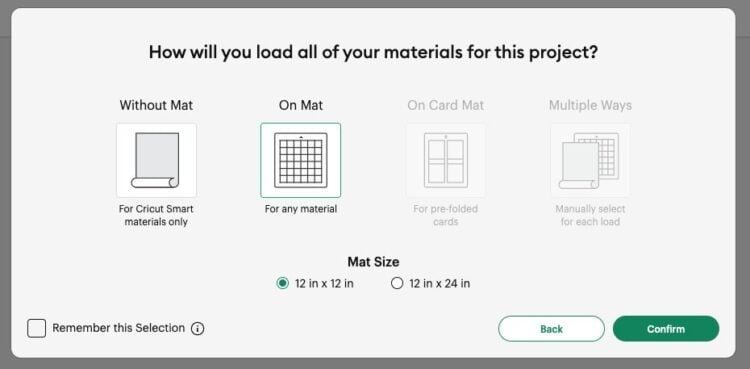
- You're ready to cut your image! Click Make It in the upper right. In the Load Mat screen, choose On Mat (unless you are using removable Smart Vinyl, then choose Without Mat). Click Confirm.
- Then you'll be taken taken to the Prepare Screen. Rotate the stencil so it cuts at the top of the mat.
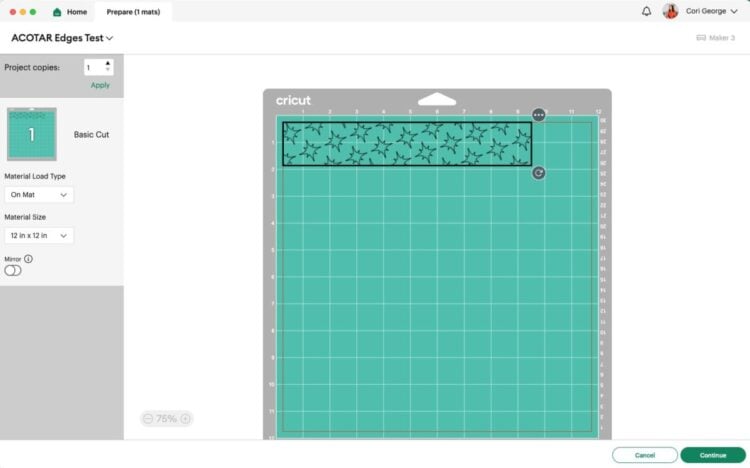
- Once your mat looks good, click Continue. Then in the Make Screen, choose your material. In this case, I chose removable vinyl.
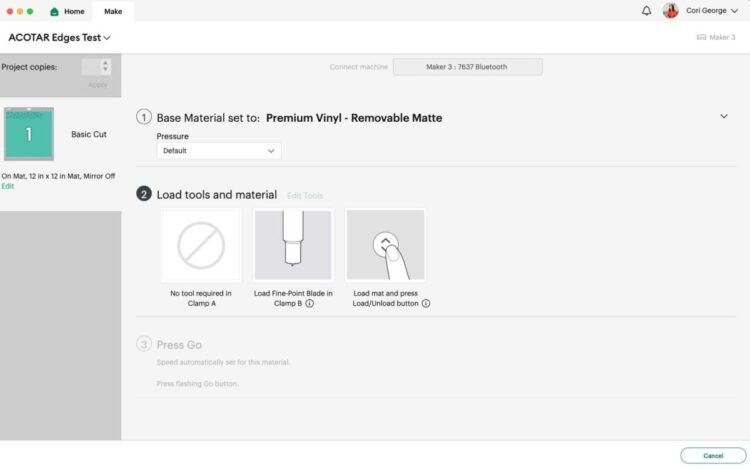
- Insert your mat into your machine and your Cricut will cut your project!

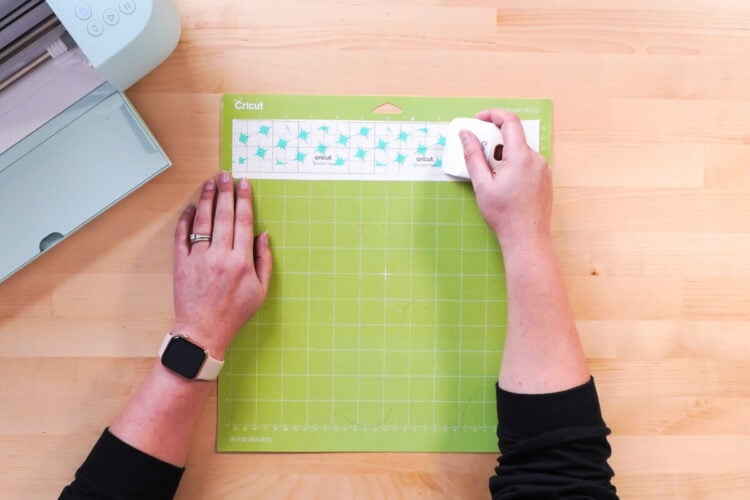
- Once your vinyl is cut, use your weeding hook to remove the excess vinyl.

- Place your transfer tape on top of the vinyl. Use your scraping tool to burnish the vinyl onto the transfer tape.
- Peel back the transfer tape to lift your vinyl design.Now you're ready to start the process of painting your book pages!

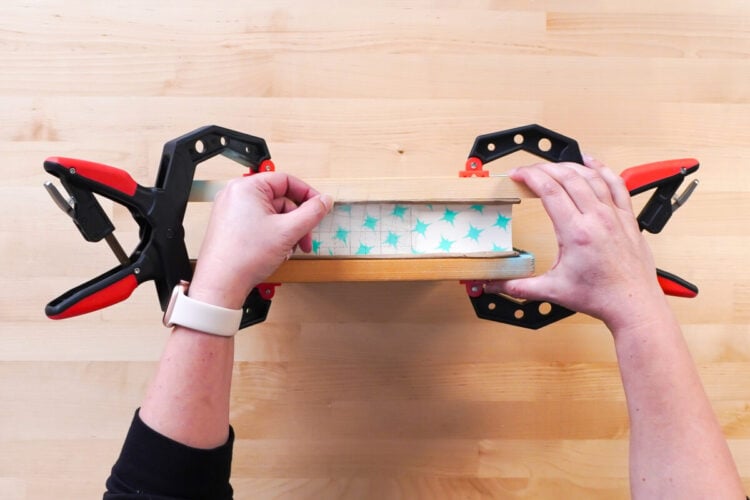
- How to Spray the Edges of a BookNow apply your stencil to your book pages. Carefully place the transfer tape with the design along the page edges of your book.
- Use a scraping tool to press the design to the pages. You want it pressed down really well!

- Now, peel back the transfer tape. The vinyl left on the book will be your stencil. If any of the pieces pull up, carefully place them with tweezers and make sure they are pressed into the pages well.
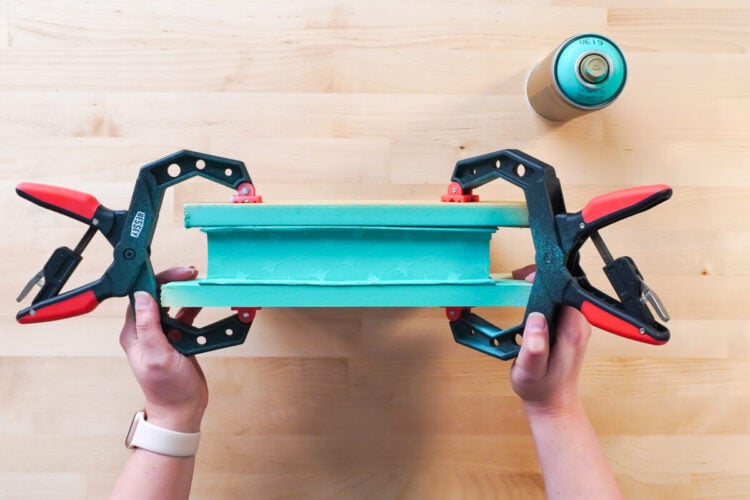
- Be sure you're in a well-ventilated area to spray paint. Begin with very light, even coats of spray paint. Spray about 6 inches away from the book and make fairly quick back and forth motions. Do this 5-6 times until you feel there's a nice, even coat. You do NOT want to soak the pages—use more light coats vs. fewer heavy coats.Also rotate the book and spray the top and bottom edges as well (some people stencil these too, which is an option!).
- Let this first coat dry for 25-30 minutes. Take a peek at your pages and determine if you need another coat. I added a second coat for a deeper color and to be sure I got in all the crevices of the book edge. Again, use a very light hand and don't oversaturate!Let this second coat dry for at least 4-5 hours. You should have really nice coverage on the book edges.
- Once you're sure the paint is dry, use your weeding tool and tweezers to remove the vinyl from your pages. You really do get a nice crisp edge when you have your book properly clamped.
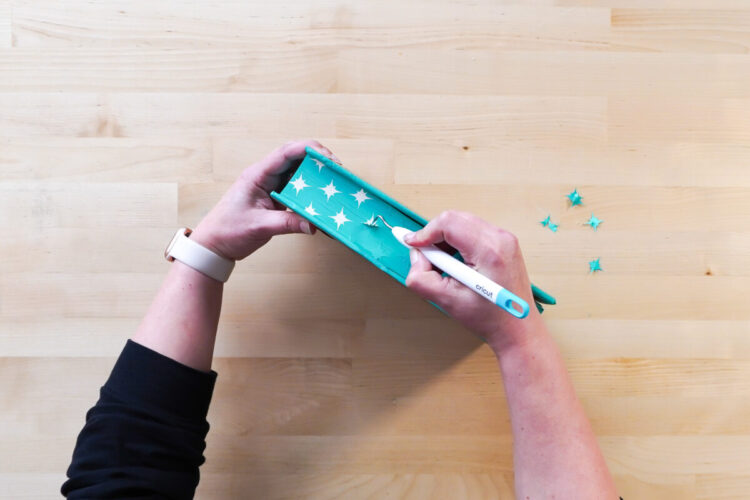
- Do not fan the pages for at least 24 hours. If you separate the pages or fan them, you run the risk of the paint flaking off and looking uneven. You may have some pages that are a bit stuck together, but take care to peel them apart and your book should look just as good as it did when you first spray painted it!GORGEOUS!
Notes
Spraying book edges is definitely an intermediate project. If you're brand new to the Cricut, this probably shouldn't be your first project. You want to be very comfortable with using vinyl and transfer tape, as well as using spray paint, before you begin.