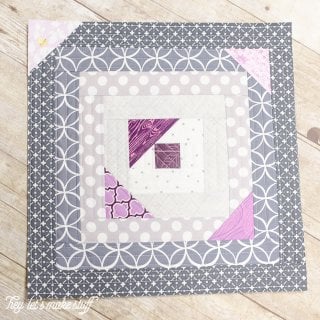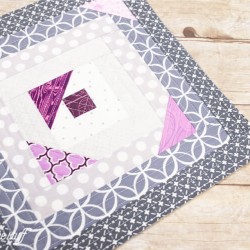
SCATTERED GEESE QUILT-AS-YOU-GO
Using the quilt-as-you-go (QAYG) method, it's easy to make this modified log cabin block. This easy quilting tutorial is a fun take on a classic design.
Ingredients
- Fabric
- 13" square batting
- 13" square backing fabric
Instructions
- Start by laying out your fabrics. You will need a selection of fabrics for the main log cabin block, and a different selection for accent "geese." A favorite color technique was used here -- splitting the block into two gradients, in this case one of gray and one of purple. As always, you'll notice in the final block that not all all the fabrics choses were used -- just picked what felt right as the quilt block progressed. The gradients chosen are just a guide for the final block.
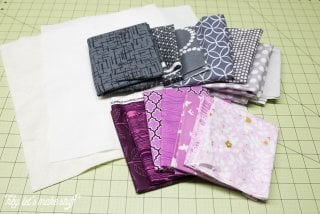
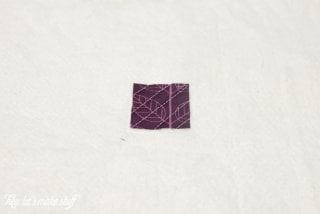
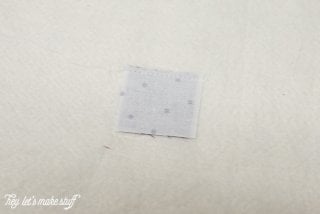
- You are also going to need a 13" square of batting, and a 13" square of backing fabric. The final block size will be 12.5" square, with that little extra for trimming. Lay out the backing fabric with your batting on top.One of the great things about these blocks is that you can modify the pieces to fit your vision. All of cut sizes used her are just suggestions. Go wild!Start by quilting a 1.5" square of your accent color fabric directly to the batting/backing layers. Used diagonal lines here because the other accent pieces will also have diagonal lines. The stitch is lengthened a little as this machine doesn't have numbers, but it's longer than a standard stitch, but not quite as long as a basting stitch.
- You're then going to build off that center block like you would any other log cabin block, with two pieces the same width above and below that center block, and two pieces running down each side. 1.5" strips were used here as well. You can lay out your fabric to get an idea of what it will look like.
- Add the top piece of your log cabin block, right-side down on top of the first piece. You are going to stitch very close along the edge of the two fabrics, 1/8" away from the edge. If you look closely at the below photo, you can see the line of white stitching at the top (sorry, it's a bit hard to see).
- Open that piece and press in the opposite direction. Quilt to the batting and backing fabric, using straight lines.
- Use this technique to quilt the piece below the center square, and the sides.
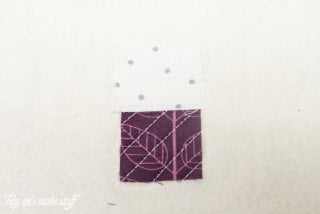
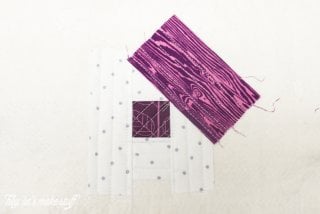
- To create the first of your geese, cut an accent color strip 4" wide and 2.25" tall. Place your accent color strip at a 45 degree angle across the edges of the two log cabin block strips. If you place it right-side up you should see where you're going.
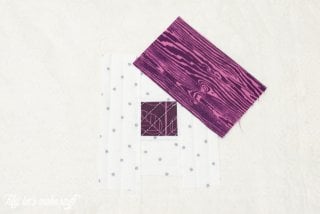
- Place the accent color strip face down and stitch along the long edge. You’ll want to position it so that your seam hits right at the top right corner of the first accent color square. Stitch along the long edge of the triangle. Open and press, and quilt to the backing.
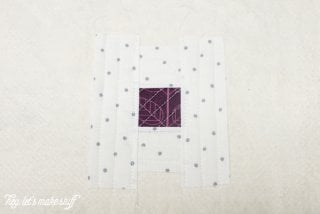
- Add another square of log cabin pieces around the original square you've created. You'll see that the triangle shape is made by the overlapping strips.NOTE: Use pieces of white fabric to help keep the bottom color from bleeding through the lighter gray fabric. You can see this and four other tricks on this post Five Tips for Better QAYG.

- Using the same technique as before, add your next accent color.
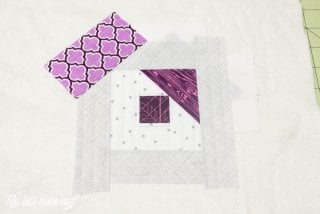
- And then your log cabin square strips.
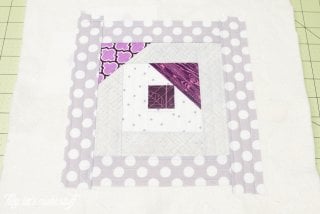
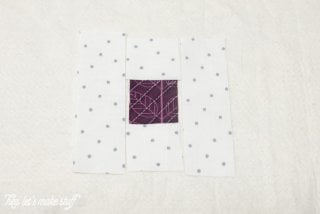
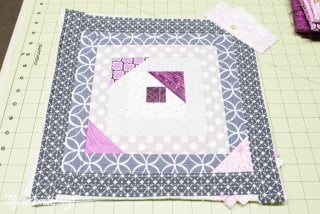
- Continue on in this manner until you've reached the edge of your block. Add that last piece of accent color in the corner, and then square up your block so that it's 12.5" x 12.5"
- And that's all! This is the perfect project if you're getting a little tired of a standard quilt-as-you-go log cabin block, but don't want to stray too far out of familiar territory.