PARTRIDGE AND PEAR ORNAMENT SEWING PATTERN
Sew these cute Partridge and Pear ornaments. Get the free PDF pattern for this easy ornament sewing project!
Equipment
Ingredients
- Heavy card stock optional
- Fabric scraps the largest being about 10" x 5" for the partridge
- 2 pieces of coordinating ribbon 7" long
- Coordinating thread
- Fiberfil or other stuffing
- Free Partridge and Pear Ornament Pattern #P1
Instructions
- Fold your fabric in half. Trace the templates using the disappearing marker onto your fabric, and cut within in the lines (if the lines are still showing, no biggie -- the ink will disappear).
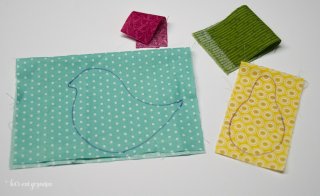
- Because you folded the fabric, you'll have a front and a back that are exactly the same, except opposite.

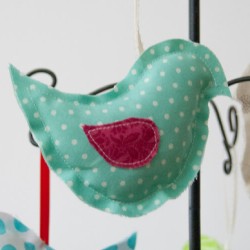
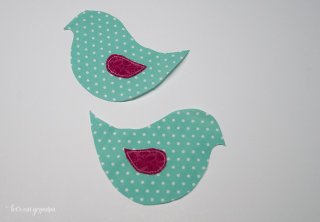
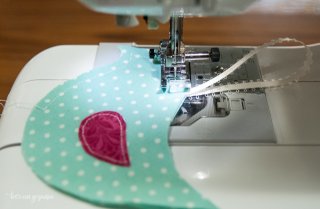
- Sewing the Partridge:Place the wing on the partridge as shown in the pattern. Top stitch the wing to the partridge. Pull your loose thread ends through to the backside of the fabric. Sew on the wings to both sides of the partridge.
- Place the two sides of the partridge wrong sides together. Using generous 1/4" seam allowance, sew around the edge of the partridge (it will have raw edges -- no turning), starting and stopping as shown on the pattern.When you get to the point where it says "insert ribbon," in the pattern, insert both ends of the ribbon 1/2" between the layers of fabric, and sew over the ribbon, locking it in place.
- Make sure to back stitch both the beginning and end of your stitch. This will leave a hole at the bottom for stuffing it.
- Stuff your partridge through the hole you left. Use a q-tip or eraser-end of a pencil to get the fiberfill into the smaller corners.
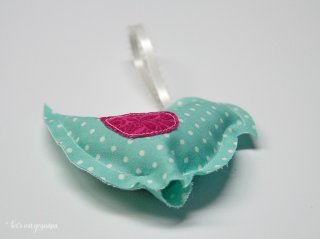
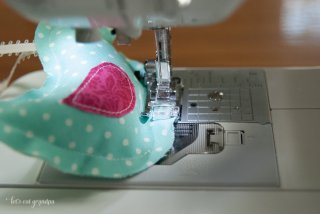
- Close the hole using the same generous 1/4" seam allowance, back stitching at the stop and start of your stitching.
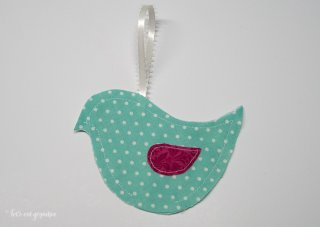
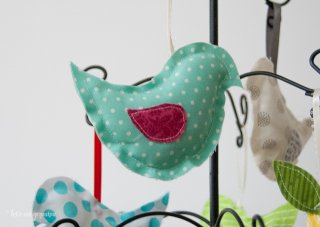
- Hug your partridge and give it a name. This one is Elinor. She says, "hello, dearie!"
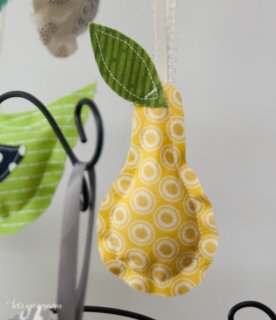
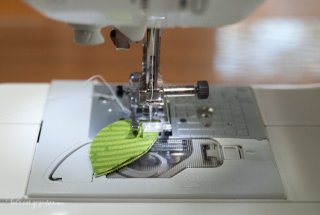
- Sewing the Pear:Place the two sides of the leaf wrong sides together, and stitch all the way around, close to the edge.
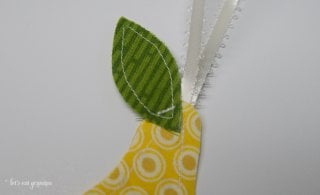
- Place the two sides of the pear wrong sides together. Using generous 1/4" seam allowance, sew around the edge of the pear (it will have raw edges -- no turning), starting and stopping as shown on the pattern. Back stitch both the beginning and end of your stitch. This will leave a hole at the bottom for stuffing it.When you get to the point where it says "insert ribbon," insert both ends of the ribbon 1/2" between the layers of fabric, and sew over the ribbon, locking it in place.Before you stuff your pear, attach the leaf to the top part of the pear, using three or four stitches (go backward and forward several times to secure it).
- Stuff your pear through the hole you left. Use a q-tip or eraser-end of a pencil to get the fiberfill into the smaller corners.Close the hole using the same generous 1/4" seam allowance, back stitching at the stop and start of your stitching.You don't have to name your pear. Unless you want to. This one is Javier the Pear. He says, "Hola!"