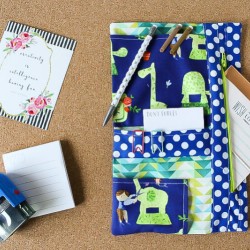
HOW TO SEW A CUSTOM PLANNER ORGANIZER
Need a better way to keep your planner organized? Get the free tutorial to sew a custom planner organizer to hold all of your pens, stickers, and anything else you need to may need!
Equipment
Ingredients
- 3 fat quarters in varying patterns (you will have plenty of fabric left over.)
- 7" zipper
- Fun elastic two strips that measure the height of your planner.
Instructions
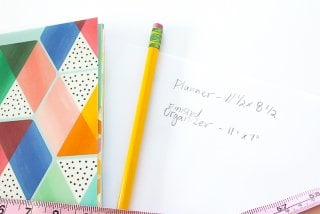
- NOTE: Credit for these instructions go to: Alicia from Sew What Alicia The first step in creating your organizer is to measure your planner. The planner for this project measures 11.5 x 8.5. You are going to want the finished piece to measure 1/2" to 1 1/2" less than the planner. For this project it was decided that the finished planner would measure 11" x 7".
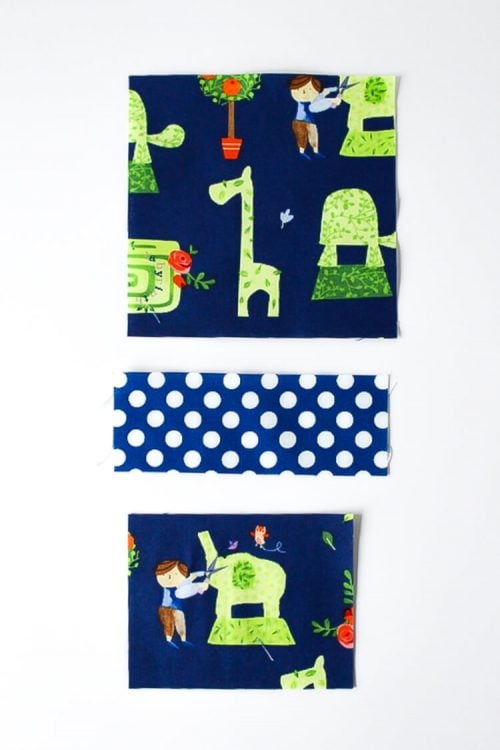
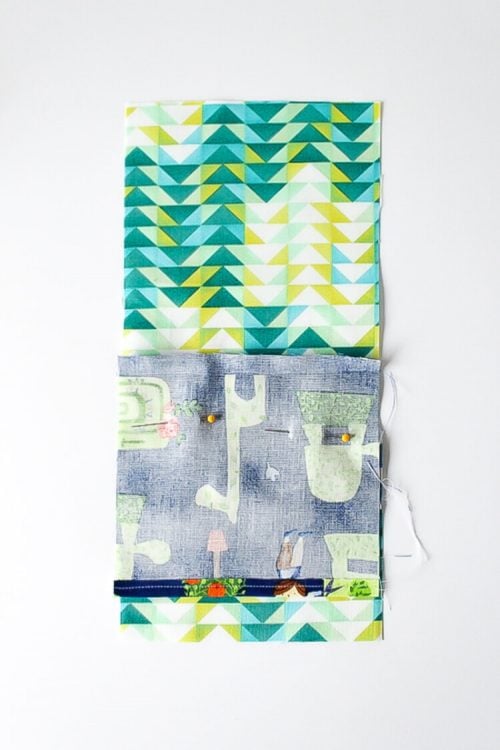
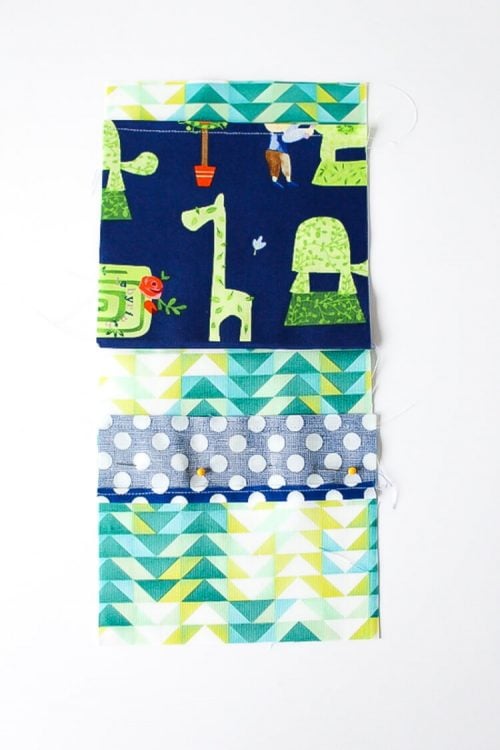
- Once the finished measurements are determined, sketch the different pieces you want to include in your organizer and find the measurements to make each piece. When you are sketching be sure to add 1/4" to every side of all the pieces for the seam allowance.Here are the different pieces for this project. (The number in parentheses is how many of each cut.)From the polka dot fabric:For the zipper- 11.5"x2" (2)Small pocket- 5.5"x3" (1)Scraps for zipper ends.From the geometric fabric:Front piece- 11.5" x 5.5" (1)From the topiary fabric:Back- 11.5" x 7.5" (1)Top pocket- 5.5" x 5" (1)Bottom pocket- 4.5" x 3.5" (1)

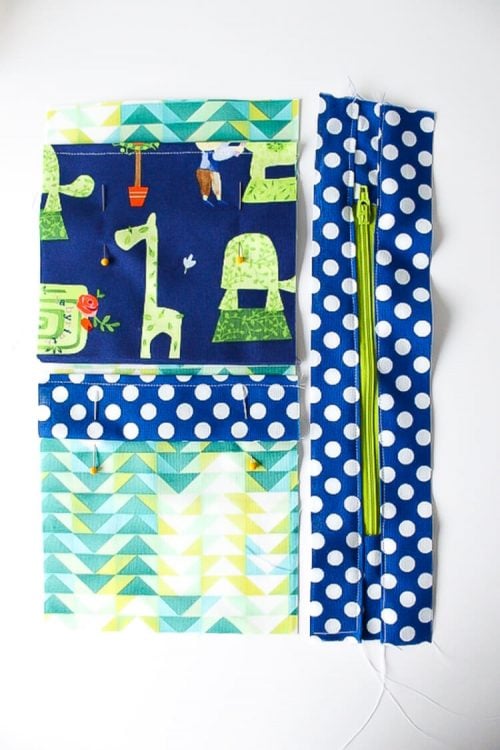
- To assemble the organizer start by inserting the zipper. Use two scraps of the same fabric that you cut the 2" strips from. Attach one scrap to each end of the zipper. The zipper and fabric should be 11.5" once you have attached these scraps. Then attach the 2" strips to either side of the zipper.
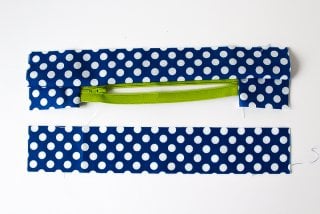
- Top-stitch along each edge of the zipper to help it lie flat. Now square this piece up so that it measures 11.5" x 2.5".

- Next we will work with the pockets. Grab the three different pocket pieces. Press the top edge under on all three of the pockets. Then sew the seam in place. Then on the 3.5" x 4.5" pocket press the right edge under and sew the seam in place.
- To place the pockets line up the top pocket where you want it to go (remember to leave an extra 1/4" for the seam. Then flip the pocket down and pin in place. You are going to sew the pocket in place, in the picture below you would sew 1/4" down from the top raw edge (just above the pins.) Then flip the pocket up and press the seam in place.
- Now add the second pocket in the same manner.
- The last pocket won't need to be sewn in place because it will be attached when we assemble the entire organizer.The next step will be to add the zipper piece to the pocket piece.
- Now pin the last pocket in place. Then pin the two 11.5" strips of elastic to the piece.
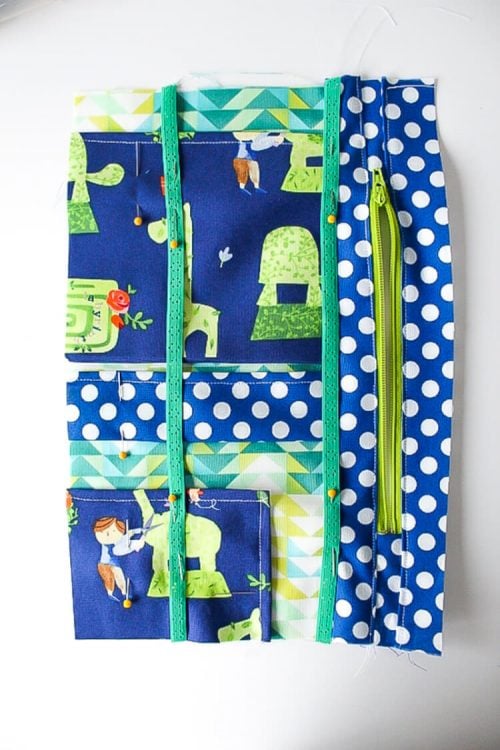
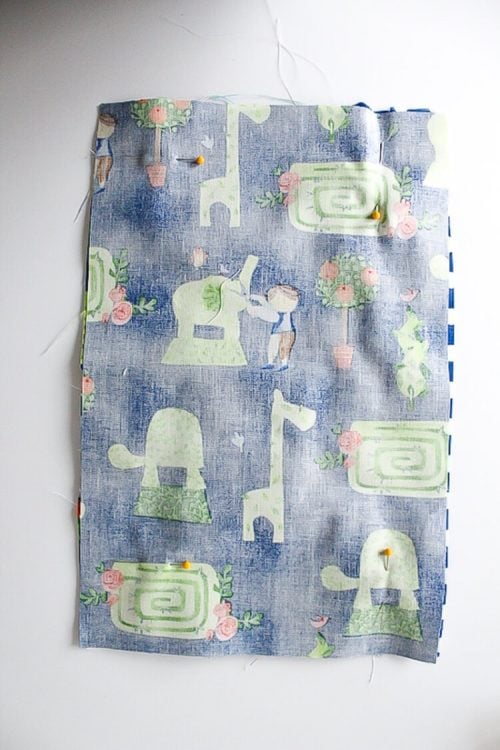
- Pin the back piece right side down to the main piece. Be sure to leave the zipper completely unzipped because that is how we are going to turn the piece out. Sew around all 4 edges.
- Turn the piece out and press the edges to get a nice crisp looking finished product.
