
HOW TO PRINT AND PRESS DTF TRANSFERS
DTF (direct-to-film) is taking the printing world by storm! Here's how to print and press DTF transfers, which work on both light and dark fabrics, including cotton, polyester, and blends!
Equipment
- N95 mask or
- curing oven optional
Ingredients
Instructions
- Refer to the post concerning DTF Setup and Maintenance along with the Safety First section on using a DTF printer.

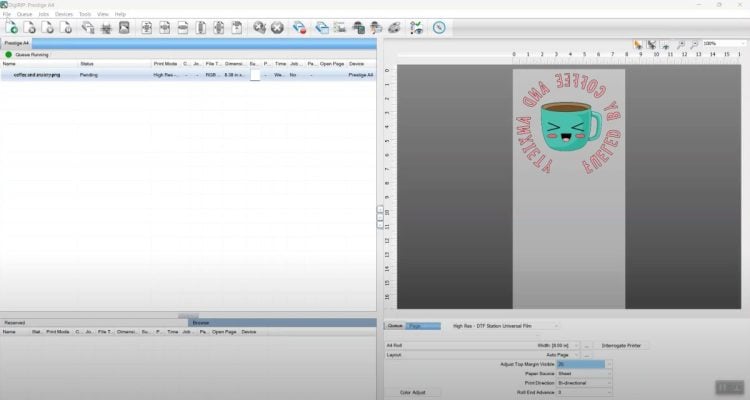
- Printing a DTF TransferTo print a DTF transfer, you'll first upload your file to the printer's RIP software (remember that most DTF printers are PC only). The Prestige A4 machine comes with RIP software called DigiRIP, and it's similar to most other RIP software. This type of software turns (“rips”) your regular image into the type of image needed for DTF printing. It should automatically mirror your image.Because these transfers use five colors of DTF ink (the normal cyan, magenta, yellow, and black, plus white), the software will convert the image to be printed with these five colors, including a white underbase layer on the back to make the image pop off the material of your garment.
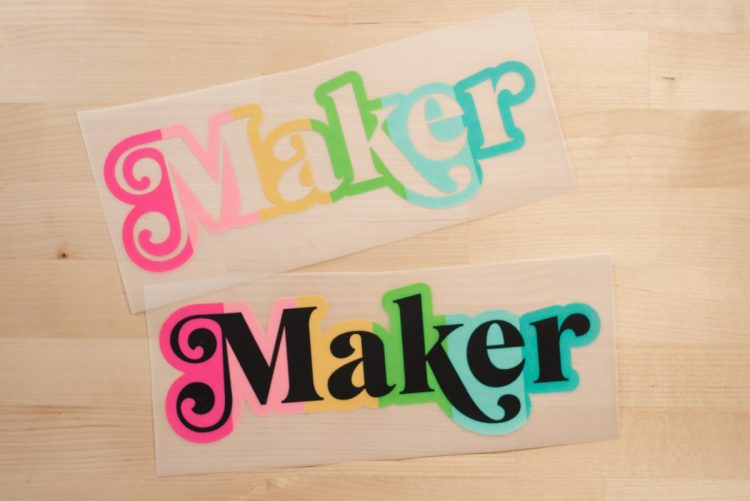
- Knocking out a ColorWithin the program, there is also a function to "knock out" a color of your print. So for example, this "Maker" print as the word Maker in black. But if you wanted to put this on a black shirt, you could knock out the black and the program would basically delete all of the black. It then prints the image without the black, but when you press it to a black shirt, the result is the same. The word Maker is in black.
- Knocking out colors like this can save you ink and printing time.There are some other settings you can use within the software, but a basic print is, well, pretty basic!You'll then send your print to the printer.
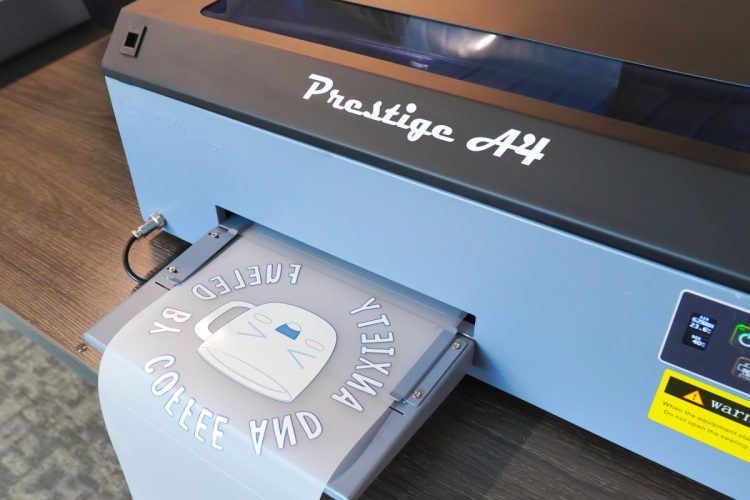
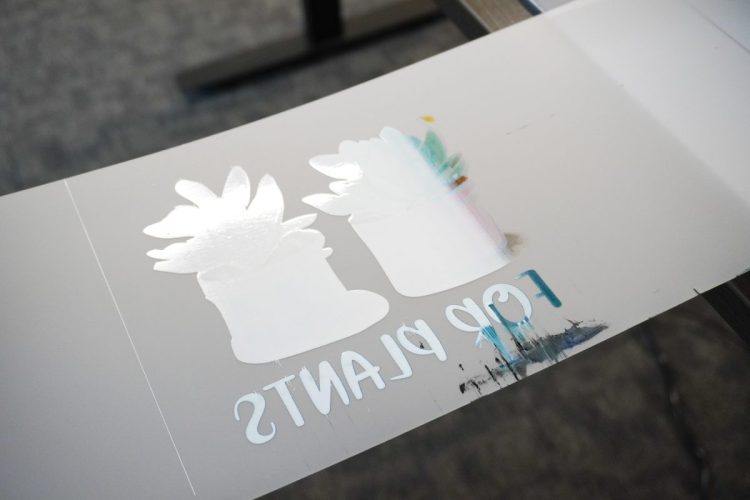
- Once your print is done, the ink will be wet on the film. You'll need to carefully cut your design off the roll without smudging the ink.You'll also notice that the printer automatically prints a very small white line at the top and bottom of your print. This is to help keep the white ink flowing and to show where your image begins and ends if you are printing more than one. Definitely cut these lines off so you don't accidentally transfer them to your project.
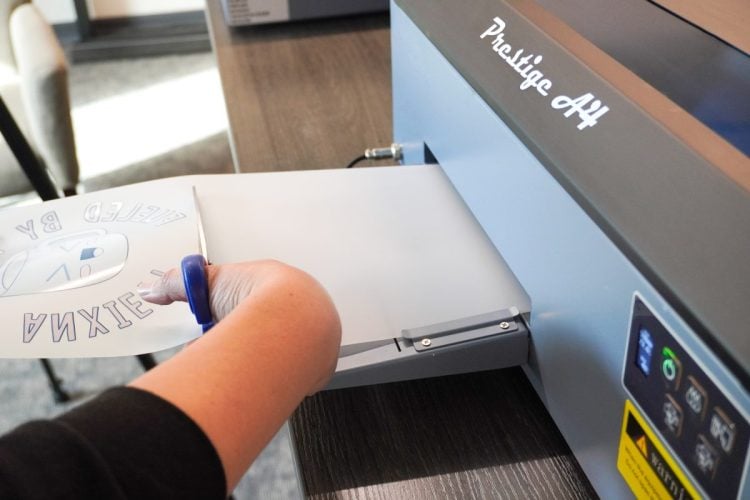
- In this image, cutting was tried while more prints were printing (since it's on a roll), but we couldn't seem to keep the film flat enough so that the transfer that was printing wouldn't hit the top of the exit slot, smudging the transfer and ruining it.There is a slit in the exit tray, however, for using a razor blade and that might work. Instead, we just fed a bit of film out of the machine using the button on the front, trimmed the transfer off, and then fed the film back into the machine to be used on the next print.No matter what you do, be very careful because any small smudge in the ink will show up in your final project! If you do smudge the ink, we recommend re-printing.
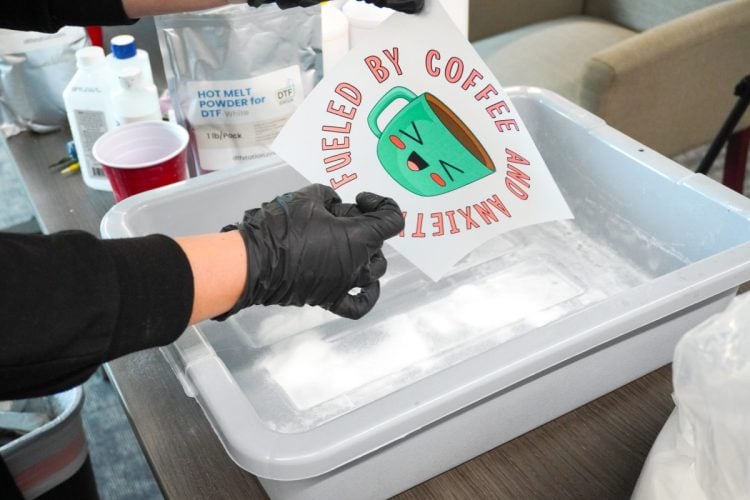
- Powdering a DTF TransferNow it's time to add the adhesive DTF powder to the transfer. Remember to take safety precautions. There are machines that can do this, but here the basic bin method was used. Place the transfer in a bin with the wet side up, and pour a bit of the hot melt powder over the transfer. Then rock the transfer back and forth to cover the entire image with hot melt powder.
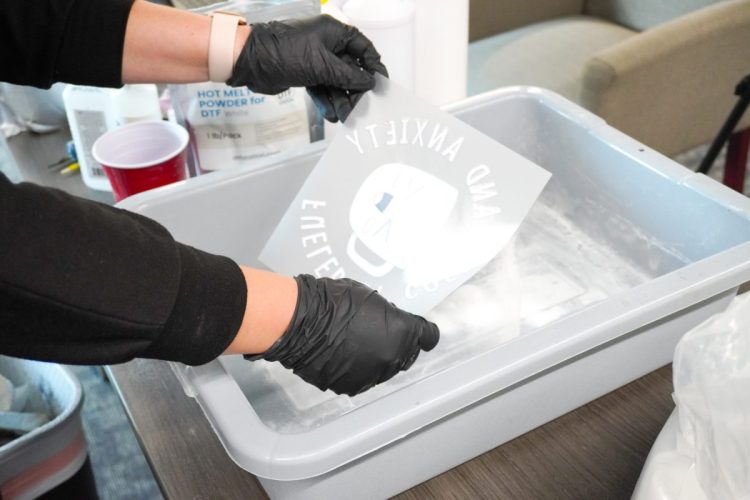
- Flick the image to remove any excess powder from the front side (not the side with the adhesive on it). You will get the best results with a lot of flicking that will leave a thin layer of adhesive. Too much and it won't melt properly. You can really see how bright and amazing the DTF image is when viewed from the front!Your image and powder are still wet, so be careful when taking it to your curing station.
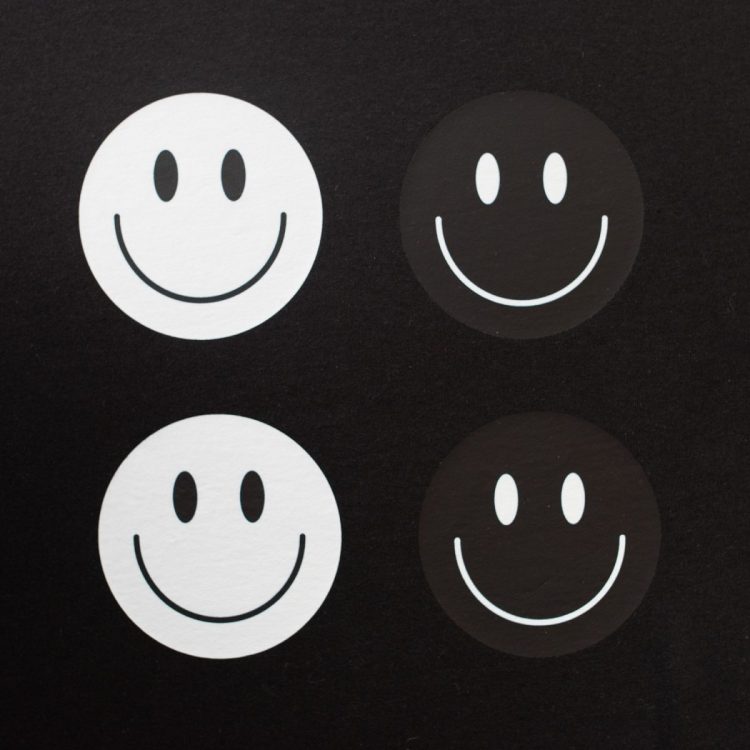
- White Powder vs. Black PowderThere are two colors of DTF powder. Generally, you'll want to use the white powder, because if you use black powder on light images, the powder can make your whites look blue or gray and you'll end up with a black "halo" around the edge of your image.
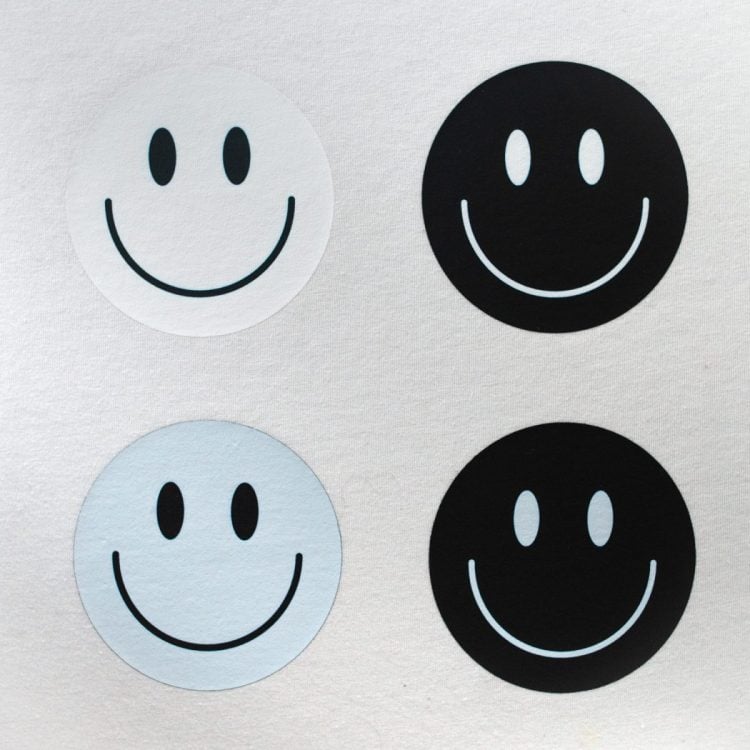
- But if you have a dark image on a dark shirt, then black powder might be the way to go. If you use white, you can end up with a white "halo" around the image (difficult to see in the top right image on black below, but it's there).Here is our test so you can see the difference. The top row on both is white powder, and the black row on both is black powder.
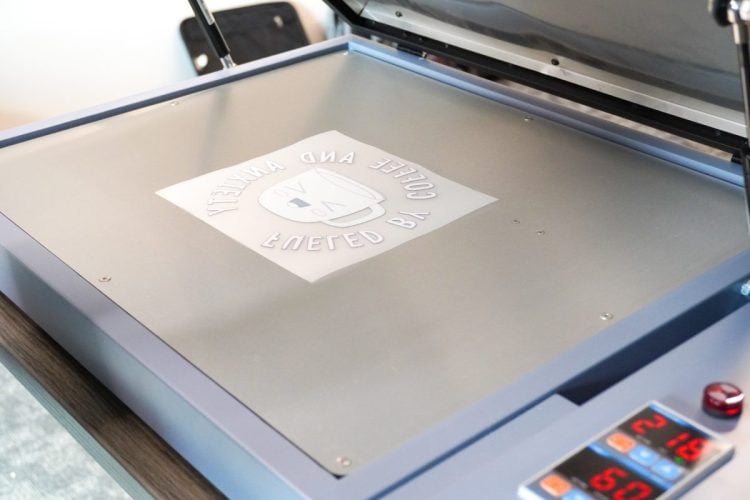
- Curing a DTF TransferThe final step in the process is to cure the adhesive to the print. Curing the print means that you can use it right away or you can store it without smudging the ink. There are two ways to cure your image. The first is by hovering it under a heat press and the second is to use a curing oven. The oven is 100% recommended. Yes, the cost is higher but with a charcoal filter, it’s so much safer than curing your adhesive by hovering it under a heat press. There’s nothing to stop all those adhesive fumes from escaping into your craft space with a heat press (not to mention, it’s so much faster with the oven—60 seconds compared to three or four minutes under a heat press).Place your transfer with the adhesive side up in the oven. Close the lid and hit the start button! 60 seconds works well on many transfers, but if the powder was too thick, another 15 to 30 seconds was needed.Once the adhesive is cured, it should look a bit rubbery. You should be able to touch it without smearing the ink.You can apply your print right away, or you can store it to adhere later.
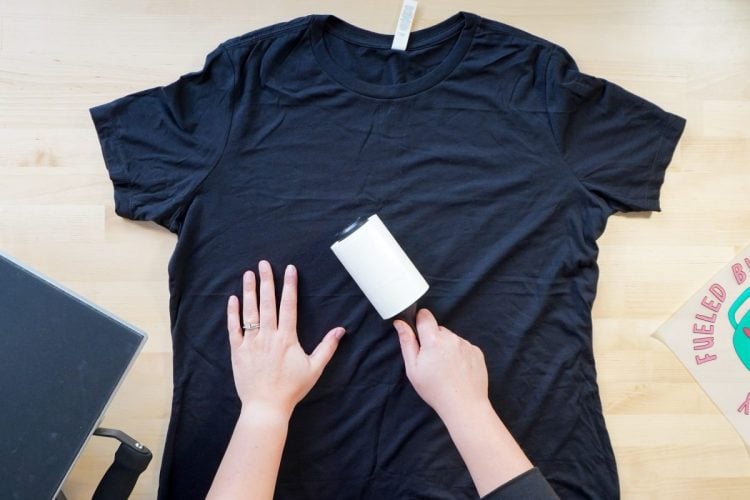
- Applying a DTF TransferWhile the printing part is a bit fussy with the powdering and curing, the DTF transfer application process couldn't be easier! Set your heat press to 325° at 15 seconds with medium pressure.Lint roll your garment.
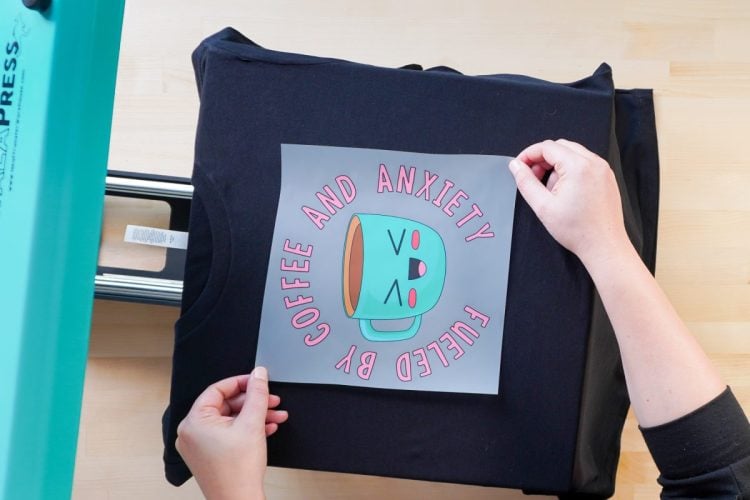
- Place your garment on the base of the heat press and pre-press your garment for 10 seconds.
- Add the DTF transfer to the garment, making sure it's centered (see T-Shirt Ruler Comparison if you need help with placement on your shirt!).
- Press for 15 seconds. Once the press is open grab the corner of the film and peel it back while it's still warm. Peel it back in one quick go without pausing partway through, which can leave an unsightly line through your transfer. It's sort of like ripping off a band-aid!
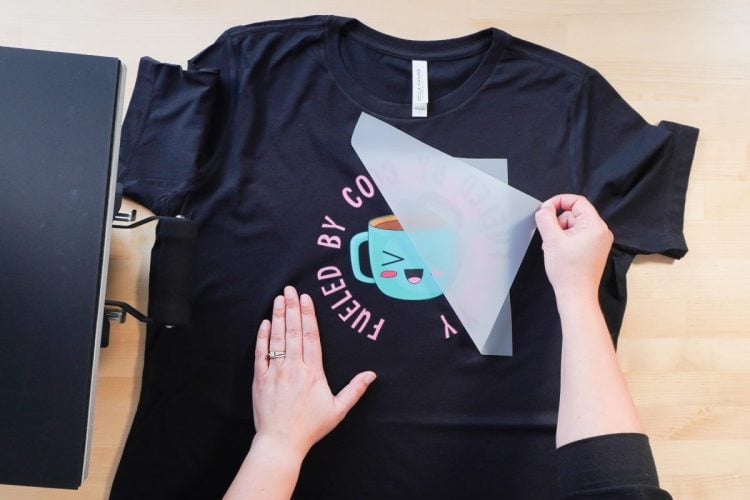
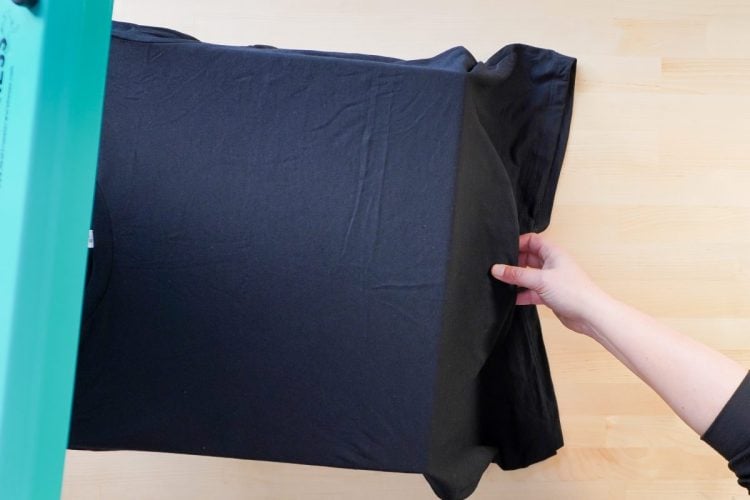
- Then do a post-press. You can use a pressing cloth, but to make it easy, just fold the bottom of the t-shirt on top of the DTF transfer and press for 10 more seconds to really adhere the transfer.NOTE: Be sure to follow the manufacturer’s instructions for peeling your DTF print. Sometimes you may want to peel it cold.And that's it! Your DTF transfer is ready to wear. It is recommended to wash your garments inside out. When applied correctly, you should get 50 to 100 washes out of a DTF transfer!