DIY KALEIDOSCOPE
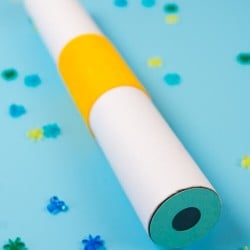
Transform ordinary Cricut supplies into a magical DIY kaleidoscope! This project is a fun way to use some unconventional Cricut materials and is a good way to teach kids about recycling!
Equipment
- Cricut Maker or
Ingredients
- Cricut vinyl tube
- Cardstock
- Cricut mat protector
- Felt or other thick but flexible material (Cricut suede, leather, or corrugated paper)
- Transparent beads
- Mirrored cardstock
- SVG file (clicking the link should begin the download)
Instructions
- Download the SVG file above. This contains four parts to your kaleidoscope. The mirrored triangle (cut from mirrored cardstock), three plastic protectors/caps (cut from the mat protector), a donut-shaped eye hole (cut from cardstock) and a spinner to go around the outside (cut from felt or another thick but flexible material—corrugated paper could be used, which is a great option that your Cricut can cut, too!).When you upload the file, you'll need to make a few changes before you can cut it properly. Start by ungrouping all of the pieces in the Layers Panel on the right side.
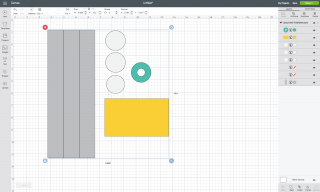
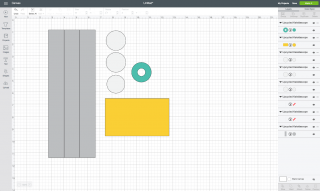
- Then change the two vertical lines on the gray piece to score lines by clicking on them in the Layers Panel and changing them to score lines. They will become dashed lines.
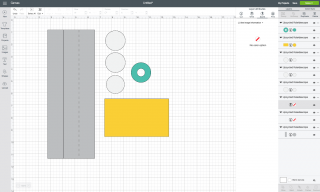
- Then group the gray box and two scored lines and Attach them together (using Attach in the bottom of the Layers Panel).
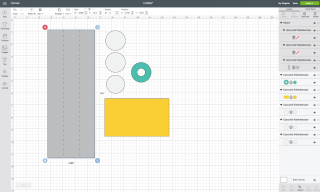
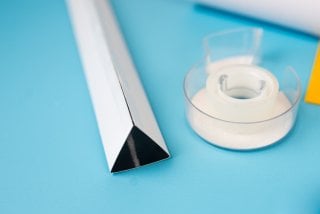
- Then cut out all your pieces!Gray = mirrored cardstock w/ scoring toolWhite = clear mat protectorTeal = cardstockYellow = feltOnce you have all of your pieces, fold the mirrored cardstock along the score lines and tape into a triangle, making sure the mirrors face to the inside of the triangle.
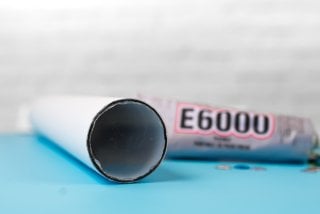
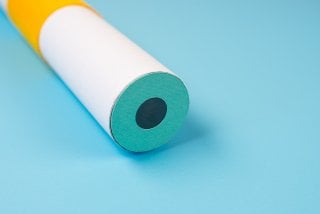
- Then use craft glue or a hot glue gun to adhere one of the larger clear disks to the end of your vinyl tube.
- Then put the triangle into your tube and rest it against the clear disk you just glued onto your tube end. (Ignore the sequins in this photo—they didn't work as well as hoped!)
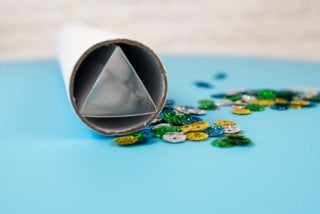
- Then, insert the smaller clear disk into the tube and rest it against the other end of the triangle. Then fill with beads! Sequins were tried first and they didn't catch the light. You need translucent beads—lots of ways to catch the light!

- Then glue the last plastic disk on the open end of the tube, and glue the cardstock eyepiece over that.
- To make the spinner piece, wrap your felt or other material around the tube so the ends just meet. You may need to trim a bit off depending on the size of your tube. You want it to fit perfectly. Then use a piece of tape face up (so away from the tube) to connect the two ends (the tape for this project is actually yellow, so you can't see it through the felt!). Then use some glue over the seam to hold everything properly.
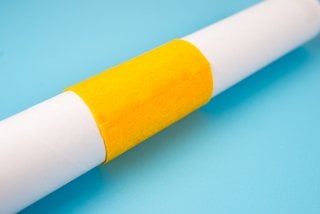
- You can hold this felt piece steady and spin the tube itself to see the colors change within the kaleidoscope!And that's it! You've made yourself a kaleidoscope!