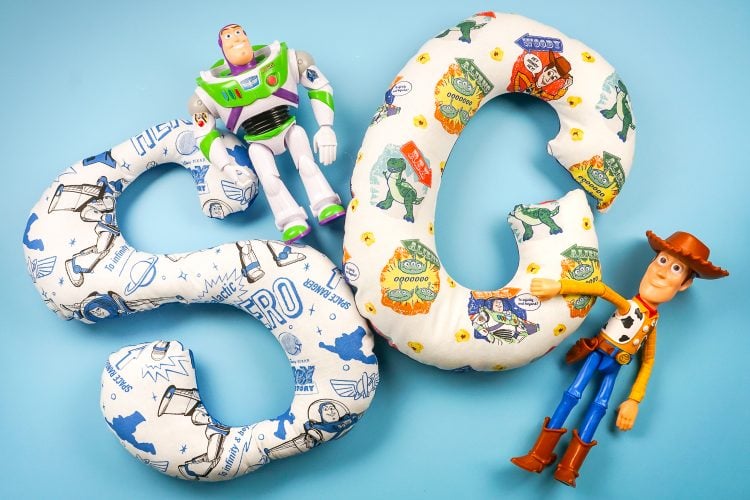
ALPHABET STUFFIES
These alphabet stuffies, made using the Cricut Maker, are the perfect gift for a child learning their letters! Make one of out their favorite character fabric, like these fun Toy Story 4 patterns!
Equipment
- Poly-Fil or other stuffing
Ingredients
Instructions
- Make Your File in Cricut Design SpaceWe're going to start in Cricut Design Space. Technically you can cut these letters by hand, but the Cricut Maker makes it so easy to make perfect letters, every single time. Find a chunky font with fairly consistent thick/thin strokes. For this project, Kristoff Block was used In Design Space, type your initial. For this project making both a C and an S—obviously choose the letter or letters you want to make.
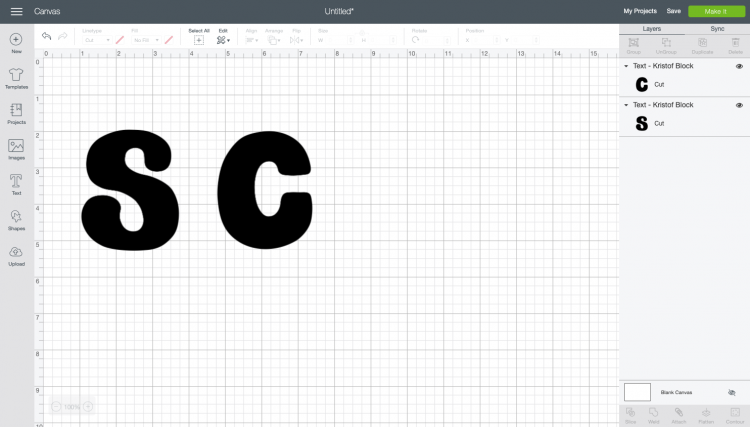
- Then change the size of each letter to 11.5" wide—the width of a Cricut mat. Duplicate each letter and use the Flip tool to flip the copies.

- Next, change the colors of your letters to reflect the fabrics you are using—this helps you keep your fabrics straight when cutting.

- Then click Make It in the upper right! You'll be taken to the prepare screen where you'll get a warning that you're going to need the bigger mat—click OK.

- Your mats should be good to go as is, so hit Continue to go to the Make screen.In the Make screen, you'll select cotton as your fabric. Then insert the Rotary Blade into your machine.

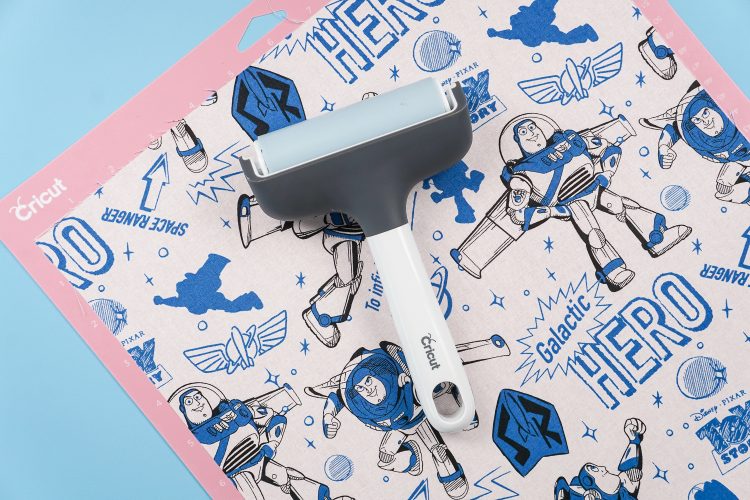
- Cutting the Fabric on Your CricutPrepare your fabric to cut. Cut it down to 11.5" wide, plus the height of your letter, and iron it as well. Then place it on the large pink FabricGrip mat. Use a brayer to smooth it out, particularly if your mat is a little old and less sticky than it was originally.
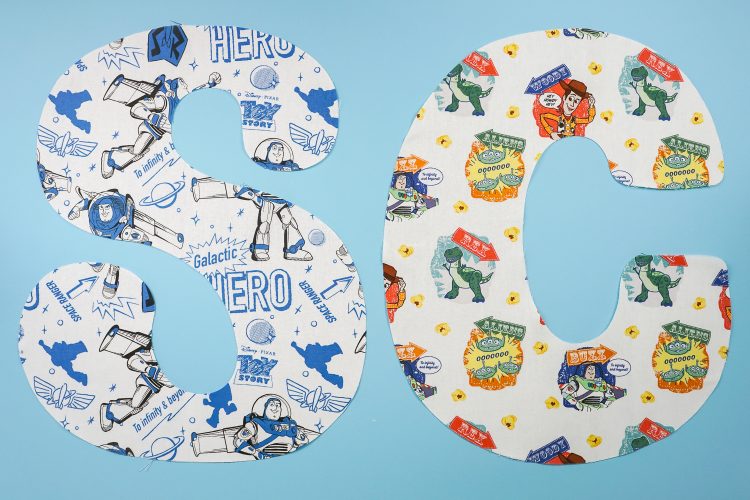
- Insert the mat into your Cricut Maker and press the arrow button to pull it into your machine. Double-check you have the Rotary Blade installed and click the blinking C to cut!Once your files are cut, peel off the extra fabric from your mat and then carefully remove the fabric letter. Check out this post for more on removing materials from your FabricGrip mat.
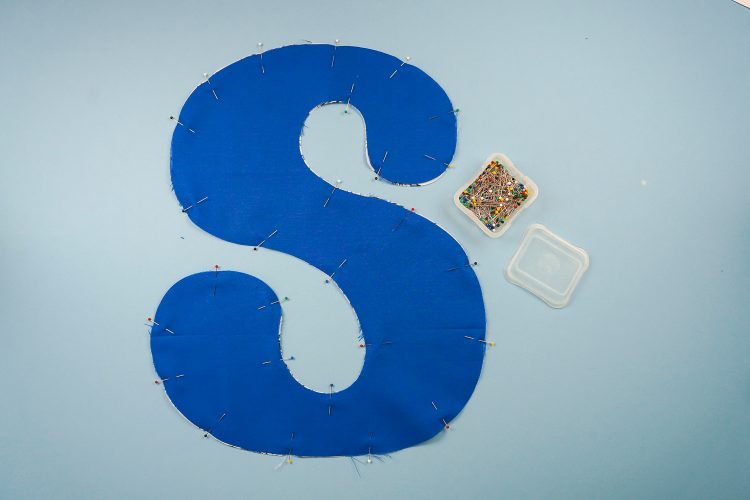
- Sewing Your Alphabet StuffiesPlace the front and the back of your letter, right sides together and pin. Pin the curves heavily—it's so easy for fabric to shift!
- Using a 1/4" seam, sew along the edge of your letters, going slowly around the tight curves. Leave a 1.5" gap for turning. Note that if you have a letter with an "inside" piece, like an A or an R, you will need to hand-sew that interior piece. Do not sew around the interior piece, or you will not be able to turn it.
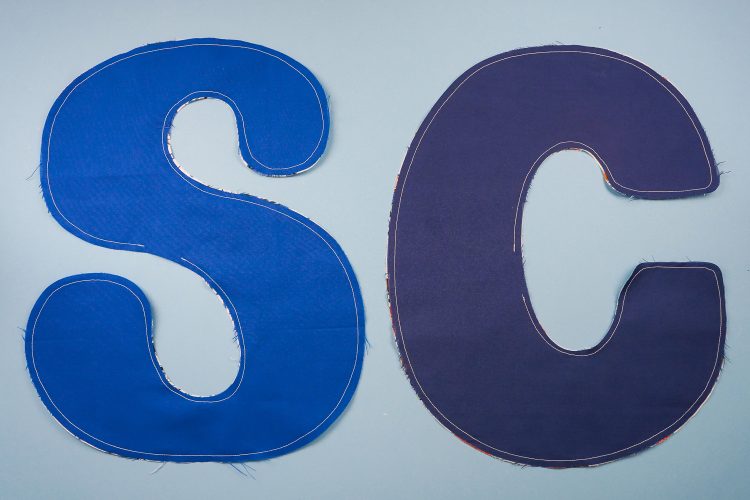
- Once you've sewn your letters, clip the curves and turn them right side out. Press.

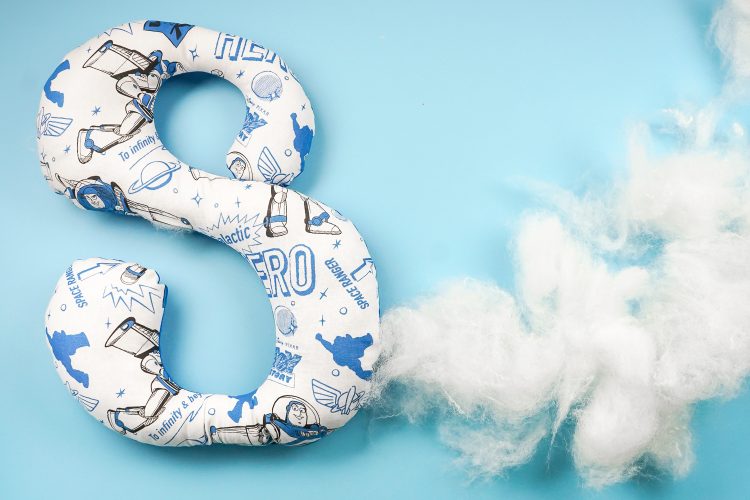
- Stuff with Poly-Fil or another fiber stuffing, Letters tend to be a little floppy, so stuff them well.
- Then hand sew the small hole shut. Again, if you are using a letter that has an interior piece, you'll have to hand sew that. Tack it in a few places to keep the stuffing inside, and then whipstitch around the whole thing.