4 WAYS TO CHANGE INK IN AN EPSON ECOTANK PRINTER
Want to change brands of ink in your Epson EcoTank printer or deal with a stubborn clog? Here are four (yes four!) ways to change ink in an Epson EcoTank printer, including one way to drain it entirely!
Ingredients
Instructions
- The following instructions are designed for swapping out one brand of sublimation ink with another brand of sublimation ink, you can use option #4 to swap out regular printer ink for sublimation ink, or swap out sublimation ink for regular printer ink. Option #4 may also help you with big clogs that you cannot resolve by running print head cleanings, printing purge pages, or doing a power cleaning.For options #3 and #4 you'll probably want a set of printer purge pages. These pages allow you to use a lot of ink when printing, so you can empty the tanks more quickly. See Supply list.
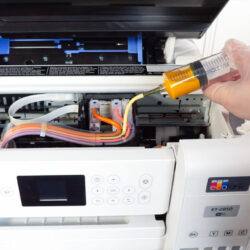
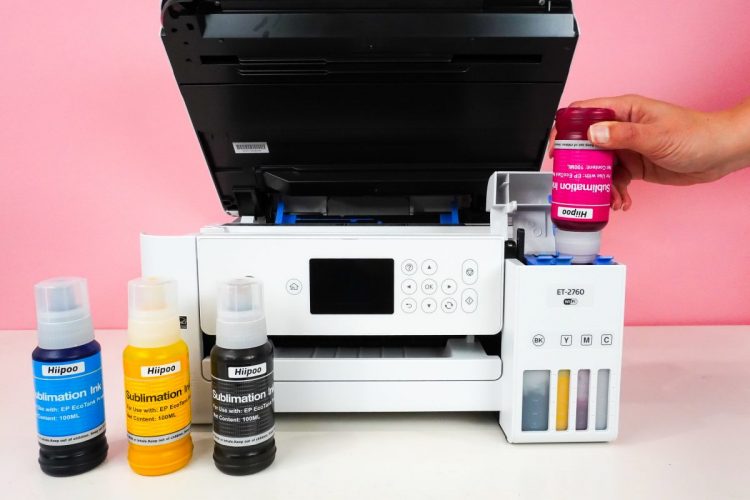
- Option 1: Refilling the Ink Tanks without EmptyingIt's fair to assume many of the sublimation ink brands on Amazon are not manufacturing the ink themselves. They buy from a chemical manufacturer who sells to many different brands. Based on some unofficial testing, many of the different ink brands are most likely the same or very similar ink, just with different brand names. Many of these say ICC-free and Anti-UV and use an easy-fill bottle, and include Hiipoo, Printer's Jack, and Aprone.It's not guaranteed these are the exact same inks, So if you have one brand of ink in your printer now, you may want to consider just adding a similar brand when your tanks get low.No one can guarantee it. There's a small chance that there might be a reaction between the two inks, causing it congeal, show color problems, or ruin the print head. It really depends on your risk tolerance. You've already voided the warranty by putting sublimation ink in a printer that wasn't designed for it. Do you want to risk adding new ink to what you already have? Or would you rather empty the tanks and go from there?This was written for the benefit of fellow crafters and makers. So let's talk about the options for the more risk averse.
- Option 2: Dumping the Ink TanksWhile researching how to empty the tanks, found this post where the author basically turns his printer upside down and drains out the ink. This was very tempting since it looks fairly simple, but I also felt like it was absolutely a disaster waiting to happen and thought there was a higher chance for ink color cross-contamination.
- Option 3: Emptying the Ink Tanks with SyringesThis next option was a friends suggestion. It worked on one of his Epson EcoTanks. See if they work for your printer before moving to option #4! There is a small amount of risk to swapping the ink using syringes. You could accidentally drip ink on the valves, contaminating the colors. There's a chance ink could go everywhere. But the risks are generally low and the cost is reasonable.This link, is linked to the things you will need to do this ink swap. Because they are inexpensive, you may want to use a different syringe for each color. But you can wash your syringes between ink colors if you'd like. If you want to wash your syringes between ink colors, remember the chamber of the syringe and the tip must be dry before you remove the next color with it.You'll also want to have a plastic tray or bowl to put your dirty syringes, as well as a glass jar (an old jam jar works well) for your used ink. You might want to wear something you don't care about just in case you have an ink disaster.
- Step 1 - Cover your work surface with a disposable, waterproof table covering.
- Step 2 - Prop the back side of the printer up so the ink flows toward the front of the tank. Don't overdo it. Lifting up the back of the printer about an inch higher than the front should be enough.
- Step 3 - Open up the ink tank cover. Inside you'll see the valve covers for each color. Open the valve cover for the first color you'd like to drain.
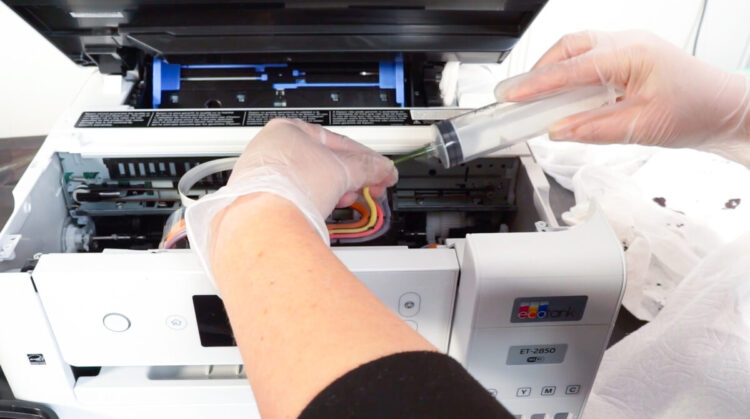
- Step 4 - Carefully insert the long tip of the syringe into the valve (this is where I had my issue—I couldn't insert my syringe into the valve!). You'll want the syringe to go all the way into the tank so you can pull out as much ink as possible.
- Step 5 - Carefully pull up on the syringe’s plunger, to draw the ink out of the tank. Unless you want to wear that color, do not pull the plunger up to more than an inch below the top of the syringe. Better to draw ink out in more than one try without out an ink explosion than trying to get it all in one go.
- Step 6 - Then pull the syringe out of the ink tank, and use the plunger to push the used ink in the glass container. Be careful so you do not spill or splatter the ink.
- Step 7 - Keep repeating this process until you can't get any more ink out of the tank.
- Step 8 - Repeat with the other colors. It is recommend using a completely new syringe and tip if possible. You can also clean your syringe, but it needs to be completely clean and dry before you use it again, even inside the long tip.
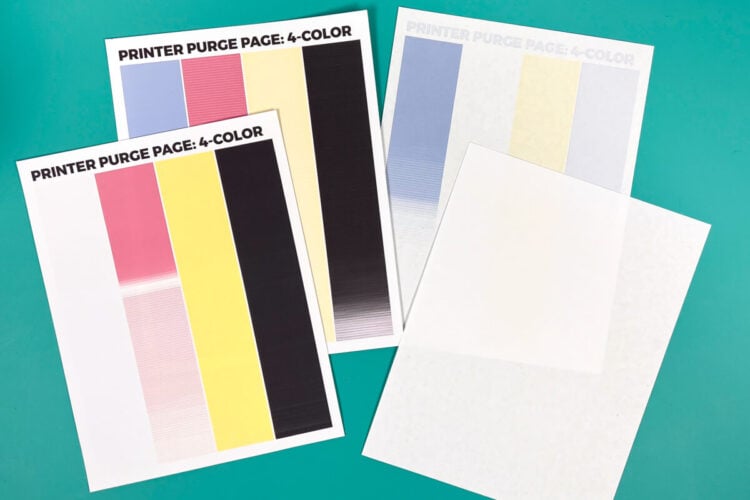
- Step 9 - You can choose to either top off the tanks as in option #1 above, OR you can print printer purge pages (grab those at the top of this post) until your printer is completely out of ink. You may be printing 30+ pages until all of your ink is gone. You can print the four-color printer purge page to start, and then the single color printer purge pages to more quickly empty your tanks as color start to run out.
- Step 10 - Disposing of the old ink is specific to your locality. You’ll need to research the proper way to dispose of your jar of used ink. If in doubt, call your local dump or sanitation department. Most localities will accept the ink as liquid hazardous waste—similar to leftover paint.Now, refill your printer with the new ink.
- Option 4: Completely Draining the PrinterThis is basically the last resort. Honestly, it may or may not work for you and no guarantees are made. Do this one at your own risk! It is highly recommend you watch the accompanying YouTube video, because it shows you in more detail what is being done here.. This method may also work for clearing stubborn clogs that you couldn't clear using the other method above. This is because you are pulling ink through the lines as well as draining it out of the tanks.There is a larger amount of risk to draining the entire printer. You could accidentally drip ink on the valves, lines, or dampers, contaminating the colors. You could break something important inside the printer. There's a chance ink could go everywhere. It's a mess, in general.This link, is linked to the things you will need to do this ink swap. Because they are inexpensive, you may want to use a different syringe for each color. But you can wash your syringes between ink colors if you'd like. If you want to wash your syringes between ink colors, remember the chamber of the syringe and the tip must be dry before you remove the next color with it.You'll also want to have a plastic tray or bowl to put your dirty syringes, as well as a glass jar (an old jam jar works well) for your used ink. You might want to wear something you don't care about just in case you have an ink disaster.
- Step 1 - Cover your work surface with a disposable, waterproof table covering.
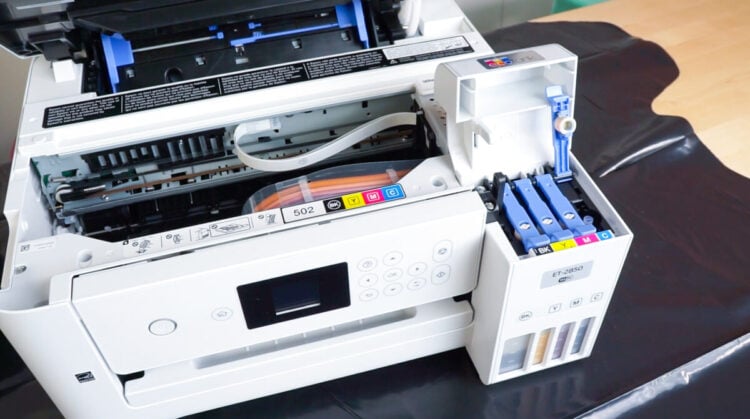
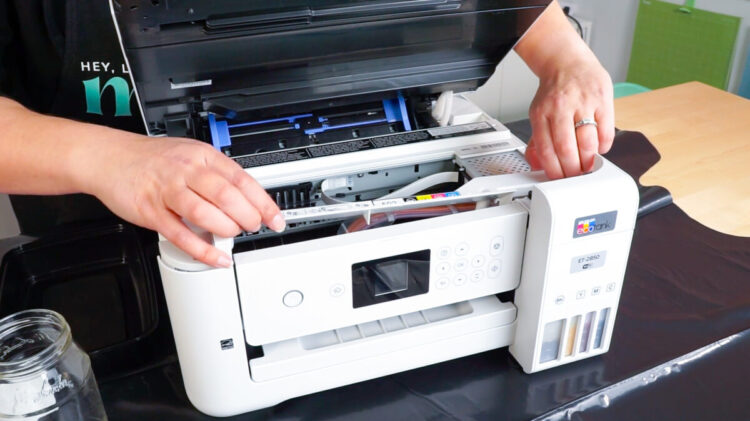
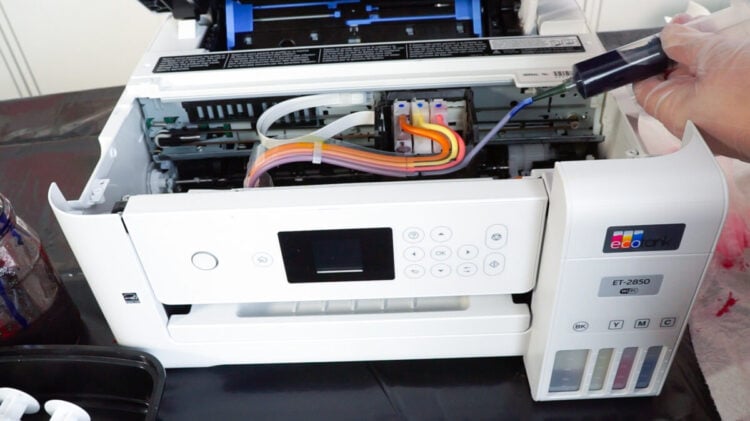
- Step 2 - Each Epson EcoTank printer is different, so you may have to modify these instructions for your machine. Karley Hall also has a good video for a larger Epson EcoTank 15000 which you may want to watch if you have that printer. You want to start by removing the interior front panel from the machine to make it easier to access the ink lines. The printer used for these instructions had five screws to remove. Put the screws somewhere safe. You may want to take pictures as you go so you have a visual reminder of how your printer is put together.
- Once you've removed the screws, remove the plastic panel and set aside.
- Step 3 - The printer head carriage may be locked to the right of the machine. If so, power your printer on and run a print head clean. While the print head carriage is unlocked for the cleaning, unplug the printer. This will allow you to move the carriage while the printer is off.
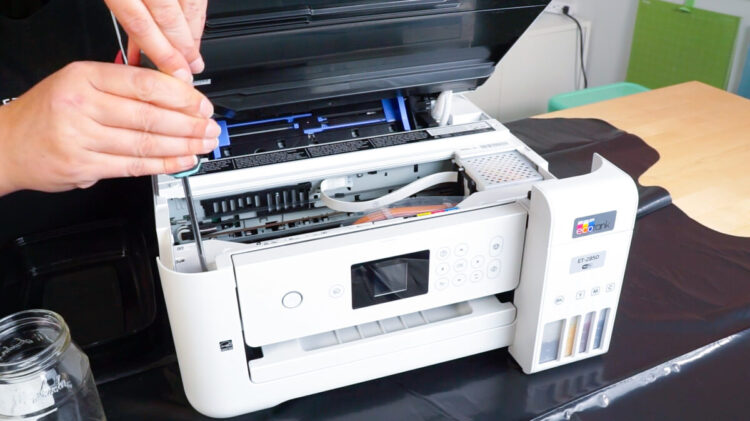
- Step 4 - Remove any screws holding the cover on the print head carriage. Printer used for these instructions, just had one small screw but you may have more.
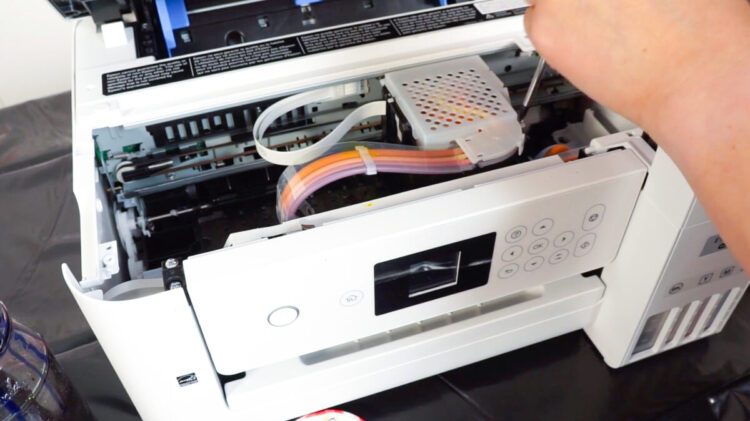
- Carefully remove the cover from the carriage and set aside.

- Step 5 - Now you have access to the ink lines and dampers. Remove the first damper using the tab at the back. The other ink lines can get in the way, so go carefully.
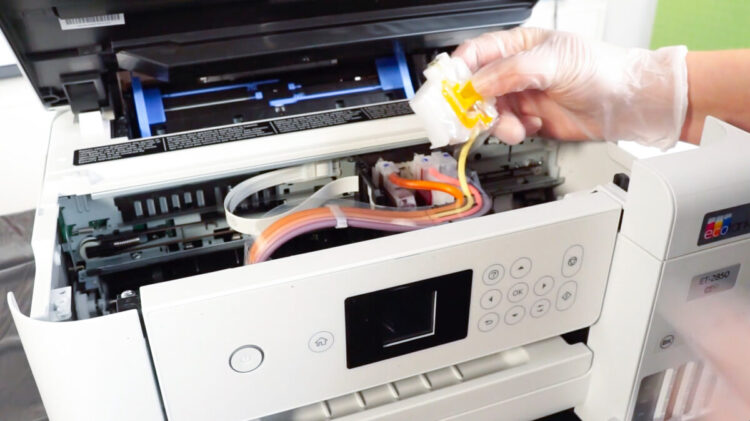
- Step 6 - Then remove the tubing from the damper. Make sure you have those paper towels handy, along with fresh gloves.
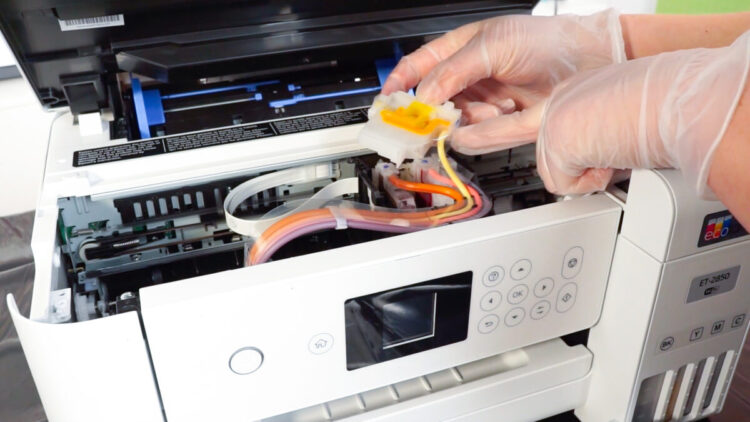
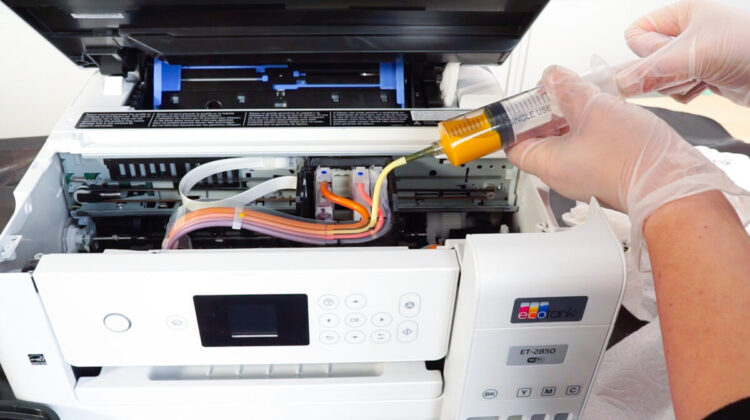
- Step 7 - Place the syringe into the end of the tube, creating a tight seal.
- Then pull the ink through the lines and out of the tanks. Unless you want to wear that color, do not pull the plunger up to more than an inch below the top of the syringe. Better to draw ink out in more than one try without ink coming out of the wrong end of the syringe.
- Step 8 - Then pull the syringe out of the tube, and use the plunger to push the used ink in the glass container. Be careful so you do not spill or splatter the ink.

- Step 9 - Keep repeating this process until you can't get any more ink out of the tank.
- Step 10 - In the video, removing the ink from the dampers themselves was tried, but it is not recommend, Instead, print more printer purge pages (get them at the beginning of this post) to get rid of the ink in the dampers. It's just too messy and not very effective to try and draw ink out of the dampers using the syringe.
- Step 11 - Replace the damper back into the carriage. Clean up any drips or spills that you may have caused in the process of removing the ink.
- Step 12 - Repeat this process with the other colors. It is recommend using a completely new syringe and tip if possible. You can also clean your syringe, but it needs to be completely clean and dry before you use it again, even inside the tip.
- Step 13 - Assemble the printer. Add the cover back onto the print head carriage. Then screw back on the front plastic panel.
- Step 14 - When you turn your printer back on, it will most likely complete the print head clean that you started earlier in this process.
- Step 15 - Now you're going to print as many printer purge pages (grab those at the top of this post) as it takes to completely drain the ink. You may be printing 30+ pages until all of your ink is gone. You can print the four-color printer purge page to start, and then the single color printer purge pages to more quickly empty your tanks as the colors run out.
- Step 16 - Disposing of the old ink is specific to your locality. You’ll need to research the proper way to dispose of your jar of used ink. If in doubt, call your local dump or sanitation department. Most localities will accept the ink as liquid hazardous waste—similar to leftover paint.Now, refill your printer with your new ink!